Updated March 20, 2023

Introduction to PHP Login Template
In this article, we will learn about PHP Login Template. The moment we talk about a web application, we need to have a login page to get access to it. This is one of the basic requirements to have the login page. The Login Page is one of the required pages where there is restricted access in any web application. Most of the login page comes up with the two fields only. Usually, the username is considered the first field and the second one will be the password one. There is no fixed opinion for the login page template. We can go with any login page template as per our business requirements.
Syntax:
As per the syntax of the login page is concerned, there is no thumb rule to follow while working for the login page design. In this article, we will see a few examples of the login template. If we ask 5 people to come up with a login page template or the design, they could come up with 5 different as there are no industry standards as per its look and feel is concerned. So, in the coming sections, we will see the progressive view of the login page template and how we can create this page as well.
How does it work?
Any login page in the PHP is not possible by using the PHP only. A template of the PHP Login combines the various other technology like JavaScript, HTML, CSS, MySql database, etc. Now, let’s see the role of each entity one by one.
HTML: HTML is one of the basic building blocks of any web page of the application. The required of the login page will be written in this HTML only.
Code:
<!DOCTYPE html>
<html>
<head>
<title>Page Title</title>
</head>
<body style="margin-left: 20%; margin: 5%;">
<form method="post" action="" name="login_form">
<div class="form-element">
<label>Username</label>
<input type="text" name="username" id="username" required />
</div>
<br>
<div class="form-element">
<label>Password</label>
<input type="password" name="password" id="password" required />
</div>
<br>
<button type="submit" name="Login" value="Login">Login</button>
</form>
</body>
</html>
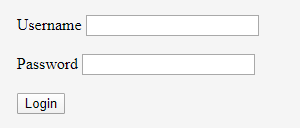
Output:
We can see, the look and the UI of this page is not professional enough we can move ahead with.
- CSS: CSS is again the very basic need in the web application. We can use this CSS to beautify our login page. We have various options available in the CSS we can use to put a professional look of the above login page. We can use the background color of the form. We can use the border of the form and various other related things.
- JavaScript/jQuery: A JavaScript is one of the scripts we can use for the client-side validation. We can use JavaScript to display the error message as per our business needs. For example, we can stop the form submission if any of the fields (either username or password or both) is not filled. This is again a value-added if we use JavaScript or jQuery in while coding for the login page.
All the above mentioned is good enough for designing a login page. But if we want to process with the complete login then we need to have the PHP and a Database (MYSQL or any other) as well.
Examples to Implement PHP Login Template
Now, it’s time to see various login page examples. We are moving ahead with the same HTML code mentioned above. We will see various templates using the above code or making a bit of modification in the above code.
Example #1
Code:
<!DOCTYPE html>
<html>
<head>
<title>Page Title</title>
</head>
<body>
<form method="post" action="" name="login_form" id="login_form">
<div class="form-element">
<label class="head">Login </label>
</div>
<div class="form-element">
<label>Username</label>
<input type="text" name="username" id="username" required />
</div>
<div class="form-element">
<label>Password</label>
<input type="password" name="password" id="password" required />
</div>
<button type="submit" id="Login" name="Login" value="Login">Login</button>
</form>
</body>
<style>
body{margin-left: 30%; margin-top: 5%; max-width: 350px;}
.head {
margin-left: 98px;
font-size: 20px;
font-weight: 900;
text-transform: uppercase;
}
#login_form{
color: blue;
font-size: larger;
border: 1px solid red;
padding: 7px;
}
.form-element{margin: 20px;}
#Login{
font-weight: 900;
background: red;
margin-left: 110px;
padding: 11px;
color: #fff;
}
label{font-weight: 900;}
</style>
</html>
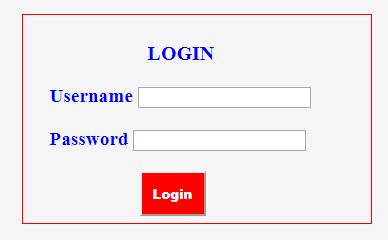
Output:
Example #2
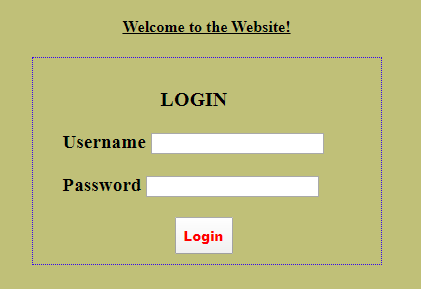
In this login page template, we will see the more interactive as compared to the previous one. We will be using some more advanced CSS.
Code:
<!DOCTYPE html>
<html>
<head>
<title>Login Page</title>
</head>
<body>
<h4>Welcome to the Website!</h4>
<form method="post" action="" name="login_form" id="login_form">
<div class="form-element">
<label class="head">Login </label>
</div>
<div class="form-element">
<label>Username</label>
<input type="text" name="username" id="username" required />
</div>
<div class="form-element">
<label>Password</label>
<input type="password" name="password" id="password" required />
</div>
<button type="submit" id="Login" name="Login" value="Login">Login</button>
</form>
</body>
<style>
body{
margin-left: 30%;
margin-top: 5%;
max-width: 350px;
background: #c0c078;
}
.head {
margin-left: 98px;
font-size: 20px;
font-weight: 900;
text-transform: uppercase;
}
#login_form{
font-size: larger;
border: 1px dotted #3406ed;
padding: 10px;
}
.form-element{margin: 20px;}
#Login{
font-weight: 900;
margin-left: 132px;
padding: 7px;
color: red;
}
label{font-weight: 900;}
h4{text-align: center; text-decoration: underline;}
</style>
</html>
Output:
Example #3
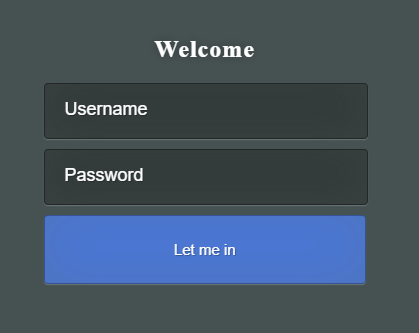
In this example, we will see the different than the above two Login page layout.
Code:
<!DOCTYPE html>
<html>
<head>
<title>Login Page</title>
</head>
<body>
<form method="post" action="" name="login_form" id="login_form">
<div class="form-element">
<h2>Welcome </h2>
<input type="text" name="username" id="username" placeholder="Username" required />
<input type="password" name="password" id="password" placeholder="Password" required />
<input type="submit" id="submit" value="Let me in" />
</div>
</form>
</body>
<style>
html{
width: 100%;
height: 100%;
overflow: hidden;
}
body {
width: 100%;
height:100%;
background: #465151;
}
h2{
color: #fff;
text-shadow: 0 0 10px rgba(0,0,0,0.3);
letter-spacing: 1px;
text-align: center;
}
input {
width: 100%;
line-height: 4;
margin-bottom: 10px;
background: rgba(0,0,0,0.3);
border: none;
outline: none;
font-size: 13px;
color: #fff;
text-shadow: 1px 1px 1px rgba(0,0,0,0.3);
border: 1px solid rgba(0,0,0,0.3);
border-radius: 4px;
box-shadow: inset 0 -5px 45px rgba(100,100,100,0.2), 0 1px 1px rgba(255,255,255,0.2);
-webkit-transition: box-shadow .5s ease;
-moz-transition: box-shadow .5s ease;
-o-transition: box-shadow .5s ease;
-ms-transition: box-shadow .5s ease;
transition: box-shadow .5s ease;
}
#submit{
background-color: #4a77d4;
padding: 25px 14px;
font-size: 15px;
line-height: normal
}
form#login_form {
width: 30%;
margin-left: 30%;
margin-top:100px;
}
::placeholder {
color:#fff;
font-size: 18px;
padding-left: 20px;
}
</style>
</html>
Output:
Conclusion
PHP Login page is one of the required things in this era of the digital revolution. Since there is not any standard of making the login page template, so we can move ahead of any template as per our business requirements. It is always advisable to use the client-side validation before posting any login page request to the server.
Recommended Articles
This is a guide to PHP Login Template. Here we discuss the introduction, syntax, and working of the PHP login template along with examples and code implementation. You can also go through our other related articles to learn more –


