Updated May 15, 2023

Introduction to Postgres Command-Line
The following article provides an outline for Postgres Command-Line. You can interact with the PostgreSQL database using two main types of interfaces: command-line interaction and graphical user interface interaction. Here we see about one such command-line terminal-based tool available in PostgreSQL for user-database interaction. Psql is the front-end tool that is based on the terminal. Hence, you can easily and effectively interact with your PostgreSQL database using the psql utility from your terminal itself.
Whenever you download PostgreSQL, psql comes built-in it. You don’t need to take any efforts if you have Postgres installed on your machine. Here we will see how we can use psql as a command-line utility for PostgreSQL database interaction and some of the most basic commands you should know while dealing with PostgreSQL while using the command line.
Syntax:
psql [options...] [databaseName [nameOfUser]]You can open your terminal and login to your shell user, and then for opening the psql command prompt, you can type the command in the above format where options, databaseName, and nameOfUser are optional arguments.
- Options: When connecting to the psql database, you can use various options such as -a, -b, -c, -d, etc. to indicate whether you want to display the results, queries, or other relevant information.
- databaseName: This is the database name you wish to connect to while entering the psql command prompt. By default, it is not mentioned; you will be connected to the database named Postgres if available, which is the case most of the time or template1 when Postgres is not present in your database system.
- nameOfUser: You can log in to the psql prompt with a particular user by specifying that user’s name over here.
Usage and Internals
Other than typing queries and issuing them to Postgres, psql can also fire the commands specified in an external file and use the metaCommands that make the task easier and allow us to write shell-like commands that enable us to write scripts using psql.
Whenever you type a command on the psql prompt, internally, this command is issued to the Postgres server, which is then interpreted and fired, and results are sent back to the psql and displayed on the psql terminal. We will take a look at some of the basic and crucial commands that a beginner should know when using the psql command-line interface to interact with the PostgreSQL database.
Examples of Postgres Command-Line
Given below are the examples mentioned:
Example #1
Let us enter o the command shell with the Postgres user using the following command.
Code:
sudo su – postgresIf you have set a root password, you will be prompted to enter it in the following manner.
Output:
Example #2
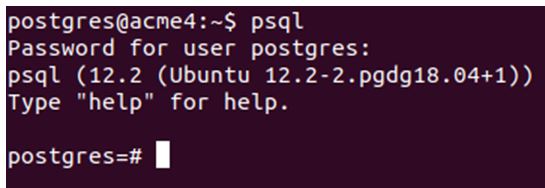
Let us now enter the psql prompt using the command.
Code:
psqlIf you want to enter the default database with the user already logged in, as in the above case, Postgres is the username.
Output:
Example #3
Here it will ask for the password because we have already set it. After entering the password, the command prompt seems to be somewhat like this.
Code:
postgres=#So, now we are going to logged in to the psql terminal prompt, and our current database is Postgres.
Example #4
View all databases.
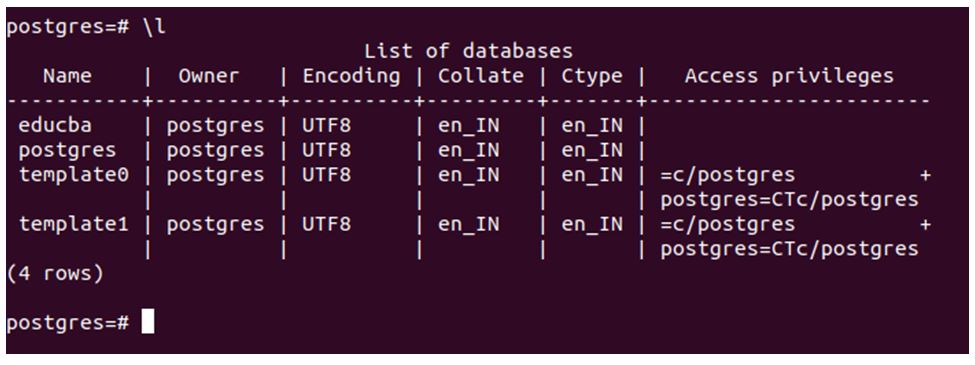
The first command we will see is \l, that lists all the databases present in the current database server. \l command gives the following output.
Code:
\lOutput:
The \l command retrieves information related to databases, such as name, owner, encoding, collation, ctype, and access privileges.
Example #5
View all tables.
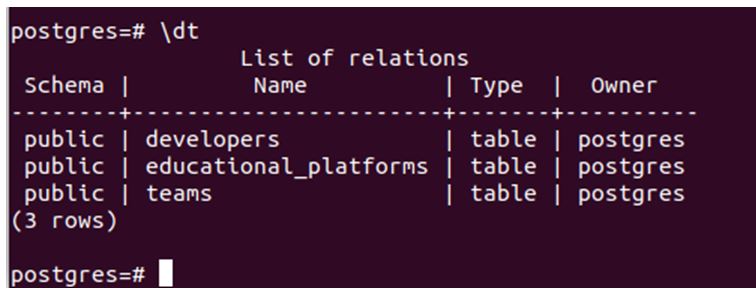
To list out all the tables in the current database, enter the \dt command. We refer to tables in RDBMS as relations, and the command’ \dt’ produces the following output.
Code:
\dtOutput:
If no tables are in your database, a message saying “No relations found” will be displayed. The schema, name, type, and owner of the table are displayed using the \dt command.
Example #6
Describe the table.
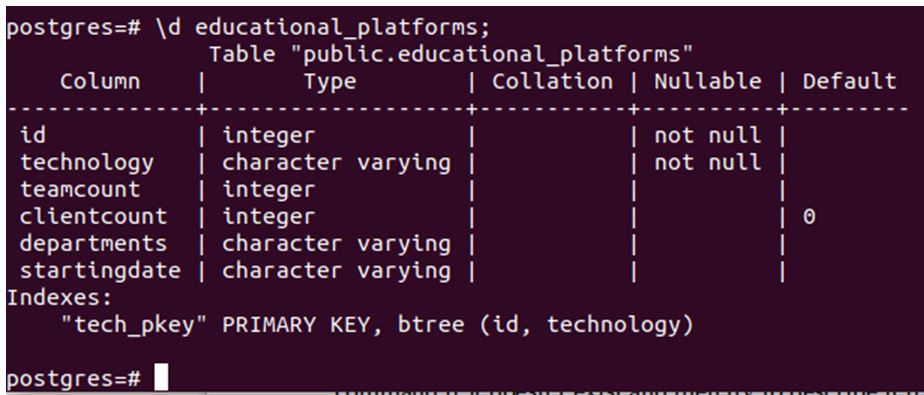
To retrieve information about the structure, constraints, and triggers on the table, we can use the \d command. This process is also known as describing the table. You can create the table using create table command if it doesn’t exist and then try to describe it if none is present in your database. For now, we will describe the table educational_platforms using the following command.
Code:
\d educational_platforms;Output:
Example #7
Switching database.
To switch your database and connect to some other database, you can use \c or \connect command as follows.
Code:
\c educba;You pass the name of the database you want to connect to as an argument to the ‘educba’ command.
Output:
So, you are now connected to the educba database.
Example #8
To know the syntax of a particular command.
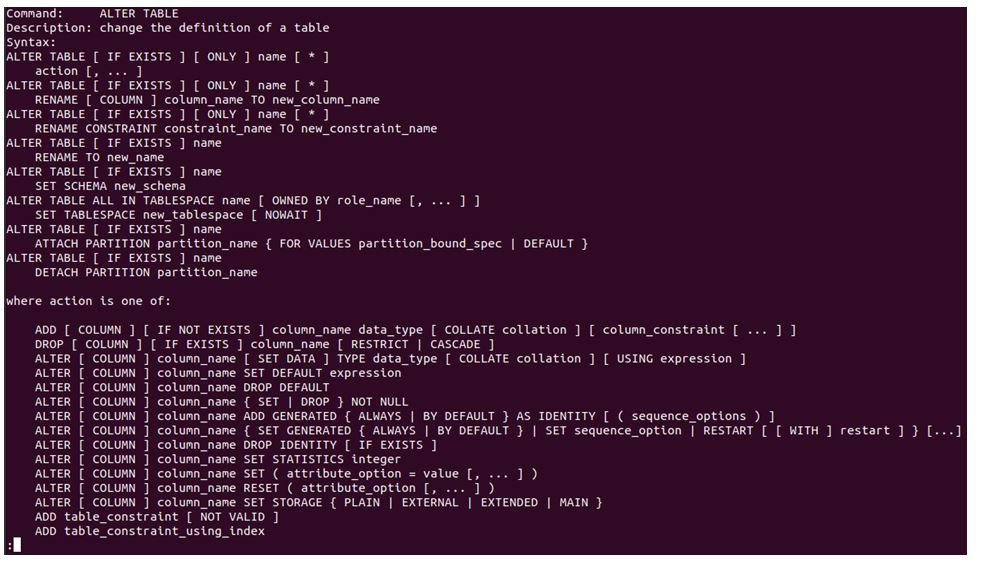
If you want to find out the syntax of a particular command, you can use the \h command.
For example, if you want to know the ALTER TABLE command syntax, you can use the following command.
Code:
\h ALTER TABLE;Output:
You can enter the \q command to exit from the retrieved result.
Example #9
List out all commands.
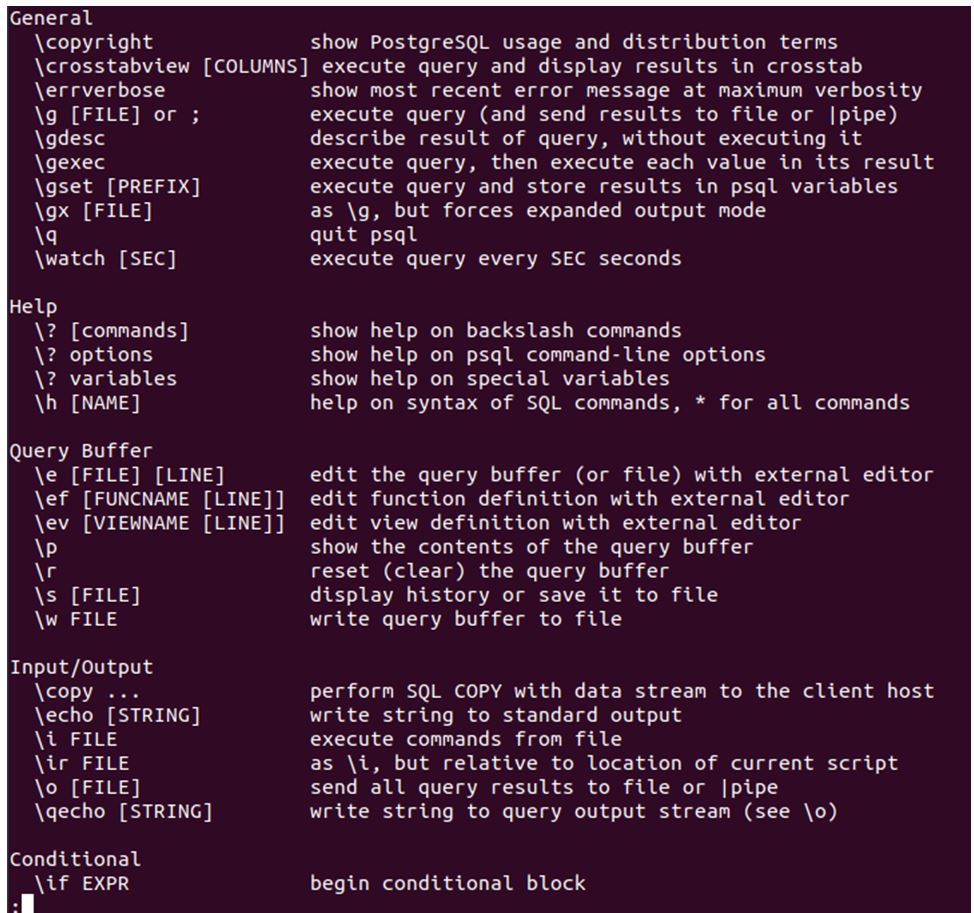
If you want to know about all the available commands in psql for your convenience, you can use \? Command.
Code:
\?educba=#/?Output:
That gives the command syntax and its description.
Example #10
Checking version.
If you want to know the information about the version of PostgreSQL you are using, then you can fire the following command.
Code:
select version();Output:
Example #11
Firing last fired command again,
Suppose you want to retrieve the last command you fired and fire the same. You can easily retrieve and fire the same using the \g command.
Code:
\gOutput:
Conclusion
We can use a psql command-line from-end terminal-based tool available to us easily and efficiently. Many metacommands help us to manipulate and interact with our database to perform operations easily. The psql command-line allows you to write scripts and execute commands stored in external files.
Recommended Articles
We hope that this EDUCBA information on “Postgres Command-Line” was beneficial to you. You can view EDUCBA’s recommended articles for more information.

