Updated March 3, 2023

Introduction to PowerShell Import-CSV
The import-csv cmdlet is used to fetch the information contained in a comma separated file and create a table like structure. Once the data is imported, then a foreach cmdlet is used to iterate the contents of the csv in a row wise manner. It is not necessary to import all the contents of the file, it is possible to apply filter conditions and fetch only the values that are required. This article will cover in detail on how to import a csv in powershell, sorting and filtering a csv file and the different ways in which it can be achieved.
Syntax and Parameters
Syntax and parameters of powershell import-csv are given below:
Syntax:
Import-Csv   [[-Delimiter] <Char>]      [-Path] <String[]>      [-Header <String[]>]      [-Encoding <Encoding>]      [<CommonParameters>]
Import-Csv   [[-Delimiter] <Char>      -LiteralPath <String[]>      [-Header <String[]>]      [-Encoding <Encoding>]      [<CommonParameters>]
Once the csv file is imported, each column in the csv file is considered as an object property and each row values corresponds to the property’s values.
Parameters:
- -Delimiter: It denotes the mark or character which will be used for separating the values in the csv file. For a csv file, the default value of the delimiter is a comma (“,”). Other values such as a colon (“:”) or a semi-colon (“;”) can also be used. If the provided delimiter doesn’t match with the delimiter that is present in the file, then the values will not be imported, and corresponding objects won’t be created. This parameter is of the char data type. Both pipeline input and wild card characters are not permitted by this parameter.
- -Encoding: This signifies the encoding instrument to be utilized for the specified csv file. The data sort of this parameter is encoding. The parameter doesn’t recognize pipeline input and besides wild card characters are not permitted. The default sort of encoding utilized is UTF8NoBOM.
The other acceptable values are as follows:
-
- Bigendianunicodes
- Oem
- utf8BOM
- utf8NoBOM
- utf7
- utf8
- utf32
- ASCII
- -Header: Indicates an interchange column header push for the imported record. This decides the objects properties names. The headers are to be mentioned in a comma separated format. These shouldn’t be enclosed within quotes. Encase each column header in single citation marks. If the entered header count is less than what it is available in the csv, then the remaining columns in the csv are discarded. If the entered value is greater than what it is available in csv, the mentioned extra columns are added with null values. When utilizing the Header parameter, erase the initial header push from the CSV record. Something else, Import-Csv creates an additional question from the things within the header push. The information sort of this parameter is String[]. The default value is none. The parameter doesn’t recognize pipeline input and besides wild card characters are not permitted.
- -LiteralPath: This denotes the path where the csv file to be imported is present. This can’t be anything typed different from its original value. No alteration is allowed. It has two aliases, PSPath and LP. The default esteem is none. It can accept pipeline input whereas wild card characters are not permitted.
- -UseCulture: This denotes that the current culture is to be used as the item delimiter. The data sort of this parameter is Switch. The default esteem is none. Pipeline input is not accepted and wild card characters are also not permitted.
Examples of PowerShell Import-CSV
Given below are the examples mentioned:
Example #1
Input:
Write-Host "Welcome to the demo of Importing a csv file in PowerShell"
$file= Import-Csv -Path "C:\test.csv"
$i=0
foreach ($f in $file)
{
if ($i -lt 10)
{
Write-Host "base name is:" $f.BaseName
Write-Host "Full name is:" $f.FullName
Write-Host "name is:" $f.Name
Write-Host "Created date is:" $f.CreationTime
Write-Host "Modified date is:" $f.LastAccessTime
Write-Host "Location of the file drive is:" $f.PSDrive
$i+=$i
}
}
Output:
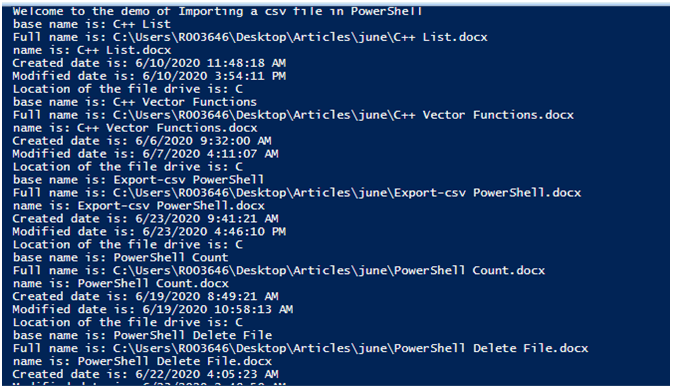
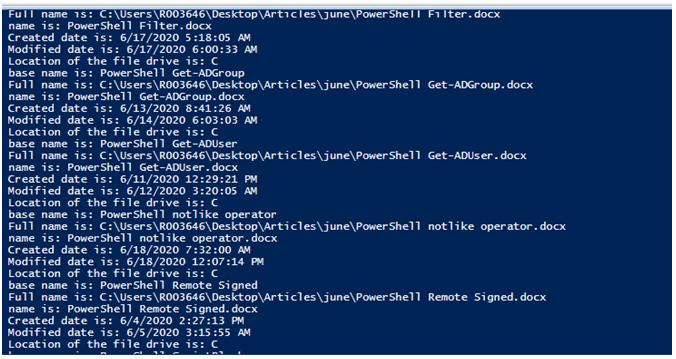
In the above example, file the csv file is imported and stored in the file variable. Then each row of the csv file is looped. $f denotes the current row of the csv that is being accessed and to access the corresponding row values $f. corresponding header or column is used.
Example #2
Input:
Write-Host "example of reading a csv completely but displaying result based only on the users input"
$studentid= Read-Host "Enter the student roll no to fetch the student details"
Write-Host "Importing the csv file"
$file= Import-Csv -Path "C:\Users\R003646\Desktop\Articles\June\Student.csv"
Write-Host "File is imported successfully"
foreach ($row in $file)
{
if ($row.Sid -contains $studentid)
{
Write-Host "the mentioned student id is valid and his details are as follows" -ForegroundColor Green
Write-Host "Student name is:" $row.Sname
Write-Host "Student age is:" $row.Sage
Write-Host "Student id is:" $row.Sid
Write-Host "Student rank is:" $row.Srank
}
else
{
Write-Host "Enter a valid student id"
break;
}
}
Output:
In the above example, the user is promoted for the student details he wants to see. If a valid student’s roll number that is available in the csv is entered, then the corresponding student details are displayed. In case if the entered student roll number is not present in the csv then the second output is displayed.
Example #3
Input:
Write-Host "Importing a csv and displaying the list of data in each column"
$file= Import-Csv -Path "C:\Users\R003646\Desktop\Articles\June\Student.csv"
Write-Host "file is imported" -ForegroundColor Green
write-host "The list of student name in the csv are as follows:" -ForegroundColor Green
$file.Sname
write-host "The list of student age in the csv are as follows:" -ForegroundColor Green
$file.Sage
write-host "The list of student marks in the csv are as follows:" -ForegroundColor Green
$file.Smarks
write-host "The list of student id in the csv are as follows:" -ForegroundColor Green
$file.Sid
write-host "The list of ranks in the csv are as follows:" -ForegroundColor Green
$file.Srank
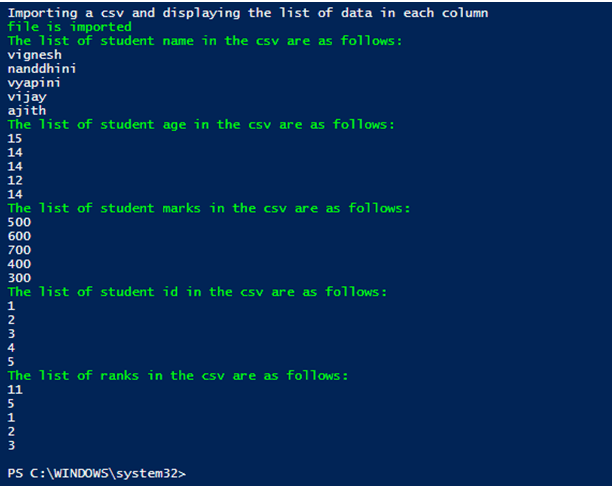
Output:
Conclusion
Thus, the article explained in detail about the import-CSV cmdlet in PowerShell. It explained in detail about various parameters, its data type, and its syntax along with appropriate examples. To learn more in detail it is advisable to write sample scripts and practice them.
Recommended Articles
This is a guide to PowerShell Import-CSV. Here we discuss the introduction and syntax and parameters of powershell import-csv along with different examples and its code implementation. You may also have a look at the following articles to learn more –


