Updated June 17, 2023
Introduction to PowerShell Out-File
The PowerShell Out-file command stores or captures output to any file. We may often want to see all the errors and output, so storing them in a file along with their date of creation is a better idea than simply printing them onto the console. Because the size of the output can be huge, so in that case, we can send output to the file is better.
Syntax:
1. Out-File
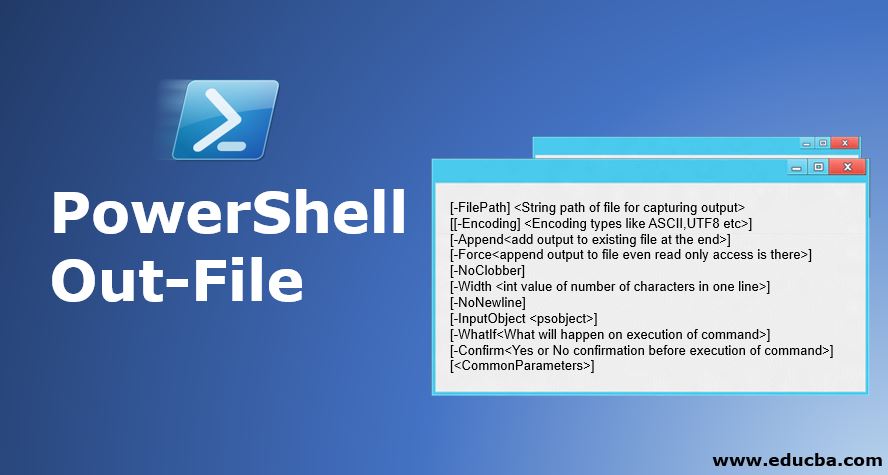
[-FilePath] <String path of file for capturing output>

[[-Encoding] <Encoding types like ASCII,UTF8 etc>]
[-Append<add output to existing file at the end>]
[-Force<append output to file even read only access is there>]
[-NoClobber]
[-Width <int value of number of characters in one line>]
[-NoNewline]
[-InputObject <psobject>]
[-WhatIf<What will happen on execution of command>]
[-Confirm<Yes or No confirmation before execution of command>]
[<CommonParameters>]
2. Out-File
[[-Encoding] <Encoding types like ASCII,UTF8 etc>]
-LiteralPath <string exact target file path>

[-Append<add output to existing file at the end>]
[-Force<append output to file even read only access is there>]
[-NoClobber]
[-Width <int value of number of characters in one line>]
[-NoNewline]
[-InputObject <psobject>]
[-WhatIf<What will happen on execution of command>]
[-Confirm<Yes or No confirmation before execution of command>]
[<CommonParameters>]
Parameters
Below are some of the parameters given.
1. -Append: If we want to add any output to any existing file, we can use this command. This command will add your output to the end of any existing file.
2. -Confirm: This command we can use to make safe command execution. Here it will display a prompt box that will ask for your confirmation for the execution of the command.
3. -Encoding: This command defines the type of encoding for the file where we will write our content. If we do not define the type, it will take UTF8NoBOM as the type’s default value.
There are several types accepted by it; they are given below:
- ASCII: In this type, it will Use ASCII 7-bit characters. This type of encoding is very common.
- BigEndianUnicode: It uses UTF-16 format to encode. It uses big-endian with UTF-16.
- OEM: In this case, it will use MS-DOS default encoding and the console program
- Unicode: It uses the UTF-16 format to encode. But it uses little-endian with UTF-16.
- UTF-7: In this type, encoding is done in UTF-7 format.
- UTF8: In this type, encoding is done in UTF-8 format.
- UTF8BOM: In this type, encoding is done in UTF 8 BOM format. It uses Byte Order marks with UTF 8 BOM.
- UTF8NoBOM: In this type, encoding is done in UTF 8 BOM format. It does not use Byte order marks with UTF 8 BOM.
- UTF32: In this type, encoding is done in UTF-32 format.
- If we use PowerShell version 6.2 or above, we can also use the numeric ID of any register code page, for example -Encode 1251. Here 1251 is the page number ID. We can use a string name of the register code page, for instance -Encode “Windows – 1251”.
4. -FilePath: This command defines the path for the output file where we want to capture or send the output(error or output of events).
5.-Force: Suppose there are any files with read-only access; then, in that case -the Force command will allow you to overwrite it. Remember that the force parameter will only be able to write in case of read-only access on file; it can not overwrite security restrictions on that file. This means it can not compromise with security.
6. -InputObject: Defines the Object which will be written on the file. We can take any variable that contains the Object, Type, or any command or expression, which will return any Object(Object as output).
7. -LiteralPath: Here, we define the file path for output capturing. We write the literal path when we know the exact path; we can not pass wildcard in it. For example, we have to pass “/desktop/ranjan/test.txt” if we will try to use a path like “*.txt”; it would not work. If we can use an escape character, but in that case, we need to enclose it with a single quotation mark. Using a single quotation, we notify PowerShell that this is an escape character.
8. -NoNewline: In case if we do not want to add a new line character at the end of the file, then we can use this command.
9. -WhatIf: Display what will happen on the execution of the command; it will make you clear about the purpose of the command, which you will run without actual execution.
10. -Width: It defines how many characters can be there on each line of output. If there will be any extra character, then that will be truncated. If you do not use this attribute, it will define this value based on the host. In general, PowerShell can accommodate 80 characters.
Examples of PowerShell Out-File
Given below are the examples of PowerShell Out-File:
Example #1
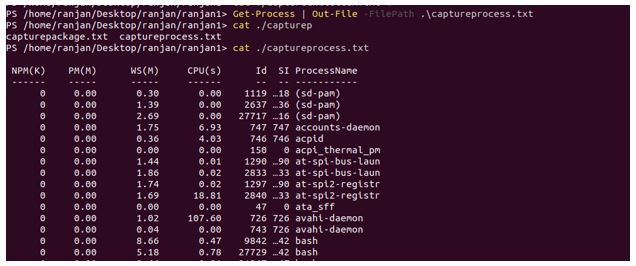
In this example, we are trying to capture all the processes into a file; we can see we are passing “.\captureprocess.txt” as an argument to -FilePath as a command, which will capture all the process and on writing cat ./captureprocess.txt file contains all the process names.
Get-Process | Out-File -FilePath .\captureprocess.txt

cat ./Process.txt
Output:
Example #2
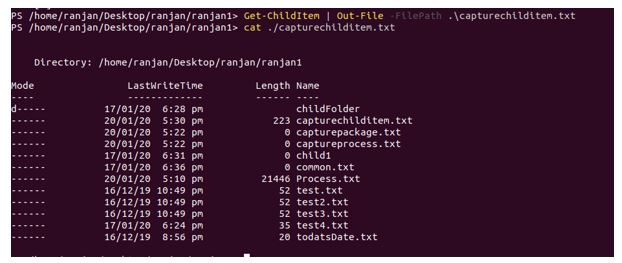
In this example, we capture all the child items (files and folders) of the current folder containing the file ./capturechilditem.txt file.
Get-ChildItem | Out-File -FilePath .\capturechilditem.txt

cat ./capturechilditem.txt
Output:
Example #3
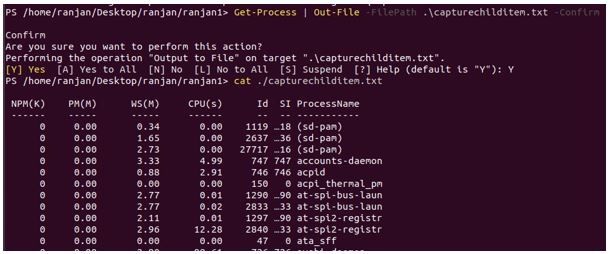
In this example, we are capturing output to the file capturechilditem.txt, but we are using the command -Confirm; this command will generate a prompt and ask for your confirmation before the execution of the command.
Get-Process | Out-File -FilePath .\capturechilditem.txt -Confirm

cat ./capturechilditem.txt
Output:
Example #4
In this command, we are using -WhatIf, and you can see the output without real execution of the command. Simply put, it is a trial for running the command without affecting anything. We use this command to understand the purpose of execution of the command before actual execution.
Get-Process | Out-File -FilePath .\capturechilditem.txt -WhatIf
Output:
Example #5
We are using the -Force command and sending output to the file capturechilditem.txt; here, we assume that this file has only read access. Here Force will be used to write output to the file. Force can not bypass the security criteria.
Get-Process | Out-File -FilePath .\capturechilditem.txt -Force

cat ./capturechilditem.txt
Output:
Conclusion
From the above tutorial, we learned that with the help of the Out-File command, we could capture(send) the file output; this output can be errors or any event or activity.
Recommended Articles
This has been a guide to PowerShell Out-File. Here we discuss the introduction, parameters, and examples of PowerShell Out-File. You may also have a look at the following articles to learn more –


