Updated August 11, 2023
Print Gridlines in Excel (Table of Contents)
Introduction to Print Gridlines in Excel
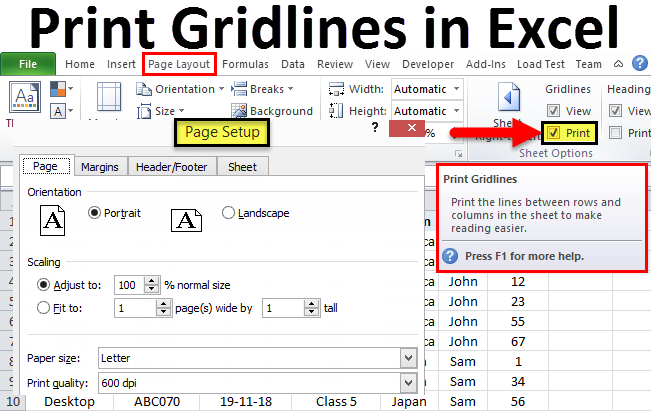
Print Gridlines in Excel is used to print the gridlines for the complete selected data we want to print. Print Gridlines can be accessed from the Page Layout menu tab under the Sheet Options section.
Once we select the print gridlines option, even if we have not bordered the data, we can still see the borders or grids when we print preview the sheet. This helps us enable the gridlines for the data we want to print.
Examples to Print Gridlines in Excel
To access the Gridlines option, go to the Page Layout menu and check the Print box under the sheet options, as shown in the below screenshot.
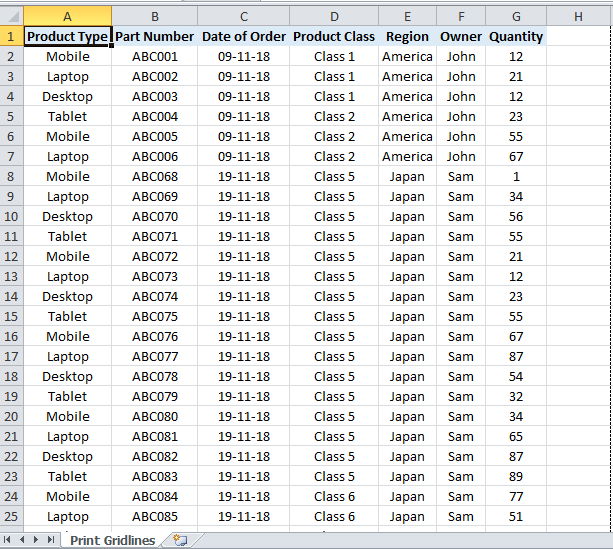
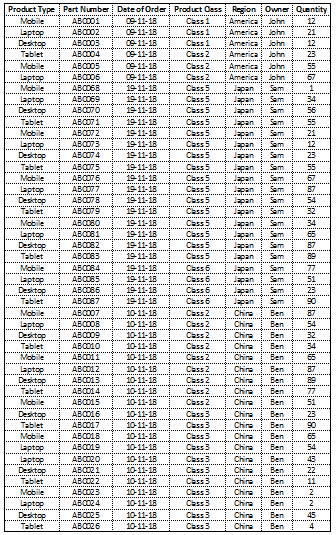
Here we have sample data of some part numbers sold in a month in the different regions. The screenshot below shows that we have not created any borders or tables. And the data is completely a plan.
Now, for printing gridlines, follow the same path given above.
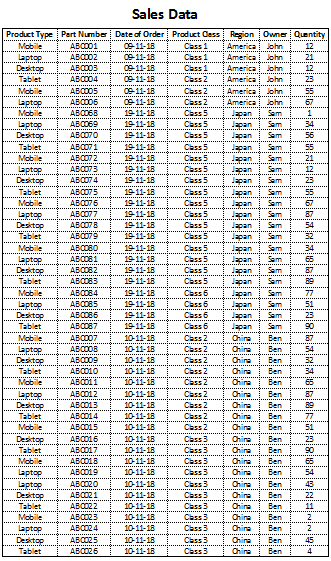
Go Page Layout menu and check the box of print under the sheet option for gridlines. Once the gridlines box is in, check with the tick. Then go to the File menu and click on Print. The gridlines will cover the current sheet, as shown in the screenshot below.
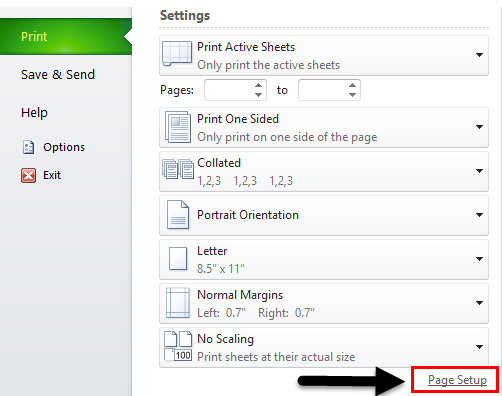
Instead of putting gridlines for each table, we can enable Print Gridlines, which automatically gridlines in all sheets ready to get printed. We can also check with the shortcut keys of Ctrl + P, which will directly take the user to the print option given under the File menu. To improvise further in Print Gridlines, go to File menu > Print > Page Setup, as shown in the below screenshot.
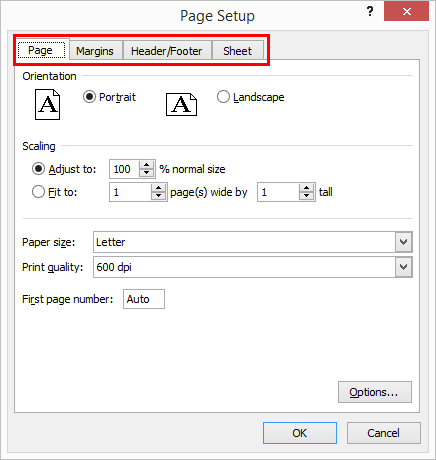
Once we click on it, it will take us to advance the page setup option, from where we can add or make changes to the existing page setup, as shown below.
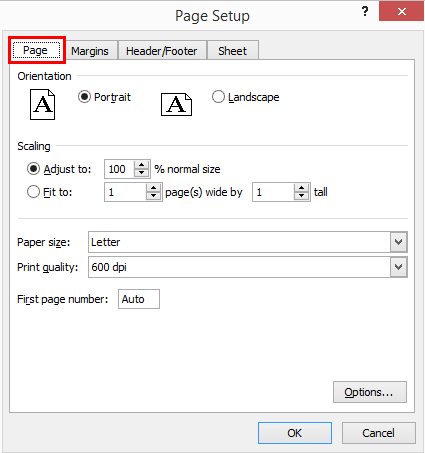
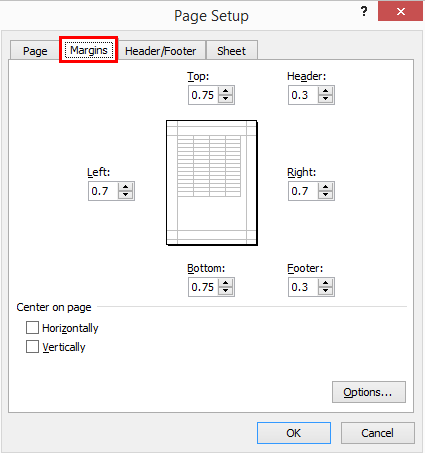
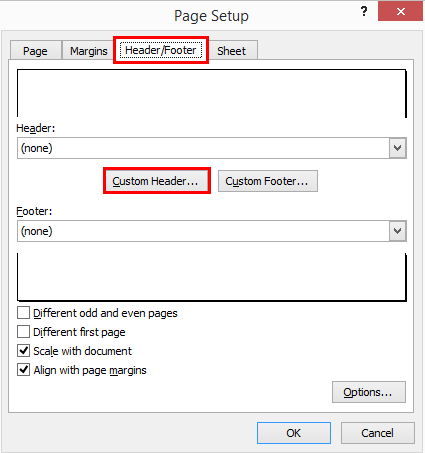
Page setup window has four more options: Page, Margins, Header/Footer, and Sheet.
In-Page button, we can make adjustments or changes in orientation, Paper Sizer to print, Print quality and even enter auto page numbers.
In Margin, we can set all sides or any side margin. Also, we can adjust the position of the data table as per our need by checking the box Horizontally and Vertically, as shown below.
In Header/Footer, We can create a Header or Footer instead of creating these from the option available in the Insert menu tab. This saves space and time both so that our data will look good. There is an option for Custom Header/Custom Footer in the below screenshot, which will enable the Header and Footer in the worksheet in the print option only.
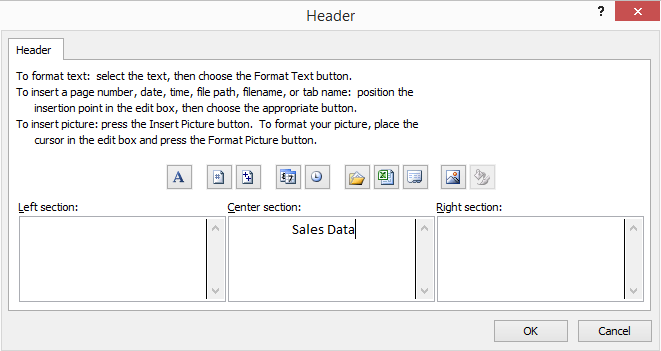
Once we click on Custom Header or Custom Footer option, shown in the above screenshot, we will get a box where we can fill desired or required Header or Footer name, as shown below.
Once we are done with filling the Header and Footer names in their respective blocks, we can click on Ok to see how our Header and Footer will look in the Print Gridline view, as shown below.
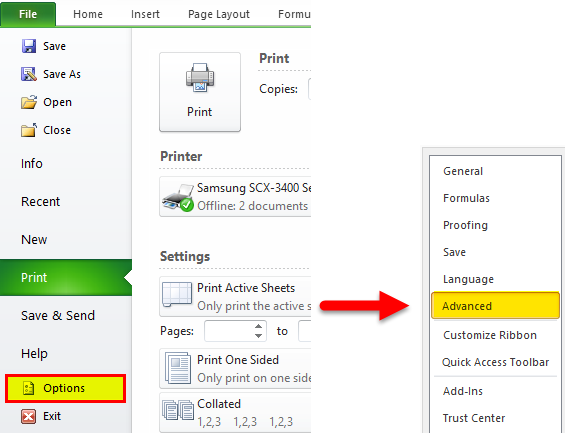
Print Gridlines has a few more advanced options in the File menu and Option and Advanced. Once we follow the mentioned path, we will get the box as shown below.
Here, we can do further modifications. And after that, we will have the final print gridlines, as already shown above, to complete the Print Gridlines in Excel and its application.
Pros of Printing Gridlines
- Creating the print gridlines makes data presentable to anyone without showing the Header/Footer and gridlines on the current page.
- Printing the gridlines makes data in printable form as well. We can print the data with gridlines, and it will also be visible in the output.
Things to Remember
- Gridlines can be used with the shortcut key Ctrl + P, which will directly take us to the Print Preview option with all the discussed commands and functions.
- Giving borders in the form of Print Gridlines in any data table is very important. We must set print gridlines after every work so that the data set can bound.
Recommended Articles
This is a guide to Print Gridlines in Excel. The easiest way to adjust a column is to use the Print Gridlines in Excel. Here we discuss how to use Print Gridlines in Excel and give practical examples. You can also go through our other suggested articles –

