Updated June 2, 2023
Protect Workbook in Excel
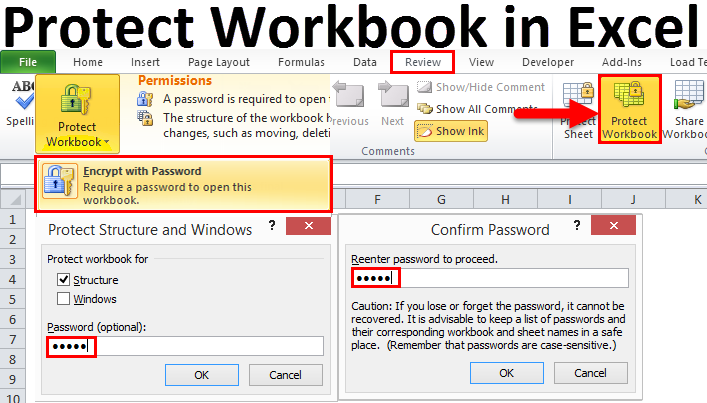
In Excel, we can protect workbooks and worksheets, which is quite helpful in protecting the data to avoid getting lost. For this, we have an option in Excel under the Review menu ribbon under the Changes section with the name Protect Workbook. We can protect the workbook using this option with and without a password. Protect Workbook protects the complete workbook, with each worksheet protected under the same. Once we click on Protect Workbook option, we will get a box to protect the structure, asking Password (Optional).
Types of Excel Protection Workbook
While discussing protection in Excel, we must understand three protection categories.
- One is worksheet protection which protects the particular worksheet.
- The second one is cell protection which protects particular cells, but the user can edit all other cells except the protected one.
- And the third one is workbook protection. Workbook means the entire Excel file itself. The workbook includes worksheets; worksheets include cells. So it protects everything that comes under the workbook. In this article, we will concentrate on workbook protection.
I want to clarify at the beginning, i.e., Both Workbook and Excel File are the same words. Do not get confused with two different words.
#1 – Protect Excel Workbook at File Level
Under this method, we can encrypt the password to open or edit the Excel file. We can protect the data, which is essential to protect this from modifying or altering by other users.
Protect Workbook option in Excel is available under the REVIEW tab.
Now we will see how we protect the Excel workbook to keep it safe from alteration.
Step 1: Open the Excel file you want to protect.
Step 2: Go to the REVIEW tab and click on PROTECT WORKBOOK option in Excel.
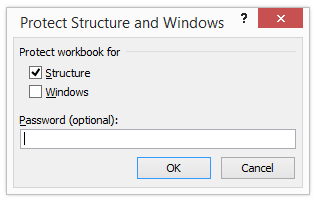
Step 3: You will see this dialogue box after clicking the button.
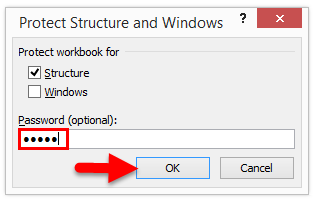
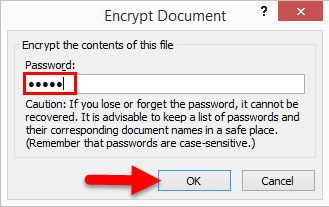
Step 4: Here, you need to mention the password as per your choice; here, I have mentioned 12345 as a password; click on OK to continue.
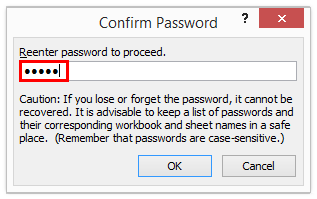
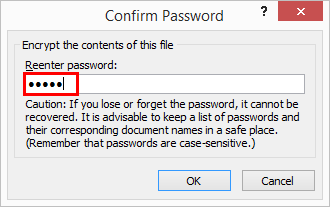
Step 5: Once you click ok, it will again ask you to enter the password; re-enter it here.
Now you have protected your workbook. This is at the file level.
#2- Protect Excel Workbook Level
Under this method, we will see how to protect Excel Workbook with a password to restrict other users from opening it. The user can easily open the Excel file and see what is in it in the previous method. In this method, we can restrict them from opening it. Follow the below steps to protect the entire file.
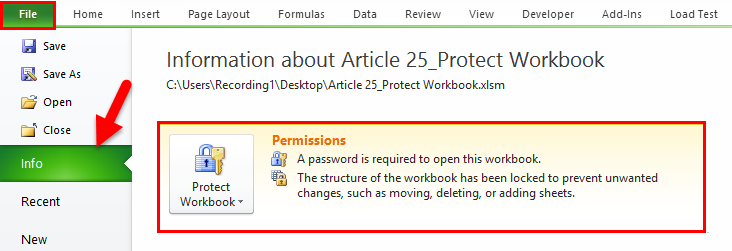
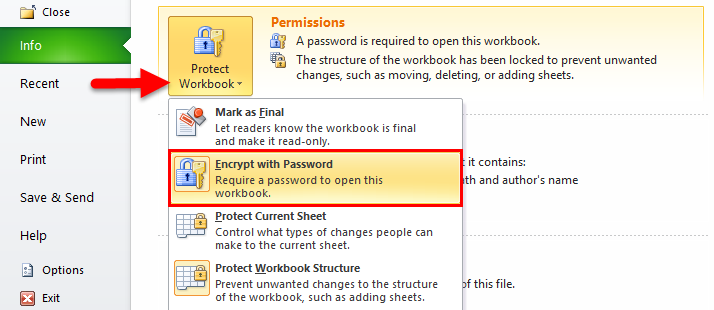
Step 1: Go to File. Once you click on the Info, you will see the Protect Workbook option on the right side.
Step 2: Click on the drop-down list of Protect Workbook option and select Encrypt with Password.
Step 3: Enter the password according to your wish and Click OK.
Step 4: It will again ask you to re-enter the password. Enter the same password which you have entered previously.
Step 5: You can see the warning in the same window as “The Structure of the workbook has been locked to prevent unwanted changes, such as moving, deleting or adding sheets”.
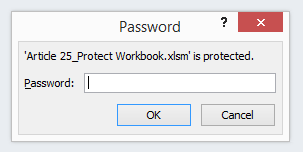
Step 6: Save and close the workbook to apply changes. After closing the workbook, try to open it; it will ask you for a password to open the file. We cannot open the workbook without a password, so carefully remember the password. Loss of password means loss of the workbook.
Things to Remember
- Protecting the workbook (under the REVIEW tab) will restrict the user from editing it only, but it will still allow them to open the workbook.
- Protecting the workbook with encryption will not allow the user to open the workbook. Without the password, they cannot open the workbook.
- Remember the password carefully. If you forget the password, you cannot recover them.
You can download this Protect Workbook Excel Template here and enter the Password 12345 – Protect Workbook Excel Template.
Recommended Articles
This has been a guide to Protect Workbook in Excel. Here we discuss how to protect Excel at the file and workbook levels with a downloadable Excel template. You can also go through our other suggested articles –

