Introduction to Python Projects on GitHub
Python projects on github, we can also find a plethora of Python projects to practice while developing projects. It has many support libraries and data structures that are simple to use. And over time, it has proven to be an excellent tool for developing command-line applications. In GitHub, we will find a variety of open-source examples. The repository has something for everyone, from doing a project using github.
Python projects of github help us understand the language’s intricacies. However, building a complete Python installation requires several additional third-party libraries, which vary and create the configuration options. To get an optimized Python to assemble, use enable-optimizations before running make. This configures the default make targets to enable Link Time Optimization (LTO) on some platforms.
The interpreter is instrumented by using the appropriate compiler flags. It is a preliminary step. Because it contains profiling instructions, the binary produced by this step is unsuitable for real-world workloads. The final step is to construct an actual interpreter using the data.
Top Python Projects on GitHub
More than 75% of respondents believe in Python. As a result, python has surpassed Java’s most popular language among repository contributors on GitHub for the first time. In addition, it increased by more than 100 percent in a year for the last three years.
Below is the top Python project, which was developed by using github as follows:
1. Python GitHub Project of Mathematical Animation Engine
- Mathematical Animation Engine is a video animation engine for explaining math concepts. It is primarily used to generate animations programmatically. Python 3.7 is used to run Mathematical Animation Engine.
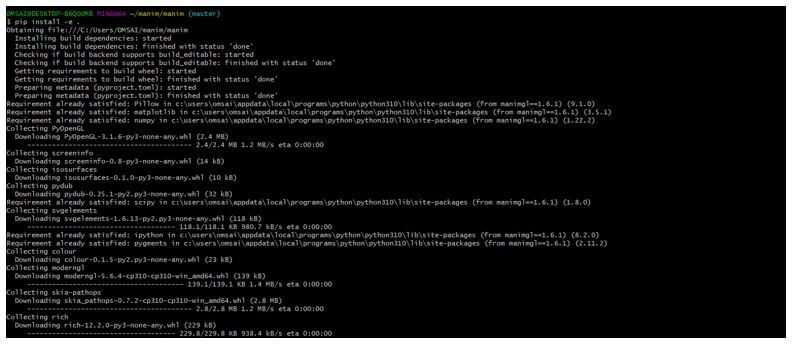
- We must install the manimlib module using the pip command to run this project first. Without establishing this command, we cannot run the above project in our system.
The below steps show how to run the Mathematical Animation Engine project by using github:
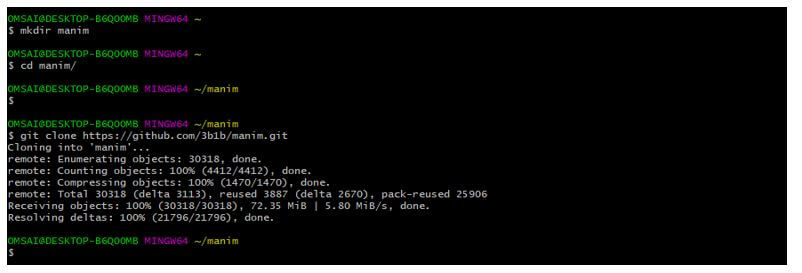
- In the first step, we upload our project to the git repository; after uploading the project, we make the parent directory in our system. After making the directory, we clone the project using the git command.
- After cloning the project, we install the required packages; after installing the required packages, we run the projects.
- This project is compatible with Python 3.7 and the later version, so we can run this project using Python version 3.7.
Code:
$ mkdir manim
$ git clone https://github.com/3b1b/manim.git
$ cd manim
$ pip install -e .
$ manimgl example_scenes.py OpeningManimExample
Output:
2. Python GitHub Project of Google Images Download
- It’s a command-line program that searches for and downloads hundreds of Google images. This Python script allows us to search for keywords and key phrases on images. This program is Python 2.x and Python 3.x compatible.
The steps below show how to run the Google image download project using github.
- In the first step, we upload our Google image download project to the git repository; after uploading the project, we make the parent directory name Google in our system. After making the directory, we clone the project using the git clone command.
In the below example, we have installed the Python package already, so we do not need to install it again on our system.
Code:
$ mkdir google
$ cd google/
$ git clone https://github.com/hardikvasa/google-images-download.git
$ python setup.py install
Output:
3. Python GitHub Project of Photon
The steps below show how to run the photon project using github.
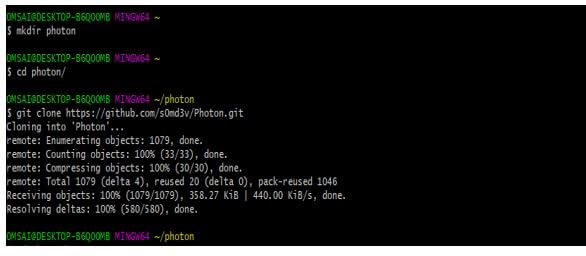
- In the first step, we upload our photon project to the git repository; after uploading the project, we make the parent directory name a photon in our system. After making the directory, we clone the project using the git clone command.
- We can run this project using Python 3.0 and later versions; we have already installed Python 3 in our system.
Code:
$ mkdir photon
$ cd photon/
$ git clone https://github.com/s0md3v/Photon.git
Output:
4. Python GitHub Project of Neural Talk
- NeuralTalk2 is a powerful image captioning code written in Lua that requires Torch to run. However, because this project is batch-processed and runs on the GPU, it is compatible with Python 2.7 and modern versions of NumPy, SciPy, and Perl.
The steps below show how to run the neural talk project using github.
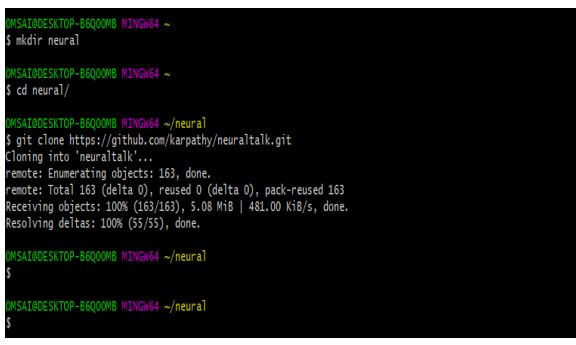
- In the first step, we upload our neural talk project to the git repository; after uploading the project, we make the parent directory name neural in our system. After making the directory, we clone the project using the git clone command.
- This project is compatible with Python 2.7 and the later version, so we can run this project using Python version 2.7.
Code:
$ mkdir neural
$ cd neural /
$ git clone https://github.com/karpathy/neuraltalk.git
Output:
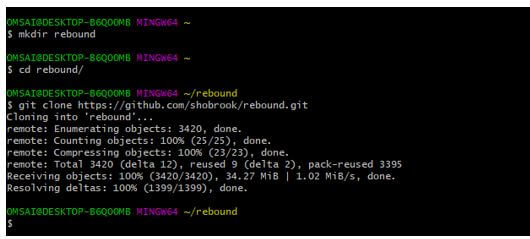
5. Python GitHub Project of Rebound
- Beautiful Soup is used in this project to scrape Stack Overflow content and as an error. To run this project, we need the Python version of 3.0 or later; we cannot run this project on less than 3.0 projects.
Below are the steps that show how to run the rebound project using github.
- In the first step, we upload our rebound project to the git repository; after uploading the project, we make the parent directory name a rebound in our system. After making the directory, we clone the project using the git clone command.
- This project is compatible with Python 3.0 and the later version, so we can run this project using Python version 3.0.
Code:
$ mkdir rebound
$ cd rebound /
$ git clone https://github.com/shobrook/rebound.git
Output:
Conclusion
To get an optimized Python to build, use enable-optimizations before running make. This configures the default make targets to enable Link Time Optimization (LTO) on some platforms. Python projects on github, we can also find a plethora of Python projects to practice while developing a project.
Recommended Articles
This is a guide to Python Projects on GitHub. Here we discuss the introduction and top Python projects on GitHub for better understanding. You may also have a look at the following articles to learn more –
