Updated March 30, 2023
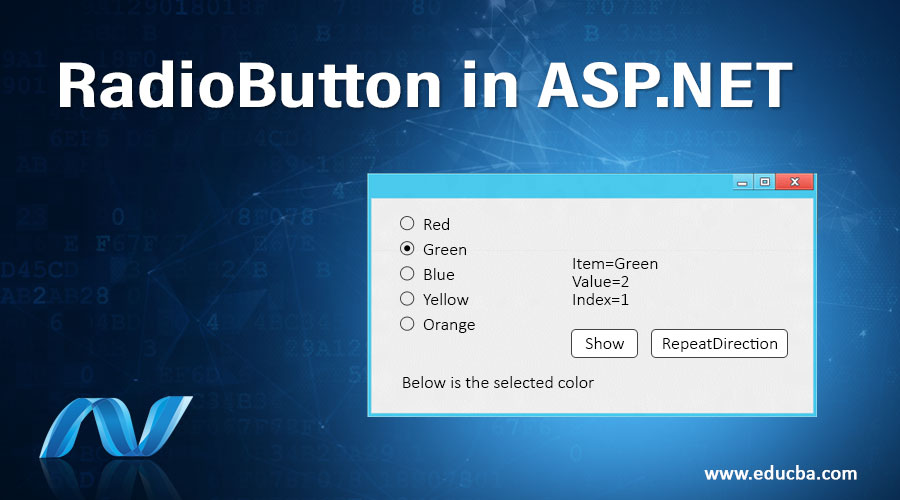
Introduction to RadioButton in ASP.NET
In this article, we will discuss RadioButton in ASP.NET. You might have seen radio buttons in many of the forms while selecting only one option out of many. We can say in any of the general forms or registration form of any websites, there is a radio button for selecting the Gender that is one for Male and another one for Female. In the same way, RadioButton in ASP.NET gives us the functionality to select one out of many options, so the developers can use it for creating the web page. It’s an input control by which input is taken from the user to select from multiple options.
How to Create a Radio Button in ASP.NET?
Let’s take an example of how to create a RadioButton in ASP.NET with the help of the diagram and code.
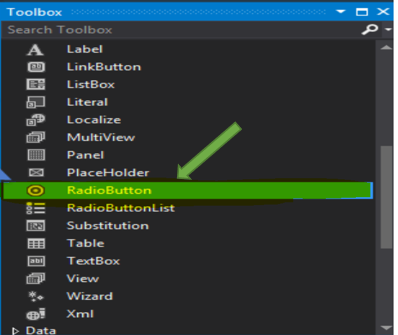
Step 1: We have a toolbox in ASP.NET so first we need to drag the given ‘radiobutton’ control in the web form from the toolbox. We can select and drag the radiobutton according to our requirements. Suppose we are creating three options so we need to ensure that 3 radio buttons should be added.
We can see the arrow given in the above snippet pointing towards the radio button.
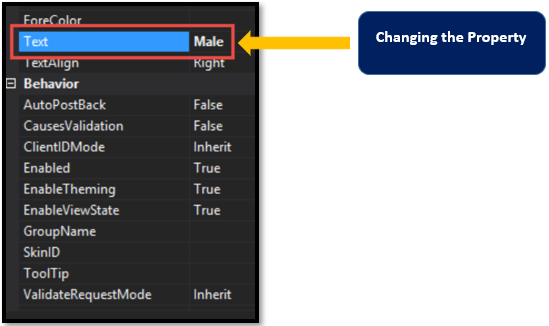
Step 2: After adding the Radiobutton, we need to change the ‘text’ property by clicking on the Radiobutton control’. We want to add the Radio buttons for form so for male and female radio buttons we need to change its text property to ‘Male’
Step 3: Now repeat the same thing for adding a radio button as ‘Female’. Change the ID Property to rdMale and rdFemale for the respective controls.
Refer to the above snippet for better understanding.
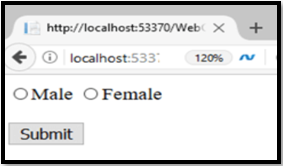
Step 4: Once all these changes have been done we can see the below output.
Output:
We can see that our web page is having two radio buttons one is ‘Male’ and the other is ‘Female’.
Likewise, we can create many radio buttons as per our requirements and add them to our web page.
Example of RadioButton in ASP.NET
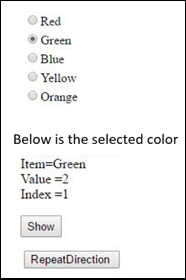
ASP.NET RadioButton is used to allow the user to pick any one of the multiple options. Let’s have a look at a simple program that has a radio button for selecting the color from the list of various colors.
Code:
using System;
using System.Web.UI.WebControls;
public partial class ListControls : System.Web.UI.Page
{
protected void Page_Load(object sender, EventArgs e)
{
}
protected void Button1_Click(object sender, EventArgs e)
{
Label1.Text = "Below is the selected color </br> Item=" +
RadioButtonList_New.SelectedItem.Text + "</br> Value =" +
RadioButtonList_New.SelectedValue       + "</br> Index =" +
RadioButtonList_New.SelectedIndex ;
}
protected void Button2_Click(object sender, EventArgs e)
{
if (RadioButtonList_New.RepeatDirection == RepeatDirection.Vertical)
{
RadioButtonList_New.RepeatDirection = RepeatDirection.Horizontal;
}
else
{
RadioButtonList_New.RepeatDirection = RepeatDirection.Vertical;
}
}
}- Using Property Window, we can add the items in our RadioButtonList via item collection to have the many radio buttons.
- RepeatDirection is used for the arrangement of the radio button. We can arrange it as vertical as well as horizontal manner according to our requirement of the application.
- So now we want to add values to the radio button. RadioButtonList_New contains different values for the colors.
- Below is the code is given for the different colors for adding the values besides the radio button.
Code:
<asp:RadioButtonList ID="RadioButtonList_New" runat="server">
<asp:ListItem Value="1">Red</asp:ListItem>
<asp:ListItem Value="2">Green</asp:ListItem>
<asp:ListItem Value="3">Blue</asp:ListItem>
<asp:ListItem Value="4">Yellow</asp:ListItem>
<asp:ListItem Value="5">Orange</asp:ListItem>
</asp:RadioButtonList>
Output:
- Suppose now we want the radio buttons for colors to be in a Horizontal way. So simply we can change the code as below.
RadioButtonList_New.RepeatDirction=RepeatDirection.Horizontal; - We can see there is a tab for RepeatDirection which will change our layout of radio buttons from Vertical to horizontal manner.
- Value for the default column by default is Zero and as per the application requirement, we can change this default value.
- Let’s see if we change this default value how it will look like. Suppose you want to set the default value as 3, then below is the output for the same.
- As we can see it will take 3 radio buttons as the value of the default has been set to 3.
The layout can be affected by its important property which is supported by RadioButtonList control.
RepeatColumns: It is used to display the number of columns of the radio button.
RepeatDirection: It is used to decide the direction of the radio buttons, that is whether it should be horizontal or vertical. By default, the direction is set as vertical.
RepeatLayout: It is used to determine the radio button in an HTML table.
It takes the four values namely Table, flow, tableorderedlist, unorderedlist. Let’s have a look at what these four values meant for and how it is used.
- Table: If we select the table then the output of radio buttons will come in table format.
- Flow: If we select the Flow, it will not take the table for the radio buttons.it will display the radio buttons as it is.
- UnorderedList: It shows with the bullet points it will only support the vertical layout. the radio button will have bullets in front of radio buttons.
- OrderedList: It will show the numbers instead of a bullet in the radio buttons.
There are two different syntaxes for Radio Button Control one is for RadioButton control and the other one is for RadioButtonList.
Syntax for RadioButton Control:
<asp:RadioButton ID="Radio1"runat="server"></asp:RadioButton>Syntax for RadioButtonList:
<asp:RadioButtonList ID="RadioButtonList1"runat="server" AutoPostBack="True"
OnSelectedldexChanged="RadioButton1_SelectedlndexChanged></asp:RadioButtonList>
Important Properties of a Radio Button Control:
Let us see some of the important properties of Radio button control
- Text: It is used to add the text for the radio button control.
- Items: Individual radio buttons are added to the control.
- RepeatColumns: It is the number of columns that are repetitively used for the values.
- TextAlign: It is used to proper alignment of the text property of a control.
- Checked: It is used to determine what exactly the user has clicked or not.it will return true or false according to the click event.
Conclusion
So we can say that it is a facility provided by the ASP.NET framework so as to choose the single option from multiple choices i.e radio button. We have learned how to implement the RadioButton in ASP.NET using a very simple program of radio buttons for different colors.
Recommended Articles
We hope that this EDUCBA information on “RadioButton in ASP.NET” was beneficial to you. You can view EDUCBA’s recommended articles for more information.
