Updated March 23, 2023
Overview of Rank Transformation in Informatica
Rank Transformation in Informatica is an important transformation feature that is built-in functionality to rank the data based upon the business requirements. It is an active type of transformation in Informatica. It organizes the data through ranges and generates top or bottom ranks. It is a connected transformation which filters out data based upon the ranks or groups. Rank transformation in Informatica is associated with a group of rows and maintains the rank index for storing the rank position values. There are rank ports and variables ports associated with rank transformation for calculation the rank values. Rank Transformation supports several configurations properties such as cache directory, index size, top/bottom tracing level, transformation input properties. This transformation is beneficial for grouping the data based upon a specified column in Informatica.
How to Perform the Rank Transformation in Informatica?
The rank transformation requires an output port which assigns a rank to the given rows. Let us have a look at step by step, creating a rank mapping.
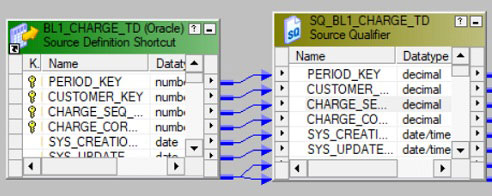
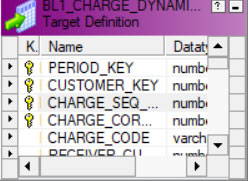
Step 1: Create a mapping having a source and target.
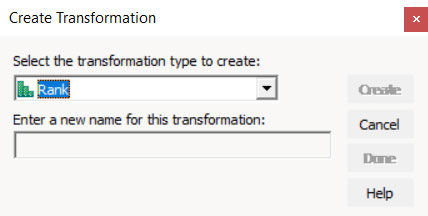
Step 2: Go to the Transformation menu and then select the create option.
Step 3: After clicking on create, go to the drop-down and select Rank in the dropdown. Enter a suitable name for this Rank transformation and then click on Create.
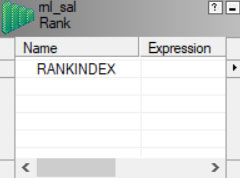
Once you click on create the below transformation will be created.
Several various configurations can be done while calculating the rank as discussed earlier. There is also a rank index used to store the ranking position for each row group created. There is a specific rank port that is used in calculating the rank. It also has a variable port which can be used in calculating rank temporarily.
Step 4: Once this is done. Connect all source ports to the rank transformation. After this double click on the Rank transformation, you can see the Edit Transformation window’s option once this window is opened than go to the Properties tab.
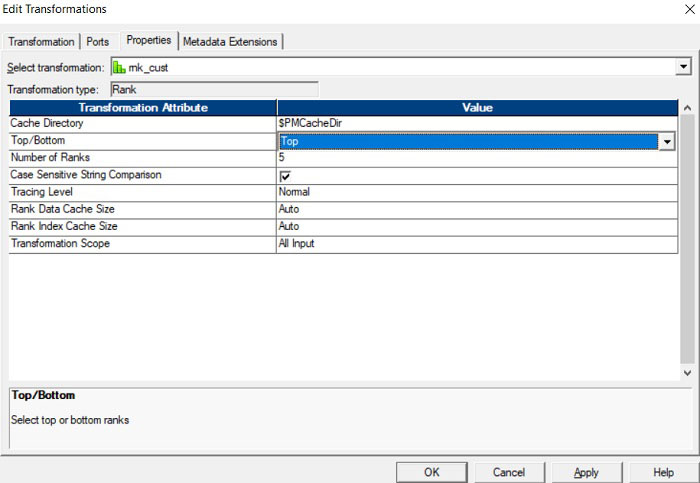
In this tab, you can define properties for rank by going to the below tab as below,
Step 5: Here, you can choose the property of your choice whether you want top rows or bottom rows that are to be selected. The number of ranks property will have a value of how many ranks are needed. Here we have chosen only one. The other fields which can be changed and configured as needed are as below:
- Cache Directory: This specifies the directory where integration service is used to create the indexes and cache the needed data.
- Top or Bottom: As mentioned earlier, this helps specify whether the top or bottom rank of data is found.
- Number of Ranks: It specifies the number of ranks needed. It can be top 3 or bottom 2, etc.
- Case Sensitive String Comparison: It specifies if sorting is to be done using case sensitivity or not.
- Tracing Level: It stores the logs which are tracked by the session log file.
- Rank Data Cache Size: The data cache size can be set in this field. If it is set to auto, then the integration service will decide the cache size at runtime.
- Rank Index Cache Size: You can set the index cache size to a numeric value. The default size is 1,000,000 bytes.
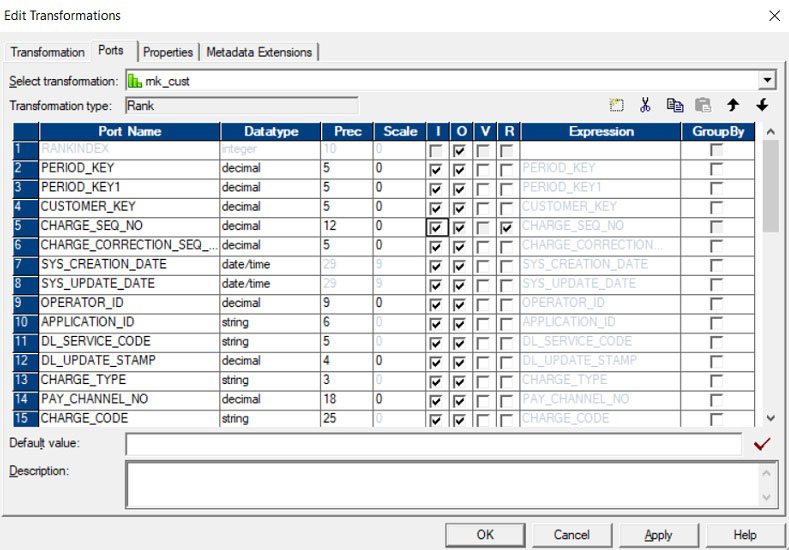
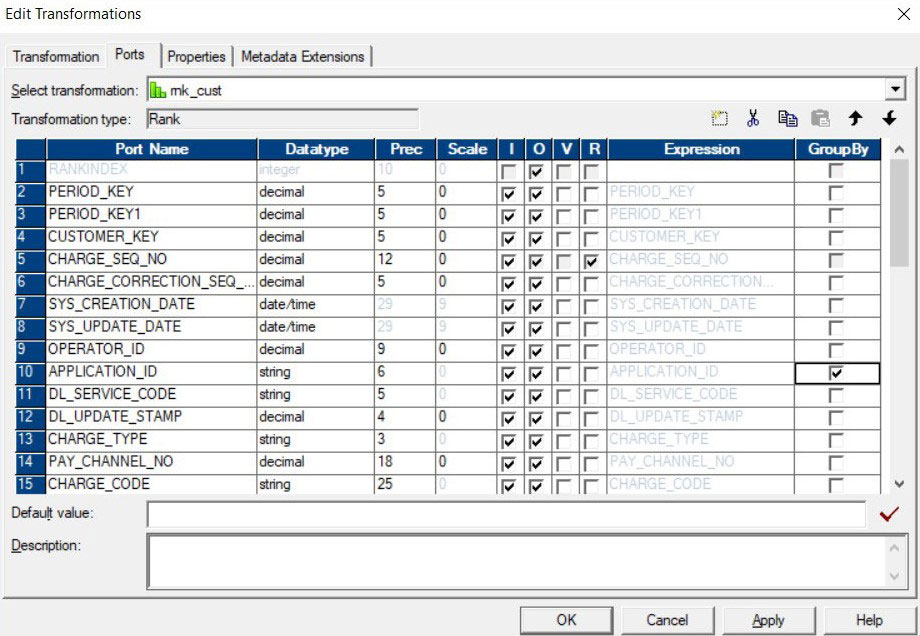
Step 6: Once this is done, go to the ports tab. Here you can choose which port you would like to find the rank for. You can also choose the group by option for the field you would like to group by while finding the rank. You have to click on the checkbox for the field with the rank to be associated and the group by a checkbox for the field that needs to be grouped by. The following is the description for the ports that are present.
- Port Name: All columns present in the table are mentioned here with its respective data type.
- O: All columns which are to be present in the output should be checked.
- Group by: If this is checked, we can understand that the transformation has to be grouped by on which field.
When you go to the Ports tab, click on the checkbox with (R) for the port where rank is found. The grouping can be done by checking the tick mark for the GroupBy option.
Here Rank is being found for Charge_seq_no. Group by can be done as below:
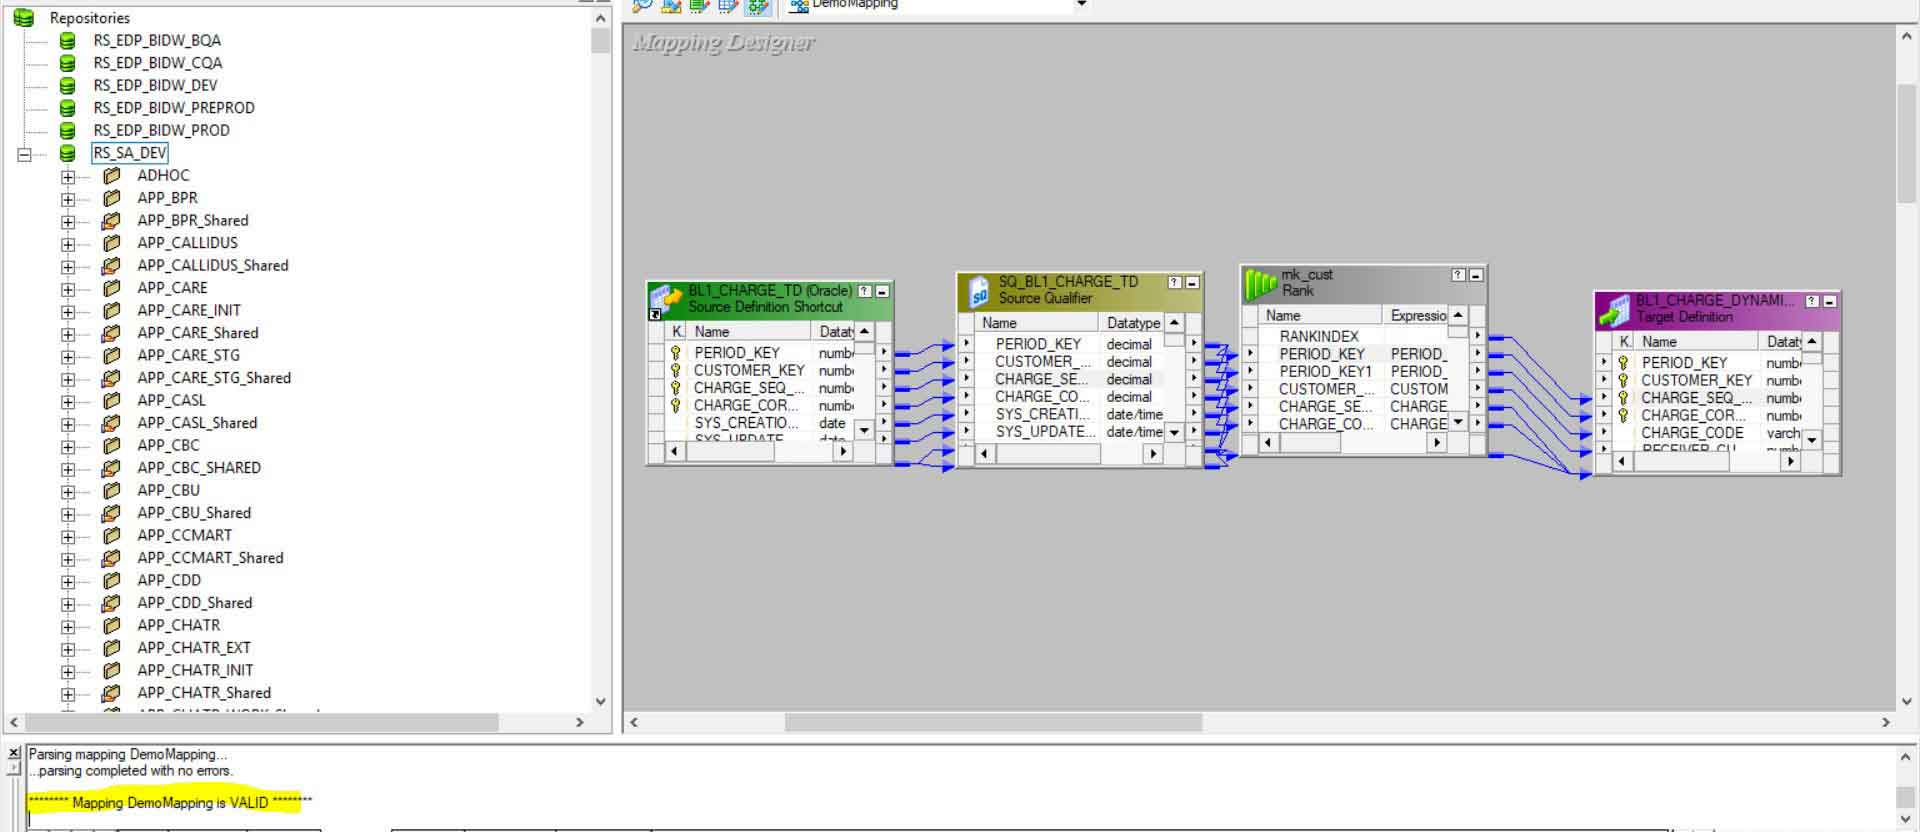
Connect this transformation to the target.
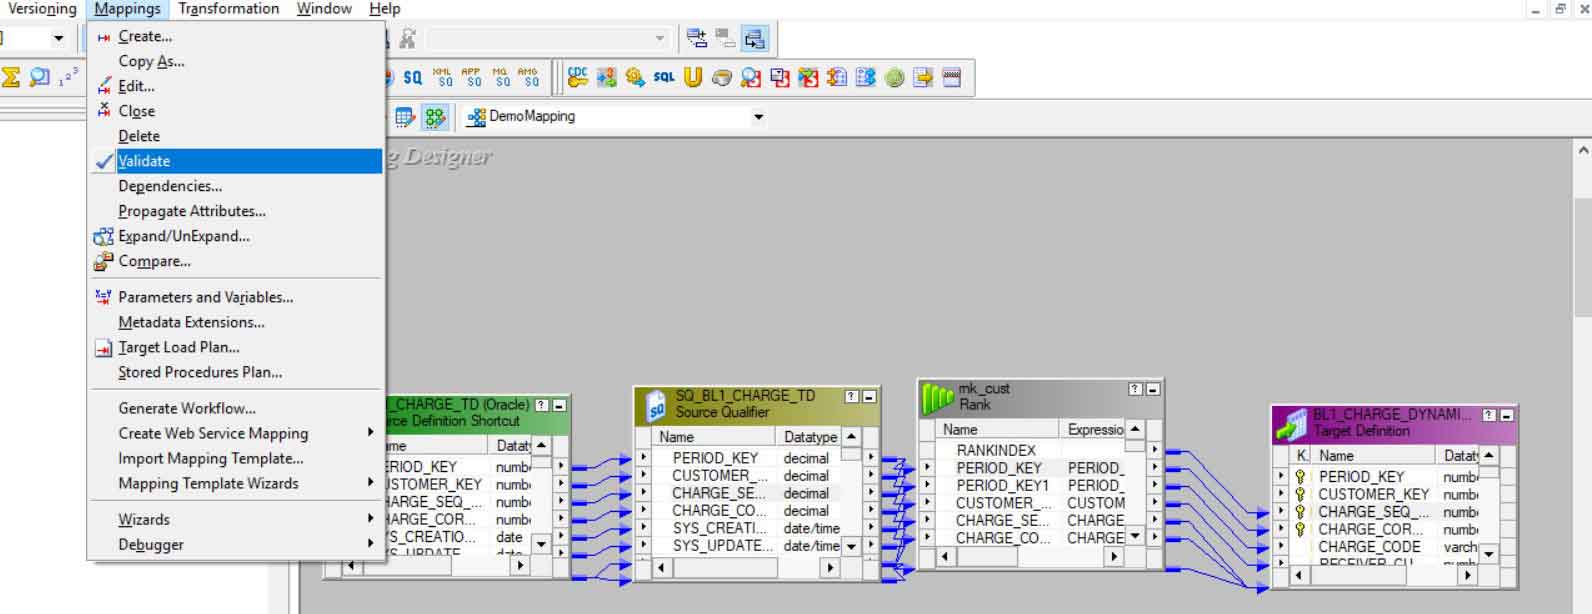
Step 7: Once all these steps are done, you can connect the rank transformation to the target table.
Now navigate to the Mapping menu and click on the Validate option as below.
The validated mapping now can be easily run by using a workflow manager. Workflows can be created manually or by using a workflow manager wizard. You can go to the Workflow menu and then click on the Create option. After the workflow is created, you have to create a session task by navigating to the Task menu and selecting create Task. A new mapping window will open where the user can associate the mapping with the session. All sources, targets and common properties can be configured with the settings needed, and thus the workflow is ready to be run. Go to the workflow manager and then click in the Start Workflow option. Once the workflow starts running, it can be monitored on Monitor, and all session logs and errors can be checked in the monitor. You can look for execution status as well. If the workflow fails, you can click on Get Session Log and checks the logs for any errors.
Conclusion – Rank Transformation in Informatica
The Rank transformation thus helps in getting the top or bottom rows in a given table. With the help of this transformation, you can easily group the results based on any particular column. Rank transformation provides the facility of choosing the number of top rows or the number of bottom rows. One you can easily specify the number of rows, and those will be displayed. Hence Rank transformation is beneficial when some top values or bottom values are to be filtered.
Recommended Articles
This is a guide to Rank Transformation in Informatica. Here we discuss how to perform the rank transformation in Informatica using various steps. You may also look at the following articles to learn more-
