Updated April 11, 2023

Introduction to React Component Lifecycle
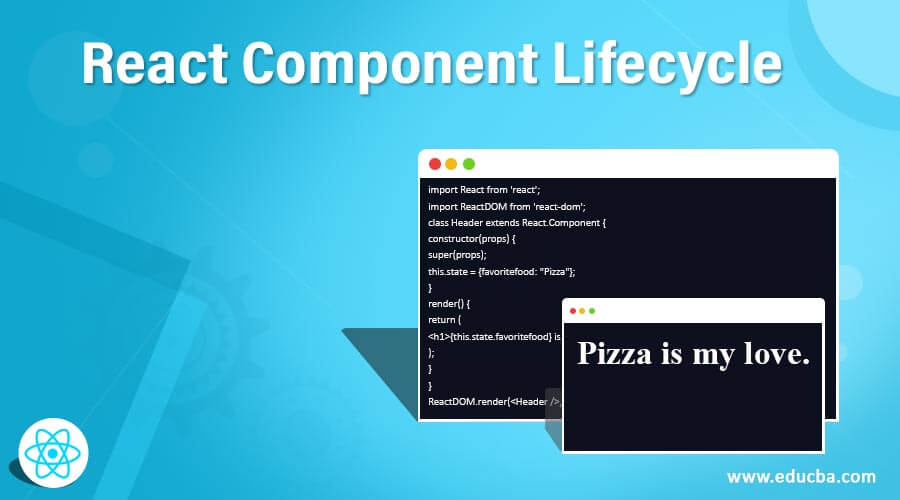
As we have seen, that a React application is made up of different components and its collection defines a React app. Usually, all of the components interact in between them and it helps in running the React app. Each and every component used has its own lifecycle. The series of different methods that are invoked in an orderly manner defines the React Component Lifecycle. The series of methods called are categorized into three different phases of the Lifecycle. In this article, we have seen all of the three phases and the different methods used in it. The phases and the methods are described in an order which should be followed while building a React app.
React Component Lifecycle
Each and every component used in React has its lifecycle which can be monitored and manipulated in the three phases of its Lifecycle.
The three main phases of a React Component’s lifecycle are:
- Mounting
- Updating
- Unmounting
1. Mounting
Mounting is referred to the process of putting the different elements in the DOM. There are four different methods which are called in a particular order written below to mount a component.
- constructor()
- getDerivedStateFromProps()
- render()
- componentDidMount()
The render() method is the most important and is always called, rest are optional and are called if we define them.
1. constructor
The first method which need to be called is constructor(), it is defined when we initiate the component. This is the most suitable place to set the initial states and values. The props are called along with the constructor() method as arguments. Super(props) should always called at the very start before calling anything else as it initiates the parent constructor method and the components easily inherit the methods from the parent.
Example:
Whenever you make a component, React calls the constructor method. In the example below, my favouritefood name is displayed using the constructor method.
index.js:
import React from 'react';
import ReactDOM from 'react-dom';
class Header extends React.Component {
constructor(props) {
super(props);
this.state = {favoritefood: "Pizza"};
}
render() {
return (
<h1>{this.state.favoritefood} is my love.</h1>
);
}
}
ReactDOM.render(<Header />, document.getElementById('root'));
Output:
2. getDerivedStateFromProps
Before rendering of the elements into the Document Object Model (DOM), the getDerivedStateFromProps() method is called. This is the most suitable place to set up the state object which is based on initial props. The state is taken as argument and an object is returned along with the changes in the state.
Example:
Before implementing the render method, getDerivedStateFromProps method is called. In the example below, the foodIlove is displayed using getDerivedStateFromProps method.
index.js:
import React from 'react';
import ReactDOM from 'react-dom';
class Header extends React.Component {
constructor(props) {
super(props);
this.state = {foodIlove: "Pizza"};
}
static getDerivedStateFromProps(props, state) {
return {foodIlove: props.favcol };
}
render() {
return (
<h1>{this.state.foodIlove} is my love! </h1>
);
}
}
ReactDOM.render(<Header favcol="Chicken Biryani"/>, document.getElementById('root'));
Output:
3. render
Render() is the method used to render the outputs of the HTML to the DOM and render() method is one of the most important part of the code.
Example:
In the example below, a simple component is developed using a simple render method.
index.js:
import React from 'react';
import ReactDOM from 'react-dom';
class Header extends React.Component {
render() {
return (
<h1>Heyoo! My name is Rahul.</h1>
);
}
}
ReactDOM.render(<Header />, document.getElementById('root'));
Output:
4. componentDidMount
After rendering the component, we need to call the componentDidMount() method. Here the statements are run which required the components to be in the DOM.
Example:
In the example below, firstly name gets displayed of my 1st favourite food then after few seconds, my 2nd favourite food’s name get displayed, and stays on the same.
index.js:
import React from 'react';
import ReactDOM from 'react-dom';
class Header extends React.Component {
constructor(props) {
super(props);
this.state = {foodIlove: "Pizza"};
}
componentDidMount() {
setTimeout(() => {
this.setState({foodIlove: "Chicken Biryani"})
}, 2000)
}
render() {
return (
<h1>{this.state.foodIlove} is My Love! </h1>
);
}
}
ReactDOM.render(<Header />, document.getElementById('root'));
Output:
2. Updating
Updating the component is considered as the second phase in the component lifecycle. Whenever there is any change in the state of the component, the component needs to be updated.
For updating, there are five methods used and are called in the order below:
- getDerivedStateFromProps()
- shouldComponentUpdate()
- render()
- getSnapshotBeforeUpdate()
- componentDidUpdate()
The render() method is the most important and is always called, rest are optional and are called if we define them.
1. getDerivedStateFromProps
When we start the updating phase, the first method which gets called is the getDerivedStateFromProps method.
Example:
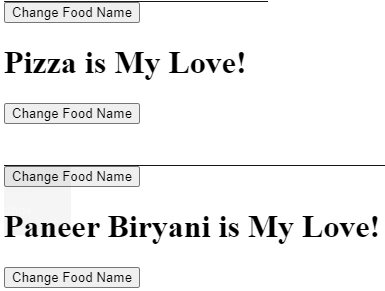
In the example below, on clicking of button, the food name should have changed to “Chicken Biryani”, but as the state of food is updated through favfood attribute on calling of getDerivedStateFromProps. So the food name is rendered to “Paneer Biryani”.
index.js:
import React from 'react';
import ReactDOM from 'react-dom';
class Header extends React.Component {
constructor(props) {
super(props);
this.state = {foodIlove: "Pizza"};
}
static getDerivedStateFromProps(props, state) {
return {foodIlove: props.favfood };
}
changeColor = () => {
this.setState({foodIlove: "Chicken Biryani"});
}
render() {
return (
<div>
<button type="button" onClick={this.changeColor}>Change Food Name</button>
<h1>{this.state.foodIlove} is My Love</h1>
</div>
);
}
}
ReactDOM.render(<Header favfood="Paneer Biryani"/>, document.getElementById('root'));
Output:
2. shouldComponentUpdate
The shouldComponentUpdate() method returns a Boolean value. It confirms that if React should continue with rendering or should stop. True is the default value returned.
Example:
In the example below, food name gets updated when respective button is clicked. If we put:
shouldComponentUpdate() {
return false;
}
Then there would be not update in the food name even if the respective button is clicked.
index.js:
import React from 'react';
import ReactDOM from 'react-dom';
class Header extends React.Component {
constructor(props) {
super(props);
this.state = {foodIlove: "Pizza"};
}
shouldComponentUpdate() {
return true;
}
changefood1 = () => {
this.setState({foodIlove: "Chicken Biryani"});
}
changefood2 = () => {
this.setState({foodIlove: "Paneer Biryani"});
}
render() {
return (
<div>
<button type="button" onClick={this.changefood1}> Change Food Name </button>
<h1>{this.state.foodIlove} is My Love! </h1>
<button type="button" onClick={this.changefood2}> Change Food Name </button>
</div>
);
}
}
ReactDOM.render(<Header />, document.getElementById('root'));
Output:
3. render
Whenever the component needs to be updated, we have to call render() method. Re-rendering of HTML is to be done to the DOM with all of the new changes.
Example:
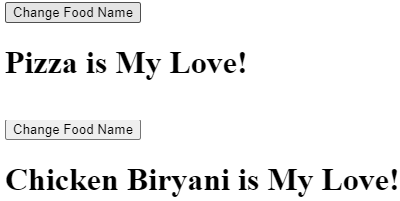
In the example below, food name gets updated when we click the button.
index.js
import React from 'react';
import ReactDOM from 'react-dom';
class Header extends React.Component {
constructor(props) {
super(props);
this.state = {foodIlove: "Pizza"};
}
changeFood = () => {
this.setState({foodIlove: "Chicken Biryani"});
}
render() {
return (
<div>
<button type="button" onClick={this.changeFood}>Change Food Name</button>
<h1>{this.state.foodIlove} is My Love!</h1>
</div>
);
}
}
ReactDOM.render(<Header />, document.getElementById('root'));
Output:
4. getSnapshotBeforeUpdate
getSnapshotBeforeUpdate() method allows us to check the values of the states and props which were before the update. Whenever we are using the getSnapshotBeforeUpdate() method, we need to include componentDidUpdate() method to make the code error free.
Example:
In the example below, firstly a text appears with one food name then food name gets auto updated within seconds and same texts get displayed with updated food name followed by some more texts below it.
index.js:
import React from 'react';
import ReactDOM from 'react-dom';
class Header extends React.Component {
constructor(props) {
super(props);
this.state = {foodIlove: "Pizza"};
}
componentDidMount() {
setTimeout(() => {
this.setState({foodIlove: "Chicken Biryani"})
}, 2000)
}
getSnapshotBeforeUpdate(prevProps, prevState) {
document.getElementById("content1").innerHTML =
prevState.foodIlove + " is also My Love." ;
}
componentDidUpdate() {
document.getElementById("content2").innerHTML =
"But I love " + this.state.foodIlove +" More!";
}
render() {
return (
<div>
<h1>{this.state.foodIlove} is My Love</h1>
<div id="content1"></div>
<div id="content2"></div>
</div>
);
}
}
ReactDOM.render(<Header />, document.getElementById('root'));
Output:
5. componentDidUpdate
After updating the component into the DOM, we need to call the componentDidUpdate method.
Example:
In the example below, firstly a text comes with food name and within a few seconds food name gets updated and the same text with updated food name comes followed by some text below it.
index.js:
import React from 'react';
import ReactDOM from 'react-dom';
class Header extends React.Component {
constructor(props) {
super(props);
this.state = {foodIlove: "Pizza"};
}
componentDidMount() {
setTimeout(() => {
this.setState({foodIlove: "Chicken Biryani"})
}, 2000)
}
componentDidUpdate() {
document.getElementById("content").innerHTML =
this.state.foodIlove + " is My New Love";
}
render() {
return (
<div>
<h1>{this.state.foodIlove} is My Love!</h1>
<div id="content"></div>
</div>
);
}
}
ReactDOM.render(<Header />, document.getElementById('root'));
Output:
3. Unmounting
The last phase in the Component lifecycle is the Unmounting phase. In this phase, we remove the component from the DOM. There is the only a method called to unmount the component:
1. componentWillUnmount()
When we need to remove or unmounts a component from the DOM, we call the componentWillUnmount method.
Example:
In the example below, the button is used to delete the header.
index.js:
import React from 'react';
import ReactDOM from 'react-dom';
class Container extends React.Component {
constructor(props) {
super(props);
this.state = {show: true};
}
Headerdel = () => {
this.setState({show: false});
}
render() {
let footer;
if (this.state.show) {
footer = <Child />;
};
return (
<div>
<button type="button" onClick={this.Headerdel}>Click to Delete Below Heading</button>
{footer}
</div>
);
}
}
class Child extends React.Component {
componentWillUnmount() {
alert("Unmounting, as the footer gets deleted");
}
render() {
return (
<h1>Heyoo! Buddy.</h1>
);
}
}
ReactDOM.render(<Container />, document.getElementById('root'));
Output:
Conclusion
On the basis of the above article, we have introduced the React Components Lifecycle. The major three phases of a component’s lifecycle and their methods are described in an orderly manner above with examples which will help you understand the process of creating a React application.
Recommended Articles
This is a guide to React Component Lifecycle. Here we discuss an introduction, three main phases of React Components with proper examples and coding. You can also go through our other related articles to learn more –


