Updated June 23, 2023
Introduction to React ComponentDidMount()
The componentDidMount() method is the last step in the Mounting phase. The post-mounting method in React, known as componentDidMount(), is invoked after all the child elements and components have been mounted into the Document Object Model (DOM). It provides a suitable place to perform actions that require access to the rendered elements and components. This article will explain the componentDidMount() method, which works with different examples.
How does React ComponentDidMount() work?
In React, we have a set of hooks for each lifecycle phase. These hooks help us understand where the Component is in the Component Lifecycle.
The three phases of the Component Lifecycle are briefed below:
Mounting: In the Mounting phase, the states and the props are configured, and the initial UI display is accessed. In this phase, we mount the children’s components into the DOM.
Updating: In the updating phase, the states and props are updated. The component spends most of its time in the update phase, where all of the new data is incorporated, and the changes with the user actions are defined.
Unmounting: When the component has completed all of the updating, it moves into the Unmounting phase. In this phase, the component gets unmounted from the Native UI stack. When the UI gets changed, and the element tree has no matching key to the component, we are in the unmounting phase.
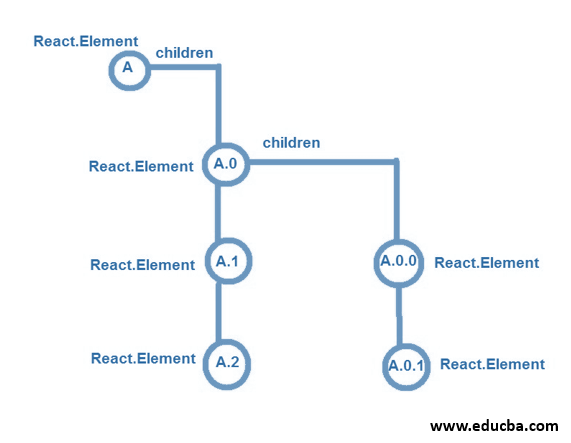
The lifecycle methods are called in a specific order. componentDidMount() is the last step or method used in the Mounting phase. All the methods in the Mounting phase start working from top to down except componentDidMount(). ComponentDidMount() methods work from the bottom to the top.
Let’s see the Element Tree below.
This way of working bottom to up ensures that every child has been mounted and the parents can access the Native UI elements.
Examples to Implement React ComponentDidMount()
Below are the examples mentioned:
Example #1: Basic React ComponentDidMount()
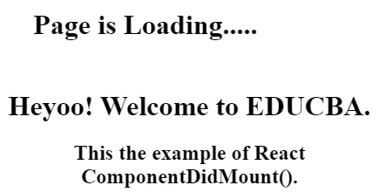
In the example below, firstly, text displays. But within a few seconds, new content gets mounted on the previous text, and a new window appears with new text. This is done with the help of ComponentDidMount().
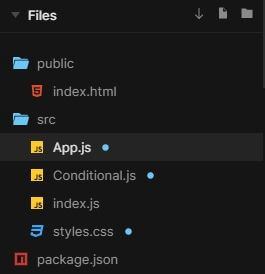
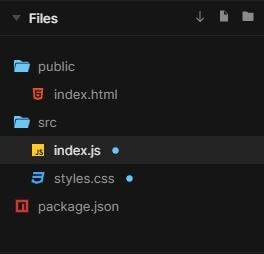
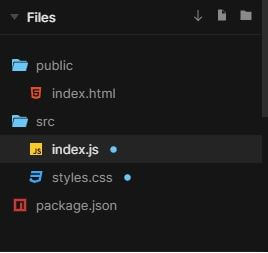
The files used to implement the example below are:
App.js
import React from "react";
import "./styles.css";
import Conditional from "./Conditional";
class App extends React.Component {
constructor() {
super();
this.state = {
isLoading: true,
status: "In progression..."
};
}
componentDidMount() {
setTimeout(() => {
this.setState({
isLoading: false,
status: "Completed!"
});
}, 2000);
}
render() {
console.log("Status: ", this.state.status);
return (
<div className="App">
{this.state.isLoading ? <h1>Page is Loading.....</h1> : <Conditional />}
</div>
);
}
}
export default App;
Conditional.js
import React from "react";
function Conditional(props) {
return (
<div>
<h1>
Heyoo! Welcome to EDUCBA.
</h1>
<h2>
This the example of React ComponentDidMount().
</h2>
</div>
);
}
export default Conditional;
index.js
import React from "react";
import ReactDOM from "react-dom";
import App from "./App";
const rootElement = document.getElementById("root");
ReactDOM.render(<App />, rootElement);
styles.css
.App {
font-family: 'Times New Roman'
, Times
, serif;
text-align: center;
}
Output:
Example #2: Example with Data Fetching Online
In the example below, firstly, text appears with “Page is Loading…” then the content is fetched online from https://jsonplaceholder.typicode.com/users and mounted using ComponentDidMount() on the pre-displayed text. After mounting, new content is displayed on the screen.
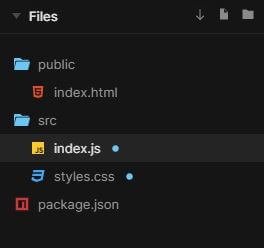
The files used to implement the below example are:
index.js
import React
, { Component } from "react";
import ReactDOM from "react-dom";
import "./styles.css";
class Users extends Component {
state = {
users: [],
loading: true
};
componentDidMount() {
fetch("https://jsonplaceholder.typicode.com/users")
.then(res => res.json())
.then(users => {
this.setState({
loading: false,
users
});
});
}
render() {
return (
<div>
{this.state.loading && <p>Page is Loading ...</p>}
<ul>
{this.state.users.map((user, index) => (
<li key={index}>
<h1>{user.name}</h1>
<h4>Email Address: ({user.email})</h4>
<h5>Phone number: {user.phone}</h5>
</li>
))}
</ul>
</div>
);
}
}
function App() {
return (
<div className="App">
<Users />
</div>
);
}
const rootElement = document.getElementById("root");
ReactDOM.render(<App />, rootElement);
styles.css
.App {
font-family: 'Times New Roman'
, Times
, serif;
}
Output:
Example #3: Example with mounting on third-line text
In the example below, the whole content remains the same. Just the text with the line “People Enrolled for our Training:” gets updated after mounting.
The files used to implement the code below are:
index.js
import React from "react";
import ReactDOM from "react-dom";
class MyComponent extends React.Component {
constructor(props) {
super(props);
this.state = {
activeUsers: null
};
}
componentDidMount() {
setTimeout(() => {
this.setState({
activeUsers: 1200000
});
}, 2500);
}
render() {
return (
<div>
<h1>Welcome to EDUCBA</h1>
<h2>We are the best Training providers on Latest Emerging Technologies.</h2>
<h3>People Enrolled for our Training: {this.state.activeUsers}</h3>
</div>
);
}
ReactDOM.render(<MyComponent />, document.getElementById("root"));
styles.css
.App {
font-family: 'Times New Roman'
, Times
, serif;
text-align: center;
}
Output:
Example #4: Using React ComponentDidMount()
In the given example, the component mounts and initializes the value of the counter using the componentDidMount() lifecycle method. When the “Click to Increase Value” button is clicked, the component updates the counter value using the componentDidUpdate() method. The below example is an increment counter.
The files used to implement the code below are:
index.js
import React
, { useState
, useEffect
, Component } from "react";
import ReactDOM from "react-dom";
import "./styles.css";
function App() {
const [counter, setCounter] = useState(1);
useEffect(() => {
console.log("Counter was incremented");
return () => console.log("Counter was cleared");
}, [counter]);
const increment = () => {
setCounter(counter + 1);
};
return (
<div className="App">
<button onClick={increment}>Click to Increase Value</button>
{counter % 3 !== 0 && <Child counter={counter} />}
</div>
);
}
class Child extends Component {
componentDidMount() {
console.log("Child was Mounted");
}
componentDidUpdate() {
console.log("Child was updated");
}
componentWillUnmount() {
console.log("Child was Unmounted");
}
render() {
return (
<div>
<h1>Counter Value</h1>
{this.props.counter}
</div>
);
}
}
const rootElement = document.getElementById("root");
ReactDOM.render(<App />, rootElement);
styles.css
.App {
font-family: 'Times New Roman'
, Times
, serif;
text-align: center;
}
Output:
Conclusion
Based on the above article, we understood using the componentDidMount() method. We went through its working and the different examples which will help you understand how to use this method while building the React applications. I hope this article will make componentDidMount() simpler to understand.
Recommended Articles
This is a guide to React ComponentDidMount(). Here we discuss an introduction to React ComponentDidMount(), working along with programming examples. You can also go through our other related articles to learn more –

