Updated March 29, 2023
Introduction to React Force Render
In React, whenever there is any change in state or props, the react components re-renders automatically. So, for example, all of the user Interface elements are re-rendered automatically by just a simple update in the state anywhere in the code. In this topic, we are going to learn about React Force Render. However, there can be cases where on a certain data, the render() method depends. So, for re-rendering in these cases, we can use the methods below:
- The component’s setState() method is called.
- The component’s forceUpdate() method is called.
In this article, we will describe these two methods with working examples that can help you in understanding the application of force render.
Working of React Force Render with Examples
Here is the working with the examples mentioned below
1. The setState() method
The state can be updated to its present value, in case our component has a state; this.setState({ state: this.state }) is used to update the state.
Example #1
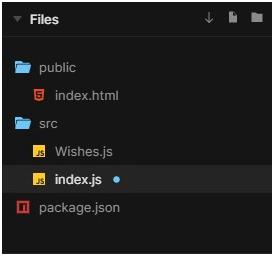
The example below has a setState() method, which is called each and every time the input is provided in the text box. This is known as re-rendering, which helps in updating the text on the screen. The example below uses the files mentioned in the image below:
Wishes.js
import React
, { Component } from 'react';
import 'bootstrap/dist/css/bootstrap.css';
class Greeting extends Component {
state = {
fullname: '',
}
stateChange = (f) => {
const {name, value} = f.target;
this.setState({
[name]: value,
});
}
render() {
return (
<div className="text-center">
<div className="border border-primary py-3">
<h4> Happy Birthday, {this.state.fullname}!!</h4>
<label htmlFor="fullname"> Personalise According to Name: </label>
<input type="text" name="fullname" onChange={this.stateChange} />
</div>
</div>
);
}
}
export default Greeting;
index.js
import React from 'react';
import ReactDOM from 'react-dom';
import Greeting from './Wishes';
ReactDOM.render(<Greeting />, document.getElementById('root'));
Output:
Example #2
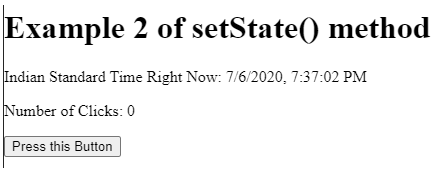
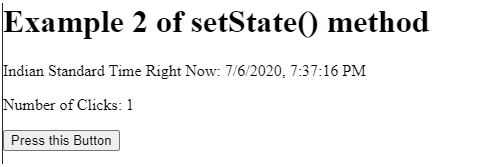
In the example below, the setState is called every time when “Press this button” is clicked. And the number of clicks on the button gets recorded and displayed on the screen. setState also displays the time according to IST automatically.
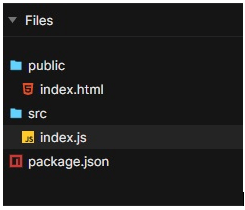
The files used to implement React force render using setState are mentioned in the below image:
index.js
import React from "react";
import { render } from "react-dom";
class CounterButton extends React.Component {
state = {
clickCounter: 0,
currentTimestamp: new Date()
};
handleClick = () => {
this.setState(prevState => {
return {
clickCounter:
prevState.clickCounter + 1
};
});
};
componentDidMount() {
setInterval(() => {
this.setState({ currentTimestamp: new Date() });
}, 1000);
}
render() {
return (
<div>
<h1>Example 2 of setState() method</h1>
<p>Indian Standard Time Right Now: {this.state.currentTimestamp.toLocaleString()}</p>
<p>Number of Clicks: {this.state.clickCounter}</p>
<button onClick={this.handleClick}>Press this Button</button>
</div>
);
}
}
render(<CounterButton />, document.getElementById("root"));
Output:
2. The forceUpdate() method
Calling forceUpdate() skips the shouldComponentUpdate() and causes render() to get called on the component.
The shouldComponentUpdate() is used to exit the component from the update cycle if there is no need to apply new renders.
This initiates the normal cycle methods for the child components. Only DOM will get updated by React whenever the markup is changed.
Example #1
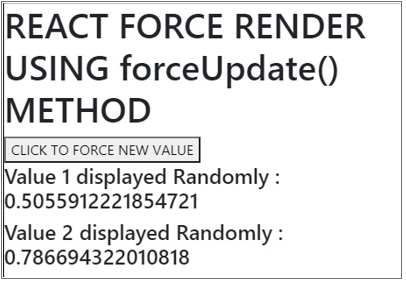
In the example below, a random number is generated whenever it is loaded. When we click the button, forceupdate() is called, and it forces a random new number to get rendered.
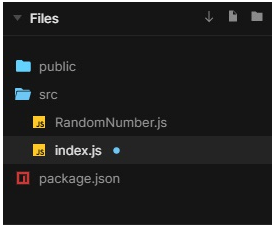
The files used to implement React force render using forceUpdate are mentioned in the below image:
RandomNumber.js
import React
, { Component } from 'react';
import 'bootstrap/dist/css/bootstrap.css';
class App extends React.Component{
constructor(){
super();
this.forceUpdateHandler = this.forceUpdateHandler.bind(this);
};
forceUpdateHandler(){
this.forceUpdate();
};
render(){
return(
<div>
<h1>REACT FORCE RENDER USING forceUpdate() METHOD</h1>
<button onClick= {this.forceUpdateHandler} > CLICK TO FORCE NEW VALUE</button>
<h4>Value 1 displayed Randomly : { Math.random() }</h4>
<h4>Value 2 displayed Randomly : { Math.random() }</h4>
</div>
);
}
}
export default App
index.js
import React from 'react';
import ReactDOM from 'react-dom';
import App from './RandomNumber';
ReactDOM.render(<App />, document.getElementById('root'));
Output:
Example #2
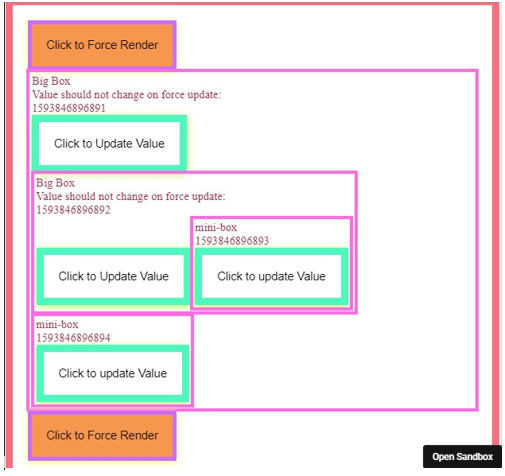
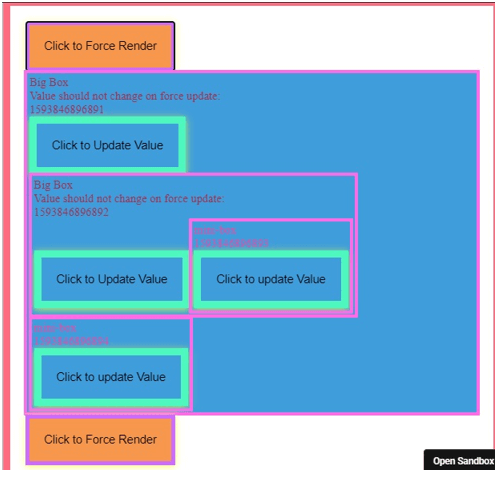
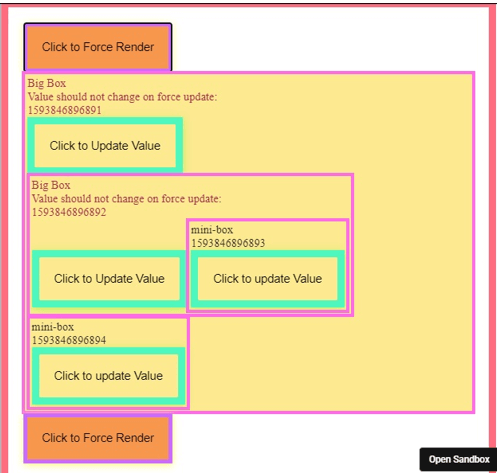
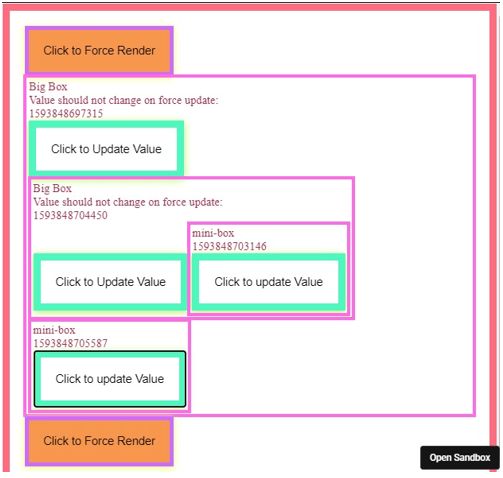
In the example below, a random number is displayed in different boxes when the respective “Click to Update Value” button is clicked. And the color of the whole box will get changed when the “Click to Force Render” button is clicked.
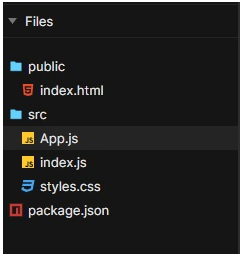
The files used to implement React force render using forceUpdate are mentioned in the below image:
App.js
import React from "react";
import "./styles.css";
import { runForceUpdate, useForceUpdate } from "react-forceupdate";
let nonReactive = {
color: "",
background: ""
};
let Box = ({ children, id }) => {
let forceupdateInfo = useForceUpdate();
console.log("sb.io demo", id, forceupdateInfo);
let [value, setValue] = React.useState(Date.now());
return (
<div className="box" style={{ background: nonReactive.background }}>
<div>Big Box</div>
<div>
Value should not change on force update: <p>{value}</p>
</div>
<button
onClick={() => {
setValue(Date.now());
}}
>
Click to Update Value
</button>
{children}
<BoxChild />
</div>
);
};
let BoxChild = ({ children }) => {
let [value, setValue] = React.useState(Date.now());
return (
<div className="box" style={{ color: nonReactive.color }}>
<div>mini-box</div> <div>{value}</div>
<button
onClick={() => {
setValue(Date.now());
}}
>
Click to update Value
</button>
{children}
</div>
);
};
export default function App() {
let onForceUpdate = () => {
nonReactive.background =
nonReactive.background === "#409ddb" ? "#fce990" : "#409ddb";
nonReactive.color = nonReactive.color === "#fc3f9e" ? "#2e282b" : "#fc3f9e";
runForceUpdate();
};
return (
<div className="App">
<button className="btn-main" onClick={onForceUpdate}>
Click to Force Render
</button>
<div>
<Box id="1">
<Box id="2" />
</Box>
</div>
<button className="btn-main" onClick={onForceUpdate}>
Click to Force Render
</button>
</div>
);
}
index.js
import React from "react";
import ReactDOM from "react-dom";
import App from "./App";
const rootElement = document.getElementById("root");
ReactDOM.render(
<React.StrictMode>
<App />
</React.StrictMode>,
rootElement
);
styles.css
* {
box-sizing: border-box;
margin: 00;
padding: 00;
}
body {
min-height: 101vh;
padding: 11px;
display: flex;
flex-wrap: wrap;
justify-content: center;
_align-items: center;
}
.App {
font-family: times;
padding: 21px;
outline: 10px solid #ff6b7f;
display: inline-block;
margin: 1 auto;
max-width: 1201px;
color: #a32e4d;
}
button {
font-size: 101%;
box-shadow: 0 2.5px 11px #bbf060;
background: none;
border: 10px solid #4df7be;
padding: 21px;
cursor: pointer;
}
.btn-main {
background: #f7974d;
box-shadow: 0 2px 10px #fffa6b;
border: 5px solid #cb6bff;
}
.box {
outline: 5px solid #ff6be6;
text-align: left;
padding: 3px;
margin: 3px;
display: inline-block;
}
Output:
Conclusion
On the basis of the above article, we understood the two methods of force rendering, i.e., forceUpdate and setState methods. Moreover, we went through some examples that can help you understand the working of these methods and how they can be applied in varied situations.
Recommended Articles
This is a guide to React Force Render. Here we discuss the introduction and working of React Force Render along with examples and code implementation. You may also have a look at the following articles to learn more –
