Introduction to React Native Camera
React native camera module allow us to perform a various activity related to accessing the camera. We can access the existing media to live media with the help of the camera feature, to use the camera module we need to install the react-native camera module and import it into the file where we are going to use it. We can also check the permission for accessing the camera, it is once the access for the camera will be granted then we can easily access the camera and perform the various activities on the camera, for the test we can install the expo-camera package.
Syntax:
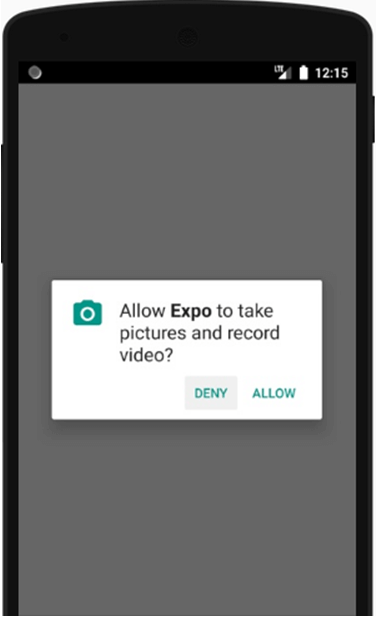
Below is the simple syntax for the camera used in the react-native, here we are first importing the Camera module of react-native, and then we can call the below function, as the below function allows us to check the status of the camera for the react-native. Here we can check status is granted or not. We can ask for a grant from the user’s device for the camera.
Please see the below simple syntax to understand the flow.
import { Camera } from 'expo-camera';
//Calling the camera module function
Camera.requestPermissionsAsync()
How to Use the Camera Module in React Native?
To use the react native camera concept in the react native we need to first install the required module.The required module is npm install expo-camera. After installing this module, we need to use or import the module into the application. Once we have imported this module then we need to use it. To use it we can import the module like import {Camera} from ‘expo-camera’.With this module, we can do various camera activities like opening in the zoom mode, flash mode, and rotating the camera. Remember if we want to run it on the out device for testing then we need to run the npm start and a QR code will appear, which we need to scan and after scanning the QR code on the installed expo app on the phone it will give us the option to see the output either on the Android and IOS app. In the below example we have a focus on Android we can also select IOS for installation of the app.
Examples of React Native Camera
In the below example we have taken a simple example of code where we are trying to access the camera. To run this example we need to follow some steps, let me explain each step needed to run the below example.
Step 1: First we need to install expo globally for working with the expo to control react native apps in the testing environment. To install the expo globally we can use the command.
npm install -g expo-cliStep 2: In the second step we are talking about the start of the project, so suppose we are going to work on the project of the camera so we will start with the below command.
expo init cameraProjectOnce we complete the running of this command we have all the required components to run a react native app ready with the help of expo.
Step 3: In this step we are talking about the camera package which we need to install along with all existing package. In the same way we can install all other packages needed for the react native app. Here we will install the package given below for uses.
npm install expo-cameraWith the help of the expo-camera package we can access the camera . This package contains many attributes which are helpful for performing various activities on the camera.
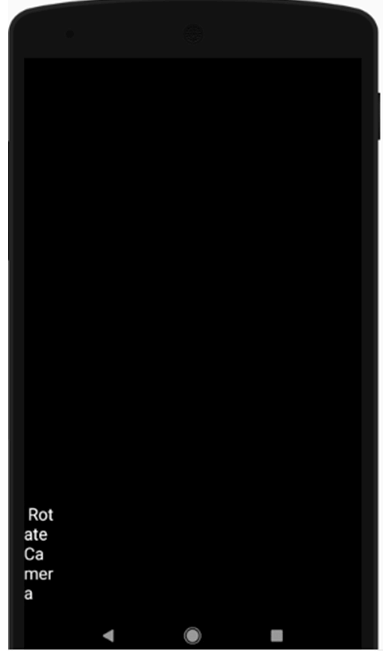
Step 4: This is the final step. In this step first, we will place the below code on the file app.js and then we will run the command npm start which will give us an option to open the app on web, android, and ios. I have taken an example for android and runs.
Please see the below example of code along with the screen of the output.
//Importing the important packages for react native
import { Text, View,StyleSheet, TouchableOpacity } from 'react-native';
//Importing the installed camera module
import { Camera } from 'expo-camera';
//exporting form react core library
import React, { useEffect ,useState  } from 'react';
export default function CameraExample() {
//Fetching permission and set permission function for other activity
let n =null
const [hasPermission, setHasPermission] = useState(n);
//Getting type and setType
let d =Camera.Constants.Type.back
const [type, setType] = useState(d);
//The package defined function call useEffect to detection camera permission
useEffect(() => {
//Calling the async function of the camera to check if the permission for accessing the camera is there or not.
(async () => {
//Getting status for checking camera permission
const { status } = await Camera.requestPermissionsAsync();
//Checking permission for camera
let z =(status === 'granted')
setHasPermission(z);
})();
}, []);
//Checking the value of has permission
let x=hasPermission === null
let y=hasPermission === false
if (x) {
return <View />;
}
if (y) {
return <Text>Camera permission is not there</Text>;
}
//Defining the style for designing the various components of the Camera which is going to open here.
const cameraStyle = StyleSheet.create({
mainView: {
flex: 1,
},
childView: {
flex: 1,
},
textStyle: {
fontSize: 18,
marginBottom: 10,
color: 'white'
},
deepView: {
flex: 1,
backgroundColor: 'transparent',
flexDirection: 'row',
},
touchStyle: {
flex: 0.1,
alignSelf: 'flex-end',
alignItems: 'center',
}})
return (
<View style={[cameraStyle.mainView]}>
<Camera style={[cameraStyle.childView]} type={type}>
<View
style={[cameraStyle.deepView]}>
<TouchableOpacity
style={[cameraStyle.touchStyle]}
onPress={() => {
setType(
type === Camera.Constants.Type.back
? Camera.Constants.Type.front
: Camera.Constants.Type.back
);
}}>
<Text style={[cameraStyle.textStyle]}> Rotate Camera </Text>
</TouchableOpacity>
</View>
</Camera>
</View>
);
}
Output:
Advantages
There are multiple advantages of using the camera module of the react-native, some of them are given below.
- With the help of a camera module, we can access the user camera of a local device.
- We can use the various available features of the camera module like opening in the zoom or any other mode, we just have to pass the correct attribute for that.
- In case the device does not have a camera it can detect.
- It is very much flexible to perform all activities needed to do for the camera.
Recommended Articles
This is a guide to React Native Camera. Here we also discuss the introduction to React Native Camera and how to use the camera module in react native along with different examples. You may also have a look at the following articles to learn more –


