Updated April 3, 2023
Introduction to React Native Drawer
React Native Drawer Navigation also known as Navigation Drawer is a full screen view which displays the main navigational menus and activities on a sliding panel. Generally, its hidden when the user is not using it, but we can make it appear to the screen just by swiping our finger from the screen’s edge or either by touching the drawer icon. It is supported by React-Native using the React Navigation Library for both the platforms i.e. Android and iOS.
For opening and closing a drawer the following methods are used:
this.props.navigation.openDrawer();this.props.navigation.closeDrawer();For toggling the drawer, we need to call the following method:
this.props.navigation.toggleDrawer();Syntax for creating:
constDrawerNavigatorExample = createDrawerNavigator({ Screen1: {
screen: FirstActivity_StackNavigator, navigationOptions: {
drawerLabel: 'Demo Screen 1',
},
},
},
Examples
Given below are the examples:
Example #1
Display1.js
import React, { Component } from 'react';
import { StyleSheet
, View
, Text } from 'react-native';
export default class Display1 extends Component {
render() { return (
<View style={styles.MainContainer}>
<Text style={{ fontSize: 23 }}> Welcome to Screen 1 </Text>
</View>
);
}
}
const styles = StyleSheet.create({ MainContainer: {
flex: 1,
paddingTop: 20, alignItems: 'center', marginTop: 50, justifyContent: 'center',
},
});
Display2.js
import React, { Component } from 'react'; import { StyleSheet
, View
, Text } from 'react-native';
export default class Screen2 extends Component{ render(){
return(
<View style={styles.MainContainer}>
<Text style={{ fontSize: 23 }}> Welcome to Screen 2 </Text>
</View>
);
}
}
const styles = StyleSheet.create({ MainContainer: {
flex: 1,
paddingTop: 20, alignItems: 'center', marginTop: 50, justifyContent: 'center',
},
});
Display3.js
import React, { Component } from 'react'; import { StyleSheet
, View
, Text } from 'react-native';
export default class Screen3 extends Component{ render(){
return(
<View style={styles.MainContainer}>
<Text style={{ fontSize: 23 }}> Welcome to Screen 3 </Text>
</View>
);
}
}
const styles = StyleSheet.create({
MainContainer: {
flex: 1,
paddingTop: 20,
alignItems: 'center',
marginTop: 50,
justifyContent: 'center',
},
});
App.js
import React, { Component } from 'react';
import { View, Image, TouchableOpacity } from 'react-native';
import { createDrawerNavigator, createStackNavigator, createAppContainer,
} from 'react-navigation';
import Display1 from './pages/Display1'; import Display2 from './pages/Display2'; import Display3 from './pages/Display3';
class NavigationDrawerStructure extends Component {
toggleDrawer = () => {
this.props.navigationProps.toggleDrawer();
};
render() {
return (
<View style={{ flexDirection: 'row' }}>
<TouchableOpacityonPress={this.toggleDrawer.bind(this)}>
<Image
source={require('./image/drawer.png')}
style={{ width: 24, height: 24, marginLeft: 4 }}
/>
</TouchableOpacity>
</View>
);
}
}
const Display1_StackNavigator = createStackNavigator({ First: {
screen: Display1,
navigationOptions: ({ navigation }) => ({ title: 'Display Screen 1',
headerLeft: <NavigationDrawerStructurenavigationProps={navigation}
/>,
headerStyle: { backgroundColor: '#88ff00',
},
headerTintColor: '#ffffff',
}),
},
});
const Display2_StackNavigator = createStackNavigator({ Second: {
screen: Display2,
navigationOptions: ({ navigation }) => ({
title: 'Display Screen 2',
headerLeft: <NavigationDrawerStructurenavigationProps={navigation}
/>,
headerStyle: { backgroundColor: '#ff0565',
},
headerTintColor: '#ffffff',
}),
},
});
const Display3_StackNavigator = createStackNavigator({ Third: {
screen: Display3,
navigationOptions: ({ navigation }) => ({ title: 'Display Screen 3',
headerLeft: <NavigationDrawerStructurenavigationProps={navigation}
/>,
headerStyle: { backgroundColor: '#00d5ff',
},
headerTintColor: '#ffffff',
}),
},
});
constDrawerNavigatorExample = createDrawerNavigator({ Display1: {
screen: Display1_StackNavigator,
navigationOptions: {
drawerLabel: 'Display Screen 1',
},
},
Display2: {
screen: Display2_StackNavigator, navigationOptions: {
drawerLabel: 'Display Screen 2',
},
},
Display3: {
screen: Display3_StackNavigator, navigationOptions: {
drawerLabel: 'Display Screen 3',
},
},
});
export default createAppContainer(DrawerNavigatorExample);
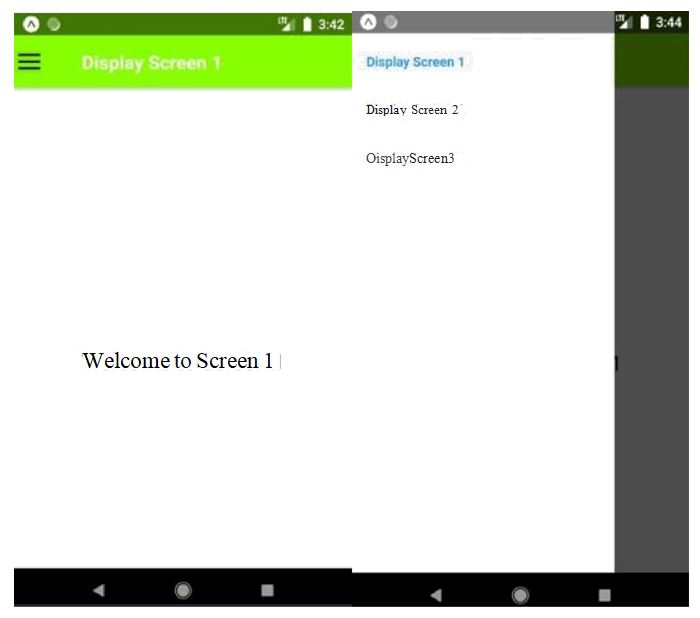
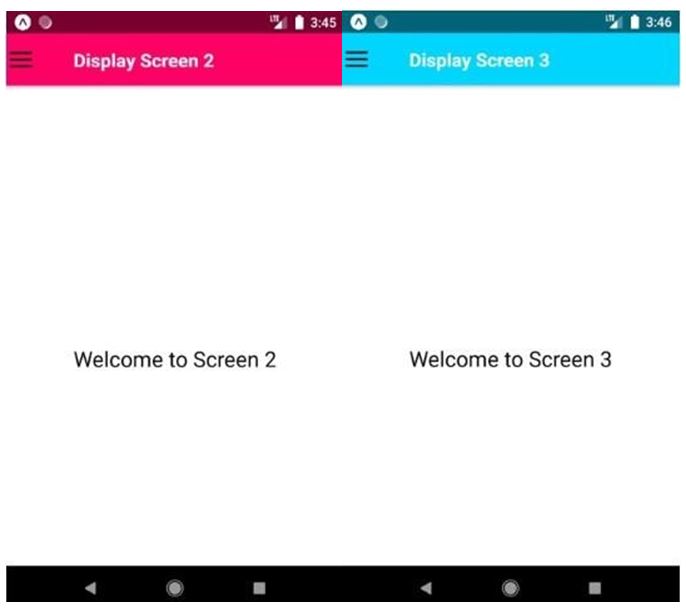
Output:
Example #2
With Screen1 with Tabs: Different Pages of Drawer.
a. Screen1
HomeDisplay.js
import React from 'react';
import { Text, View } from 'react-native';
export default class HomeScreen extends React.Component{ render(){
return(
<View style={{ flex: 1, justifyContent: 'center',alignItems: 'center'}}>
<Text>Welcome to Home Screen</Text>
</View>
);
}
}
SettingDisplay.js
import React from 'react';
import { Text, View } from 'react-native';
export default class SettingsScreen extends React.Component{ render(){
return(
<View style={{ flex: 1, justifyContent: 'center',alignItems: 'center'}}>
<Text>Welcome to Settings</Text>
</View>
);;
}
}
TabCombiner.js
import React from 'react';
import { createAppContainer, createStackNavigator,
createMaterialTopTabNavigator,
} from 'react-navigation';
import HomeScreen from './HomeDisplay';
import SettingsScreen from './SettingsDisplay';
constTabScreen = createMaterialTopTabNavigator(
{
Home: { screen: HomeScreen },
Settings: { screen: SettingsScreen },
},
{
tabBarPosition: 'top', swipeEnabled: true, animationEnabled: true, tabBarOptions: {
activeTintColor: '#FFFFFF', inactiveTintColor: '#f7fffe', style: {
backgroundColor: '#7ade4b',
},
labelStyle: { textAlign: 'center',
},
indicatorStyle: { borderBottomColor: '#7268ad', borderBottomWidth: 2,
},
},
}
);
constTabCombiner = createStackNavigator({ TabScreen: {
screen: TabScreen, navigationOptions: {
header: null,
},
},
});
export default TabCombiner;
b. Screen2.js
import React, { Component } from 'react'; import { StyleSheet
, View
, Text } from 'react-native';
export default class Display2 extends Component{ render(){
return(
<View style={styles.MainContainer}>
<Text style={{ fontSize: 23 }}> Welcome to Display 2 </Text>
</View>
);
}
}
const styles = StyleSheet.create({ MainContainer: {
flex: 1,
paddingTop: 20, alignItems: 'center', marginTop: 50, justifyContent: 'center',
},
});
App.js
import React, { Component } from 'react';
import {
StyleSheet, Platform, View,
Text, Image,
TouchableOpacity,
} from 'react-native';
import { createDrawerNavigator, createStackNavigator, createAppContainer
} from 'react-navigation';
import TabHelper from './pages/TabPages/TabCombiner'; import Screen2 from './pages/Display2';
class NavigationDrawerStructure extends Component { toggleDrawer = () => {
this.props.navigationProps.toggleDrawer();
};
render() { return (
<View style={{ flexDirection: 'row' }}>
<TouchableOpacityonPress={this.toggleDrawer.bind(this)}>
<Image
source={require('./image/drawer.png')}
style={{ width: 25, height: 25, marginLeft: 5 }}
/>
</TouchableOpacity>
</View>
);
}
}
constFirstActivity_StackNavigator = createStackNavigator({ First: {
screen: TabHelper,
navigationOptions: ({ navigation }) => ({ title: 'Display Screen 1',
headerLeft: <NavigationDrawerStructurenavigationProps={navigation}
/>,
headerStyle: { backgroundColor: '#b914f5', shadowOpacity: 0,
elevation: 0,
},
headerTintColor: '#fff',
}),
},
});
const Screen2_StackNavigator = createStackNavigator({ Second: {
screen: Screen2,
navigationOptions: ({ navigation }) => ({ title: 'Display Screen 2',
headerLeft: <NavigationDrawerStructurenavigationProps={navigation}
/>,
headerStyle: { backgroundColor: '#f70a6d',
},
headerTintColor: '#fff',
}),
},
});
constDrawerNavigatorExample = createDrawerNavigator({ Screen1: {
screen: FirstActivity_StackNavigator, navigationOptions: {
drawerLabel: 'Screen 1',
},
},
Screen2: {
screen: Screen2_StackNavigator, navigationOptions: {
drawerLabel: 'Screen 2',
},
},
});
export default createAppContainer(DrawerNavigatorExample);
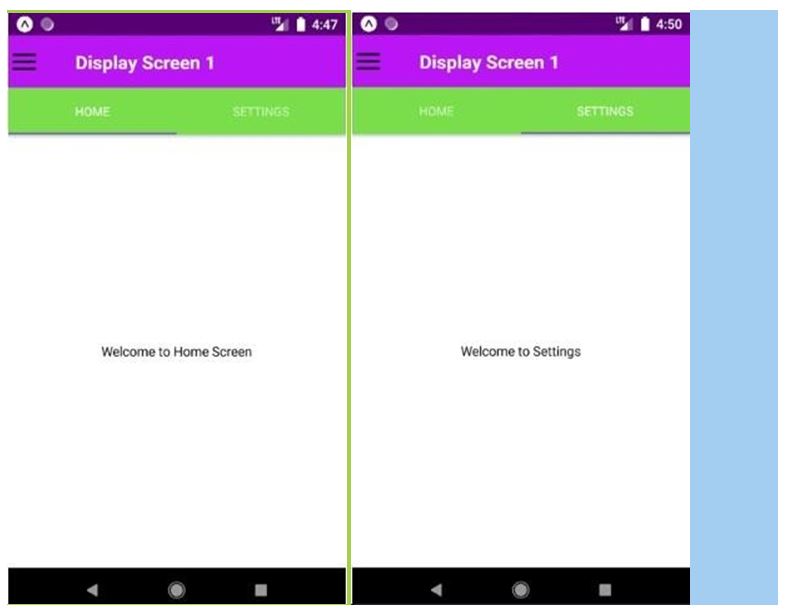
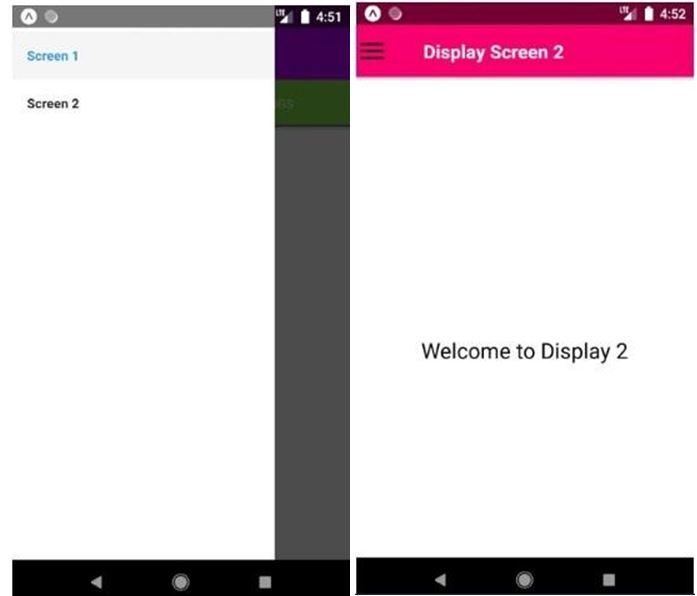
Output:
Conclusion
From the above examples we can understand how we can implement React Native Drawers and how to use them according to our requirements.
Recommended Articles
This is a guide to React Native Drawer. Here we discuss the introduction, syntax and examples of React Native Drawer along with code implementation. You may also have a look at the following articles to learn more –
