Updated March 28, 2023

Introduction to React Native Drawer Navigation
React Native Drawer Navigation is community based react native library. Main uses of Drawer navigation is it will open a navigation(when we open any app and if we touch the screen then a navigation menu will come up with some important contents). Initially the Drawer navigation will not be visible (it will appear when user touches the screen which means it will be hidden by default and on finger touch or swipe the edge of the screen then the navigation will be open), drawer Navigation library will be used from the npm package react-navigation library which we can import into our projects.
Syntax
We can define the syntax into the following steps:
- In the first step we are importing the all related react native, react and Drawer Navigation library.
- In the second step we are creating a class with name drawer example and inside it we are returning the navigation which can hold the navigation information when the user swipe the finger on the edge into the application.
- Inside the return part we are creating Header and Contents1 and Contents2.
Code:
import { createDrawerNavigator } from '@react-navigation/drawer';//importing the drawer library from the react native
const DrawerNavigation = createDrawerNavigator();//creating the
export default function drawerExample() { //exporting the class drawerExample as the default class
return (
<DrawerNavigation.Navigator>
<DrawerNavigation.Screen name="Header" component={Header} />
<DrawerNavigation.Screen name="Content1" component={Content1} />
<DrawerNavigation.Screen name="Content2" component={Content2} />
</DrawerNavigation.Navigator>
);
}
How Drawer Navigation works in React Native?
- In the first step we import the drawer library from the react native navigation community library.
- Once we import we need to define the default screen for it. Here default screen will be visible in case no activity happens.
- createStackNavigator inside this we can define first and third and so on for displaying and on clicking on them they will open.
- By using first, second, etc inside the createStackNavigator we can tell the react native navigator for which screens should be visible for the first time .
- createStackNavigator, on the IOS screen float from right and on the android screen will fade in. In case of IOS it will be configurable from for sliding from the bottom.
- createAppContainer, this attribute allows you to manage states of the app and link the top navigator to the application environment .
Example of React Native Drawer Navigation
Below example contains the complete structure and layout for implementation of react native drawer.
- First we created a main react native component name NavigationDrawerExample, which will contain the main logic.
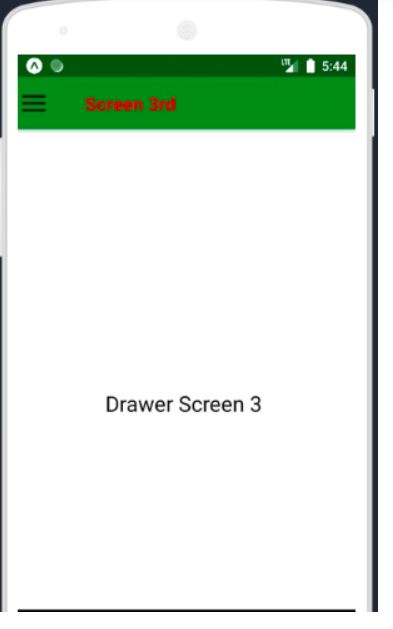
- Inside this component we are using the drawer screen 1 ,drawer screen 2 and drawer screen 3.
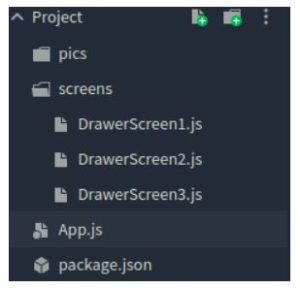
- All the drawer screen pages are inside the screens folder , we can see in the image for folder structure.
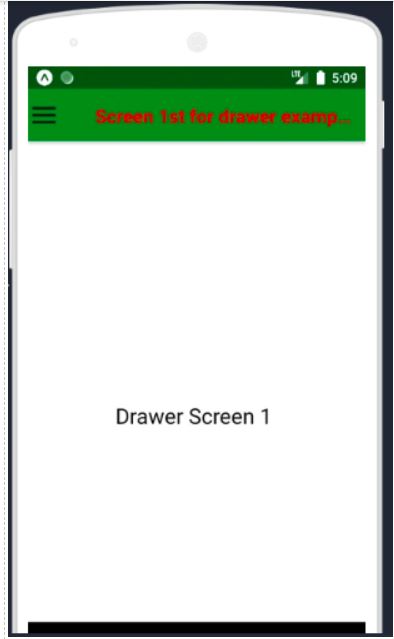
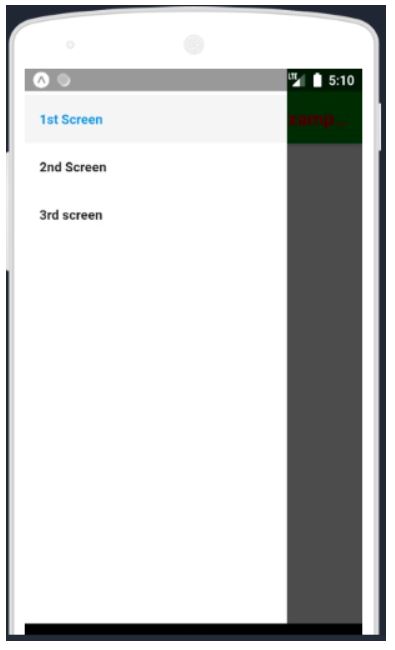
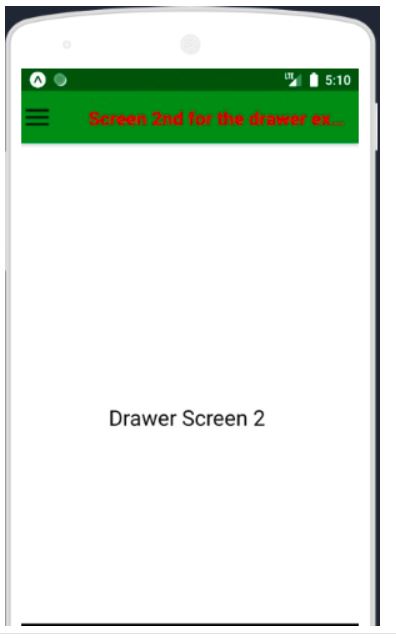
- We made the first screen as the default screen and on swiping or clicking it will open other pages by calling them.
- All the Drawer screens have their own message and data. Also we have given little designs for each screen.
- We have made a pics folder where we can put some pics and the same will be visible for the end users.
The below screen is the structure for the code. Here App.js contains the main components and App.js calls and using other things .
Given below are the architecture steps:
- pics: This folder contains any image which we want to display on any screen.
- screen: Inside this folder we have made three more files with names DrawerScreen1.js ,DrawerScreen2.js and DrawerScreen3.js. On opening of the navigation if we click the screen these are the components which get called .
- App.js: This contains the main logic for the navigation here.
Follow the below examples with the screen of outputs.
This is the main component for react native drawer example.
Code:
import React, { Component } from 'react';
//importing react components.
import { View, Image, TouchableOpacity } from 'react-native';
// importing all the basic components needed for react native
import {
createDrawerNavigator,
createStackNavigator,
createAppContainer,
} from 'react-navigation';//importing all the required attribute for the drawer and navigation
importing the screen which need to be displayed here in the main component.
import DrawerScreen1 from './screens/DrawerScreen1';
import DrawerScreen2 from './screens/DrawerScreen2';
import DrawerScreen3 from './screens/DrawerScreen3';
//defining the main component class which extend react core component
class NavigationDrawerExample extends Component {
toggleDrawer = () => {
this.props.navigationProps.toggleDrawer();
};
render() {
return (
<View style={{ flexDirection: 'row' }}>
<TouchableOpacity onPress={this.toggleDrawer.bind(this)}>
{/*We can use any image and that image can be displayed here*/}
<Image
source={require('./pics/drawer.png')}
style={{ width: 25, height: 25, marginLeft: 5 }}
/>
</TouchableOpacity>
</View>
);
}
}
const defaultScreenForDrawer = createStackNavigator({
//first screen which will be visible as the default screen
First: {
screen: DrawerScreen1,
navigationOptions: ({ navigation }) => ({
title: 'Screen 1 for drawer example',
headerLeft: <NavigationDrawerExample navigationProps={navigation} />,
headerStyle: {
backgroundColor: 'green',
},
headerTintColor: 'red',
}),
},
});
//second screen which will be visible on the clicking the navigation open
const Screen2ForDrawer = createStackNavigator({
Second: {
screen: DrawerScreen2,
navigationOptions: ({ navigation }) => ({
title: 'Screen 2',
headerLeft: <NavigationDrawerExample navigationProps={navigation} />,
headerStyle: {
backgroundColor: 'green',
},
headerTintColor: 'red',
}),
},
});
//3rd screen which will be visible for the click on the r3d screen
const Screen3ForDrawer = createStackNavigator({
Third: {
screen: DrawerScreen3,
navigationOptions: ({ navigation }) => ({
title: 'Screen 3',
headerLeft: <NavigationDrawerExample navigationProps={navigation} />,
headerStyle: {
backgroundColor: 'green',
},
headerTintColor: 'red',
}),
},
});
//content for the screen first which is going to display on clicking the 1st screen or default content
const DrawerNavigatorExample = createDrawerNavigator({
Screen1: {
screen: defaultScreenForDrawer,
navigationOptions: {
drawerLabel: 'First Screen',
},
},
//content for the 2nd screen which is going to be displayed for clicking on the 2nd screen
Screen2: {
screen: Screen2ForDrawer,
navigationOptions: {
drawerLabel: '2nd Screen',
},
},
//content for the 3rd screen which is going to be displayed on clicking the 3rd screen.
Screen3: {
screen: Screen3ForDrawer,
navigationOptions: {
drawerLabel: '3rd screen',
},
},
});
export default createAppContainer(DrawerNavigatorExample);
Output:
Conclusion
In this tutorial we learned about react native navigation library ,we learned how it will handle many navigation screens and how we can display the data related to the many screens. We also learned the principle of it’s working for displaying the default screen and screens on clicking or performing certain activity.
Recommended Articles
This is a guide to React Native Drawer Navigation. Here we discuss the introduction, how drawer navigation works in react native along with respective example. You may also have a look at the following articles to learn more –


