Updated September 5, 2023
Introduction to React Native Firebase
Earlier, when we were building an application other than a text editor, we used the MVC model. It means that we were fetching the data from the server and displayed it on our view. We used to apply some added authentication on the data which required login and other access privileges.
Firebase solves these kind of problems and makes the backend with a very low maintenance. Firebase provides us a connection between our data, users and authentication. Firebase does the handling of the Model, the MVC’s Controller. The only thing that we need to handle is the view. Listening for data changes in the database is also allowed in it which can also be implemented very easily. No-SQL database is also incorporated in it just like MongoDB.
React Native Firebase has a set of packages which provides us React Native support for each and every Firebase services on Android and iOS apps.
Examples to Implement React Native Firebase
Below are the examples mentioned:
Step 1: Install React Native
Code:
# using mac
sudo npm install -g react-native-cli# Using Windows: Type the following command over
cmd npm install -g react-native-cliWe will have to create a project:
react-native init RNFbase` Open the project.
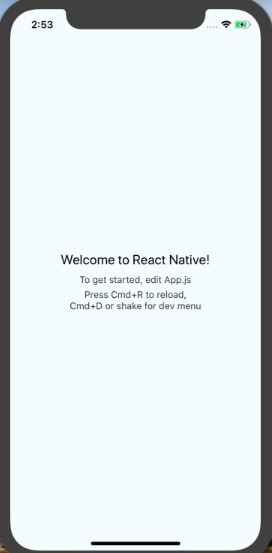
cd RNFbaseOutput: The following command will start the package server and the simulator. react-native run-ios –simulator=”iPhone X” The display screen will be as follows:
Step 2: Installation of the Firebase Dependency.
Code:
yarn add firebase# or
npm install firebase –saveStep 3: We will create two screens here.
Inside scr >> screens folder, we will create these files. HomeScreen.js
Add.js List.js
Home.js is the pure React Native class.
// HomeScreen.js
import React, { Component } from 'react';
import { Text, View} from 'react-native';
export default class HomeScreen extends Component { render() {
return (
<View>
<Text> Home Screen</Text>
</View>
)
}
}
// Add.js
import React, { Component } from 'react';
import { View, Text } from 'react-native';
export default class Add extends Component { render() {
return (
<View>
<Text>Add Item</Text>
</View>
)
}
}
// List.js
import React, { Component } from 'react';
import { Text, View } from 'react-native';
export default class List extends Component { render() {
return (
<View>
<Text>List Item</Text>
</View>
)
}
}
Step 4: Integrating React Native Navigation.
We will install the React navigation library for the transitioning between the screens.
yarn add react-navigation# or
npm install react-navigation --saveAfter the installation, we will open the App.js file. We are using Stack Navigator for the transition between the screens.
// App.js
import React, { Component } from 'react'; import {
StyleSheet,
Platform Text, View,
} from 'react-native';
import { StackNavigator } from 'react-navigation';
import HomeScreen from './scr/screens/Home';
import Add from './scr/screens/Add';
import List from './scr/screens/List';
import { YellowBox } from 'react-native';
YellowBox.ignoreWarnings(['Warning: isMounted(...) is deprecated', 'Module RCTImageLoader']);
const AppNavigator = StackNavigator({ HomeScreen: { screen: HomeScreen }, AddScreen: { screen: Add }, ListScreen: { screen: List }
});
export default class App extends Component { render() {
return (
<AppNavigator />
);
}
}
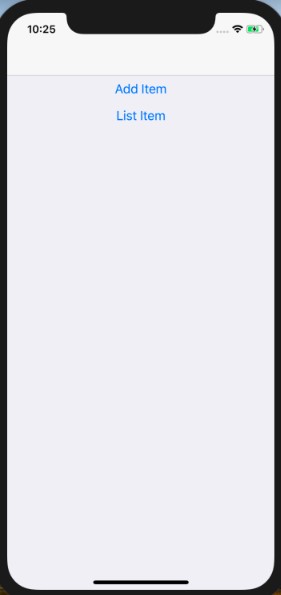
Output: Both the screens are here. The Stack Navigator will support the transitions of the screens. ] Home Screen display:
Step 4: A form is created to add the data.
// Add.js
import React, { Component } from 'react'; import {
StyleSheet, TouchableHighlight, Text,
View, TextInput,
} from 'react-native';
export default class Add extends Component { constructor(props) {
super(props); this.state = { name: '', error: false
}
this.handleChange = this.handleChange.bind(this);
this.handleSubmit = this.handleSubmit.bind(this);
}
handleChange(e) { this.setState({
name: e.nativeEvent.text
});
}
handleSubmit() { console.log(this.state.name)
}
render() { return (
<View style={styles.main}>
<Text style={styles.title}>Add Item</Text>
<TextInput
style={styles.itemInput} onChange={this.handleChange}
/>
<TouchableHighlight
style = {styles.button} underlayColor= "white" onPress = {this.handleSubmit}
>
<Text
style={styles.buttonText}> Add
</Text>
</TouchableHighlight>
</View>
)
}
}
const styles = StyleSheet.create({ main: {
flex: 2,
padding: 32, flexDirection: 'column', justifyContent: 'center',
backgroundColor: '#2a8ab7'
},
title: { marginBottom: 22,
fontSize: 27, textAlign: 'center'
},
itemInput: { height: 52,
padding: 6,
marginRight: 7,
fontSize: 25,
borderWidth: 2, borderColor: 'white', borderRadius: 10, color: 'white'
},
buttonText: { fontSize: 20,
color: '#111', alignSelf: 'center'
},
button: { height: 50,
flexDirection: 'row', backgroundColor:'white', borderColor: 'white', borderWidth: 2,
borderRadius: 6,
marginBottom: 8,
marginTop: 12, alignSelf: 'stretch', justifyContent: 'center'
}
});
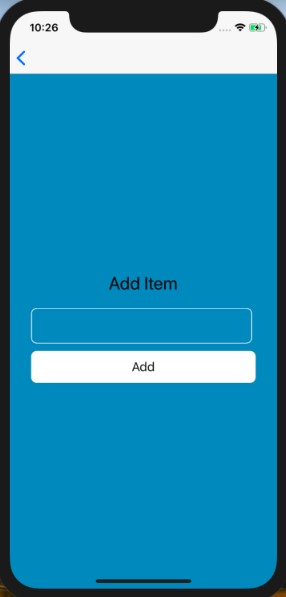
Output:
Step 5: Adding data to the Firebase.
// Item.js
import { db } from '../config/db';
export const addItem = (item) => { db.ref('/items').push({
name: item
});
}
This service file is imported into the Add.js file.
// Add.js
import React, { Component } from 'react'; import {
AlertIOS,  StyleSheet, TouchableHighlight, Text,
View, TextInput,
} from 'react-native';
import { addItem } from '../services/Item';
export default class Add extends Component { constructor(props) {
super(props); this.state = {
name: ''
}
this.handleChange = this.handleChange.bind(this);
this.handleSubmit = this.handleSubmit.bind(this);
}
handleChange(e) { this.setState({
name: e.nativeEvent.text
});
}
handleSubmit() { addItem(this.state.name); AlertIOS.alert(
'Item saved successfully'
);
}
render() { return (
<View style={styles.main}>
<Text style={styles.title}>Add Item</Text>
<TextInput
style={styles.itemInput} onChange={this.handleChange}
/>
<TouchableHighlight
style = {styles.button} underlayColor= "white"
onPress = {this.handleSubmit}
>
<Text
style={styles.buttonText}> Add
</Text>
</TouchableHighlight>
</View>
)
}
}
const styles = StyleSheet.create({ main: {
flex: 2,
padding: 32, flexDirection: 'column', justifyContent: 'center',
backgroundColor: '#2a8ab7'
},
title: { marginBottom: 22,
fontSize: 27, textAlign: 'center'
},
itemInput: { height: 52,
padding: 5,
marginRight: 6,
fontSize: 25,
borderWidth: 2, borderColor: 'white', borderRadius: 10, color: 'white'
},
buttonText: { fontSize: 20,
color: '#111', alignSelf: 'center'
},
button: { height: 50,
flexDirection: 'row', backgroundColor:'white', borderColor: 'white', borderWidth: 2,
borderRadius: 9,
marginBottom: 12,
marginTop: 12, alignSelf: 'stretch', justifyContent: 'center'
}
});
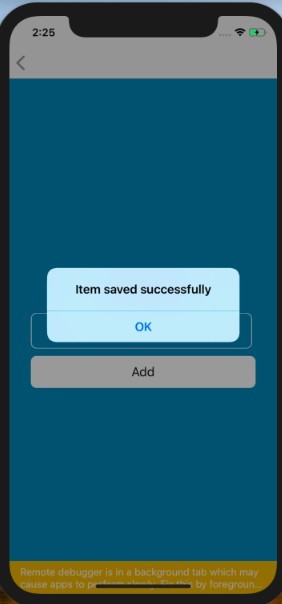
Output: The addItem function is imported, the textbox value is passed to it, and the alertbox is displayed.
Conclusion
In this article we went through an example that how we can add data to the Firebase. We understood how much Firebase is important and how it has helped the developers to connect the apps to the servers seamlessly. We went through the steps to apply Firebase to our apps and I hope it would have made quite easier for the budding developers to understand Firebase.
Recommended Articles
This is a guide to React Native Firebase. Here we discuss an introduction to react native with appropriate steps to install firebase in an easy manner. You can also go through our other related articles to learn more –
