Updated March 23, 2023

Introduction to React Native FlatList
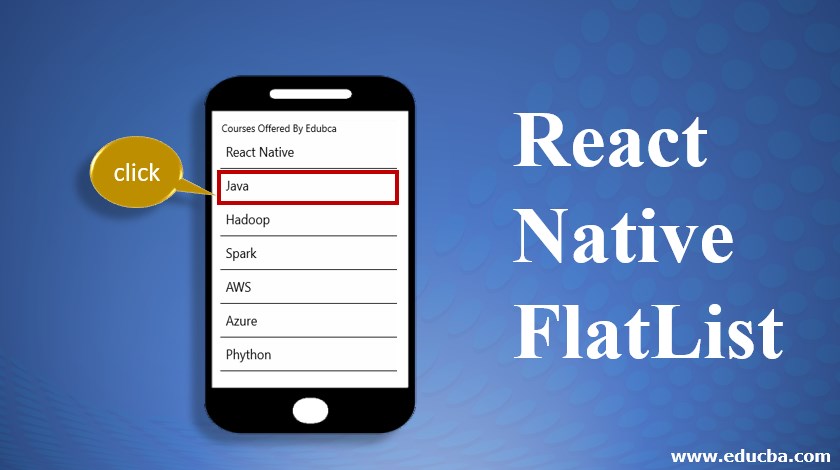
React native flatlist is like a listview which is used to hold items in a list and provide important features like scrolling horizontally and vertically. Flatlist in reacts native is designed to handle large datasets that might not fit on the device screen. This flatlist performs rendering of only current displaying items on a screen and not all items.
Syntax:
Here is a basic syntax:
import {Flatlist } from 'react-native';
<FlatList
data={
// data to be rendered in flatlist
}
SeparatorComponent={
// A separator to separate data items
}
renderData= {({ singledata}) =>
//  Single data view
}
/>
From the above syntax, we can see that the flatlist can be rendered using two primary props that are data and renderItem. Other props like Separator, Header, Footer, and Pulltoscroll are optional components.
How Flatlist Works?
It can be compared to the List view and is one of the most used components in react native. Flatlist in reacts native is a built-in component that provides scrolling of data that does not fit into the screen of a mobile device in which the application is running. Flatlist works on the following primary props:
- Data: This is an array of data that contains individual items that will be used to create a flatlist in react native.
- RenderItem: This is a function whose purpose is to pick up individual items from an array and render it into a section of a react-native flatlist.
Features of React Native Flatlist
Given below are the important features:
- Pull to refresh support
- Header support
- Footer support
- Separator support
- Scroll loading support
- ScrollToIndex support
- Cross-Platform support
- Configurable callbacks
- Optional support for horizontal mode
All the above-listed features make flatlist a very commonly used and an efficient component of react native.
Example
Here is an example showing the use of flatlist:
Code:
import React, { Component } from 'react';
import { AppRegistry, FlatList,
StyleSheet, Text, View,Alert } from 'react-native';
export default class FlatListDemo extends Component {
renderHeader= () => {
var header= (
<View style ={styles.header_footer_style}>
<Text style ={styles.textStyle}> Courses Offered By Edubca </Text>
</View>
);
return header;
};
renderSeparator = () => {
return (
<View
style={{
height: 1,
width: "100%",
backgroundColor: "#000",
}}
/>
);
};
//handling item Press event
getListViewItem = (item) => {
Alert.alert('Clicked Item : ' + item.key);
}
render() {
return (
<View style={styles.container}>
<FlatList
data={[
{key: 'React Native'},{key: 'Java'}, {key: 'Hadoop'},{key: 'Spark'},
{key: 'AWS'},{key: 'Azure'},{key: 'Phython'},
{key: 'Python'},{key: 'Javascript'}, {key: 'C++'},
{key: 'Data Science'},{key: 'Machine Learning'},{key: 'MYSQL'},
{key: 'Hive'}
]}
renderItem={({item}) =>
<Text style={styles.item}
onPress={this.getListViewItem.bind(this, item)}>{item.key}</Text>}
ItemSeparatorComponent={this.renderSeparator}
ListHeaderComponent={this.renderHeader}
/>
</View>
);
}
}
const styles = StyleSheet.create({
container: {
flex: 1,
},
item: {
padding: 10,
fontSize: 18,
height: 44,
},
})
AppRegistry.registerComponent('ReactFlatListDemo',()=>FlatListDemo);
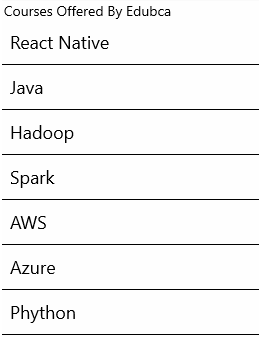
Output:
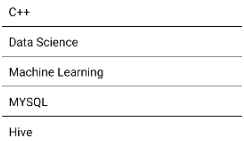
After Scrolling we can see the below items like:
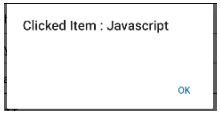
On clicking an item we will see the below:
From the above example we can see that the following properties are used in flatlist:
- Separator: This is used as a splitter between different views of a flatlist. This is configured using the ItemSeparatorComponent property of flatlist.
- Data: Data to be rendered on a flatlist is set using data prop of flatlist.
- RenderItem: The function of this prop is to render a flatlist with the content of data such that each part of an array is rendered into different cells of flatlist. This is basically a function that accepts a single argument which is the item to be populated.
- Header: Header of a flatlist can be set usingListHeaderComponent and its value can be set using a function.
- Footer: Footer of a flatlist can be set using ListFooterComponent prop of a flatlist.
Apart from the above properties, there are also other properties like PullToScroll and InfiniteScroll that can be set according to our requirements. Also, we can see how click events of items are handled in flatlist.
Conclusion
From the above article, we have a clear understanding of flatlist in react native. It provides several useful features some of which have been covered through the above examples. Apart from the above features, other customizations can be performed on flatlist according to the requirement and needs of the application.
Recommended Articles
This is a guide to React Native FlatList. Here we discuss the features and how flatlist works along with example respectively. You may also look at the following articles to learn more –


