Updated April 5, 2023

Introduction to React Native Header
Headers are an important part of any webpage. Headers define the context of the information described under it. While creating a website or an application, one must include multiple headers for the different website or the application sections. This helps in the bifurcation of the different sections of the website or application. React Native also provides the option of creating headers according to the requirements of the website or application. In this article, there are different examples of header which are described to explain headers in react native and its usage according to different situations respectively.
Syntax
Syntax are mentioned below:
ParallaxHeader Syntax-
<ReactNativeParallaxHeader
headerMaxHeight={400}
headerMinHeight={HEADER_HEIGHT}
extraScrollHeight={50}
navbarColor="#f2c068"
backgroundImageScale={9}
backgroundImage={require('./Dragon.png')}
titleStyle={styles.titleStyle}
title={title()}
innerContainerStyle={styles.container}
renderContent={renderContent}
renderNavBar={renderNavBar}
/>
Progress Header Syntax-
<ProgressHeader
progressActiveColor="#c70606"
headerTitle="EDUCBA"
headerTitleHeight= "10"
headerTitleColor="#f07c3e"
totalProgress="10"
currentprogress="5"
headerBackgroundColor="#aaf054"
progressInactiveColor="#edcb6d"
/>
AppHeader Syntax-
<Appbar.Header
style={styles.title}>
<Appbar.Content subtitle="Traning Provider"
title="EDUCBA"
color="#4369e6"
/>
</Appbar.Header>
React Native Header Examples with their working
Different example and their working are mentioned below:
1. Basic Header Example
In this example, navigation.setOptions is used to navigate the different options available in the applications when added. We have used headerTitle to set the title of the header and headerStyle to style the header component.
Components to execute the code:
[i] Fun.js
import React from 'react';
import { SafeAreaView
, StyleSheet
, Text
, TouchableOpacity
, View
} from 'react-native';
const Rahul = ({ navigation }) => {
React.useLayoutEffect(() => {
navigation.setOptions({
headerTitle: (props) => (
<Text {...props} style={{ color: '#f5df53', fontWeight: 'italics' }}>
EBUCBA
</Text>
),
headerStyle: {
backgroundColor: '#d1133f',
},
});
}, );
return (
<SafeAreaView style={{ flex: 2, backgroundColor: '#98f5c2' }}>
<Text style={{ textAlign: 'center', color: '#fa3620' }}>
www.educba.com
</Text> </SafeAreaView>
);
};
export default Rahul;
const styles = StyleSheet.create({
container: {
flex: 5,
justifyContent: 'center',
alignItems: 'center',
padding: 18,
},
header: {
fontSize: 20,
textAlign: 'center',
marginVertical: 15,
},
});
[ii] App.js
import 'react-native-gesture-handler';
import React from 'react';
import { createStackNavigator } from '@react-navigation/stack';
import { NavigationContainer } from '@react-navigation/native';
import Rahul from './zoo/Fun';
const Shelf = createStackNavigator();
const Application = () => {
return (
<NavigationContainer>
<Shelf.Navigator initialRouteName="Fun">
<Shelf.Screen name="Fun" component={Rahul} />
</Shelf.Navigator>
</NavigationContainer>
);
};
export default Application;
Output:
2. ParallaxHeader Example
In this example, we have developed React Native parallaxheader with background image using react-native-parallax-header’ dependency.
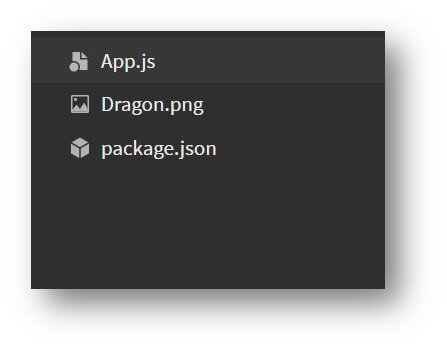
Components used to execute code properly:
[i]Dragon.png
[ii] App.js
import React from 'react';
import {
StyleSheet
, View
, Text
, StatusBar
, Dimensions
, TouchableOpacity
} from 'react-native';
import ReactNativeParallaxHeader from 'react-native-parallax-header';
const NAV_BAR_HEIGHT = 50;
const HEADER_HEIGHT = 50;
const IS_ANDROID_X = 900;
const STATUS_BAR_HEIGHT = 20;
const {height: SCREEN_HEIGHT} = Dimensions.get('window');
const styles = StyleSheet.create({
container: {
flex: 1,
backgroundColor: '#eb6e67',
},
statusBar: {
backgroundColor: '#ef78ff',
alignItems: 'center',
flexDirection: 'column',
height: 26,
},
navContainer: {
height: 30,
marginHorizontal: 15,
},
navBar: {
alignItems: 'center',
flexDirection: 'column',
backgroundColor: '#bbfc79',
},
});
const renderContent = () => {
return (
<View style={styles.body}>
{Array.from(Array(1).keys()).map((i) => (
<View
key={i}
style={{padding: 25
, alignItems: 'center'
, justifyContent: 'center'
, color: '#f02ba8'}}>
<Text>EDUCBA</Text>
</View>
))}
</View>
);
};
const renderNavBar = () => (
<View style={styles.navContainer}>
<View style={styles.statusBar} />
<View style={styles.navBar}>
<TouchableOpacity style={styles.iconRight} onPress={() => {}}>
<Text style={{color: '#e6153b'}}>E</Text>
</TouchableOpacity>
</View>
</View>
);
const App = () => {
return (
<>
<ReactNativeParallaxHeader
headerMaxHeight={400}
headerMinHeight={HEADER_HEIGHT}
extraScrollHeight={50}
navbarColor="#f2c068"
backgroundImageScale={9}
backgroundImage={require('./Dragon.png')}
titleStyle={styles.titleStyle}
title={title()}
innerContainerStyle={styles.container}
renderContent={renderContent}
renderNavBar={renderNavBar}
/>
<StatusBar barStyle="light-content" />
</>
);
};
const title = () => {
return (
<View style={styles.body}>
<Text style={{color: '#e8dce4'
, justifyContent: 'center'
, fontSize: 25}}>EDUCBA HEADER EXAMPLE</Text>
</View>
);
};
export default App;
Output:
3. React Native Progress Header
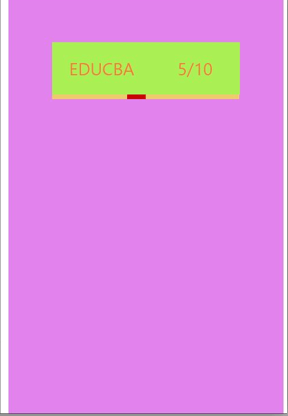
In this example, we have developed a progress header with a progress bar using the ‘react-native-header-types’ dependency.
Components used to execute code properly:
[i] App.js
import React from 'react';
import { ProgressHeader } from 'react-native-header-types';
import {StyleSheet
, Text
, View
, TouchableOpacity
, Image } from 'react-native';
const decoration = StyleSheet.create({
container:{
padding: 50,
flex: 3,
backgroundColor:'#e182ed',
height: 100,
marginHorizontal: 9,
},
});
class Rahul extends React.Component {
render() {
return (
<View style={decoration.container}>
<ProgressHeader
progressActiveColor="#c70606"
headerTitle="EDUCBA"
headerTitleHeight= "10"
headerTitleColor="#f07c3e"
totalProgress="10"
currentprogress="5"
headerBackgroundColor="#aaf054"
progressInactiveColor="#edcb6d"
/>
</View>
);
}
constructor(props) {
super(props);
this.state = {
isLoading:true,
};
}
}
export default Rahul;
Output:
4. React Native AppHeader
A basic AppHeader is developed using ‘react-native-paper’ dependency, which is styled using the stylesheet.
Components used to execute code properly:
[i] App.js
import * as React from 'react';
import {StyleSheet
, Text
, View
, TouchableOpacity } from 'react-native';
import { Appbar } from 'react-native-paper';
const styles = StyleSheet.create({
container:{
flex: 2,
backgroundColor:'#f76d8b',
},
title:{
flex: 2,
backgroundColor:'#e88f3c',
flexDirection: 'column',
},
});
const EDUCBA = () => {
return (
<View style={styles.container}>
<Appbar.Header
style={styles.title}>
<Appbar.Content subtitle="Traning Provider"
title="EDUCBA"
color="#4369e6"
/>
</Appbar.Header>
</View>
);
};
export default EDUCBA;
Output:
5. Advance Example with all headers merged
All the above-discussed headers are combined in the example below and are developed by importing their respective dependencies.
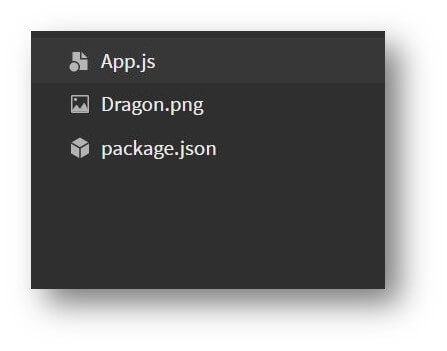
Components used for proper execution:
[i] Dragon.png
[ii[ App.js
import React from 'react';
import {
StyleSheet
, View
, Text
, StatusBar
, Dimensions
, TouchableOpacity
} from 'react-native';
import { ProgressHeader } from 'react-native-header-types';
import ReactNativeParallaxHeader from 'react-native-parallax-header';
import { Appbar } from 'react-native-paper';
const NAV_BAR_HEIGHT = 50;
const HEADER_HEIGHT = 50;
const IS_ANDROID_X = 900;
const STATUS_BAR_HEIGHT = 20;
const {height: SCREEN_HEIGHT} = Dimensions.get('window');
const styles = StyleSheet.create({
ex:{
backgroundColor:'#e182ed',
marginHorizontal: 9,
marginVertical: 9,
},
rx:{
backgroundColor:'#e182ed',
marginHorizontal: 9,
marginVertical: 9,
},
container: {
flex: 3,
backgroundColor:'#e182ed',
marginHorizontal: 9,
marginVertical: 9,
},
title:{
flex: 2,
backgroundColor:'#e88f3c',
flexDirection: 'column',
},
statusBar: {
backgroundColor: '#64deab',
alignItems: 'center',
flexDirection: 'column',
height: 26,
marginHorizontal: 9,
marginVertical: 9,
},
navContainer: {
height: 30,
marginHorizontal: 9,
marginVertical: 9,
},
navBar: {
alignItems: 'center',
flexDirection: 'column',
backgroundColor: '#f55678',
},
});
const renderContent = () => {
return (
<View style={styles.body}>
{Array.from(Array(1).keys()).map((i) => (
<View
key={i}
style={{padding: 25
, alignItems: 'center'
, justifyContent: 'center'
, color: '#f02ba8'
, marginHorizontal: 9
, marginVertical: 9,}}>
<Text>EDUCBA</Text>
</View>
))}
</View>
);
};
const renderNavBar = () => (
<View style={styles.navContainer}>
<View style={styles.statusBar} />
<View style={styles.navBar}>
<TouchableOpacity style={styles.iconRight} onPress={() => {}}>
<Text style={{color: '#ebe859', marginHorizontal: '9',
marginVertical: '9'}}>E</Text>
</TouchableOpacity>
</View>
</View>
);
const App = () => {
return (
<>
<View style={styles.rx}>
<Appbar.Header
style={styles.title}>
<Appbar.Content subtitle="Traning Provider"
title="EDUCBA"
color="#4369e6"
/>
</Appbar.Header>
</View>
<ReactNativeParallaxHeader
headerMaxHeight={400}
headerMinHeight={HEADER_HEIGHT}
extraScrollHeight={50}
navbarColor="#f2c068"
backgroundImageScale={9}
backgroundImage={require('./Dragon.png')}
titleStyle={styles.titleStyle}
title={title()}
innerContainerStyle={styles.container}
renderContent={renderContent}
renderNavBar={renderNavBar}
/>
<StatusBar barStyle="light-content" />
<View style={styles.ex}>
<ProgressHeader
progressActiveColor="#c70606"
headerTitle="EDUCBA"
headerTitleHeight= "10"
headerTitleColor="#f07c3e"
totalProgress="10"
currentprogress="5"
headerBackgroundColor="#aaf054"
progressInactiveColor="#edcb6d"
/>
</View>
</>
);
};
const title = () => {
return (
<View style={styles.body}>
<Text style={{color: '#e8dce4'
, justifyContent: 'center'
, fontSize: 25
,marginHorizontal: 100,
marginVertical: 100,}}>EDUCBA HEADER EXAMPLE</Text>
</View>
);
};
export default App;
Output:
Conclusion
Based on the above article, we understood the concept of headers. We went through multiple examples to understand its application according to the application or web page’s different requirements. We came across the advantages of creating headers and how it helps in creating our application more interactive to the users.
Recommended Articles
This is a guide to the React native header. Here we discuss the concept of headers in React Native along with the multiple examples to understand its application. You may also have a look at the following articles to learn more –
