Updated April 20, 2023
Introduction to React Native Linking
For the incoming app links and the outgoing links, React Native provides Linking as an interface which helps in the interaction between the app links. For each and every link there is a scheme for URL, the websites are prefixed either by https:// or by http://. The http is called as the scheme of the URL. Other than HTTPS, we are also very much used to the mailto scheme. While opening a mailto scheme link, the pre-installed mail application gets executed. There are other schemes as well which helps us to make phone calls, send text messages etc.
How to use Linking in React Native?
For linking different applications to our React application, we can use different custom url schemes. Like in the case of a Magic Link email which we get from Slack. There will be a Launch Slack button which is something like : slack://secret/magic-login/other-secret. In the case of Slack, we can notify the Operating System about the custom scheme we want to use. While opening the Slack app, an URL is received which was used. This is called Deep Linking.
As we have seen about the URL schemes, below are some of the URL schemes which performs core functionalities and are available on each and every platform.
- mailto: This URL scheme helps in calling the Mailing application to open.
Example:
mailto: info@educba.com.
- Tel: This URL scheme helps in calling the phone app to open.
Example:
tel: +123456789
- Sms: This URL scheme helps in calling the SMS app to open.
Example:
Sms: +123456789
- https/http: This URL scheme helps in calling the web browser to open.
Example:
https: //educba.com
Examples of React Native Linking
Given below are the examples of React Native Linking:
Example #1
Universal Links (Deep Links and open Links).
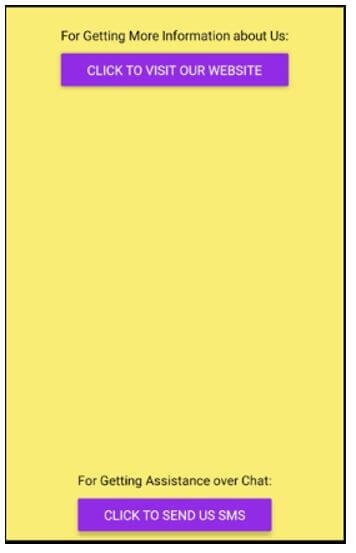
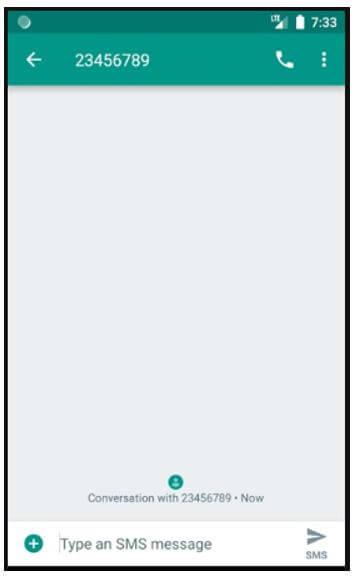
In the example below, 2 buttons are displayed. First button links the user to our website eduCba.com when it’s been clicked and second button directs links user to directly chat with us.
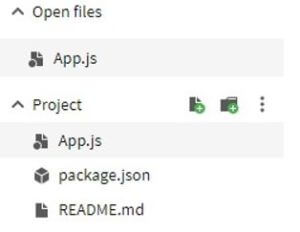
Files used to implement the code below are:
App.js
import React
, { useCallback } from "react";
import { Alert
, Button
, Linking
, StyleSheet
, View
, Text
, SafeAreaView } from "react-native";
const supportedURL = "https://www.educba.com/";
const unsupportedURL = "sms: +123456789";
const OpenURLButton = (
{
url
, children
}
) => {
const handlePress
= useCallback(async () =>
{
const supported = await Linking.canOpenURL(url);
if (supported) {
await Linking.openURL(url);
}
}, [url]);
return <Button
title={children}
onPress={handlePress}
color= "#922ce6"/>;
};
const Separator = () => (
<View style={styles.separator} />
);
const App = () => {
return (
<SafeAreaView style={styles.container}>
<View>
<Text style={styles.title}>
For Getting More Information about Us:
</Text>
<OpenURLButton url={supportedURL}>Click to Visit our Website</OpenURLButton>
</View>
<Separator />
<View>
<Text style={styles.title}>
For Getting Assistance over Chat:
</Text>
<OpenURLButton url={unsupportedURL}>Click to Send us SMS</OpenURLButton>
</View>
</SafeAreaView>
);
};
const styles = StyleSheet.create({
container: { flex: 1
, justifyContent: "center"
, alignItems: "center"
, backgroundColor:"#faed75"
},
title: {
textAlign: 'center',
marginVertical: 10,
},
separator: {
marginVertical: 200,
borderBottomColor: '#d94e9a',
borderBottomWidth: StyleSheet.hairlineWidth,
},
});
export default App;
Output:
Screen appears on executing code:
Screen appears on clicking website visit button:
Screen appears when chat button is clicked:
Example #2
Opening Phone Settings.
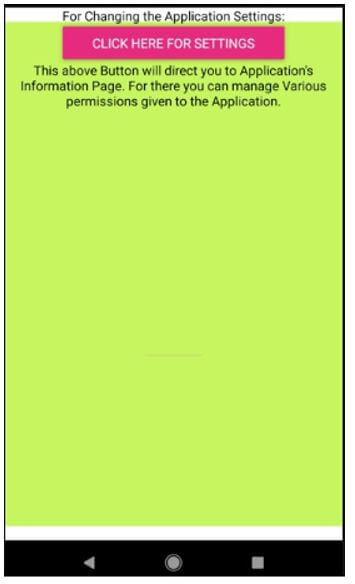
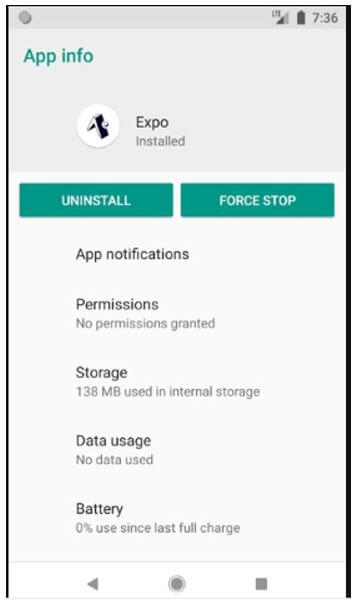
In the example below, the button links directly to the settings of the application.
The files used to implement the code below are:
App.js
import React
, { useCallback } from "react";
import { Button
, Linking
, StyleSheet
, View
, Text
, SafeAreaView } from "react-native";
const Opentel = (
{
children
}
) => {
const handlePress
= useCallback(
async () => {
await Linking.openSettings();
}, []);
return <Button
title={children}
onPress={handlePress}
color="#e62c7f" />;
};
const Separator = () => (
<View style={styles.separator} />
);
const App = () => {
return (
<SafeAreaView style={styles.container}>
<View>
<Text style={styles.title}>
For Changing the Application Settings:
</Text>
<Opentel>Click Here for Settings</Opentel>
</View>
<View>
<Text style={styles.title}>
This above Button will direct you to Application's Information Page. For there you can manage Various permissions given to the Application.
</Text>
</View>
<Separator />
</SafeAreaView>
);
};
const styles = StyleSheet.create({
container: { flex: 1
, justifyContent: "center"
, alignItems: "center"
, backgroundColor: "#c6f55f"
, marginVertical: 15
},
title: {
textAlign: 'center',
marginVertical: 2,
},
separator: {
padding: 30,
marginVertical: 200,
borderBottomColor: '#d94e9a',
borderBottomWidth: StyleSheet.hairlineWidth,
},
});
export default App;
Output:
Screen appears on executing code:
Screen appears on clicking settings button:
Example #3
Sending Intents in Android.
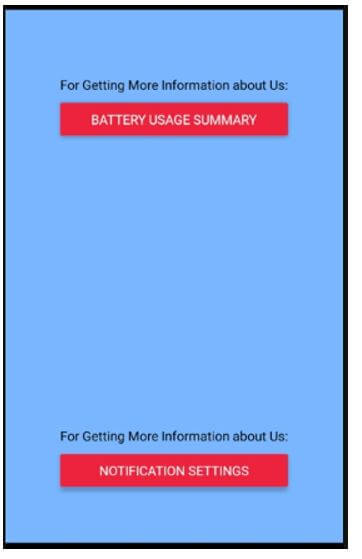
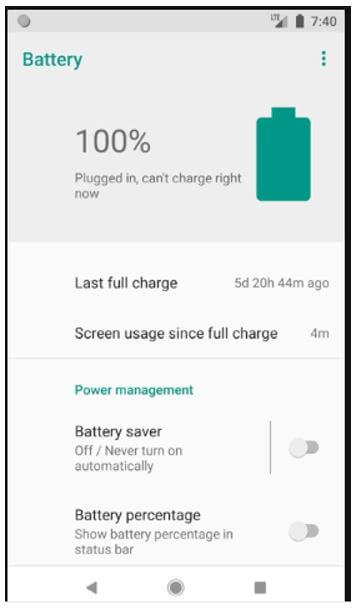
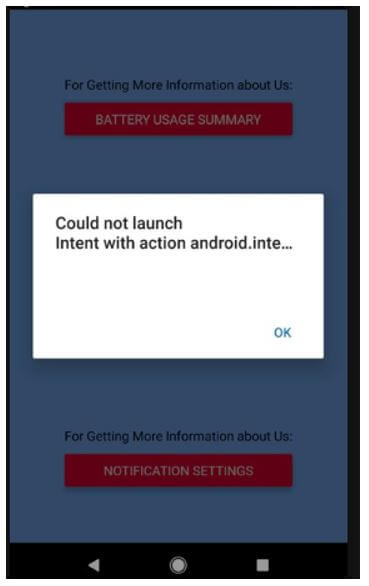
In the example below, 2 buttons are displayed. First button links the user to battery usage display by the application and second button directs the user to the notification settings of that application but it is an unsupported URL, which displays as a pop-up on clicking it.
Files used to implement the code below are:
App.js
import React
, { useCallback } from "react";
import { Alert
, Button
, Linking
, StyleSheet
, View
, Text
, SafeAreaView } from "react-native";
const unsupportedURL = "slack://open?team=123456";
const SendIntentButton
= (
{
action
, extras
, children
}
) => {
const handlePress
= useCallback(
async () => {
try {
await Linking.sendIntent(action, extras);
} catch (e) {
Alert.alert(e.message);
}
}, [action, extras]);
return <Button
title={children}
onPress={handlePress}
color="#ed213c" />;
};
const Separator = () => (
<View style={styles.separator} />
);
const App = () => {
return (
<SafeAreaView style={styles.container}>
<View>
<Text style={styles.title}>
For Getting More Information about Us:
</Text>
<SendIntentButton action="android.intent.action.POWER_USAGE_SUMMARY">
Battery Usage Summary
</SendIntentButton>
</View>
<Separator />
<View>
<Text style={styles.title}>
For Getting More Information about Us:
</Text>
<SendIntentButton
action="android.intent.action.settings.APP_NOTIFICATION_SETTINGS"
>
Notification Settings
</SendIntentButton>
</View>
</SafeAreaView>
);
};
const styles = StyleSheet.create({
container: { flex: 1
, justifyContent: "center"
, alignItems: "center"
, backgroundColor:"#7ab6ff" },
title: {
textAlign: 'center',
marginVertical: 10,
},
separator: {
marginVertical: 150,
borderBottomColor: '#d94e9a',
borderBottomWidth: StyleSheet.hairlineWidth,
},
});
export default App;
Output:
Screen appears on executing code:
Screen appears post clicking of “Battery Usage Summary” button:
Screens appears when clicking “Notification Settings” (Unsupported URL) button:
Conclusion
On the basis of the above article, we saw the concept of Linking in React Native. We saw how Linking is helpful to link different other apps to our React App. The examples shown above will help us to know the application of linking in our React Native Apps according to the different requirements.
Recommended Articles
This is a guide to React Native Linking. Here we discuss the introduction and how to use linking in react native along with examples and code implementation. You may also have a look at the following articles to learn more –
