Introduction to React Native Orientation
Orientation is one of the important aspects of a mobile application. With the evolution of Mobile Phones, big screens came into the picture and now we watch movies, play games which needs a broader line of sight and for certain other apps which needs a portrait display of the screen. Orientation has become a very important feature for a phone which adapt with the needs and comfortability of the user. Today we will see how we can handle the screen rotation and how can we rotate the screen automatically. Screen orientation also provides a good user friendly experience for the user. For example, In Youtube, we tend to search for a particular video in a portrait mode but we like to watch it in a landscape mode so that we can use the full screen.
Categories of React Native Orientation
The React Native Orientation Library provides us two categories to get the orientation.
1. Normal Orientation
The Normal Orientation provides us the following responses:
- Landscape
- Portrait
- Portraitupsidedown
- Unknown
- To get the current Orientation
Orientation.getOrientation((err, orientation) => {});- We will add an Orientation Listener to change the Orientation whenever the device changes its orientation.
Orientation.addOrientationListener((orientation) => {});- Removing the Orientation
Orientation.removeOrientationListener();2. Specific Orientation
The Specific Orientation provides us the following responses:
- Landscape-Left
- Landscape-Right
- Portrait
- Portraitupsidedown
- Unknown
- To get the current Specific Orientation
Orientation.getSpecificOrientation((err, specificOrientation) => {});- Specific Orientation Listener will be added to change the orientation in sync with the devices.
Orientation.addSpecificOrientationListener((specificOrientation) => {});- Removing the Specific Orientation Listener.
Orientation.removeSpecificOrientationListener();These are the orientations that we can set using the React Native Orientation Library
- For Locking the screen to Portrait Mode.
Orientation.lockToPortrait()- For Locking the Screen to Landscape Mode.
Orientation.lockToLandscape()- To Lock the Screen to Right Landscape Mode.
Orientation.lockToLandscapeLeft()- For Locking the Screen to Left Landscape Mode.
Orientation.lockToLandscapeRight()- For Unlocking any of the Previous Locked Orientations.
Orientation.unlockAllOrientations()Examples of React Native Orientation
The examples of react native orientation are:
Example #1
Code:
import React, { Component } from 'react';
import {
StyleSheet,
Text,
View
} from 'react-native';
import Orientation from 'react-native-orientation';
export default class App extends Component
{
componentDidMount() {
Orientation.addOrientationListener(this._orientationDidChange)
}
componentWillUnmount() {
Orientation.removeOrientationListener(this._orientationDidChange)
}
_orientationDidChange(orientation) {
console.log(orientation)
}
render() {
return (
<View style={styles.container}>
<Text style={styles.welcome}> Welcome to my world!
</Text>
</View>
)
}
}
const styles = StyleSheet.create({ container: {
flex: 1,
justifyContent: 'center',
alignItems: 'center',
backgroundColor: '#e98aff'
}
})
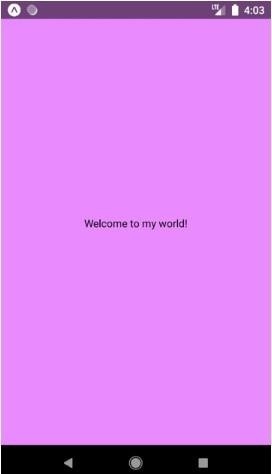
Output:
We have two types of Orientation available for mobile phones. They are Portrait mode and landscape mode respectively. Portrait mode is the default orientation for every mobile phone where the height is larger than the width of the screen. The second one, Landscape Mode comes into the picture after rotating the screen to 90 degrees where the width of the screen is larger than the height. In the second example, we will see how to detect the orientation of a mobile phone.
Example #2
React Native Orientation with Change in Screen Text with Orientation:
Code:
import React, { Component } from 'react';
import { StyleSheet
, View
, Text } from 'react-native';
export default class App extends Component<{}> {
constructor(){
super();
this.state = {
OrientationStatus : '',
Height_Layout : '',
Width_Layout : '',
}
}
componentDidMount(){
this.DetectOrientation();
}
DetectOrientation(){
if(this.state.Width_Layout > this.state.Height_Layout)
{
this.setState({
OrientationStatus : 'Phone is in Landscape Orientation'
});
}
else{
this.setState({
OrientationStatus : 'Phone is in Portrait Orientation'
});
}
}
render() {
return (
<View style={styles.MainContainer} onLayout={(event) => this.setState({
Width_Layout : event.nativeEvent.layout.width,
Height_Layout : event.nativeEvent.layout.height
}, ()=> this.DetectOrientation())}>
<Text style={styles.TextStyle}> { this.state.OrientationStatus }
</Text>
</View>
);
}
}
const styles = StyleSheet.create({
MainContainer: { flex: 1,
justifyContent: 'center',
alignItems: 'center',
backgroundColor: '#e4ff6e',
margin: 10
},
TextStyle :{
fontSize : 21,
color : '#4655db'
}
});
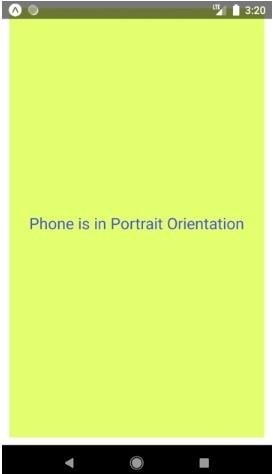
Output:
It shows text that will appear when the mobile phone is in Portrait Mode.
It shows the text that will appear when the mobile phone is oriented in Landscape Mode.
In the above example, we used a simple trick to detect the orientation of the screen. We have just used the screen height and width and created a condition that if the screen height is greater than the width, then it is a Portrait mode and on the other case where the screen width would be greater than the screen height then it will be landscape mode. This helps the application to understand when to change its orientation according to the user and the device’s orientation.
Example #3
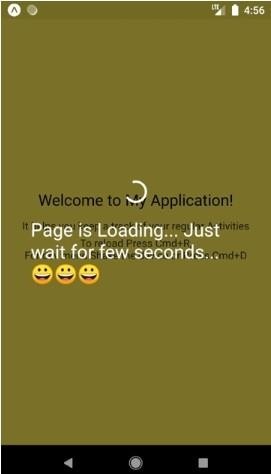
Orientation Supported Loading Overlay.
import React, { Component } from 'react'; import {
AppRegistry, StyleSheet, Text,
View
} from 'react-native';
import OrientationLoadingOverlay from 'react-native-orientation-loading- overlay';
export default class original extends Component { render() {
return (
<View style={styles.container}>
<Text style={styles.welcome}>
Welcome to My Application!
</Text>
<Text style={styles.instructions}>
It helps you keep a track of your regular Activities
</Text>
<Text style={styles.instructions}> To reload Press Cmd+R,{'\n'}
For dev menu Shake the device or Press Cmd+D
</Text>
<OrientationLoadingOverlay visible={true} color="#ffffff" indicatorSize="large" messageFontSize={25}
message="Page is Loading... Just wait for few seconds... "
/>
</View>
);
}
}
const styles = StyleSheet.create({ container: {
flex: 1,
justifyContent: 'center', alignItems: 'center', backgroundColor: '#f5e14e',
},
welcome: {
fontSize: 21, textAlign: 'center', margin: 11,
},
instructions: { textAlign: 'center', color: '#242020',
marginBottom: 4,
},
});
AppRegistry.registerComponent('original', () => original);
Output:
Conclusion
In this article, we understood how to get the orientations and also how to set a particular orientation in React-native. We also saw how to Lock a particular Orientation and even unlock the previous orientation. Even at the time of loading overlay, we can implement the App’s Orientation changes with device orientation changes. Using these methods, we can make our applications more user friendly and easy to use. Orientations can make an average application look good and compatible with the user. So, the user can use it according to their comfortability.
Recommended Articles
This is a guide to React Native Orientation. Here we also discuss the Introduction and categories of react native orientation along with different examples and its code implementation. You may also have a look at the following articles to learn more –


