Updated April 4, 2023

Introduction to React native overflow
Overflow is majorly a failure in while writing a code or developing a website or application. Overflow occurs when the input is too large to be stored. Each computer or device has its own capacity to represent a range of values, and whenever the information gets past the capacity, overflow occurs. While executing a program, when a number or information comes up outside the computer’s capacity, there will be an overflow error. This article explores the overflow conditions in React Native. There are various examples explained below that will help understand the overflow concept and ways to tackle it.
Syntaxes to solve Overflow
The different syntax is mentioned below:
View Overflow Syntax-
Below v0.57 versions of React Native, this ‘react-native-view-overflow’ library is useful. This library solves the problem of an overflow of view in Android. As the children Views contents are clipped by parent View.
import ViewOverflow from 'react-native-view-overflow';
<ViewOverflow>
<Component in which you want to enable Overflow />
</ViewOverflow>
Scrolling Overflow Syntax-
It helps in stopping the body propagation scroll. Below, the syntax of importing OverflowScrolling is also discussed.
import OverflowScrolling from 'react-overflow-scrolling';
export class OverflowScrollingexample extends React.Component {
render() {
return (
<OverflowScrolling className='overflow-scrolling'>
...
</OverflowScrolling>
);
}
}
Examples of React native overflow
Different Examples along with the working of Native Overflow:
Example #1 – Text Overflow
It is a basic text-overflow example. The below example explains the overflow of texts. The files used in the successful implementation of this code are:
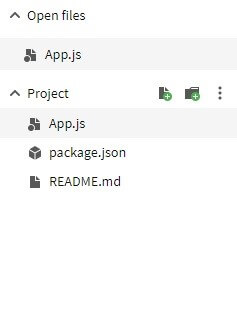
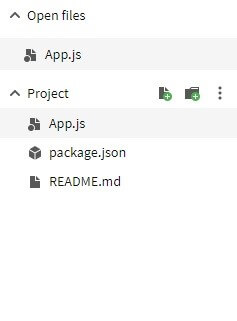
App.js
import React
, { Component } from 'react';
import { View
, StyleSheet
, Text } from 'react-native';
export default class App extends Component<{}>
{
render()
{
return(
<View style = { styles.MainContainer }>
<Text style={styles.TextStyle} numberOfLines = { 1 } >
EDUCBA is best. This line shows the overflowing of text from the end.
</Text>
<Text style={styles.TextStyle} numberOfLines = { 1 } ellipsizeMode = 'head'>
EDUCBA is best. This line shows the overflowing of text from the start.
</Text>
<Text style={styles.TextStyle} numberOfLines = { 1 } ellipsizeMode = 'middle'>
EDUCBA is best. This line shows the overflowing of text from the middle
</Text>
</View>
);
}
}
const styles = StyleSheet.create(
{
MainContainer:
{
flex: 1,
justifyContent: 'center',
alignItems: 'center',
backgroundColor: '#4ef5a4',
},
TextStyle:
{
textAlign: 'center',
fontSize: 20,
padding: 10,
color: '#940f30'
}
});
Output:
In the output below, the first line shows the text overflowing from the end, and the second line shows the text overflowing from the start, and the third line shows the text overflowing in the middle.
Example #2
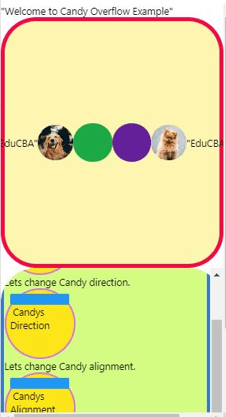
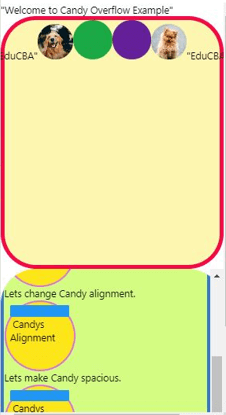
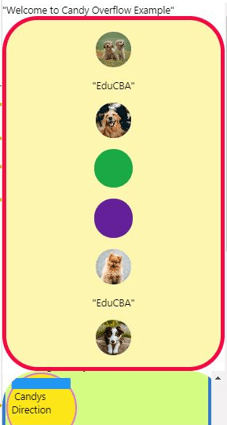
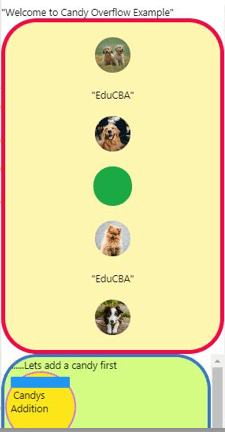
As the below example is for the above v0.57 versions of React Native and the below example removes the view overflow problem. With the clicking of different buttons, the overflowing has been observed at different instances and different corners of the box. One has to click the blue button to perform the different tasks for overflow observation, respectively. Used files for the code implementation are:
App.js
import React

, { useState } from 'react';

import { Button

, ScrollView

, StyleSheet

, Text

, View

, Image } from 'react-native';

import Constants from 'expo-constants';

const App = () => {

const Alignment = [

'center',

'baseline',

];

const Spacing = [

'center',

'space-evenly',

];

const Movement = [ 'column'

, 'row'];

const [alignment

, setalignment] = useState(0);

const [spacing

, setspacing] = useState(0);

const [movement

, setmovemento] = useState(0);

const Stylo = {

alignItems: Alignment[alignment],

justifyContent: Spacing[spacing],

flexDirection: Movement[movement],

};

const overflow = (value

, options

, setterFunction) => {

if (

value

==

options.length-1

) {

setterFunction(0);

return;

}

setterFunction(value + 1);

};

const EDUCBA = () => {

const sqStyle = {

width: 55,

height: 55,

borderRadius: 100/2,

backgroundColor: random(),

};

return <View style={sqStyle} />

};

const [circle

, etcircle] = useState([EDUCBA()]);

return (

<>

<Text>

"Welcome to Candy Overflow Example"

</Text>

<View style={{ paddingTop: Constants.statusBarHeight }} />

<View style={[styles.maincontainer

, styles.arena

, Stylo]}>

<Image

style={styles.Stylo}

source={{

uri: 'https://images.pexels.com/photos/1108099/pexels-photo-1108099.jpeg?auto=compress&cs=tinysrgb&dpr=1&w=500',

}}

style={{

width: 50,

height: 50,

borderBottomLeftRadius: 50,

borderBottomRightRadius: 50,

borderTopRightRadius: 50,

borderTopLeftRadius: 50,

overflow: 'hidden',

}}

/>

<Text>

"EduCBA"

</Text>

<Image

style={styles.Stylo}

source={{

uri: 'https://images.pexels.com/photos/2253275/pexels-photo-2253275.jpeg?auto=compress&cs=tinysrgb&dpr=1&w=500',

}}

style={{

width: 50,

height: 50,

borderBottomLeftRadius: 50,

borderBottomRightRadius: 50,

borderTopRightRadius: 50,

borderTopLeftRadius: 50,

overflow: 'hidden',

}}

/>

{circle.map(elem => elem)}

<Image

style={styles.Stylo}

source={{

uri: 'https://images.pexels.com/photos/3687770/pexels-photo-3687770.jpeg?auto=compress&cs=tinysrgb&dpr=1&w=500',

}}

style={{

width: 50,

height: 50,

borderBottomLeftRadius: 50,

borderBottomRightRadius: 50,

borderTopRightRadius: 50,

borderTopLeftRadius: 50,

overflow: 'hidden',

}}

/>

<Text>

"EduCBA"

</Text>

<Image

style={styles.Stylo}

source={{

uri: 'https://images.pexels.com/photos/2820134/pexels-photo-2820134.jpeg?auto=compress&cs=tinysrgb&dpr=1&w=500',

}}

style={{

width: 50,

height: 50,

borderBottomLeftRadius: 50,

borderBottomRightRadius: 50,

borderTopRightRadius: 50,

borderTopLeftRadius: 50,

overflow: 'hidden',

}}

/>

</View>

<ScrollView style={[styles.maincontainer]}>

<View style={[styles.manager]}>

<Text>

.........Lets add a candy first

</Text>

<View style={styles.button}>

<Button

onPress={() => etcircle([...circle

, EDUCBA()])}

/>

<Text> Candys Addition </Text>

</View>

<Text>

Lets change Candy direction.

</Text>

<View style={styles.button}>

<Button

onPress={() =>

overflow(movement

, Movement

, setmovemento)

}

/>

<Text> Candys Direction </Text>

</View>

<Text>

Lets change Candy alignment.

</Text>

<View style={styles.button}>

<Button

onPress={() =>

overflow(alignment

, Alignment

, setalignment)

}

/>

<Text> Candys Alignment </Text>

</View>

<Text>

Lets make Candy spacious.

</Text>

<View style={styles.button}>

<Button

onPress={() =>

overflow(

spacing,

Spacing,

setspacing

)

}

/>

<Text> Candys Position </Text>

</View>

<Text>

Lets remove Unwanted Candy.

</Text>

<View style={styles.button}>

<Button

onPress={() =>

etcircle(circle.filter((v, i) => i != circle.length-1))

}

/>

<Text> Candys Deletion </Text>

</View>

</View>

<Text> *****EduCBA***** </Text>

</ScrollView>

</>

);

};

const styles = StyleSheet.create({

maincontainer: {

height: '50%',

borderRadius: 100/2,

},

arena: {

borderRadius: 100/2,

borderWidth: 6,

backgroundColor: '#fcf6b1',

borderColor: '#f50a45',

},

manager: {

borderWidth: 5,

borderRadius: 100/2,

flexWrap: 'wrap',

flexDirection: 'column',

backgroundColor: '#d4fc83',

borderColor: '#3979cc',

},

button: {

borderWidth:3,

borderColor:'#d970e0',

width:100,

height:100,

borderRadius:50,

padding: 5,

backgroundColor: '#fce619',

buttonColor: '#64faf7',

},

text: { textAlign: 'center',

backgroundColor: '#2c38db',

},

});

const random = () => {

return '#000000'.replace(/0/g, () => {

return (~~(Math.random() *12)).toString(14);

});

};

export default App;
Output:
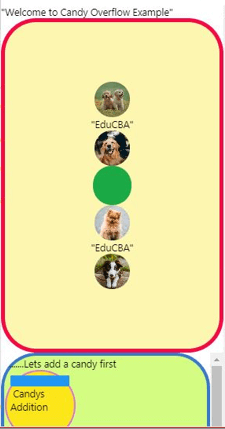
Output when code is executed –
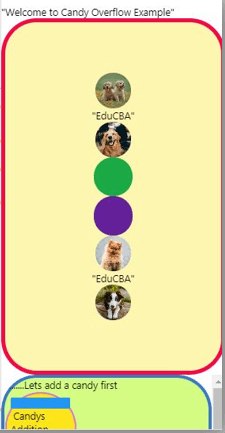
After clicking button name “Candys Addition” –
After clicking button name “Candys Direction” –
After clicking button name “Candys Alignment” –
After clicking button name “Candys Position” –
After clicking button name “Candys Deletion” –
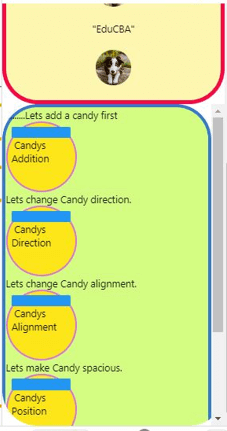
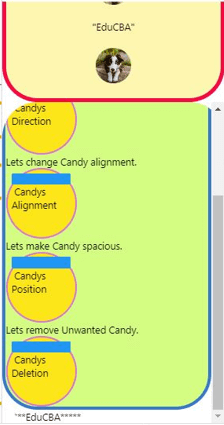
Manager Window
Conclusion
On the basis of the above discussion, we understood what Native overflow is as overflow is the view component in React Native and what syntax is used for overflow. We understood the working of native overflow and have discussed the different examples to discuss overflow working.
Recommended Articles
This is a guide to React native overflow. Here we discuss the introduction, syntax, and examples of React native overflow along with code implementation. You may also have a look at the following articles to learn more –
