Updated April 19, 2023

Introduction to React Native Overlay
While using an app, we may face many kinds of errors or bugs or some kind of inconvenience. These errors or causes of the inconvenience should be communicated further to the user. For conveying these messages, overlay is used. A view or a box with some content which floats above an app’s content is called overlay. Overlays are one of the easiest and effective way of informing the user or taking information from the user. React Native also provides an option to setup overlay in an app.
Syntax:
import Overlay from 'react-native-modal-overlay';
<Overlay>
…… props ……
</Overlay>
Examples of React Native Overlay
Given below are the examples mentioned:
Example #1
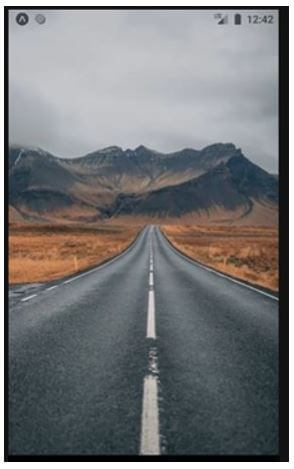
Below an overlay window appears on the code execution and it is vanished when we click anywhere outside the overlay window. We have styled the overlay window using different styling components.
App.js
import React
, { Component} from 'react';
import Overlay from 'react-native-modal-overlay';
import {
SafeAreaView
, View
, Text
, ImageBackground
, StyleSheet
, Image
, Button
, Alert
} from 'react-native';
export default class EDUCBA extends Component {
onClose = () => this.setState(
{
modalVisible: false
});
state = {
modalVisible: true,
}
render() {
return (
<ImageBackground
source={{
uri:
'https://images.pexels.com/photos/1955134/pexels-photo-1955134.jpeg?auto=compress&cs=tinysrgb&dpr=1&w=500',
}}
style={{flex: 1}}
>
<View>
<Overlay
visible={this.state.modalVisible}
onClose={this.onClose}
closeOnTouchOutside
style={
{ fontSize: 36
, marginBottom: 48
, color: '#faf569'
, backgroundColor: '#54f0cb'
, alignItems: 'center'
, borderWidth: 10
, textAlign: 'center'
,  borderRadius: 100
, borderColor: '#d938f5'
, justifyContent: 'center'}
}>
<ImageBackground
source={{
uri:
'https://images.pexels.com/photos/1978126/pexels-photo-1978126.jpeg?auto=compress&cs=tinysrgb&dpr=2&h=650&w=940',
}}
style={{flex: 1}}
/>
<Image
source={{
uri:
'http://pngimg.com/uploads/lion_king/small/lion_king_PNG90.png',
}}
style={{
height: 150,
marginTop: 10,
width: 160,
}}
/>
<Text
style={
{ fontSize: 30
, marginBottom: 48
, color: '#faf569'
, backgroundColor: '#54f0cb'
, alignItems: 'center'
, borderWidth: 10
, textAlign: 'center'
,  borderRadius: 100
, borderColor: '#d938f5'
, justifyContent: 'center'}
}>
Welcome to Example of React Native Overlay
</Text>
</Overlay>
</View>
</ImageBackground>
);
}
}
Output:
On code execution:
On clicking outside the overlay window:
Example #2
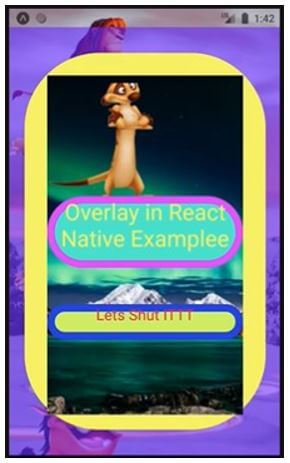
Below also an overlay window appears on the code execution and it is vanished when we click “Let’s Shut ITTT”. We have styled the overlay window using different styling components include image, text and image background.
App.js
import React
, { Component
, Fragment} from 'react';
import Overlay from 'react-native-modal-overlay';
import {
SafeAreaView
, View
, Text
, ImageBackground
, StyleSheet
, Image
, Button
, Alert
} from 'react-native';
export default class EDUCBA extends Component {
onClose = () => this.setState(
{
modalVisible: false
});
state = {
modalVisible: true,
}
render() {
return (
<ImageBackground
source={{
uri:
'https://images.pexels.com/photos/2437299/pexels-photo-2437299.jpeg?auto=compress&cs=tinysrgb&dpr=1&w=500',
}}
style={{flex: 1}}
>
<Image
source={{
uri:
'http://pngimg.com/uploads/lion_king/small/lion_king_PNG69.png',
}}
style={{
height: 150 ,
marginTop: 10 ,
width: 160 ,
}}
/>
<Image
source={{
uri:
'http://pngimg.com/uploads/lion_king/small/lion_king_PNG50.png',
}}
style={{
height: 150 ,
marginTop: 10 ,
width: 160 ,
}}
/>
<Image
source={{
uri:
'http://pngimg.com/uploads/lion_king/small/lion_king_PNG63.png',
}}
style={{
height: 150 ,
marginTop: 10 ,
width: 160 ,
}}
/>
<Image
source={{
uri:
'http://pngimg.com/uploads/lion_king/small/lion_king_PNG49.png',
}}
style={{
height: 150 ,
marginTop: 10 ,
width: 160 ,
}}
/>
<Image
source={{
uri:
'http://pngimg.com/uploads/lion_king/small/lion_king_PNG90.png',
}}
style={{
height: 150 ,
marginTop: 10 ,
width: 160 ,
}}
/>
<View>
<Overlay
visible={
this.state.modalVisible
}
onClose={
this.onClose
}
closeOnTouchOutside
animationType="zoomIn"
containerStyle={
{
backgroundColor: 'rgba(97, 18, 370, 0.58)'
}}
childrenWrapperStyle={
{
backgroundColor: '#f5f76a'
, borderRadius: 100
}}
animationDuration={500}>
{
(hideModal, overlayState) => (
<ImageBackground
source={{
uri:
'https://images.pexels.com/photos/1933239/pexels-photo-1933239.jpeg?auto=compress&cs=tinysrgb&dpr=1&w=500',
}}
style={{
height: 450
, marginTop: 10
, width: 260
,  borderRadius: 100
}}
>
<Image
source={{
uri:
'http://pngimg.com/uploads/lion_king/small/lion_king_PNG31.png',
}}
style={{
height: 150 ,
marginTop: 10 ,
width: 160 ,
}}
/>
<View>
<Fragment>
<Text
style={
{ fontSize: 30
, marginBottom: 48
, color: '#faf569'
, backgroundColor: '#54f0cb'
, alignItems: 'center'
, borderWidth: 10
, textAlign: 'center'
,  borderRadius: 100
, borderColor: '#d938f5'
, justifyContent: 'center'}
}
>Overlay in React Native Examplee</Text>
<Text
onPress={hideModal}
style={
{ fontSize: 20
, marginBottom: 48
, color: '#db1d4f'
, backgroundColor: '#cff768'
, alignItems: 'center'
, borderWidth: 10
, textAlign: 'center'
,  borderRadius: 100
, borderColor: '#273cdb'
, justifyContent: 'center'}
}>
Lets Shut ITTT</Text>
</Fragment>
</View>
</ImageBackground>
)
}
</Overlay>
</View>
</ImageBackground>
);
}
}
Output:
On code execution:
On clicking “Lets Shut ITTT”:
Example #3
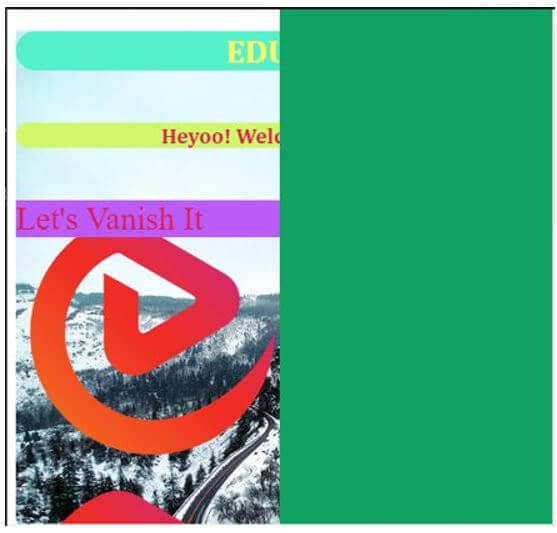
Below also an overlay window appears on the right side of the window on the code execution and it is vanished when we click “Let’s Vanish It”. We have styled the overlay window using background color as styling component.
index.js
import React from "react"; import ReactDOM from "react-dom";
import "./styles.css";
function Arrow(props) {
return (
<div style={{
backgroundImage: 'url("https://cdn.educba.com/academy/wp-content/uploads/2020/05/cropped-website_logo_transparent_background_white.png")'
, height:'980px'
, width: '250px'
}}>
<div
id="root-name"
onClick={props.onClick}
style={
{ fontSize: 30
, color: '#db1d4f'
, backgroundColor: '#bc5bf5'
, backgroundWidth: 1
}
}
Let's Vanish It
</div>
</div>
);
}
class App extends React.Component {
state = {
overlayVisible: true ,
overlayID: null
};
clickHandle = e => {
e.preventDefault();
this.setState(
{
overlayVisible: !this.state.overlayVisible
});
this.setState(
{
overlayID: e.target.id
});
console.log(
e.target.id
);
};
render() {
return (
<div style={{
backgroundImage: 'url("https://images.pexels.com/photos/3608629/pexels-photo-3608629.jpeg?auto=compress&cs=tinysrgb&dpr=1&w=500")'
, height:'480px'
, width: '500px'
}}>
<div>
<div className="App">
<h1 style={
{ fontSize: 30
, marginBottom: 48
, color: '#faf569'
, backgroundColor: '#54f0cb'
, alignItems: 'center'
, borderWidth: 10
, textAlign: 'center'
,  borderRadius: 100
, borderColor: '#d938f5'
, justifyContent: 'center'}
}
>EDUCBA
</h1>
<h2 style={
{ fontSize: 20
, marginBottom: 48
, color: '#db1d4f'
, backgroundColor: '#cff768'
, alignItems: 'center'
, borderWidth: 10
, textAlign: 'center'
,  borderRadius: 100
, borderColor: '#273cdb'
, justifyContent: 'center'}
}
>Heyoo! Welcome Here.......</h2>
</div>
{}
<Arrow onClick={this.clickHandle} />
{this.state.overlayVisible && (
<div
className="overlay"
style={{
backgroundImage: 'url("https://images.pexels.com/photos/433142/pexels-photo-433142.jpeg?auto=compress&cs=tinysrgb&dpr=1&w=500")' ,
width: "150%" ,
height: "150%" ,
position: "absolute" ,
top: "0" ,
left: "50%" ,
bottom: "0" ,
background: "#10a162" ,
fontSize: "100" ,
color: "#a10840"
}}
>
<p>{
this.state.overlayID
}</p>
</div>
)}
</div>
</div>
);
}
}
const rootElement = document.getElementById(
"root"
);
ReactDOM.render(
<App />
, rootElement);
Output:
On code execution:
On clicking “Let’s Vanish It”:
Conclusion
The examples would help in understanding the implementation of overlay according to different situations. This article would help the readers in creating overlays for their own apps and make them more interactive for the user.
Recommended Articles
This is a guide to React Native Overlay. Here we discuss the introduction, syntax, and examples of react native overlay along with code implementation. You may also have a look at the following articles to learn more –


