Updated April 3, 2023

Introduction to React Native Template
With React Native application template, one can reuse and save a collection of processes, environment, resources and component templates or tagged components to create a standard mobile application. A template in a mobile application can be defined as the standard framework for users to take on when applications are created by them. In the application’s template, one can define environment gates, environment properties and the application properties for the particular application. The templates of an application can contain as many of these elements as per the requirement to help users throughout the process of application creation and also through standardizing their environment.
Syntax
Syntax of importing some basic Templates in React Native:
1. Hello World
var helloRT = function () {
return React.createElement('h2', {}, 'You are welcome to my world');
}
2. rt-if
var rtIfRT = function () { function onClick1() {
this.toggle();
}
return React.createElement('div', {}, React.createElement('h4', { 'style': { cursor: 'pointer' },
'onClick': onClick1.bind(this)
}, '\n
Click to ', this.state.open ? 'close' : 'open',
'\n
'), this.state.open ? React.createElement('p', { 'key': '134' }, 'This content is written by me and it will appear when you click open') : null);
}
3. rt-props
var propsRT = function () {
function mergeProps(inline, external) {
var res = _.assign({}, inline, external); if (inline.hasOwnProperty('style')) {
res.style = _.defaults(res.style, inline.style);
}
if (inline.hasOwnProperty('className') && external.hasOwnProperty('className')) {
res.className = external.className + ' ' + inline.className;
}
return res;
}
return React.createElement('div', {}, '\n    Style:\n    ', React.createElement('select', { 'valueLink': this.linkState('key') }, React.createElement('option', { 'value': 'color' }, 'Color Option'), React.createElement('option', { 'value': 'backgroundColor' }, 'Background color'), React.createElement('option', { 'value': 'borderColor' }, 'Border color')), React.createElement('br', {}), '\n              Value:\n    ', React.createElement('select', { 'valueLink': this.linkState('val') }, React.createElement('option', { 'value': 'black' }, 'Black'),
React.createElement('option', { 'value': 'blue' }, 'Blue'),
React.createElement('option', { 'value': 'red' }, 'Red')),
React.createElement('br', {}), React.createElement('br', {}), React.createElement('div', mergeProps({
'style': {
padding: '5px',
textAlign: 'center',
border: '1px solid'
}
}, this.getProps()), 'Sample'));
};
4. Weather Report
var weatherRT = function () { function onKeyDown1(e) {
if (e.keyCode === 13) { e.preventDefault(); this.addCity();
}
}
function repeatWeather2(city, cityIndex, weather, weatherIndex) { return React.createElement('img', {
'src': 'https://openweathermap.org/img/w/' + weather.icon +
'.png',
'title': weather.description
});
}
function repeatCity3(city, cityIndex) {
return React.createElement.apply(this, [
'div',
{ 'key': city.id },
'\n        ',
cityIndex + 1,
')\n        ',
_.map(city.weather, repeatWeather2.bind(this, city, cityIndex)),
React.createElement('span', { 'style': { whiteSpace: 'nowrap' }
}, city.name, ', ', city.sys.country)
]);
}
return React.createElement.apply(this, [
'div',
{},
React.createElement('h4', {}, 'Cities weather report'),
React.createElement('input', {
'placeholder': 'Type your city for report',
'style': { width: '130px' },
'valueLink': this.linkState('cityToAdd'),
'onKeyDown': onKeyDown1.bind(this)
}),
React.createElement('button', { 'onClick': this.addCity }, 'Add'),
this.state.loading ? React.createElement('div', { 'key': 'preloader' }, '\n   -- Weather Report is Loading --\n    ') : null,
_.map(this.state.info, repeatCity3.bind(this)),
React.createElement('button', { 'onClick': this.refresh }, 'Refresh')
]);
}
How to Create Template in React Native?
There is a huge variety of Templates available for React Native and the steps to use these pre-available templates are:
- Step 1: Download the template.
- Step 2: Install Dependencies.
- Step 3: Build and Run.
- Step 4: Configure your application where you want to use these templates.
Some examples of templates available by instamobile are mentioned below-
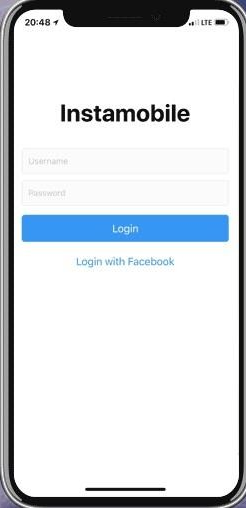
1. Login Screen React Native by
instamobile App.JS:
import React from 'react'; import { StyleSheet
, Text
, View } from 'react-native';
import LoginScreen from './src/login/login.js'; export default class App extends React.Component {
render() { return (
<LoginScreen />
);
}
}
const styles = StyleSheet.create({ container: {
flex: 1,
backgroundColor: '#fff',
alignItems: 'center', justifyContent: 'center',
},
})
App.JSON:
{
"expo": {
"facebookScheme": "fb1047121222092614", "facebookAppId": "1047121222092614", "facebookDisplayName": "instmobile", "android": {
"package": "io.instamobile.login"
},
"name": "login-screen",
"description": " iosapptemplates.com-&-instamobile.io-Implemented- Login-Screen-of-this-application .",
"slug": "login-screen",
"privacy": "public",
"sdkVersion": "26.0.0",
"platforms": ["ios", "android"],
"version": "1.0.0", "orientation": "portrait", "icon": "./assets/icon.png", "splash": {
"image": "./assets/splash.png", "resizeMode": "contain", "backgroundColor": "#ffffff"
},
"updates": { "fallbackToCacheTimeout": 0
},
"assetBundlePatterns": [ "**/*"
],
"ios": { "supportsTablet": true
}
}
}
Output: Below is the template output that will appear when the above code is used within your application-
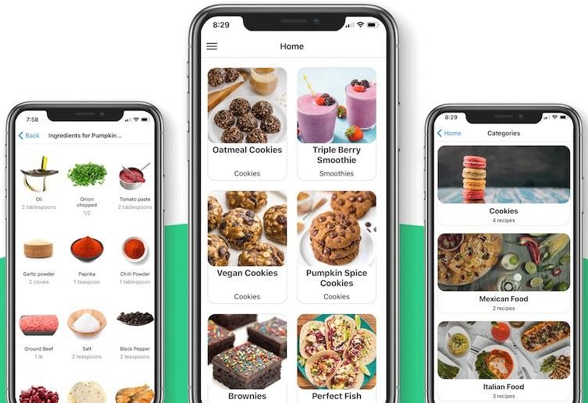
2. Food App Template by
instamobile App.JS:
import React from 'react'; import { StyleSheet
, Text
, View } from 'react-native';
import AppContainer from './src/navigations/AppNavigation';
export default function App() { return (
<AppContainer />
);
}
App.JSON:
{
"expo": {
"name": "Instafood",
"slug": "instafood-recipes-app",
"description": "React-Native Recipes Application Demo. “, "privacy": "public",
"sdkVersion": "36.0.0", "platforms": [
"ios", "android", "web"
],
"version": "1.0.0", "orientation": "portrait", "icon": "./assets/icon.png", "splash": {
"image": "./assets/splash.png", "resizeMode": "contain", "backgroundColor": "#ffffff"
},
"updates": { "fallbackToCacheTimeout": 0
},
"assetBundlePatterns": [ "**/*"
],
"ios": { "supportsTablet": true
}
}
}
Output: Below is the template output that will appear when the above code is used within your application-
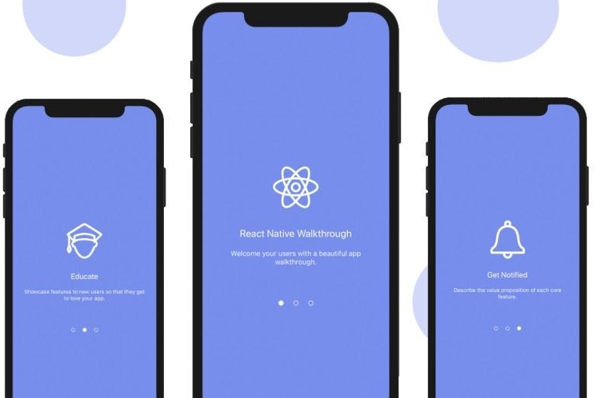
3. React Native WalkThrough Flow by
instamobile App.JS:
import React, {Component} from 'react';
import {Platform, StyleSheet, Text, View} from 'react-native';
const instructions = Platform.select({
ios: 'To reload press Cmd+R,\n' + 'For dev menu shake mobile or press Cmd+D',
android:
'Shake or press menu button for dev menu' + 'Double tap R on your keyboard to reload,\n' ,
});
export default class App extends Component { render() {
return (
<View style={styles.container}>
<Text style={styles.welcome}>Welcome to React Native based Mobile Application!</Text>
<Text style={styles.instructions}>To get started, please edit the App.js</Text>
<Text style={styles.instructions}>{instructions}</Text>
</View>
);
}
const styles = StyleSheet.create({ container: {
flex: 1,
justifyContent: 'center', alignItems: 'center', backgroundColor: '#F5FCFF',
},
welcome: { fontSize: 20,
textAlign: 'center', margin: 10,
},
instructions: { textAlign: 'center', color: '#333333',
marginBottom: 5,
},
})
Output:
Conclusion
Templates hold key importance in the development of a mobile application. Best templates help in providing the best user experience and lots of information in one application only. Based on the above discussion, we got to know about React-Native templates.
We also discussed basic templates and the templates available by Instamobile. This is a great framework to implement the best templates. This provides a huge variety of Templates that can be very easily implemented in one’s based application and these templates provide a great user interface.
Recommended Articles
This is a guide to React Native Template. Here we discuss an introduction, syntax and steps to create React Native Template with examples. You can also go through our other related articles to learn more –


