Updated April 6, 2023

Introduction to React native useeffect
useEffect is a type of hook in React Native that encloses the code which has “side effects” useEffect works like a combination of componentDidUpdate, component DidMount, and componentWillUnmout. Earlier, the functional components couldn’t access the component lifecycle, which useEffect has allowed to do. useEffect also enables us to replace the component lifecycle code, which is of a repetitive nature. useEffect is a short form of “use side effect”. Whenever our app starts reacting to the outside world, like working with API is called effects. useEffect enables us to process a function whenever there is some change.
Syntax:
useEffect is directly imported from React in the React Native application using the below syntax:
import useEffect from "react";for React Native-based applications, below is the syntax for counter using useEffect, which counts the number of times click has been done.
const [count, setCount] = useState(0);
useEffect(() => {
document.title = `Clicking done {count} times`;
});
For React Native-based applications, below is the syntax for a reverse timer or countdown using useEffect, which sets the timer value to zero and starts the reverse timer once certain action is performed.
useEffect(
() => {
let interval;
if (Start) {
interval = setInterval(() =>
Counters(Counter => Counter - 1), 1000);
}
return () => clearInterval(interval);
},
[Start]
);
Examples of React native useeffect
Below are the examples mentioned:
Example #1
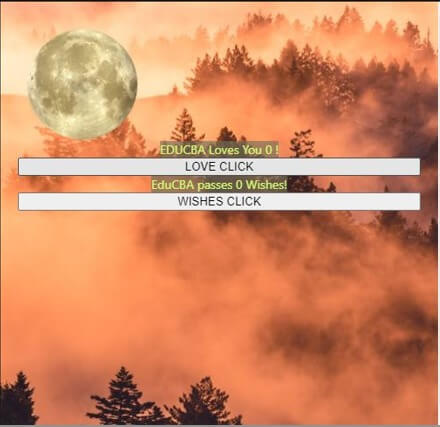
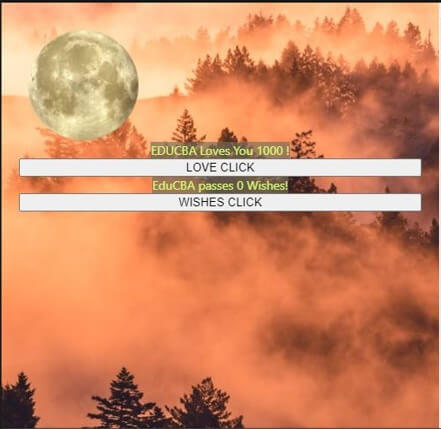
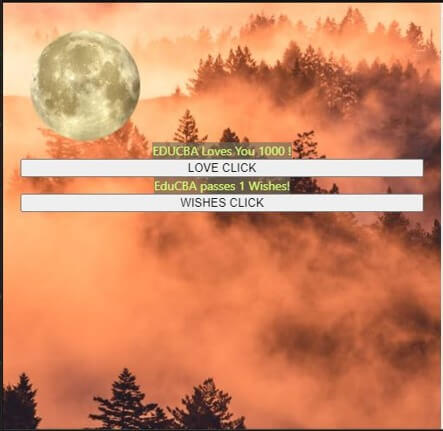
Here, clicks are counted using useEffect in the below application. The “LOVE CLICK” button counts click in thousands, and the “WISHES CLICK” button counts click in ones, and they display the number in the text, just above the respective buttons.
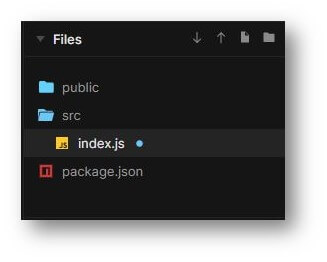
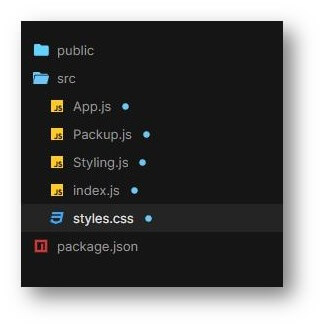
Files components used for the proper execution of the code are:
[i] index.js
import React
, { useState
, useEffect } from "react";
import ReactDOM from "react-dom";
import { ImageBackground
, StyleSheet
, Text
, View
, Image
} from "react-native";
function Rahul() {
useEffect(
() => {
console.log("Count Changed, its called");
return () => {
console.log("Compnent umount, its called");
};
},
[love]
);
const [love, lovee] = useState(0);
const [wish, wishe] = useState(0);
return (
<>
<ImageBackground style={decoration.photo}
source={photo} >
<View style={decoration.docker}>
<Image
source={{
uri:
'http://pngimg.com/uploads/moon/moon_PNG35.png',
}}
style={{
height: 130,
marginTop: 10,
width: 150,
}}
/>
<div>
<Text style={decoration.styletext}>
EDUCBA Loves You {love} !
</Text>
</div>
<button
onClick={Clickme}>
LOVE CLICK
</button>
<div>
<Text style={decoration.styletext}>
EduCBA passes {wish} Wishes!
</Text>
</div>
<button
onClick={Wishme}>
WISHES CLICK
</button>
</View>
</ImageBackground>
</>
);
function Clickme() {
lovee(love + 1000);
}
function Wishme() {
wishe(wish + 1);
}
}
const photo = { uri: "https://images.pexels.com/photos/2440061/pexels-photo-2440061.jpeg?auto=compress&cs=tinysrgb&h=750&w=1260" };
const decoration = StyleSheet.create({
photo: {
justifyContent: "center",
backgroundColor: "#91001fa9",
height: 500,
},
styletext:{
textAlign: 'center',
color: '#d2ff70',
backgroundColor: '#706d5ca0',
},
docker: {
flexDirection: "column",
flex: 1,
padding: 20,
textAlign: 'center',
}
});
const rootElement = document.getElementById("root");
ReactDOM.render(<Rahul />, rootElement);
Output:
- After code execution:
- Clicking the “LOVE CLICK” button:
- Clicking the “WISHES CLICK” button:
Example #2
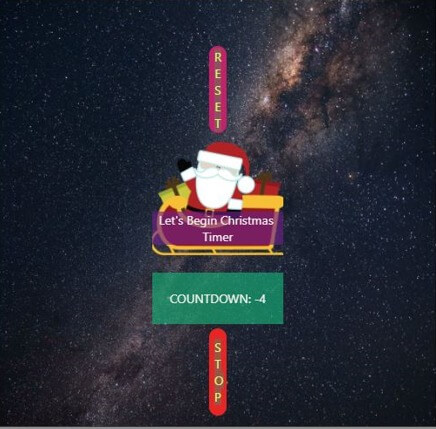
We have used useEffect in the application below to define the countdown timer or the reverse timer. When one clicks the START button in the application, it starts the reverse timer or countdown. When one clicks the STOP button in the application, it stops the timer at that very instance only. To reset the timer’s value to the initial one or zero, one can simply click the RESET button. We have used two different background images for styling the below application and imposed different texts upon them.
Files components used for proper execution of the code are:
[i] App.js
import React
, { useState
, useEffect } from "react";
import Packup from "./Packup";
import StyledButton from "./Styling";
import { ImageBackground
, StyleSheet
, Text
, View
, Image
} from "react-native";
const Rahul = () => {
const [Start
, Starts] = useState(false);
const [Counter
, Counters] = useState(0);
const Beginer = () => {
Starts(false);
Counters(0);
};
useEffect(
() => {
let interval;
if (Start) {
interval = setInterval(() =>
Counters(Counter => Counter - 1), 1000);
}
return () => clearInterval(interval);
},
[Start]
);
return (
<ImageBackground style={decoration.photo}
source={photo} >
<View>
<Packup>
<StyledButton
Begining
type="button"
disabled={Counter === 0}
onClick={Beginer}
>
<Text style={decoration.styletext}>
RESET
</Text>
</StyledButton>
<ImageBackground
source={{
uri:
'http://pngimg.com/uploads/santa_sleigh/santa_sleigh_PNG74.png',
}}
style={{
height: 130,
marginTop: 10,
width: 150,
}}
>
<Text style={decoration.styletext1}>
Let's Begin Christmas Timer
</Text>
</ImageBackground>
{!Start && (
<StyledButton type="button" onClick={() => Starts(true)}>
<Text style={decoration.styletext}>
START
</Text>
</StyledButton>
)}
<Text style={decoration.styletext2}>
COUNTDOWN: {Counter}
</Text>
{Start && (
<StyledButton Start type="button" onClick={() => Starts(false)}>
<Text style={decoration.styletext}>
STOP
</Text>
</StyledButton>
)}
</Packup>
</View>
</ImageBackground>
);
};
const decoration = StyleSheet.create({
photo: {
justifyContent: "center",
backgroundColor: "#91001fa9",
height: 500,
},
styletext:{
textAlign: 'center',
color: '#d2ff70',
backgroundColor: '#706d5ca0',
},
styletext1:{
textAlign: 'center',
textWeight: 'bold',
marginTop: 80,
color: '#f7f3f0',
backgroundColor: '#6f208aa0',
},
styletext2:{
textAlign: 'center',
textWeight: 'bold',
marginTop: 20,
padding: 20,
color: '#f7f3f0',
backgroundColor: '#14b378a0',
},
docker: {
flexDirection: "column",
flex: 1,
padding: 20,
textAlign: 'center',
}
});
const photo = { uri: "https://images.pexels.com/photos/1257860/pexels-photo-1257860.jpeg?auto=compress&cs=tinysrgb&dpr=2&h=650&w=940" };
export default Rahul;
[ii] Packup.js
import styled from "styled-components";
const Packup = styled.div`
align-items: center;
flex-direction: column;
display: flex;
font-family: 'Trebuchet MS'
, 'Lucida Sans Unicode'
, 'Lucida Grande'
, 'Lucida Sans'
, Arial
, sans-serif;
justify-content: center;
`;
export default Packup;
[iii] Styling.js
import styled from "styled-components";
const Styling = styled.button`
background-color: ${({ Start, Begining }) =>
Start ? "#e82525" : Begining ? "#c4216b" : "#3b88cc"};
margin-top: ${({ Begining}) => (Begining ? "30px" : "5px")};
border: none;
height: 100px;
border-radius: 10px;
width: 20px;
`;
export default Styling;
[iv] index.js
import React from "react";
import { render } from "react-dom";
import Rahul from "./App.js";
import "./styles.css";
const rootElement = document.getElementById("root");
render(<Rahul />, rootElement);
[v] styles.css
.Rahul {
font-family: 'Times New Roman'
, Times
, serif;
text-align: center;
}
Output:
- On Code Execution-
- Clicking the “START” button-
- Clicking the “STOP” button-
- Clicking the “RESET” button-
Conclusion
Based on this article, we understood the concept of useEffect, and different examples explain the useEffect in different scenarios, which will help in applying this concept according to the requirements of applications. This article will contain the syntax, which will help understand the basic structure of useEffect.
Recommended Articles
This is a guide to React native useeffect. Here we discuss the introduction, syntax, and examples of React Native useEffect along with code implementation. You may also have a look at the following articles to learn more –
