Updated July 5, 2023
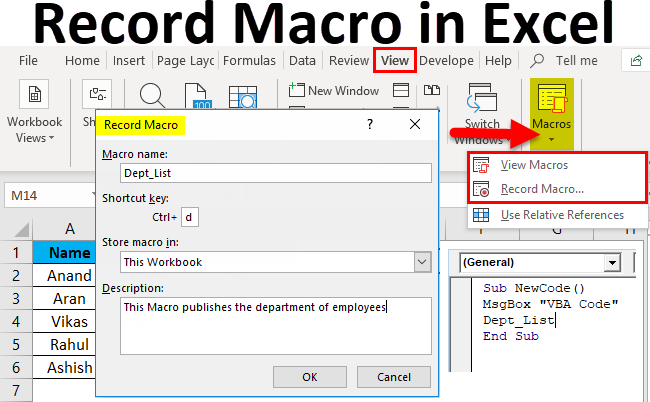
Record Macro in Excel (Table of Contents)
Record Macro in Excel
Macro, by definition, is a set of instructions used to perform a particular task. Macro is an automatic repetitive task sequence that replaces a repetitive task of keystrokes and mouse actions. What we repeatedly do in an Excel project, we can use a macro to do that for us.
So, for example, if we have a few formulas that will be repeated, whether there is any data change or not, we can use a macro to do that for us instead of doing the same task repeatedly and again.
In technical terms, macro enables users to trim downtime commonly used in repetitive tasks. Macros can contain functions, formulas, logic, etc.
Macro is created by recording a sequence of keyboard and mouse actions using the built-in macro recorder function in Excel. When a macro is registered, it can be used again by assigning a keyboard shortcut or from the View macro function.
There are two ways to use Excel Macros:
- Macro Recorder: We can record our steps or specific tasks by Excel record macro function, call it whenever required by any assigned hotkey, or call it from View Macros.
As in Example 1, we created a macro to fetch the department list of employees.
- VBA Editor: In the VBA editor, we write a set of codes in the VB language and perform specific tasks in the worksheet.
As in Example 2, we prompted the user about the new code and called in the other macro to fetch the department list.
How to Record Macro in Excel?
Record Macro in Excel is very simple and easy to create. Let’s understand the working of Record Macro in Excel with some examples.
Record Macro in Excel – Example #1
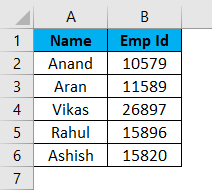
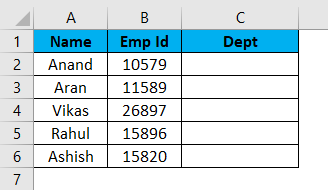
In a workbook, we have two data sets in two different worksheets. For example, from sheet 2, we want some data in sheet 1. We usually use V-lookups to find the data. But we can use the macro recorder to do the same for us.
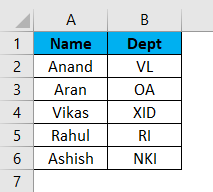
This is data in sheet 1 and data in sheet 2 shown below,
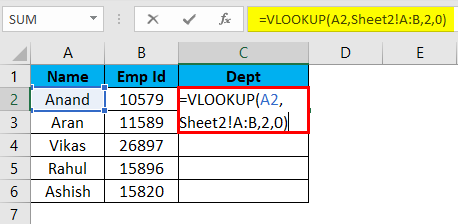
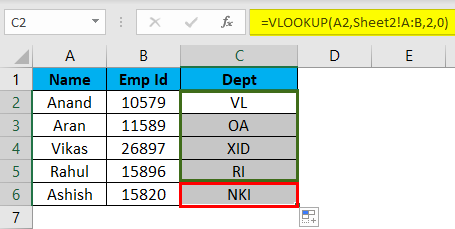
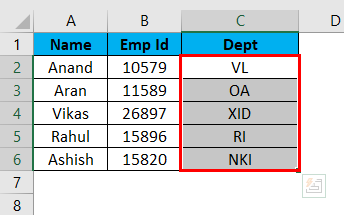
Suppose we want the Department Name in Sheet 1 for the respective employees. Now we can use the simple V-lookup function for this.
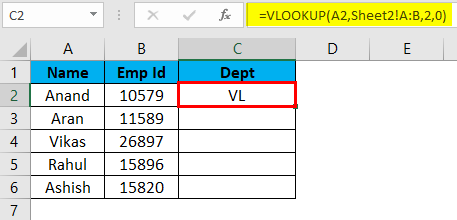
The Output is:
But if the sheet is in the same format and the data gets changed, then we have a repeated task repeatedly. Macro in Excel comes in handy here. We can record the same steps using the Excel macro tool and make Excel do the same tasks for us. So let us learn to use the Excel Macro Recorder tool.
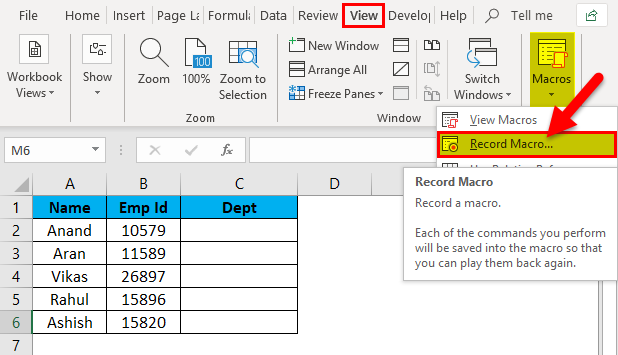
- Firstly, Go to Views Tab; in the rightmost corner, there is an option for macros.
- Click on Record Macro.
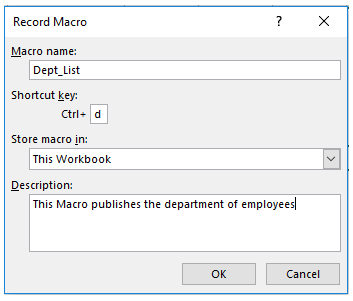
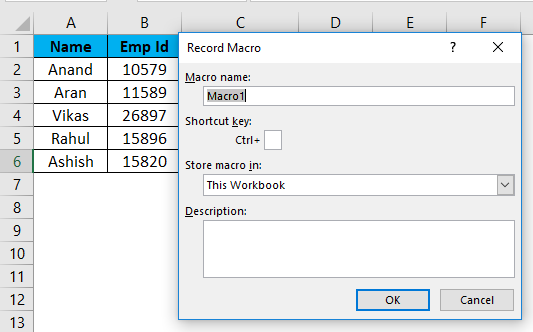
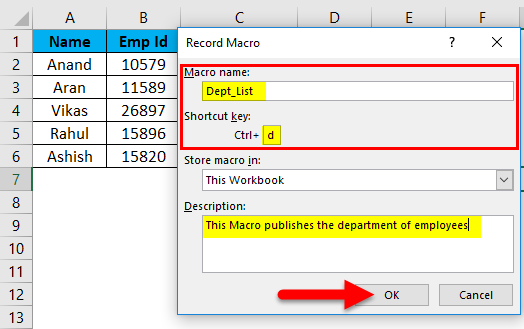
- A dialog box pops up.
- In the dialog, Box has a box to name the macro and assign a shortcut key. So we can write a short description of the macro too.
(Tip: Do not use space in Excel macro Name)
- Click ok, and we can see that Excel has started recording our sequence.
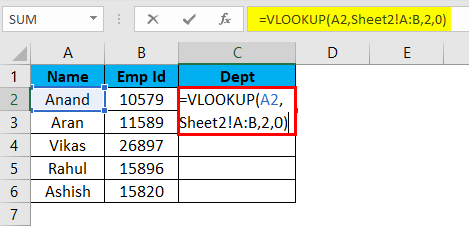
- Now perform the tasks required to fetch the department name from sheet 2, i.e., V-lookup from sheet 1.
VLOOKUP Formula is applied in Sheet 1.
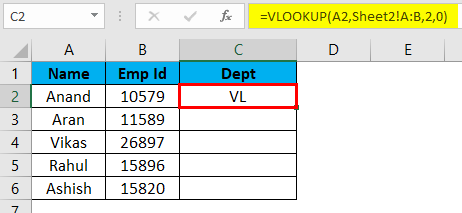
- It gives the desired output in Sheet 1 as in Sheet 2.
- Select the remaining cells and Press Ctrl +D to get the rest results.
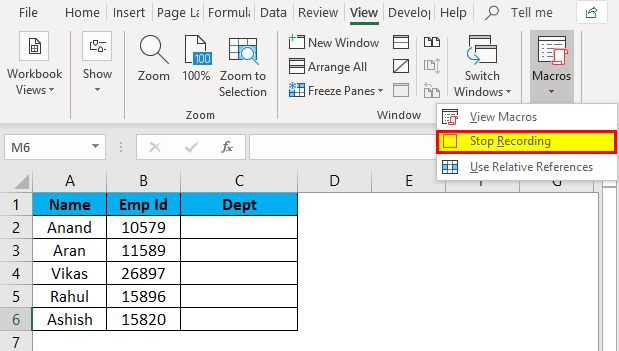
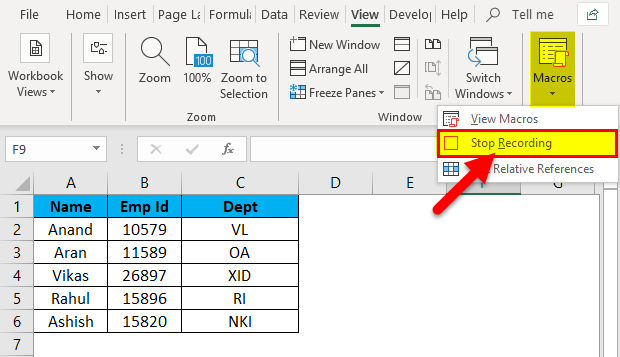
- Now our task is complete, we click on stop Recording.
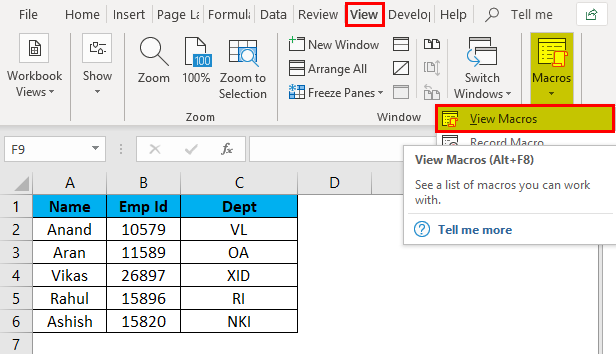
- Under the View tab in the macros section, we can check that our macro has been recorded from the view macros option.
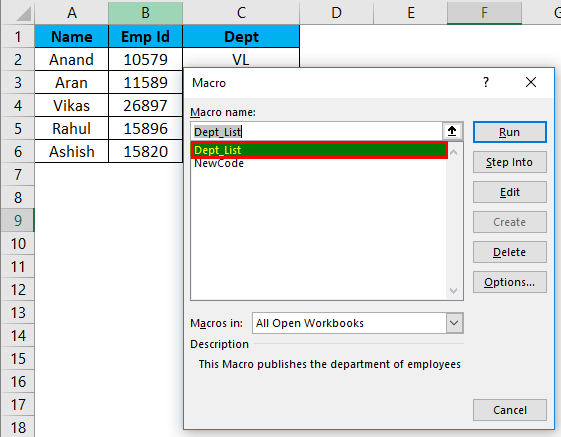
- If we click on the view macros option, it shows the macro name which we added. Here it is, Dept_List.
- Delete the data under Dept Column to check whether our macro is working or not.
- Press CTRL + D and see the result.
We have successfully recorded and tested our first macro.
Record Macro in Excel – Example #2
Prompt a message to run the above V-lookUp Macro.
Example 1 was an Excel tool used to record a macro. Now we will use VBA to create a macro. For this, we need to activate the Developer tab.
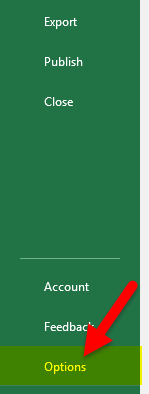
Go to Files and then to Options.
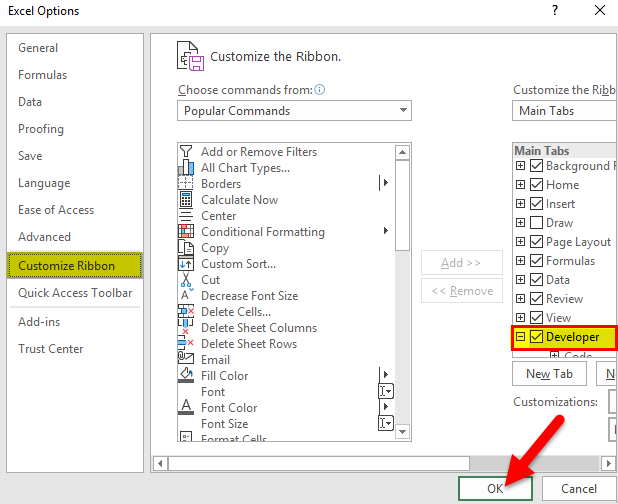
Mark the checkbox named “Developer” as checked in the Customize Ribbon toolbar on the right-hand side, and then click OK.
Before getting started with VBA, we need to get some basics.
A VBA Code contains variables, declarations, logic, and functions, which sums up as a whole code.
First, we need to follow some steps to create a macro code.
- Select the workbook in which we want to use the macro. In the current example, our target workbook is sheet 1.
- Tab clicks on Visual Basic in the developer, Which opens a VB Editor for us.
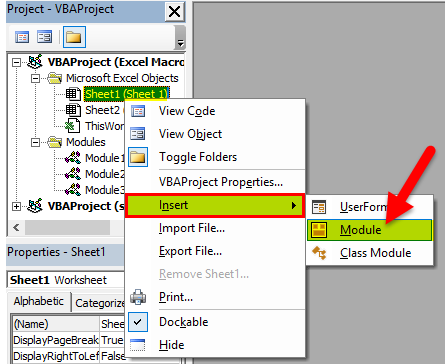
- Click on the Object where we want to write our code: sheet 1 and insert them to Insert Module.
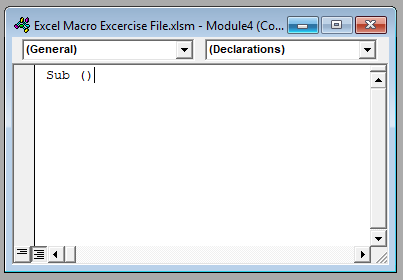
- Now we can start writing code in the Module. But, first, we open our function by SUB() function.
Tip: We use the sub () procedure as its primary purpose to carry out a particular task or action.
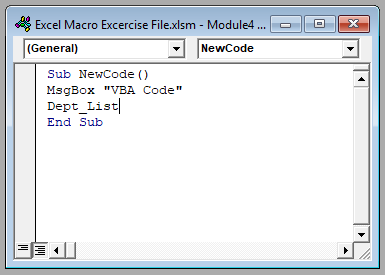
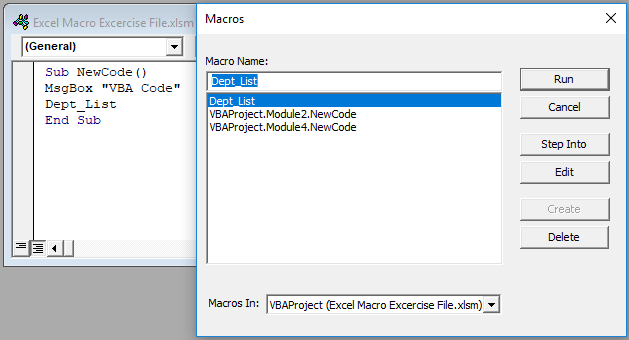
- Now write the following code in the sheet.
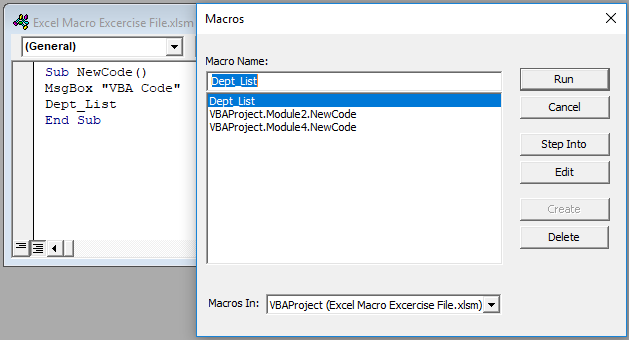
The message box function prompts the user with a VBA Code and then calls the recorded macro named “Dept_List.”
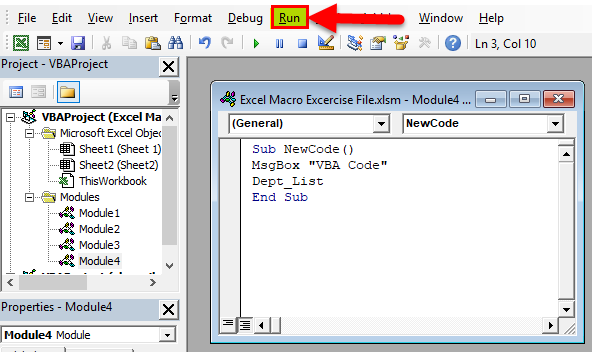
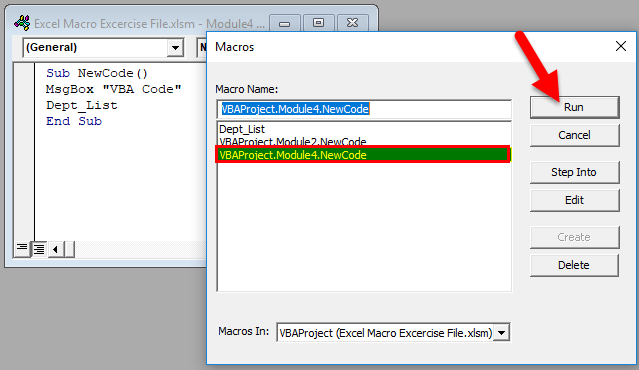
- When we click on Run in the VBA Editor, it gives us the following prompt.
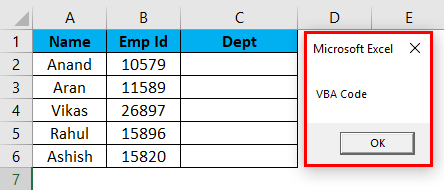
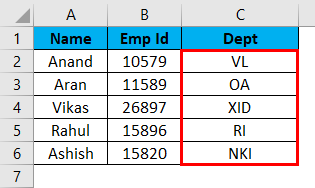
- We Select VBA Project Module4. New Code as the Macro to Run and Excel first gives us a prompt and then the Department List.
Then the Department List will be updated,
Tip: Excel with Macro should be saved as *.xlsm as an Excel Macro-Enabled workbook to save the macros.
Explanation of Excel Macro:
Recording a set of tasks as macros is a helpful way to minimize repetitive tasks that must be done daily. This enables easy access and repetition of the tasks as needed. Users can access it by either selecting it from a menu list or defining their own hotkeys.
The definition of a macro is a set of rules or patterns that specifies how to map a certain input sequence to a certain output sequence based on a defined procedure.
Things to Remember About Record a Macro in Excel
- Macro Name should not contain space.
- Save the macro as an “Excel Macro-Enabled Workbook” with the file extension *.xlsm.
- Before writing any VBA code, we need to activate the developer Tab by customizing the ribbon button in the options.
- Excel Macro Recorder has limitations, but we can virtually automate anything from Excel VBA.
Recommended Articles
This has been a guide to a Record Macro in Excel. Here we discuss how to create Record Macro in Excel examples and downloadable Excel templates. You may also look at these useful functions in Excel –
