Updated May 29, 2023
Introduction to Reduce Excel File Size
In this article, we will earn about Reducing Excel File Size. Excel workbooks are unreasonably sometimes large and thus become quite slow due to their heavy size. As a result, they become difficult to share via mail. Also, large files reduce the read and write time of the disk and RAM.
The large size of Excel workbooks is acceptable for Excel. However, they cause other troubles, like trouble sharing via mail, etc., for which it becomes quite important to reduce their size.
Some of the common reasons that can increase the size of an Excel workbook are:
- Large data like worksheets with rows/columns of more than 100,000.
- Heavy images in the file.
- Pivot Tables with large data.
- Invisible contents.
- Formatting: In case worksheets are formatted although cell ranges are not used, the file size may also increase
- Hidden worksheets.
- Unnecessary worksheets, i.e., worksheets that are of no use.
- Data formatting on empty cells.
- Hidden rows/columns.
The way to reduce the size of an Excel workbook is different for the above reasons.
How to Reduce Excel File Size?
In the below examples, we will show how to reduce the size of an Excel workbook via some of the most common methods (when the size is large due to different reasons like the above). Some common ways to reduce the size of an Excel workbook.
Example #1 – Removing Unnecessary Worksheets
Let us say we have an Excel file with 8 worksheets, and each worksheet has 26 columns with 15,000 data points in each column. If we wish to reduce the file size, we follow the steps below.
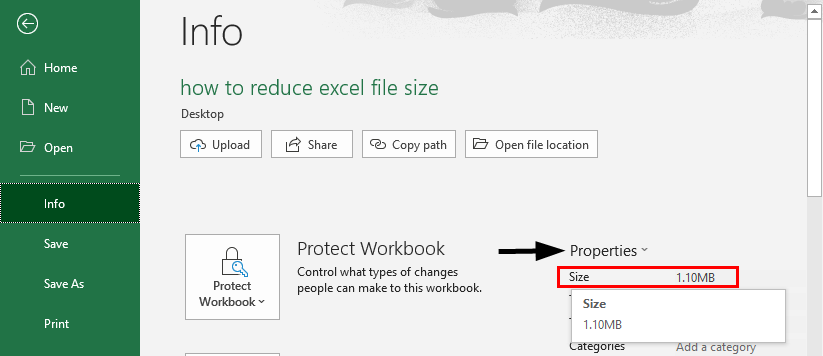
- Click File’ to see the file size in the ‘Properties’ section.
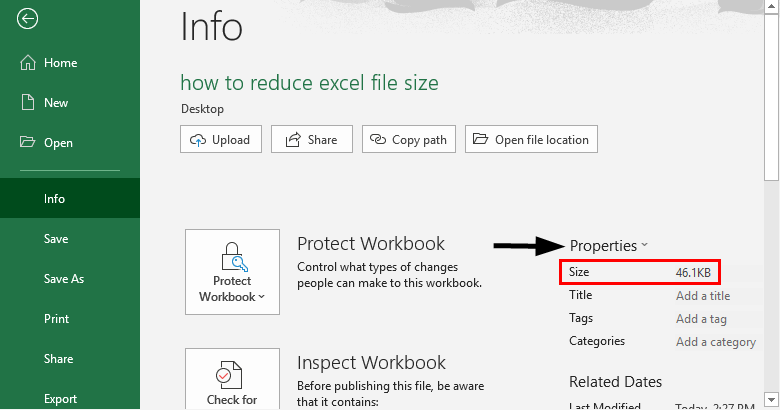
So we can see in the above screenshot that the file size is 1.10MB. Now if we delete some of the worksheets, let’s say 4 (which are unnecessary), then the file size gets reduced to 46.1KB.
So we can see that the Excel file size is now reduced to 46.1KB.
Example #2 – Compressing the Size of Images
Excel workbooks are sometimes large in size due to some pictures within them. Let us say we have an Excel file with an image in a worksheet. NClick the image in the worksheet and then activate the ‘Format’ ribbon. Ow if we wish to reduce the file size by compressing the image size, we follow the below steps:
- C
- Now click on ‘Compress Pictures:
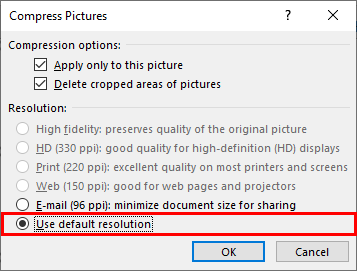
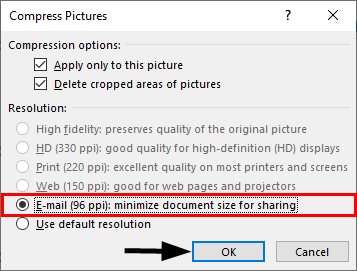
- On doing this, a new pop-up window will appear as below:
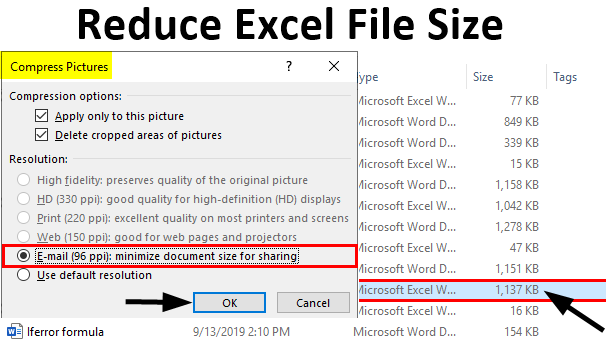
- Now click on ‘Email (96 ppi)’ and select the first two options in the ‘Compression options’ section in case there is more than one image/picture (and we wish to compress each) and also when we wish to delete the cropped areas of image/picture as well. Then click on ‘OK’:
- On doing this, the Excel file size will be reduced.
Example #3 – Zip the Excel File
Another way to reduce the size of an Excel file is to zip the file. This would reduce the size to 10-15% approximately. The following steps can use to zip the file:
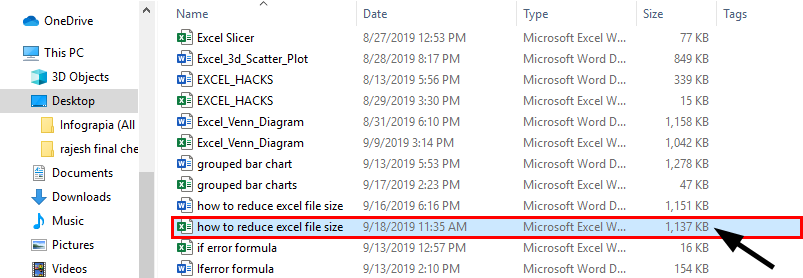
- Let’s say we have an Excel file whose size we see is 1137 KB.
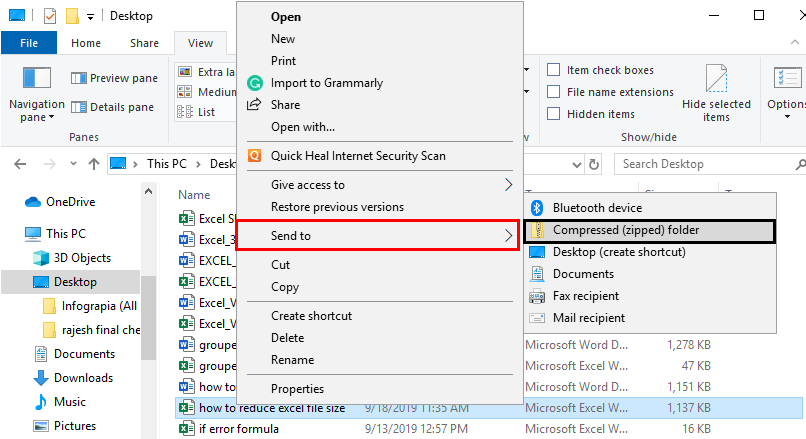
- After saving the file, right-click on the folder, move or hover the cursor to the ‘Send To’ option, and then click on ‘Compressed (zipped) folder’.
- This would now create a zipped file for the same, and thus we will observe a reduction in file size (138 KB):
Example #4 – Removing Unused or Unnecessary Data Formatting
Another reason for the increase in Excel file size is the data formatting applied to it, like cell color, font style, background color, borders, etc. So we can look for formatting that we can avoid and then select that data and remove it from the workbook. Let’s say we wish to remove the formatting applied to a worksheet, say to Sheet 6 named ‘Example4’ in a workbook.
To do this, we will follow the below steps:
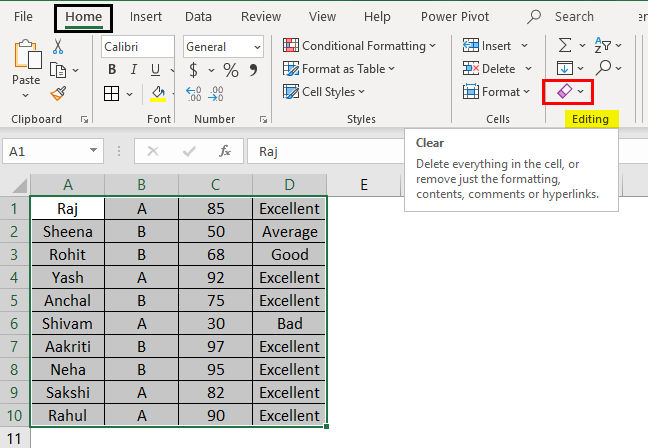
- Select the data from which we wish to remove the data formatting:
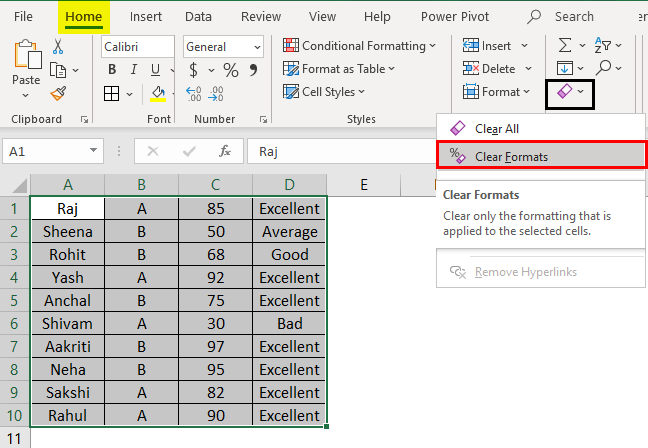
- Click on the ‘Home’ tab and then expand the ‘Clear’ dropdown in the ‘Editing’ section as below.
- Now click on ‘Clear Formats’ to expand the dropdown.
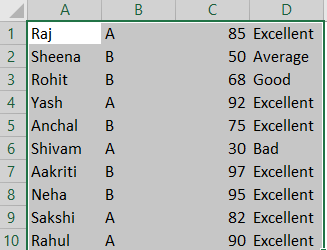
- This would now reduce the file size of the Excel workbook after saving it.
Example #5 – Deleting / Clearing Unused Cell Ranges
Another way to help reduce the size of an Excel workbook is to delete the unused portions below and on the right of the data.
- To delete/clear the unused rows below the last used row and unused columns to the right of the last used column, select the unused rows and columns. (To select the unused rows and columns, we can press the Ctrl+Shift+Down arrow key and the Ctrl+Shift+Right arrow key, respectively).
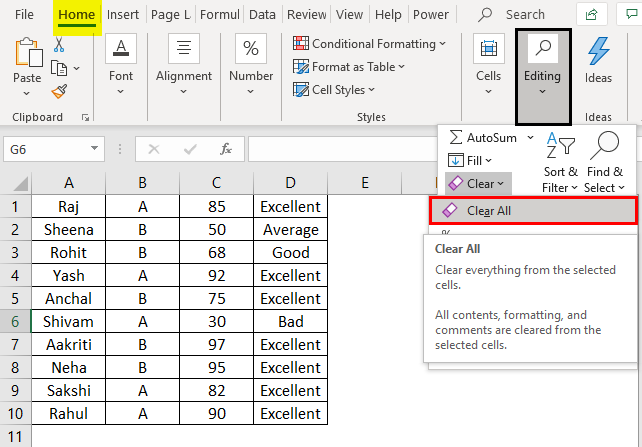
- Now expand the ‘Clear’ dropdown in the ‘Home’ section and select ‘Clear All’.
Similarly, select the unused columns and repeat the same.
Things to Remember About Reduce Excel File Size
Some things that can help in reducing the size and hence the performance of Excel workbooks are:
- There might be cases when an Excel workbook has some hidden worksheets. The hidden worksheets that are useless should be removed as they are also a reason for the increased size of Excel workbooks.
- Avoid using volatile functions like OFFSET(), RAND(), TODAY(), etc., as they make the workbook slow.
- Referencing an entire row or column in a formula should be avoided.
- It is advisable to prefer pivot tables over formulas when creating a summary for a large numerical dataset, as pivot tables are fast and intuitive.
- To achieve faster workbook performance, it is recommended first to convert the tabular data to an Excel table and then use it in formulas.
- If the workbook contains many formulas, it is preferable to choose manual calculation over automatic calculation.
- Unused content should be removed
- Excel files should be saved preferably in .xslx, .xslm, and .xlsb formats
(.xlsb is a binary file format that can accommodate macros as well and would save the Excel file in binary mode)
Recommended Articles
This is a guide to Reducing Excel File Size. Here we discuss How to Reduce Excel File Size, practical examples, and downloadable Excel templates. You can also go through our other suggested articles –
