Updated May 18, 2023
Definition of Scala IDE
Scala is an object-oriented programming language that has so many similarities to Java. If we talk about IDE, it is the tool by which we can write our code, and they provide much support for the language. When working with any programming language, we should choose our editor wisely. Using IDE, we can also check in and check out our code remotely. They come with various features. For Scala also, we have many different IDE available where we can edit our code and make it work the way we want.
List of Scala IDE with Explanation
We have a list of different IDEs available to edit our code. If we talk about Java, our most popular editor is Eclipse and IntelliJ. Below we can see the list of editors that we can use for the Scala language, which are as follows;
1. IntelliJ IDEA
Intellij idea is one of the most popular IDE we have. This editor provides support for many languages, which cover most of them like; java, typescript, groovy, Scala, SQL, Kotline, javascript, and many more. Inside this, we have so many build tools available that can be used to create our project based on the requirement. We have ANT, maven, and gradual support to make our applications. Using this, we can create a new project and import the existing project into the workspace, making the development easy. To start with the Intellij idea and how to use Scala with it, we will see some steps to follow, which are mentioned below;
- First, we need to download the IntelliJ idea into our system. We can download IntelliJ Community Edition for better support for the language.
- In the second step, we must check whether Java is installed on our machine. If not, we must install it because Scala uses Java libraries. To check whether Java is installed, we have one command for this; we should check for its version, javac -version. It would be best if you had Java 8 installed on your machine. If not, then we should install Java Jdk 8 or higher.
- After setting up Java, we can open the IntelliJ idea and set the version of Java we want to use for the specific project.
- Now open intellij and download the plugin for Scala from the marketplace. Go to file >> settings >> then search for the Scala plugin and type Scala into it. You will see various plugins for Scala. Download the most appropriate one.
- Now we will create a new project for Scala; click on File > New > Project. This will open a panel where we have to select the scale on the left-hand side.
- Give the name of the project. Example: DemoScalaProject
- We are creating the Scala project for the first time, so we must also set up the Scala SDK. On the right-hand side, click on SDK and click Create.
- After setting all things, click on finish.
- Now start writing code for Scala. Go to the src folder and start writing your code. We can have one sample program to show it working. See below;
object Main extends App{
// Your code here!
println("Welcome to Scala.!!")
println("Setup done.")
}
2. Eclipse for Scala
Eclipse also supports various programming languages, including Java, groovy, Scala, typescript, and many more. It also has strong support for version control, like; git, perforce, svn, etc. We can easily create our application using Eclipse because the marketplace has many plugins and support. It provides various build tools such as a maven, ant, grades, etc. We can also create web-based applications very easily by using it. To start with scale, we have to follow some steps below;
- To start setting up a scale with Eclipse,, we have to download the Eclipse installer. Using an Eclipse installer, we can easily download the latest version of Eclipse.
- After setting up, Eclipse, we must check for our Java version. If Java is unavailable on your machine, download the latest one. JDK 8 or higher.
- Also, we have to download the Scala plugin from the Eclipse marketplace. Inside Eclipse,, search for the market and type Scala there. You will see various available plugins for Scala. Download one from the list.
- After downloading the plugin, we will create one project. So click on File > New > Scala Project. You will see this option only when successfully installing a Scala plugin into your Eclipse.
- Before creating the project, set up the SDK for Scala inside the settings menu.
- You will see a new window after clicking on the Scala project. Provide a suitable name for your project and click finish.
- After finishing, it will take around 3-4 seconds to load the project into the project explorer. Then you will see a project got created in your workspace by the name you have given.
- Go to the src folder; here, you can create your packages and classes to start with your code.
Code:
object Main extends App{
// Your code here!
println("Welcome to scala.!!")
println("Setup done using eclipse.")
}
From Eclipse, you can check out your code as well. We just have to select the correct version control for this.
3. NetBeans for Scala
This is also one of the popular editors who provide support for various languages. But I would suggest you go for an Eclipse or intellij idea because they are more user-friendly, with lots of support available with less configuration. Let’s get started with net beans. Follow the below steps to work setting up the environment;
- First, we need to download the Netbeans for our machine. You can go for this >> NetBeans 6.7.1 – NetBeans 6.7.1 latest nightly.
- After setting up this, we have to download the scala and setting up into the home variable.
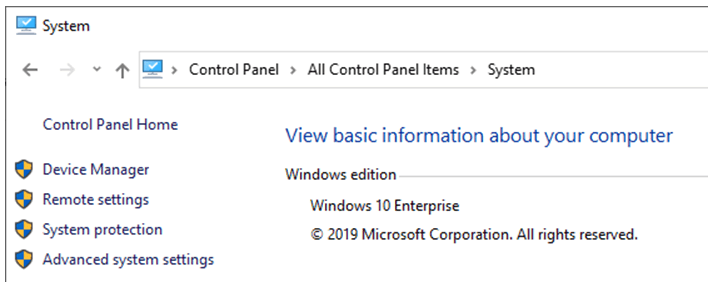
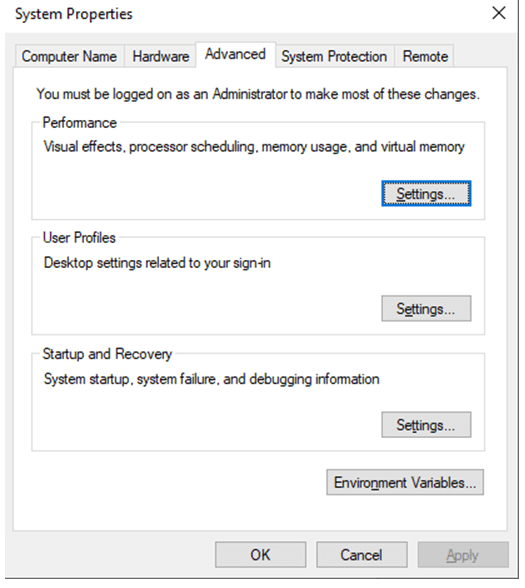
- After downloading of the Scala file, unzip it and open the environment variables >> go to your properties >> click on advanced system properties.
- Add the path of scale here with the name Scala_home
- We have to add this path for the system variable.
- After setting up the Scala home variable, we have to download the Scala plugin for Netbeans.
- Open net beans, go to the menu > tools > Plugin, and look for an available plugin.
- At the top, we have an option for the search for plugin >> search scala there, and in some time, you will see a list of the available plugin for scala.
- Select all the files and click Install.
- We can create a new project by clicking on file > new project >scala project
- A new window will appear to type the name of the project and click finish.
Recommended Articles
We hope that this EDUCBA information on “Scala IDE” was beneficial to you. You can view EDUCBA’s recommended and related articles on Scala IDE.


