Introduction to Selenium UI Testing
In Selenium UI testing is to perform the automated web browser interaction with the help of writing test scripts to perform various user activities on web applications and user interface also it’s a known for the ideal for UI testing performance activities as well as cross-browser script testing because it can run with the same tests on different browsers and versions based on the requirement. The UI testing is also known as GUI testing; it can be tested with any type of software features that can be interact with users to ensure the criteria.
What is Selenium UI Testing?
- Generally, the selenium is one of the most popular open-source Web-based UI; this user interface will automate the test; hence it will generate the trigger process with the help of internal tools like Thought Works, etc.
- It is a browser-based automation tool that helps work with various browsers, web, and other platforms, including computer languages.
- It can run of different modern web browsers which supported by selenium that include other browsers like Internet Explorer, Chrome and Safari, etc. It also supports automated functional testing that can be integrated with tools like Maven, Jenkins & Dockers, and other Devops tools.
How to Perform Selenium UI Testing?
Given below are the steps that are frequently used in the most straightforward approach.
- Mainly, while interacting with the web app as a user, utilize Selenium IDE’s automated recorder to build the script.
- Adjust the locators as necessary.
- Ensure that everything is in harmony.
- Fill in the blanks with verifications.
- Create a WebDriver export.
The above steps are the basic steps to perform UI testing using selenium automation. Based on the requirement, it will vary for while passing the inputs in the UI elements.
How to Set Up Selenium UI Testing?
Let’s look at how to set up Selenium before diving into how to develop Selenium UI tests. First and foremost, the conditions listed below must be met with the specific requirement. It has some prerequisites conditions; the first step we need to install the Eclipse or STS ide, and then we can install the selenium server utility using the npm commands if the project requires node js. Before that, we must be check and confirm whether the node js is installed with the commands. Then finally, we must be set the selenium web drivers and client language bindings.
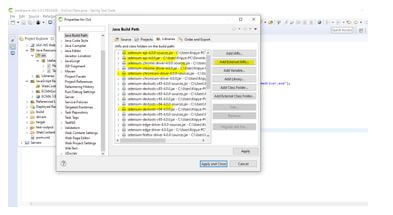
In the above screenshot, we should be added the external selenium jars in the project java build path.
Types of Locators
- Generally, selenium supports 8 different types of locators, namely Id, name, className, tagName, linkText, partialLinkText, CSS selector, and xpath are the eight types of locators supported by Selenium. One of the most reliable and fast techniques of element recognition is to use id. We can also use other locators, but it’s more easily identified and retrieved the web datas using ID. Sometimes name, className are also used frequently for accessing the datas.
- The xpath is the most common technique and easily fetches and highlights the specific html web elements in the web page.
Best Practices for Selenium UI Testing
With the following adjustments, Selenium scripts can be made faster:
- First one we can make use of quick selections.
- The second one is to reduce the number of locators you use.
- Third, we can construct atomic tests.
- Fourth we must do not test the same feature twice.
- Fifth, we can create high-quality tests.
- The sixth thing is only use explicit waits.
- Then we can make use of the Google Chrome driver.
- Also, for headless browsers, use drivers.
Each step of practice will consider for selenium automation to be more helpful and needs to reduce time consumption.
Creating Selenium UI Testing
Generally, the selenium will help to create automated testing in the web-based application. Therefore, it can reduce the number of testing times and build the application more sophisticated.
We can see the following examples to perform the UI operations.
Example #1
Code:
import org.openqa.selenium.By;
import org.openqa.selenium.WebDriver;
import org.openqa.selenium.chrome.ChromeDriver;
import org.testng.annotations.Test;
public class Tests {
@Test
public void test() throws InterruptedException {
System.setProperty("webdriver.chrome.driver", "C:\\Users\\Kripya-PC\\Downloads\\chromedriver_win32 (1)\\chromedriver.exe");
WebDriver dr = new ChromeDriver();
dr.manage().window().maximize();
dr.get("https://accounts.google.com/signin/v2/identifier?continue=https%3A%2F%2Fmail.google.com%2Fmail%2F&service=mail&sacu=1&rip=1&flowName=GlifWebSignIn&flowEntry=ServiceLogin");
dr.findElement(By.id("identifierId")).sendKeys("ramansiva57@gmail.com");
Thread.sleep(1000);
dr.findElement(By.className("VfPpkd-vQzf8d")).click();
Thread.sleep(1000);
String a = dr.getTitle();
String b = "welcome";
dr.close();
if(a.equalsIgnoreCase(b))
{
System.out.println("Your inputs are validated successfully");
}
else
{
System.out.println("Your inputs are not validated please try again");
}
}
}
Output:
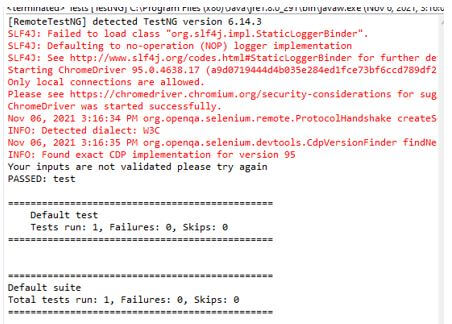
In the above example, we want to test the input url called gmail.com. And we want to pass and validate the test use case with different scenarios. We already installed the TestNG tool in the eclipse STE so that we can run the test case automatically with the help of code like validation conditions from the Selenium java code. Before that, we should be installed Junit in the IDE and try to trigger the automation from the mentioned scripts.
Example #2
Code:
import org.openqa.selenium.By;
import org.openqa.selenium.WebDriver;
import org.openqa.selenium.chrome.ChromeDriver;
import org.testng.annotations.Test;
public class Tests {
@Test
public void test() throws InterruptedException {
System.setProperty("webdriver.chrome.driver", "C:\\Users\\Kripya-PC\\Downloads\\chromedriver_win32 (1)\\chromedriver.exe");
WebDriver dr = new ChromeDriver();
dr.manage().window().maximize()
dr.get("https://www.facebook.com/");
dr.findElement(By.id("email")).sendKeys("ramansiva57@gmail.com");
dr.findElement(By.xpath("//button[@name='login']")).click();
String a = dr.getTitle();
String b = "welcome";
if(a.equalsIgnoreCase(b))
{
System.out.println("your email is validated please enter the password");
}
else
{
System.out.println("Your inputs are not validated please try again");
}
}
}
Output:
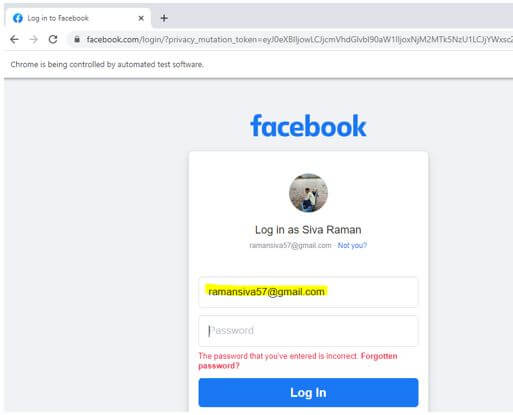
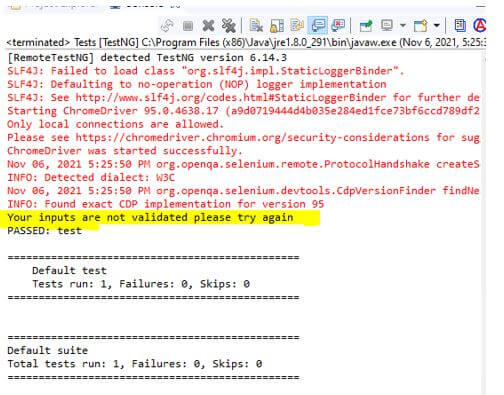
In the second example, we tested the Facebook login with the help of the TestNG feature. We also used the same loop condition, which is already in the first example; here, the test results are passed initially, and then it failed because it needs a password to submit the user request to the corresponding web server.
Conclusion
In the selenium framework, we used a lot of features to implement and perform the automation operation in the application. It supports all the user task operations, and it will validate the conditions corresponding to the project requirement with specified use cases. It needs to be supported to all the web and mobile browsers.
Recommended Articles
We hope that this EDUCBA information on “Selenium UI Testing” was beneficial to you. You can view EDUCBA’s recommended articles for more information.


