Updated August 28, 2023
Introduction to Shape Layers in After Effects
Adobe After Effect is a software of versatility used for Video Editing, Image Editing, Masking, Animating any object, etc. Adobe After Effect has many different types of command and tools for making it’s working easy. The shape layer is one of them. Generally, in Adobe After Effects, we work in layers like other adobe software, so when we draw any basic shape, it becomes a layer. We use these shapes layer in different manners. Here you will see some of them for making your project effective and attractive.
Adding Shape Layers in Adobe After Effects
The shape layer is a very basic and important term of adobe software, and it makes our working easy. Let’s start our tutorial for the shape layer in an interesting way.
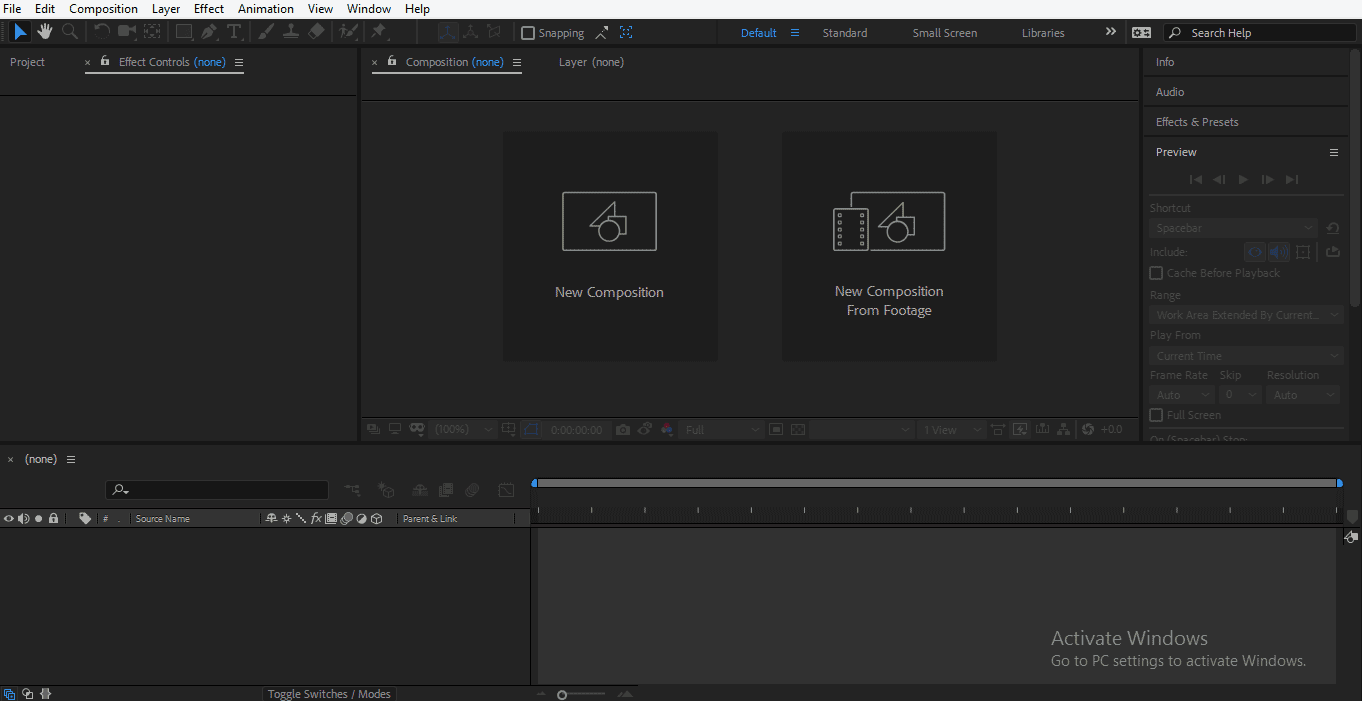
Step 1: This is the user interface of Adobe After effect software, and works in this software are quite simple as other adobe software.
We have different types of sections here in this working space. We have some tools in the tool panel at the top of the work area, Project Window for opening composition at the left corner of the work area, Layer section with Timeline section at the bottom of the work area and Composition window at the middle of the work area.
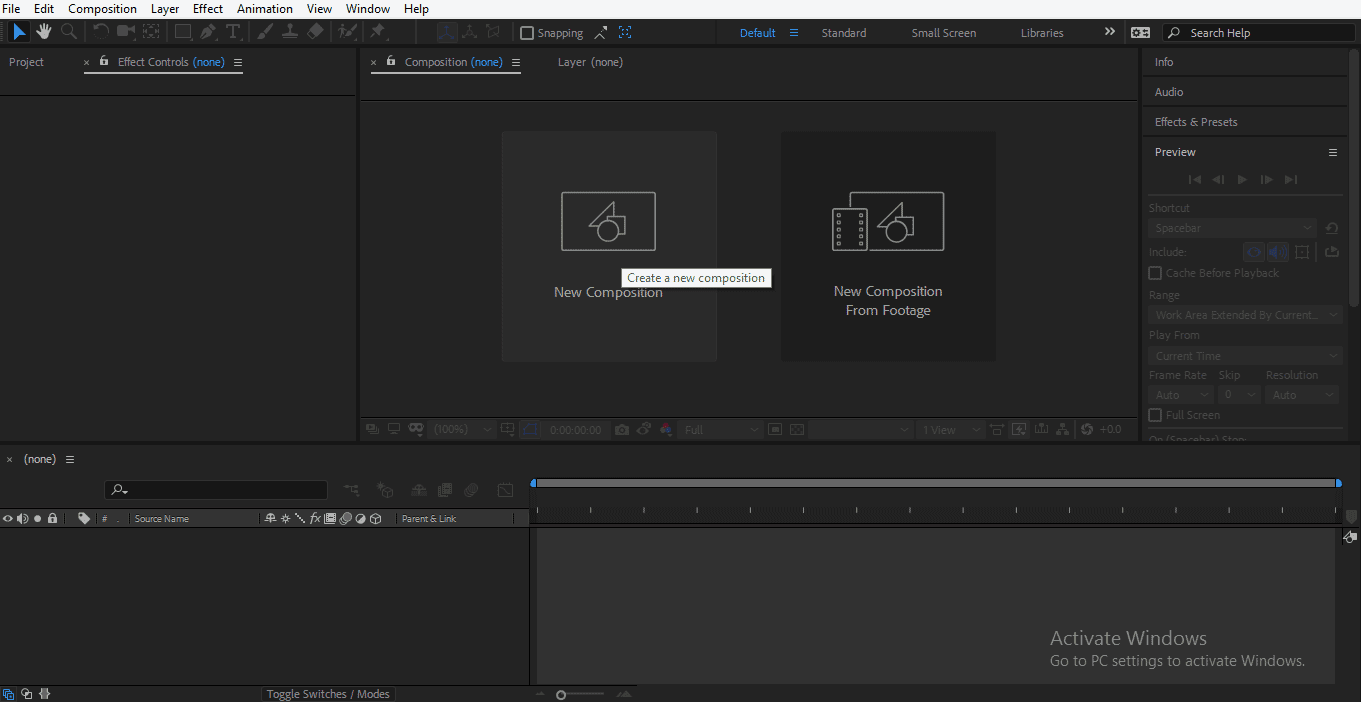
Step 2: First of all, we will make a New Composition. For creating New Composition, click on the New Composition tab, which is present in the Composition window area.
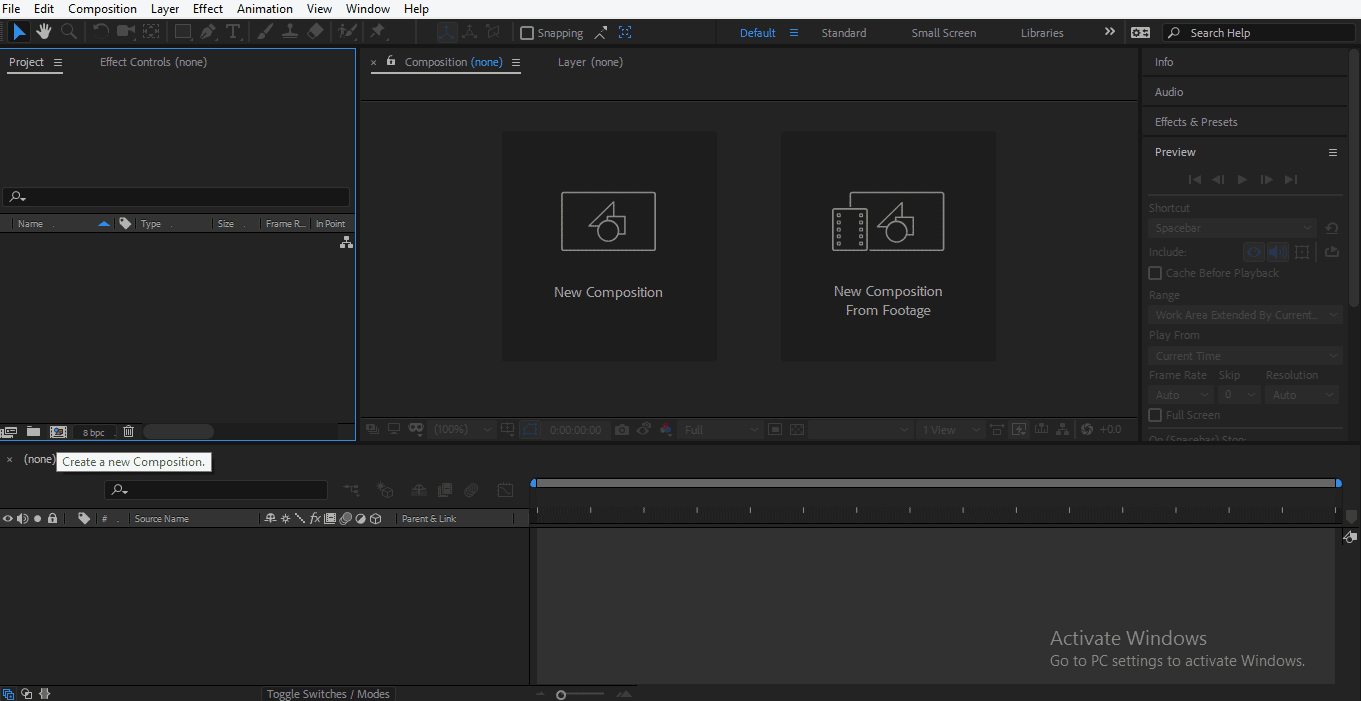
Or click on the tab of Create a new Composition which is present on the project window of this software.
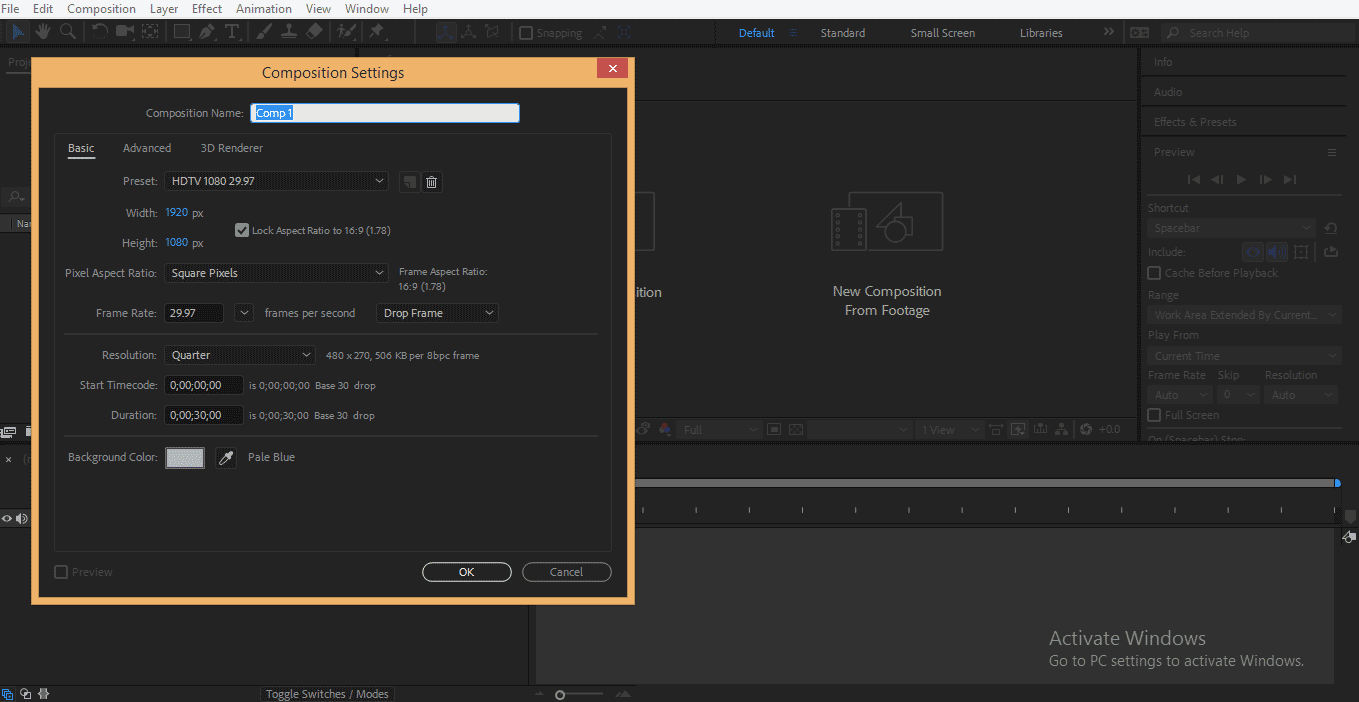
Step 3: The composition Setting dialog box will open; choose your desired setting for your composition. I will choose the default setting for my composition; click on OK of this dialog box to apply the setting for your composition.
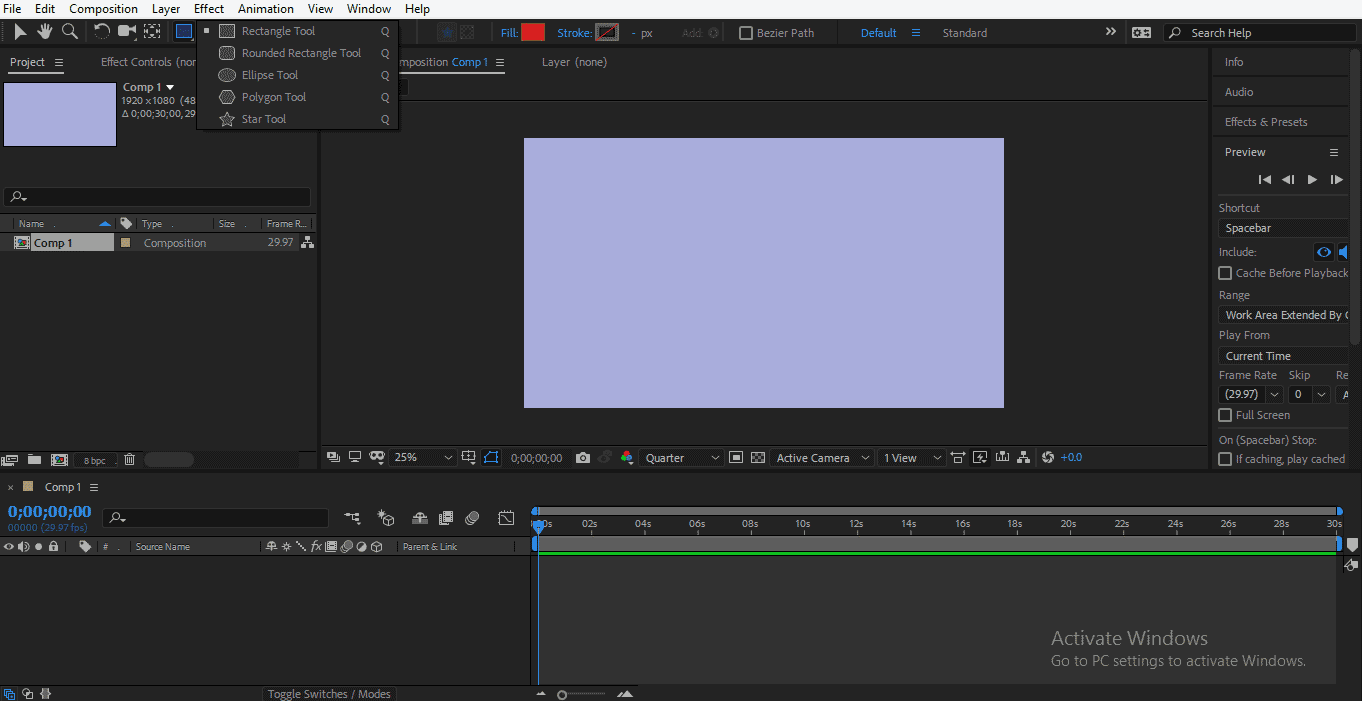
Step 4: These are the basic shape of adobe after effect, and when we work with them without any background image, they form a shape layer, but if we work with them on any background image, the shape will work as a mask for that image.
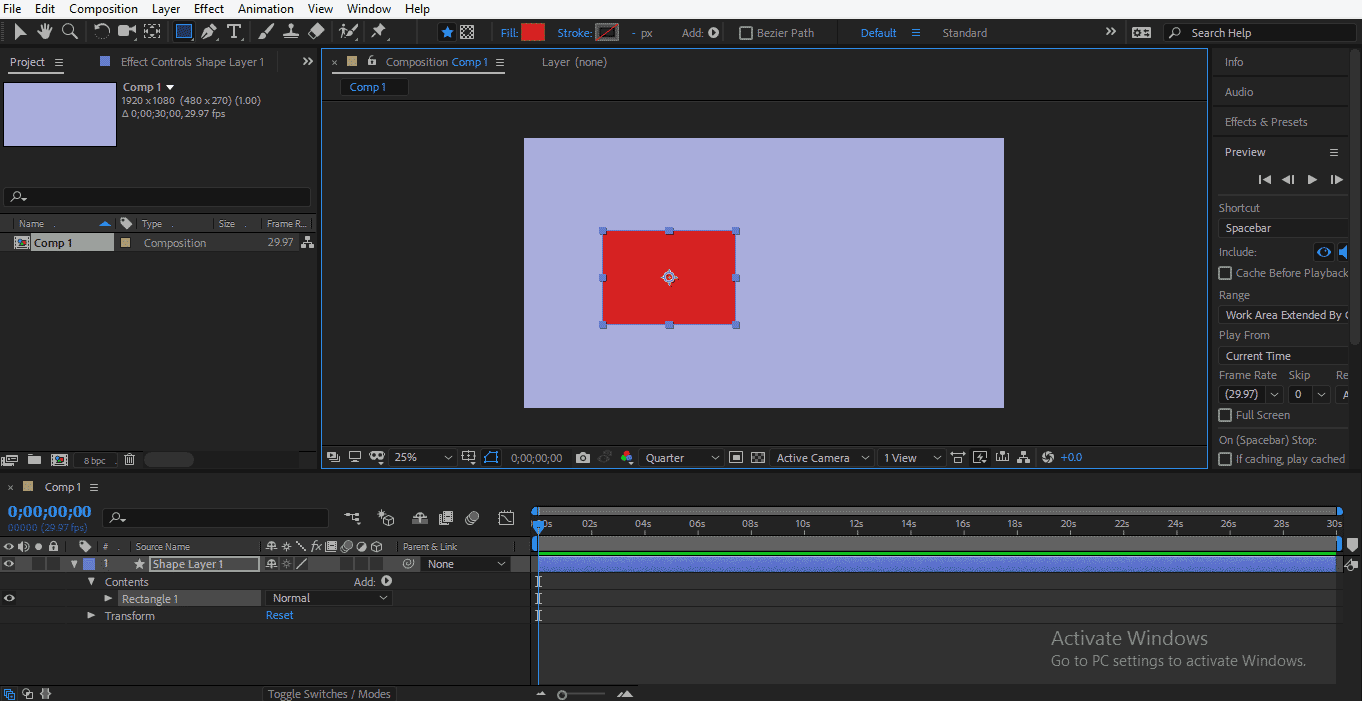
Step 5: Now, I will teach you about the shape layer with the rectangle shape tool; you can make any shape for your learning from here; click on the rectangle tool to activate the rectangle command from these shape tools and draw a rectangle to draw a rectangle. Place your cursor on the work area and drag it at your desired size.
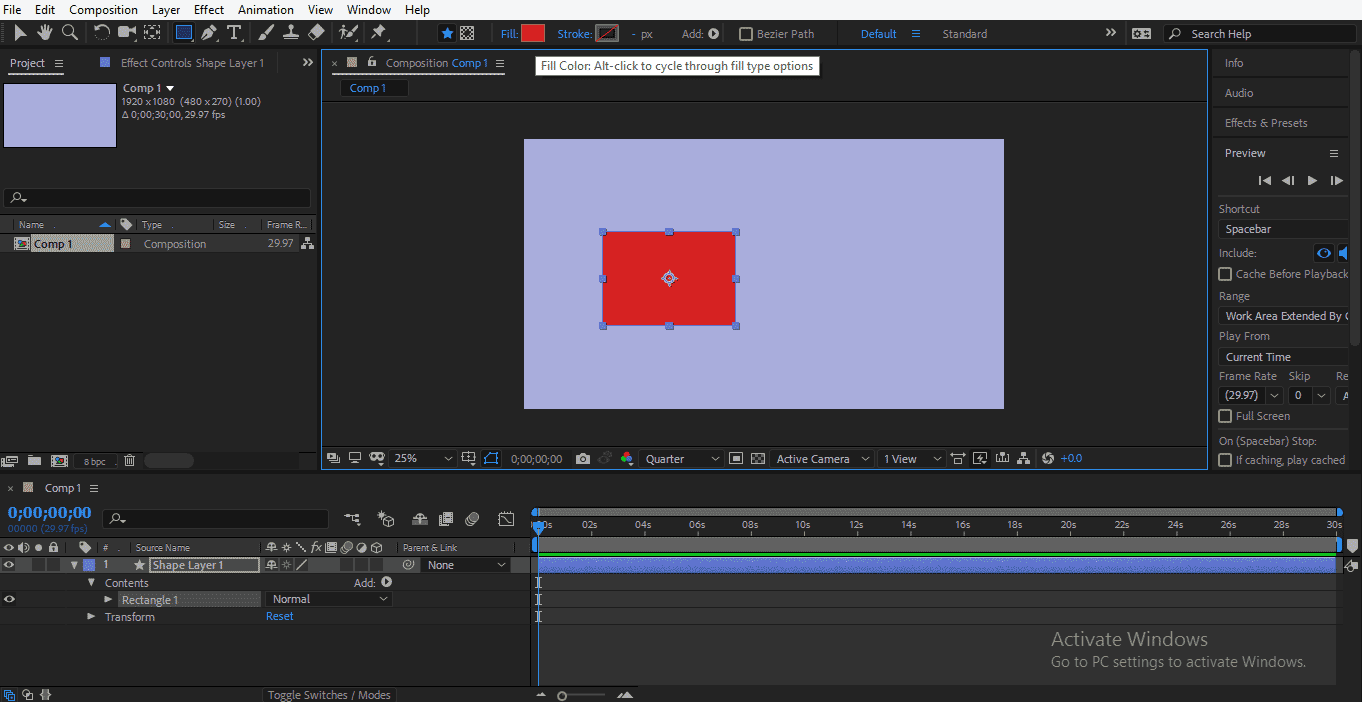
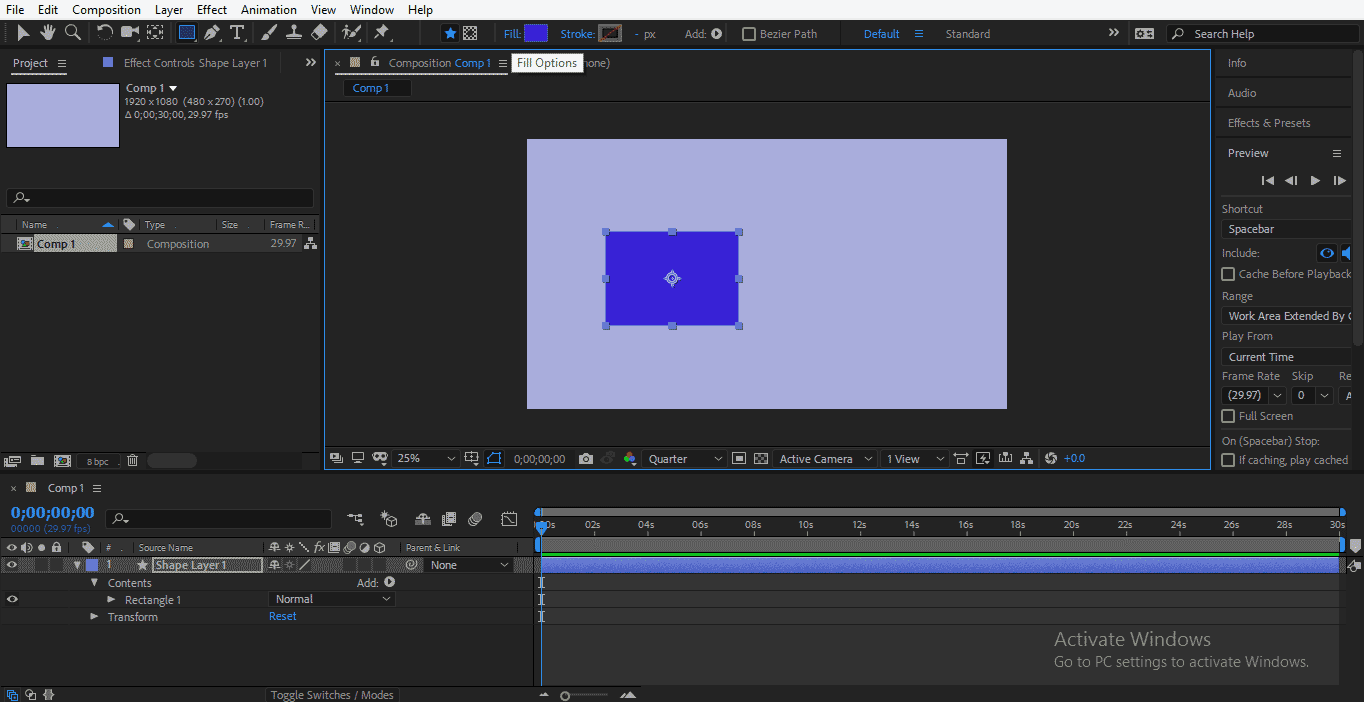
You can change the color of this shape layer from the Fill option, which is present on the tool panel at the top of the work area.
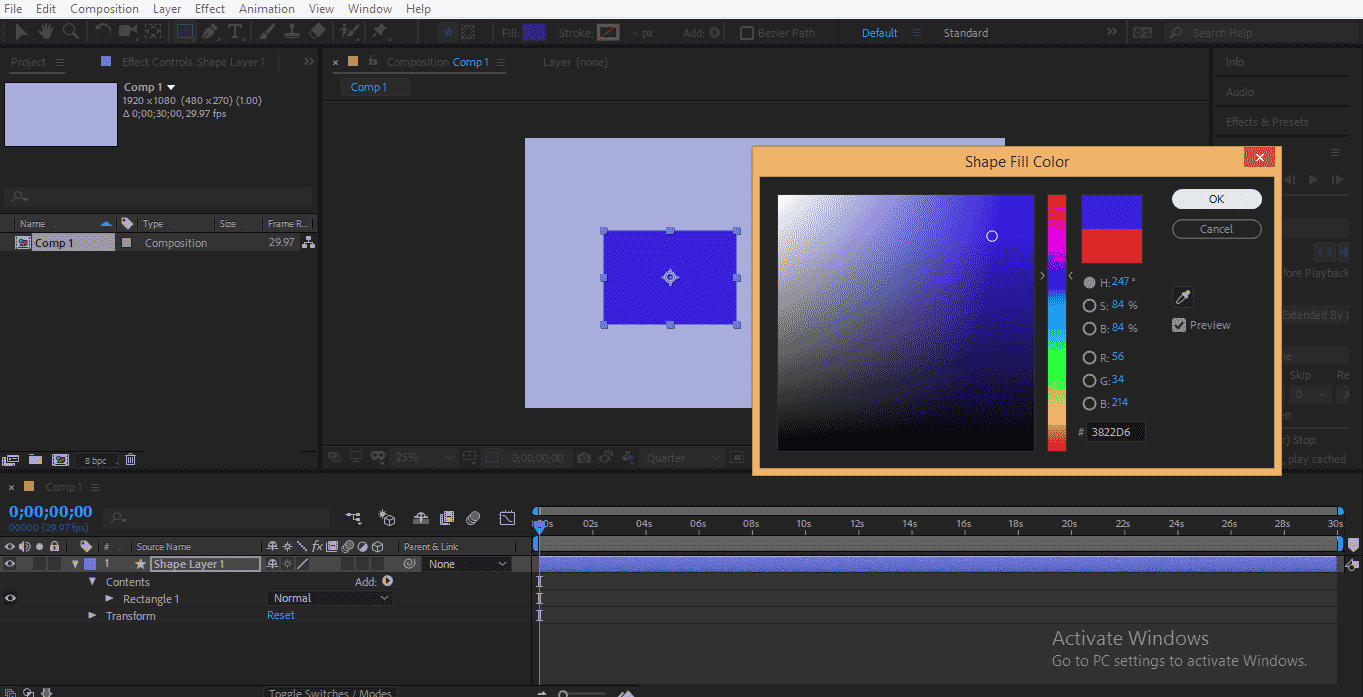
Step 6: Click on the color box, a dialog box of the color panel will open. Choose your desired color and press Ok from the OK tab of this box.
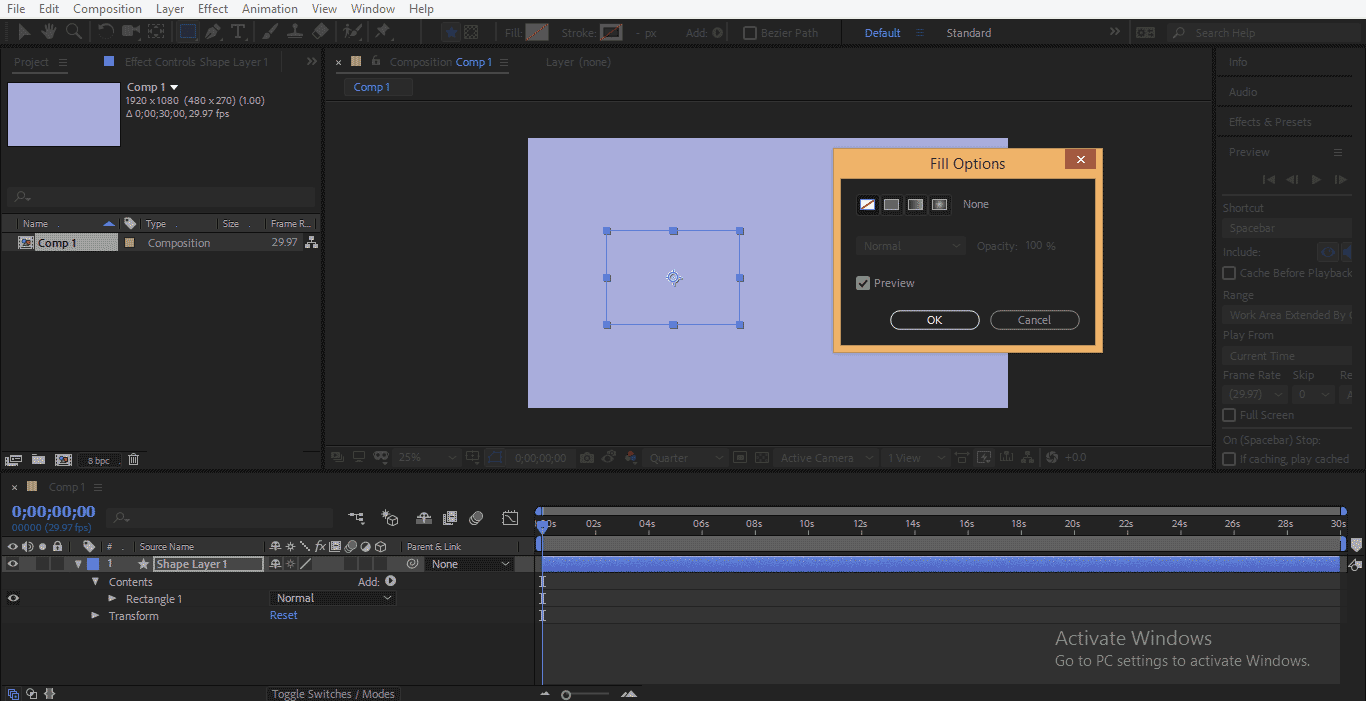
Click on the Fill option to off the fill form the shape.
Step 7: Fill dialog box will open; choose none from here.
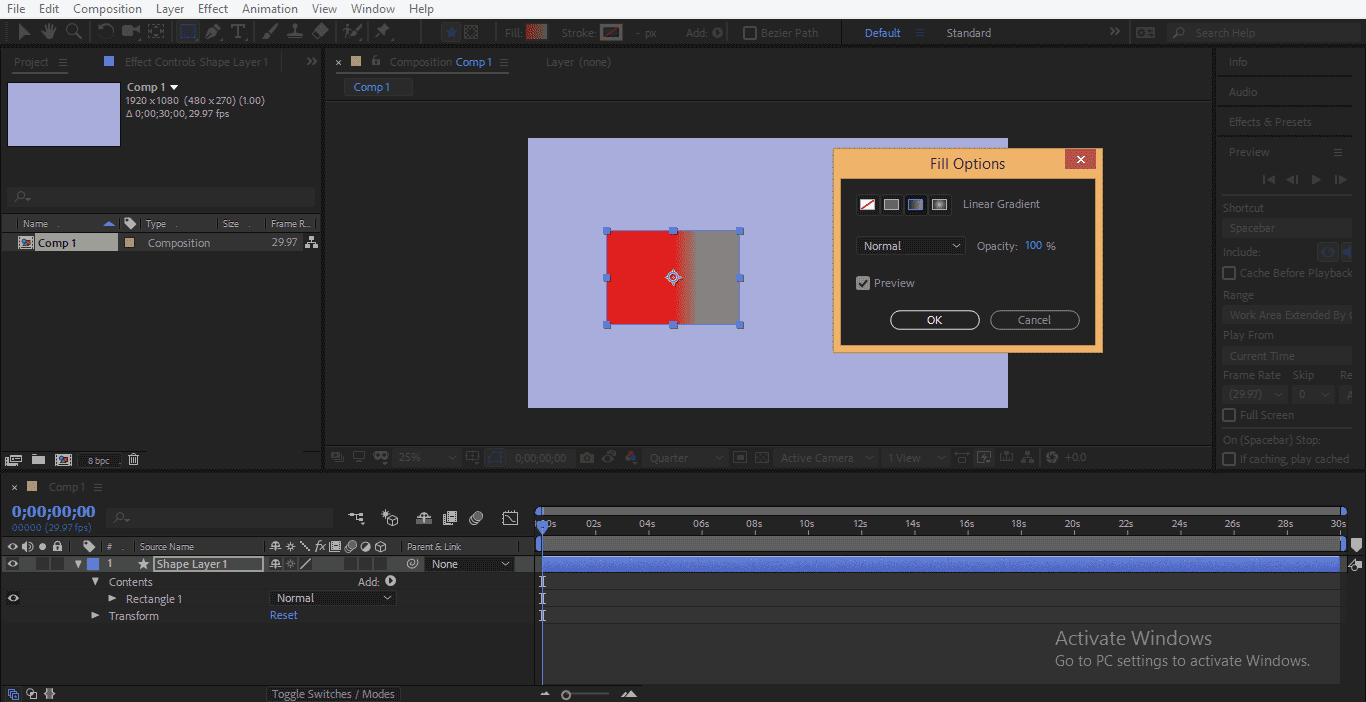
Step 8: You can also apply Gradient from this dialog box; click on the linear-gradient option for your shape and press on the OK tab.
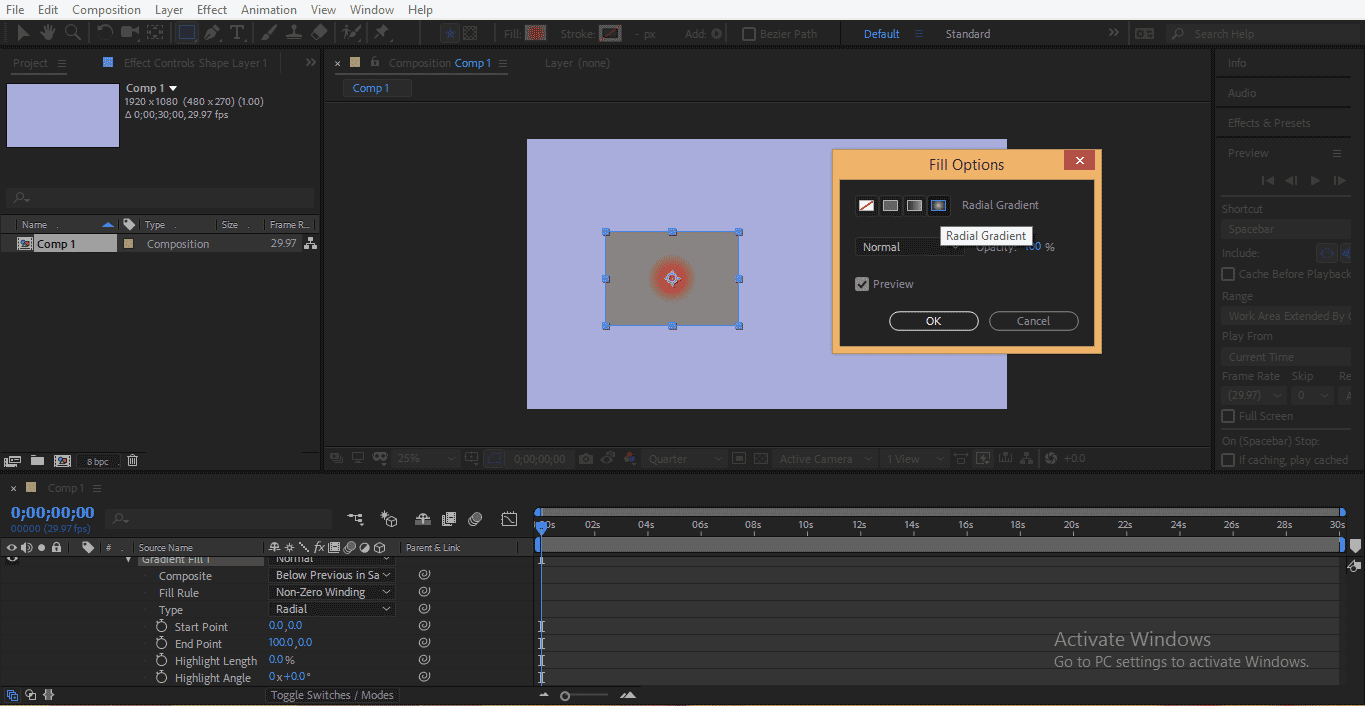
You can also apply the radial gradient to your shape. For that, click on the Radial Gradient option and press on the OK tab.
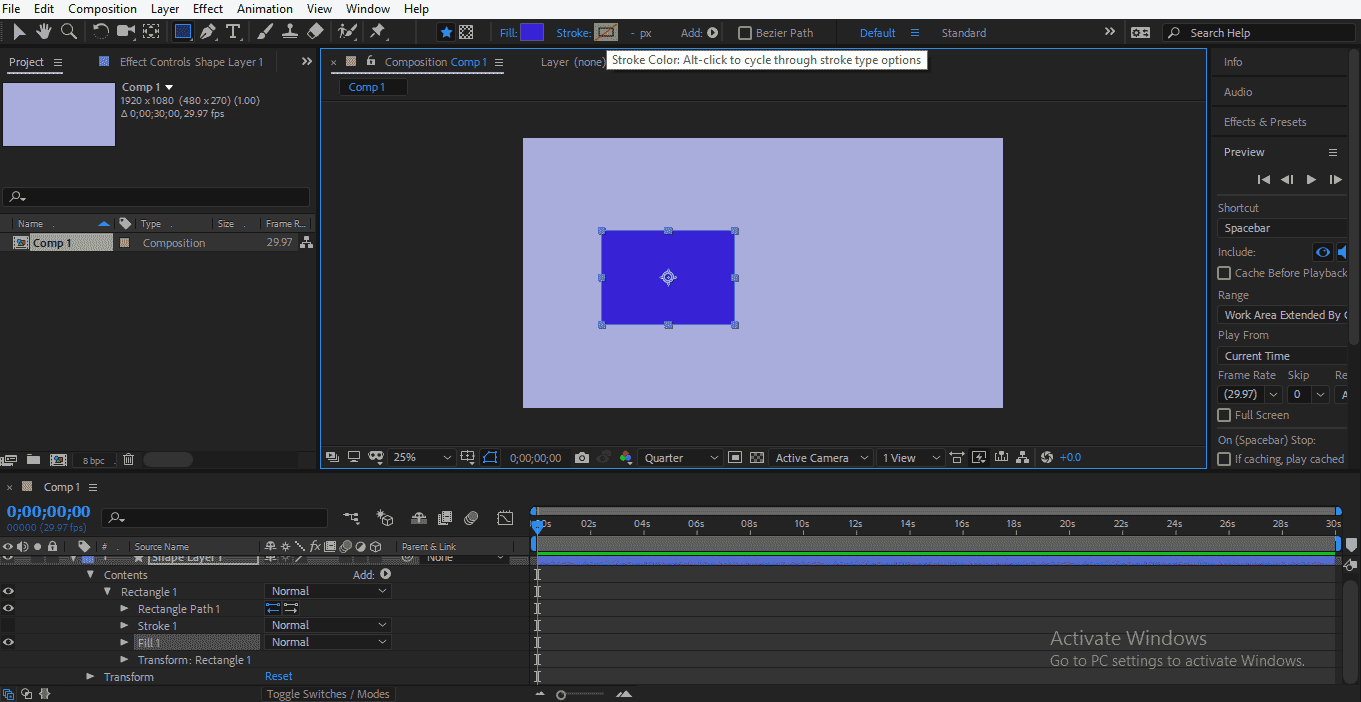
Step 9: You can choose the Stroke color from here.
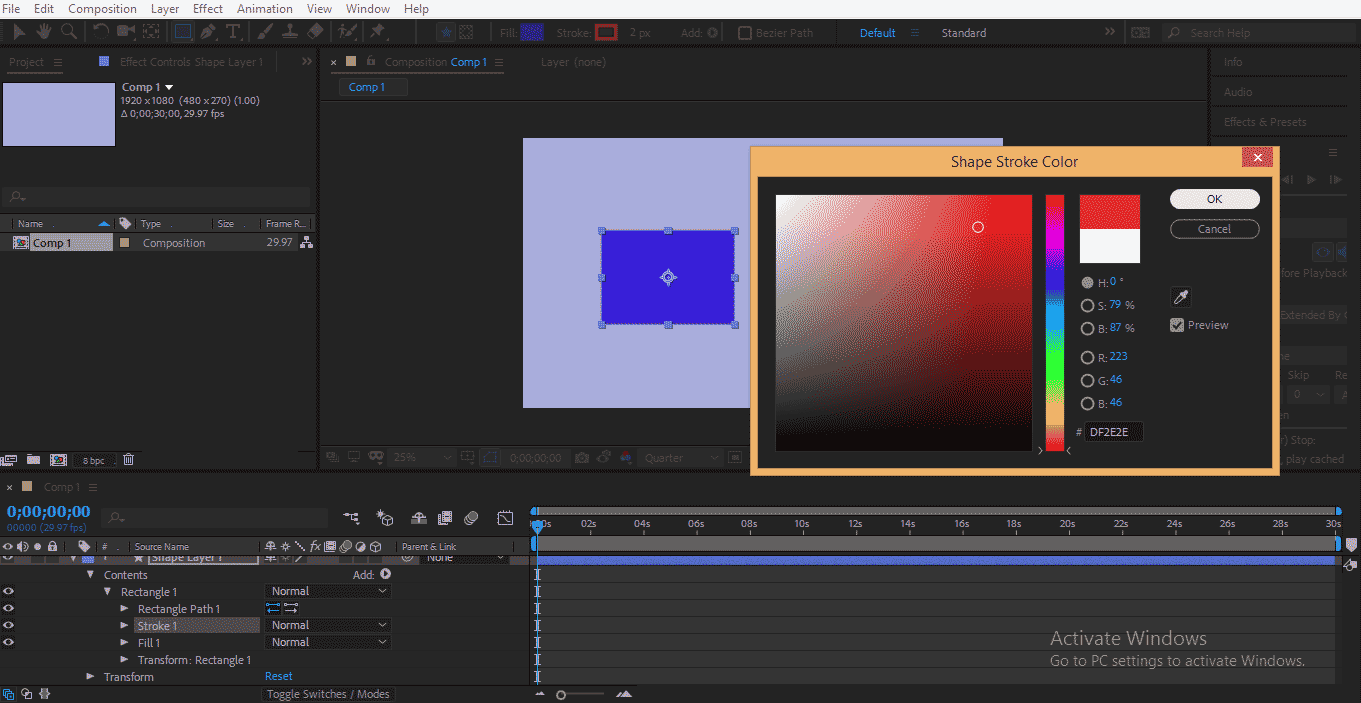
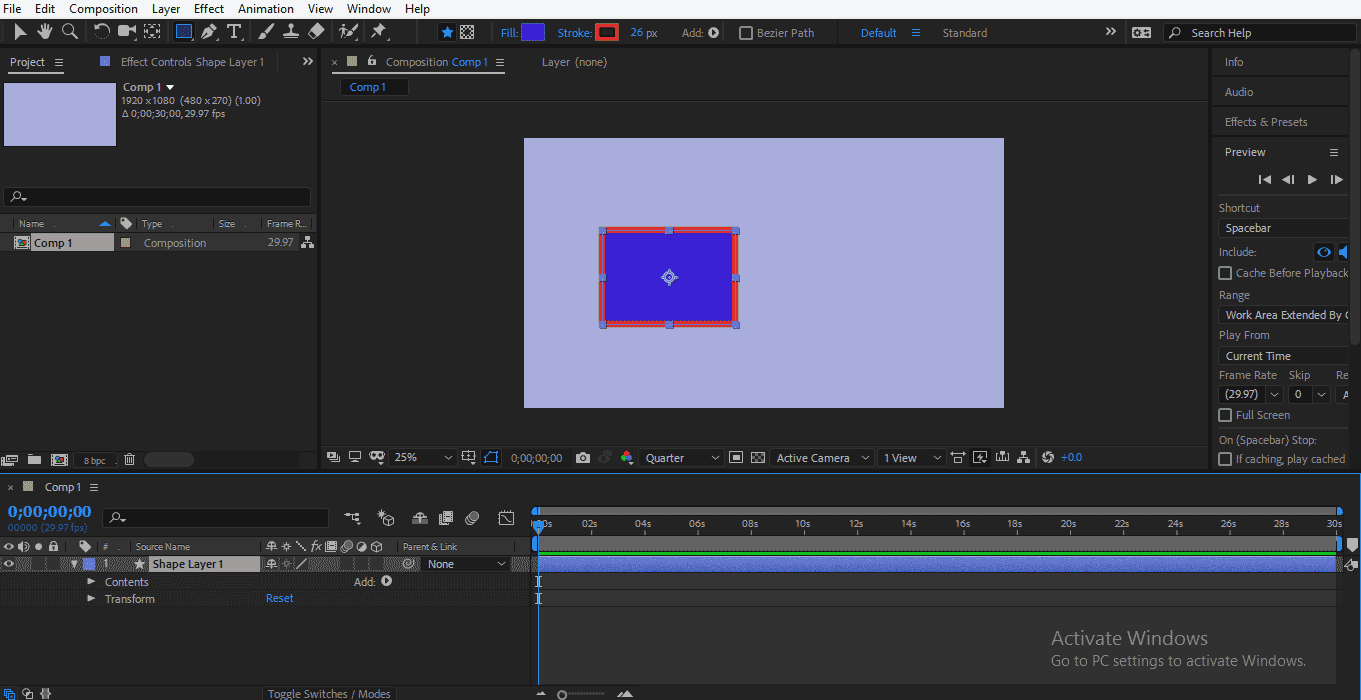
Step 10: Click on this icon, a dialog box of the color panel will open; choose your desired stroke color from here and press on the OK tab to apply this color to the stroke of your shape.
Step 11: Here in the layer section, we have two properties of the shape layer: Contents and Transform.
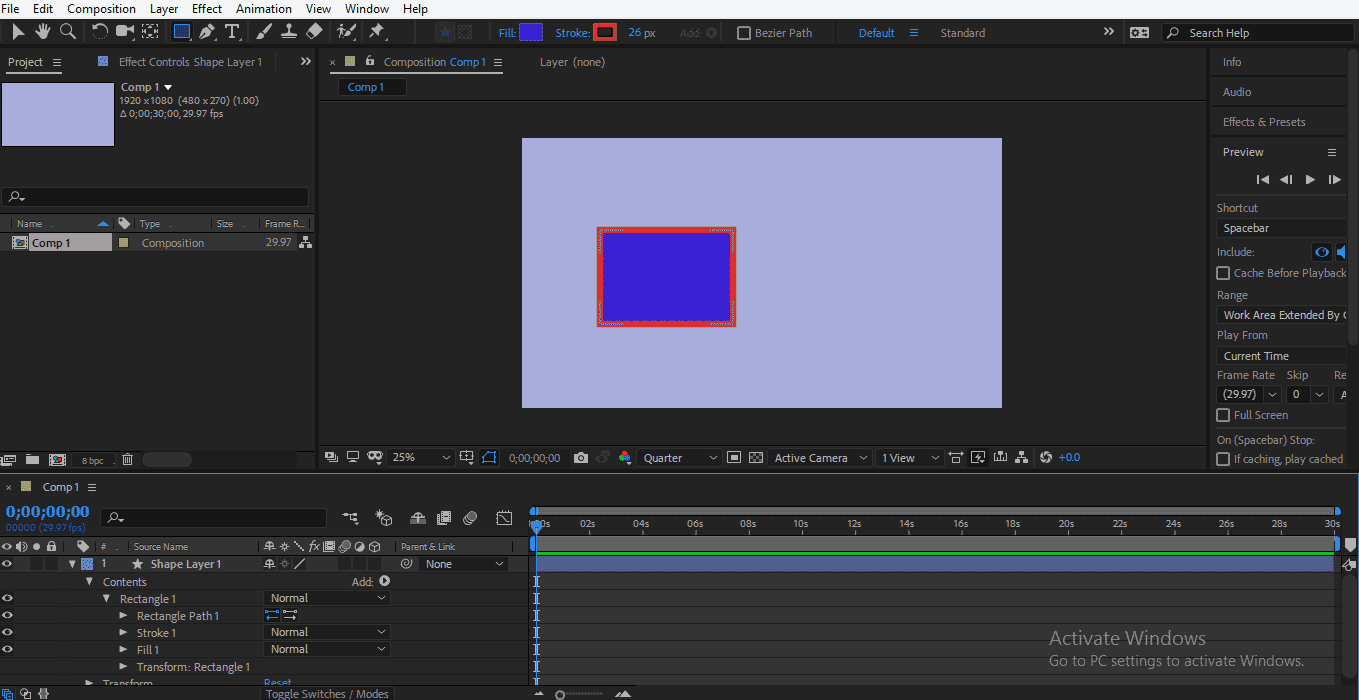
Step 12: Click on the arrow icon of the Contents option and again click on the arrow icon of the Rectangle 1 option, basic properties of the rectangle will open; you can set Fill and Stroke from here also.
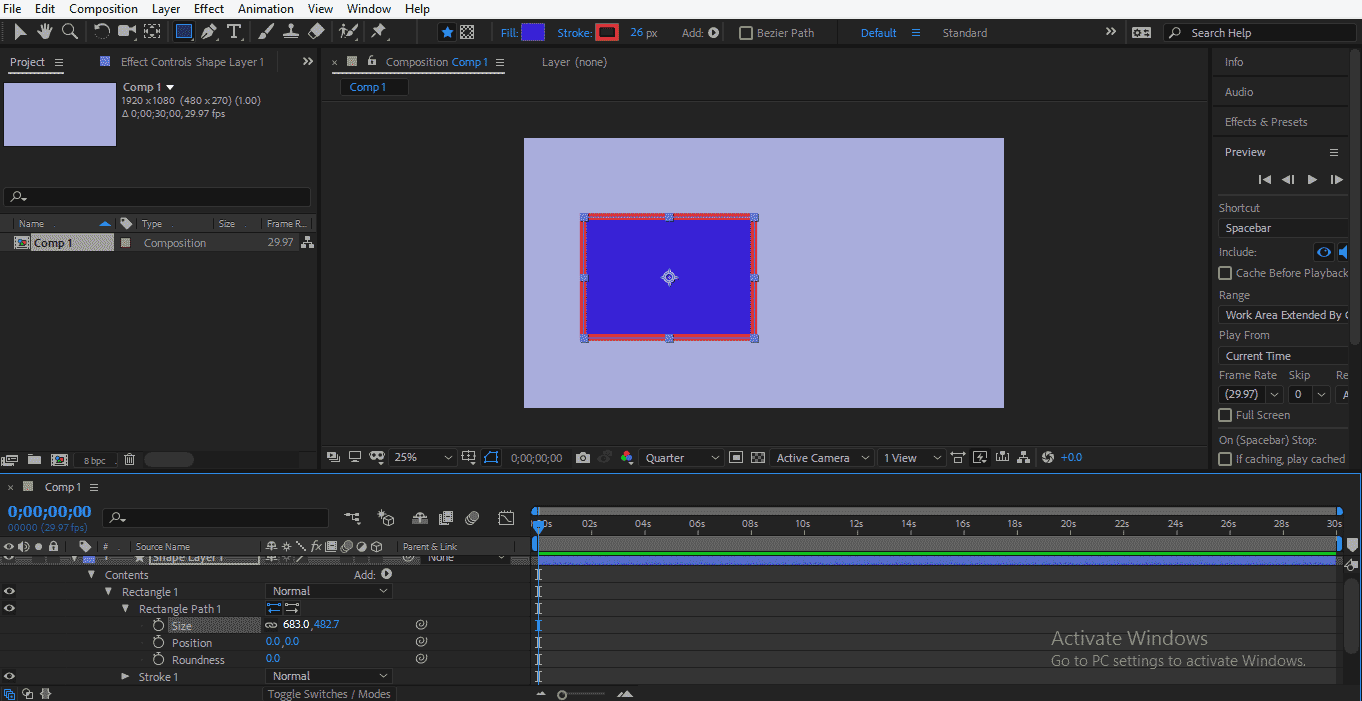
For changing the actual size of this shape, click on the arrow icon of Rectangle Path 1. Here we have the size option to change the size of shape by changing the data of the size option.
Step 13: If you want to change the height and width of the shape separately, click on this chain-link icon; now, you can change both parameters separately.
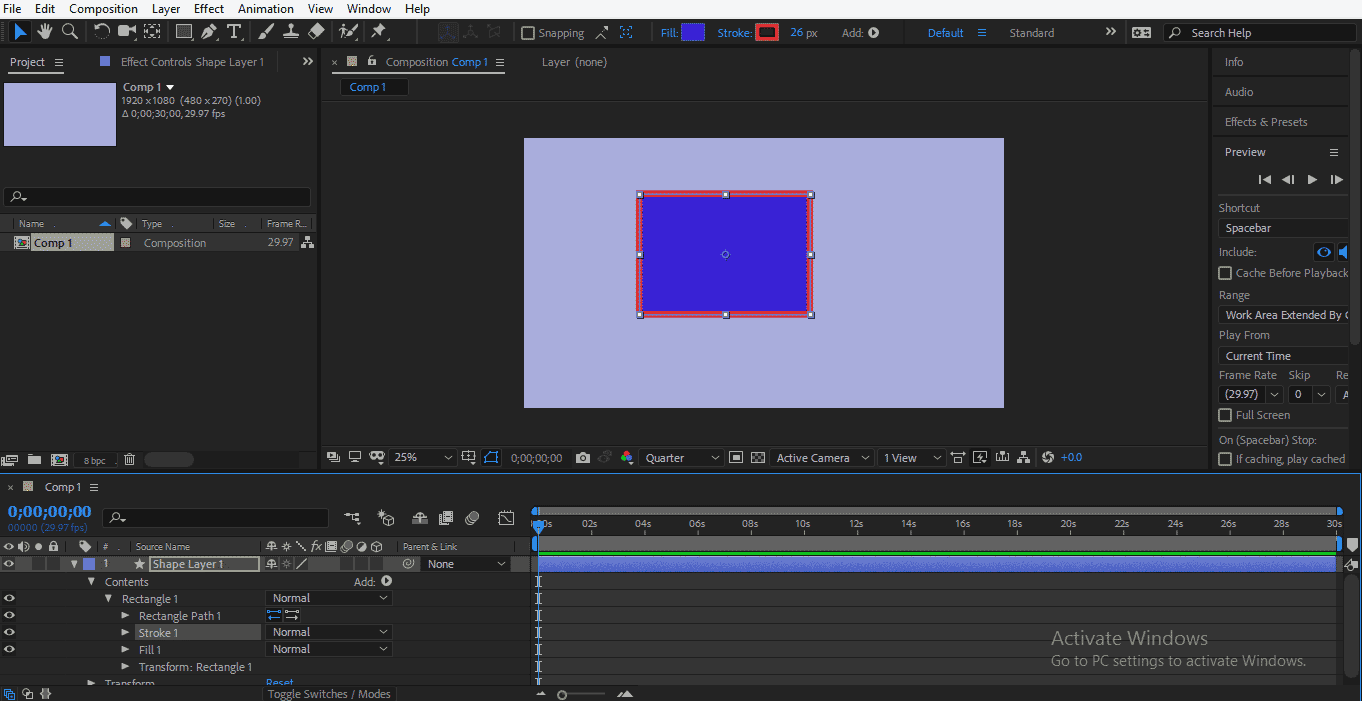
Step 14: You can On or Off Fill and Stroke of shape from here.
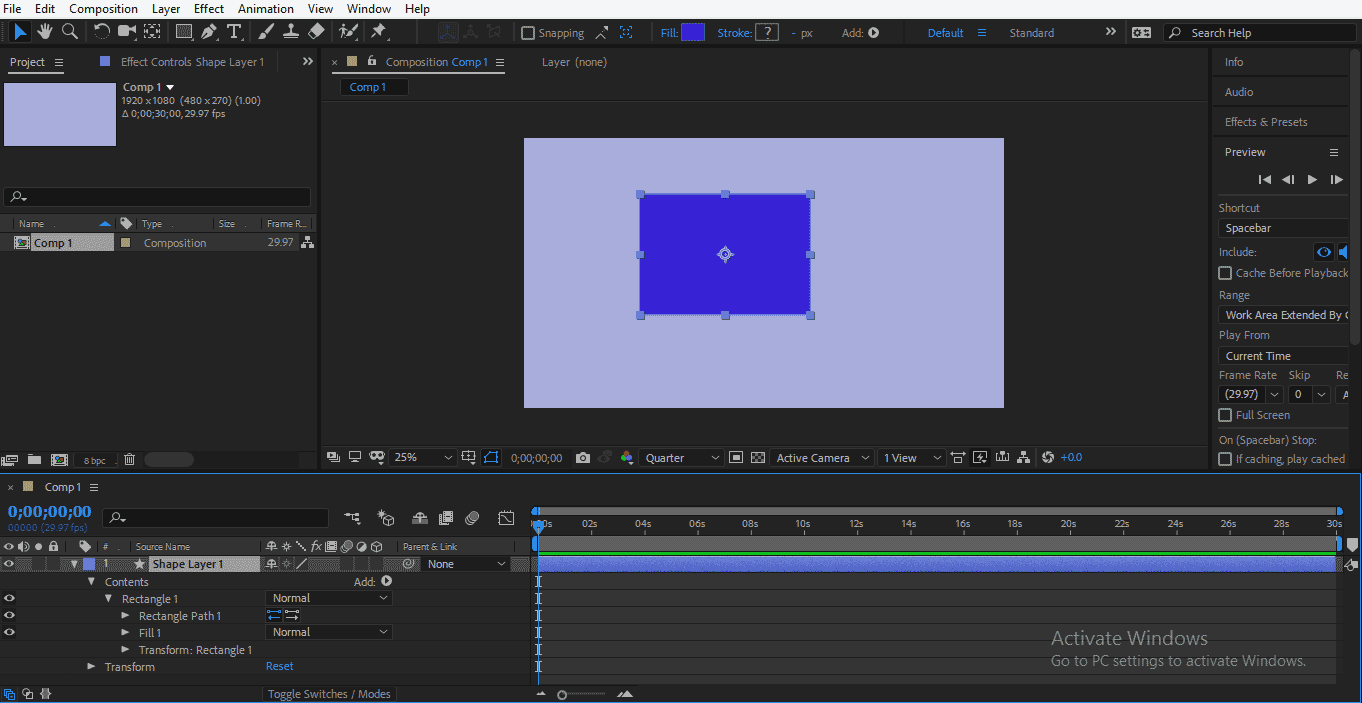
Also, click on the Stroke option and press the delete button from the keyboard for no stroke in your shape.
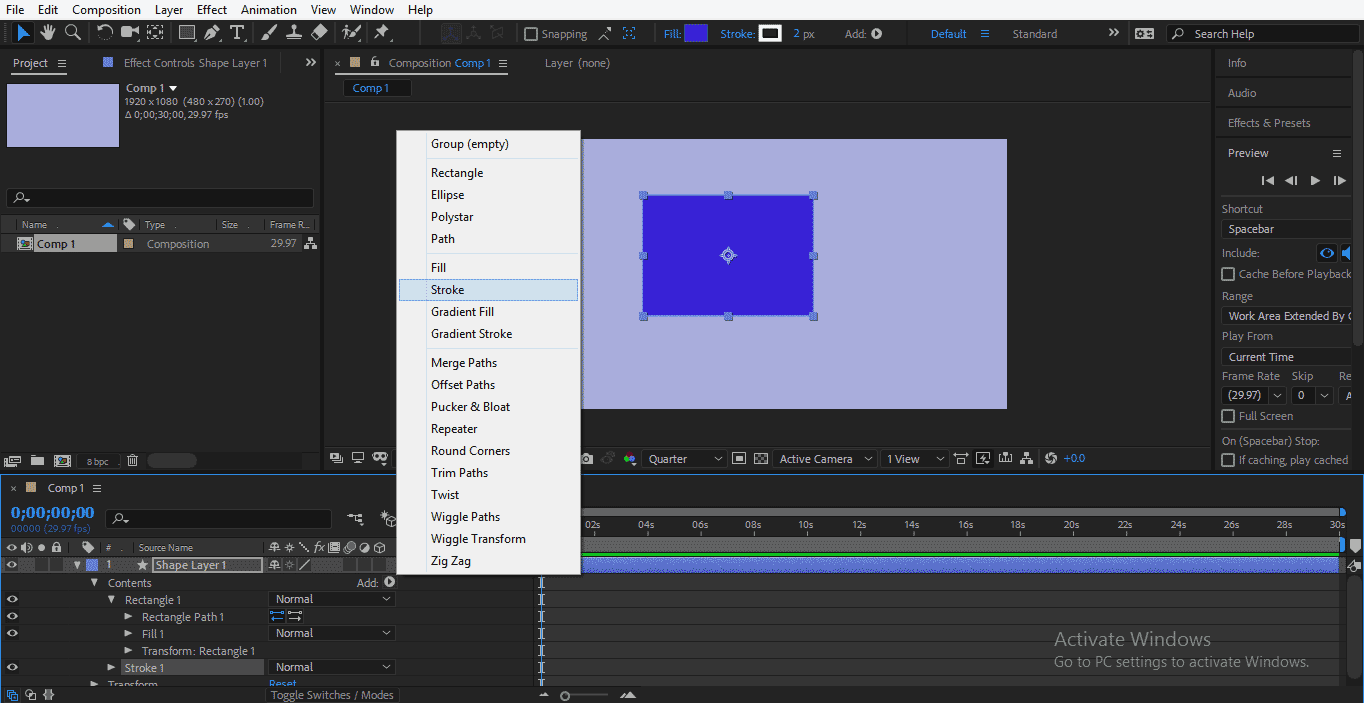
Step 15: If you again want to add a stroke or Fill to your shape, click on Add button here and choose Stroke to apply a stroke or Fill to fill your shape.
Step 16: Now, you can make any change in the Fill or stroke option.
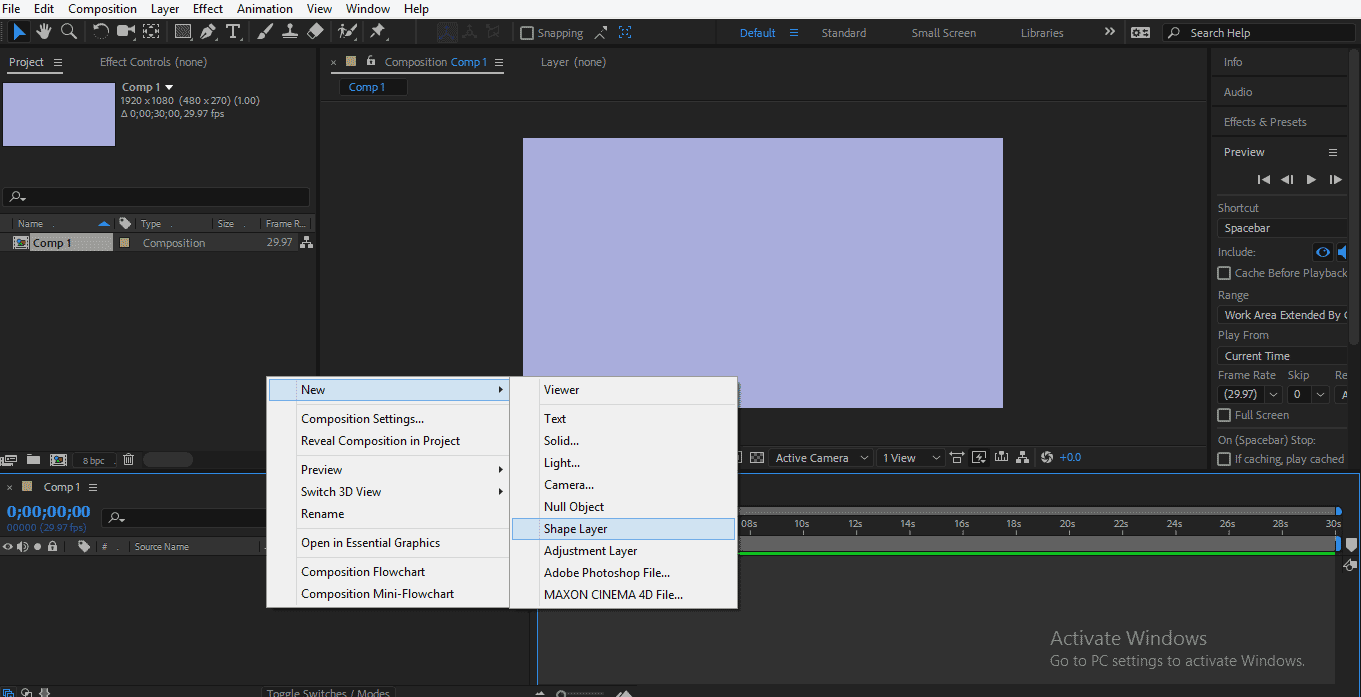
Step 17: You can also take shape layer with this method, right-click on layer section, go to New in a drop-down list and again a drop-down list will open, click on the Shape layer option.
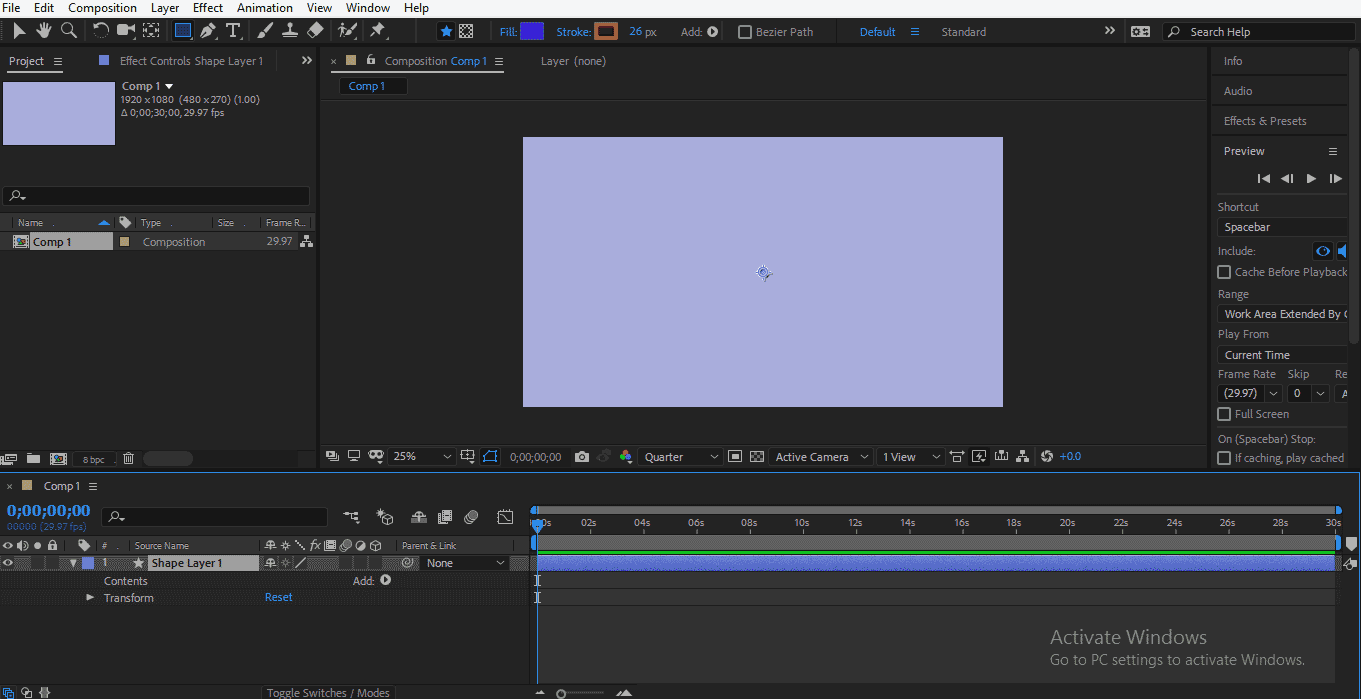
Here you can see by taking the shape layer by this method; we have nothing in the Content option of this shape layer because there is no arrow icon.
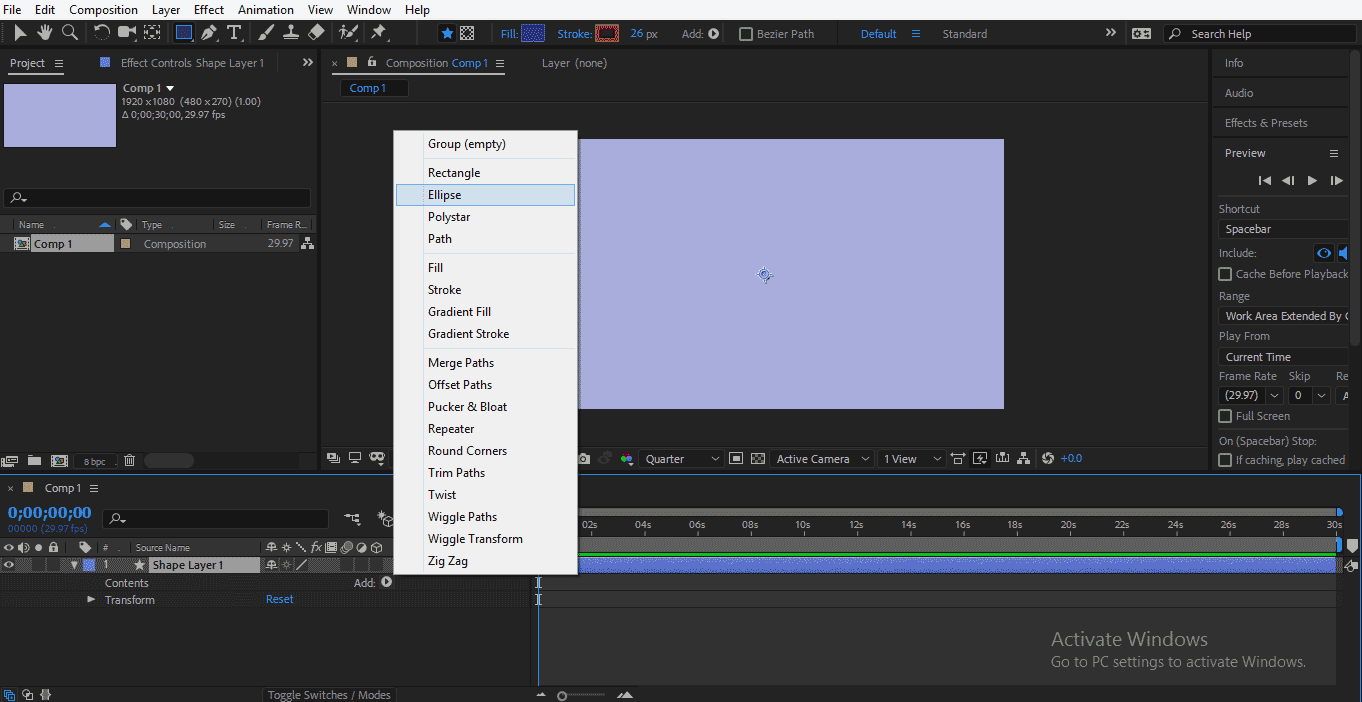
Step 18: For adding shape to this content, click on the Add button icon and take your desired shape from here.
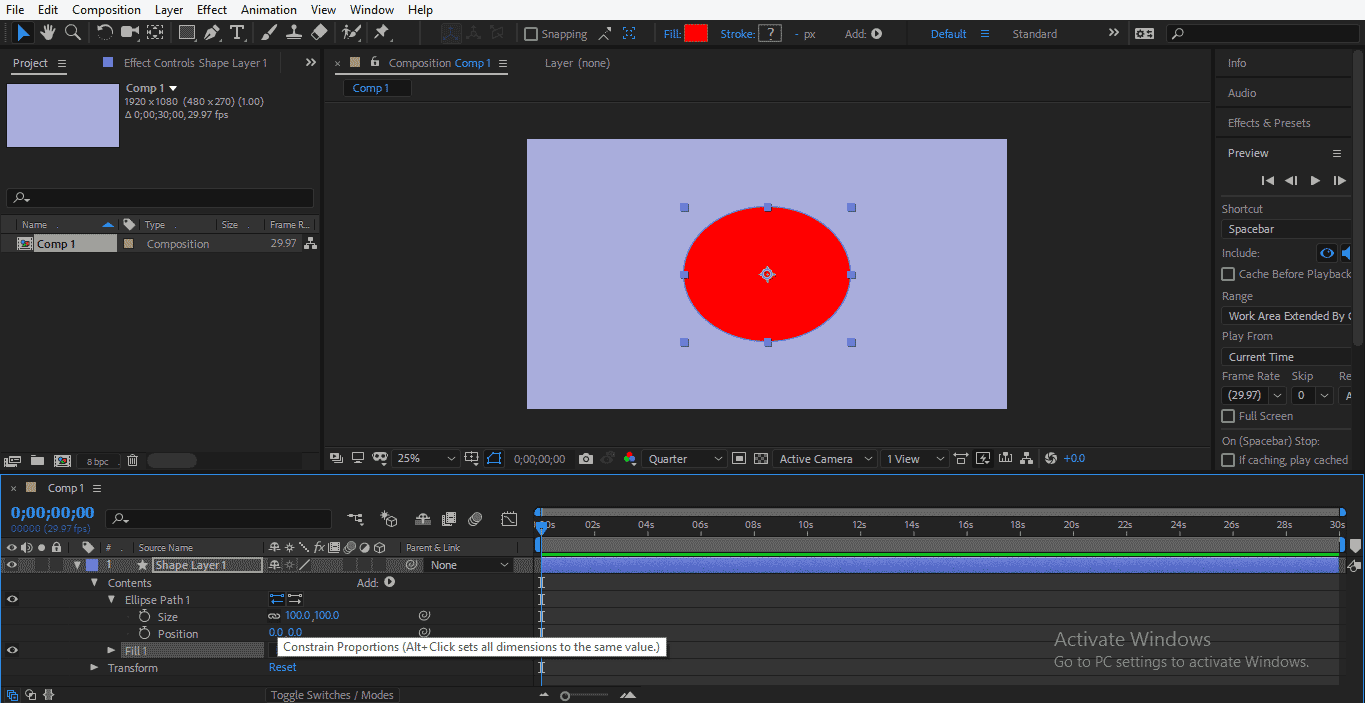
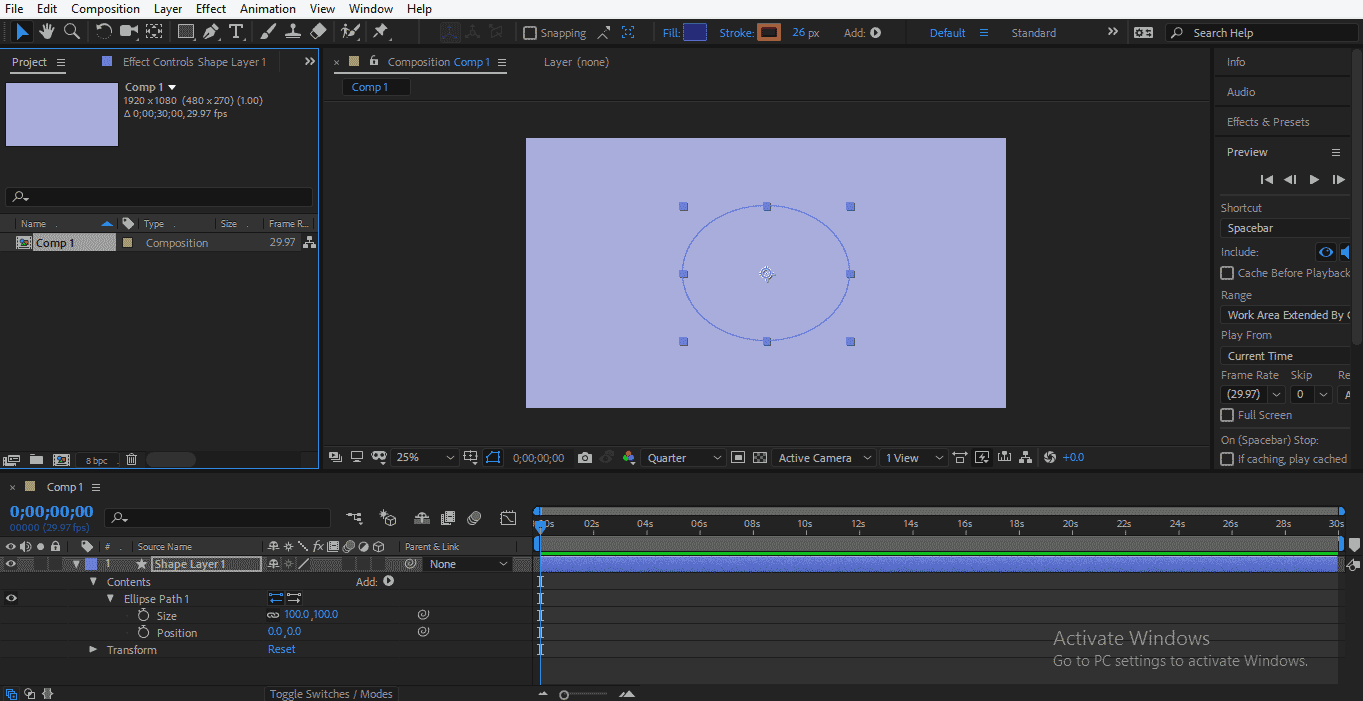
I will take the Ellipse command from here as my shape layer.
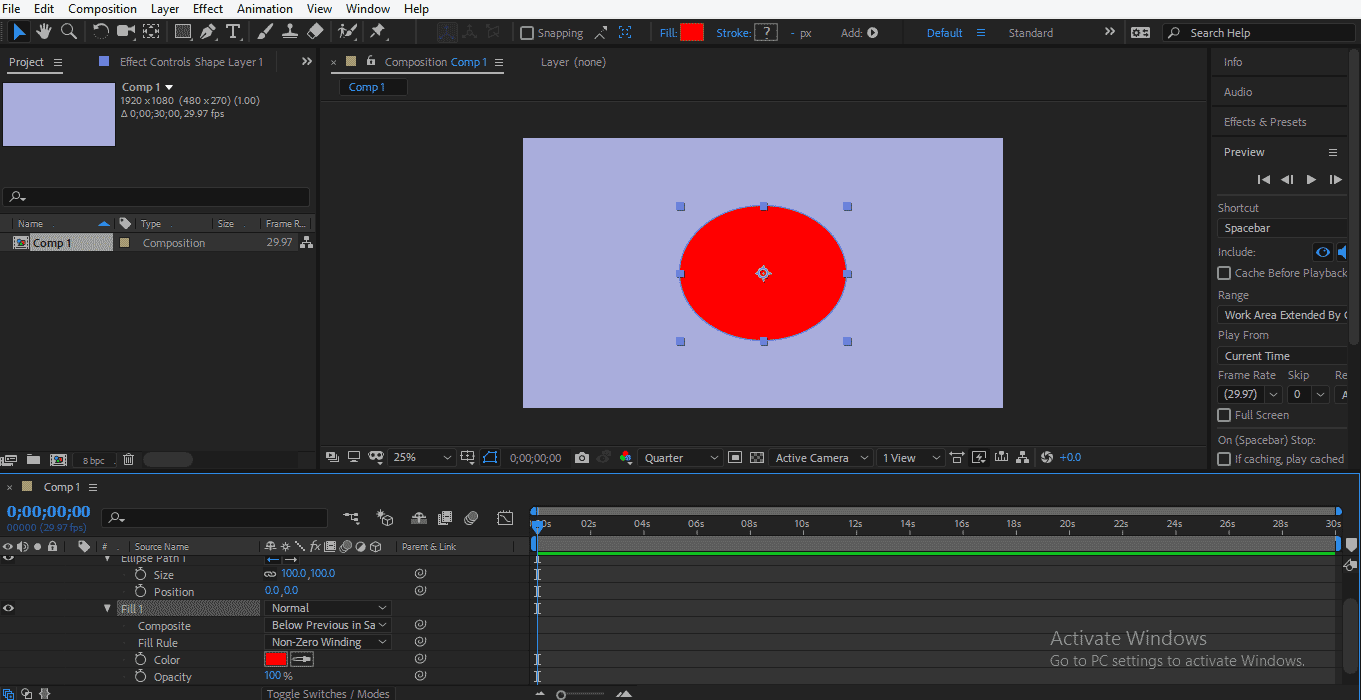
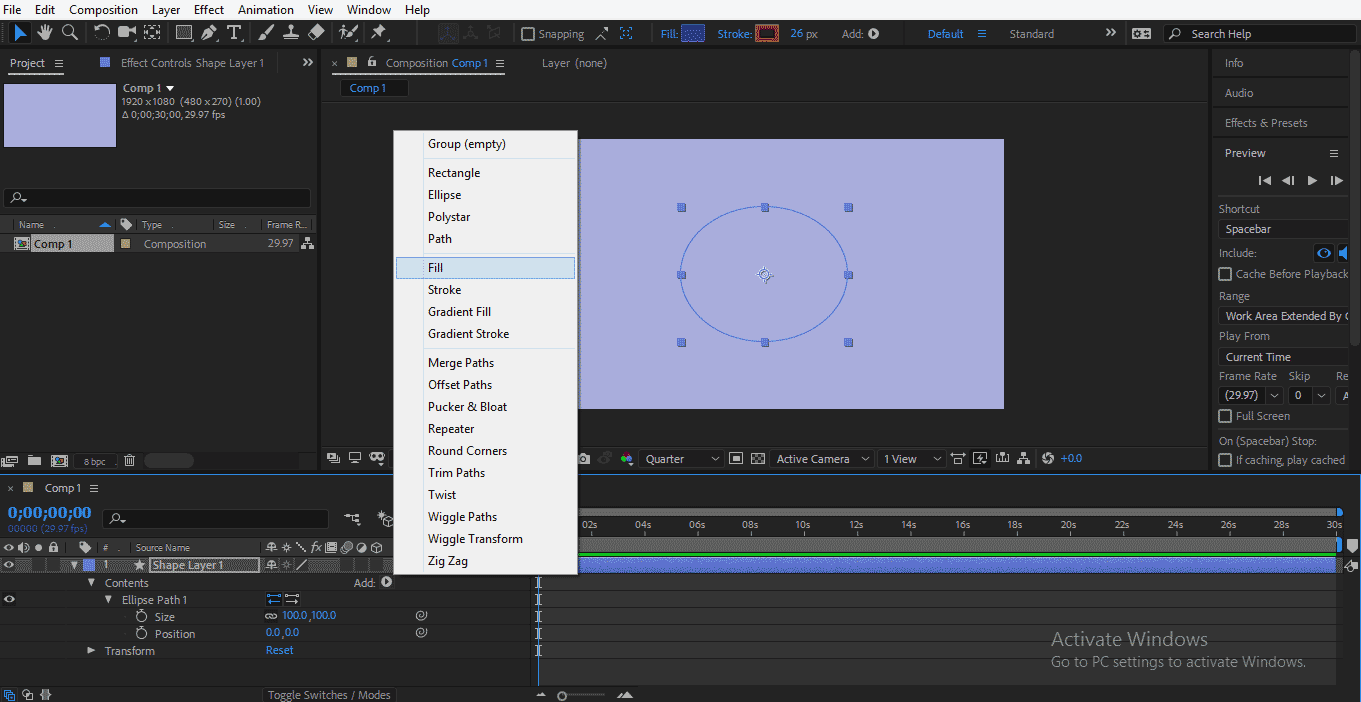
Step 19: You can see the other property of shape is not shown here; you can add each and every property according to your requirement. I want to add fill in my shape, so I will click on Add button icon and choose Fill from here.
Like, Fill you can choose the number of properties from here for your shape. You can also animate the properties of a shape layer for making your project more attractive by simple animation methods.
Conclusion
Now you are very familiar with shape layers in adobe after effect after this tutorial. It becomes quite simple for you to use these shape layers in your project to make your project captivated for the viewers. Having knowledge about shape layers enhances your quality of work and gives it a realistic view.
Recommended Articles
This is a guide to Shape Layers in After Effects. Here we discuss the introduction along with steps for adding shape layers in adobe after effect software. You may also look at the following articles to learn more –

