Introduction to SketchUp Animation
SketchUp Animation is a very good feature of this software, and by doing animation for your model with animation option, you can present your model from a different viewpoint by just playing animation scenes. There are few things that you have to do to create an animation of the different scenes of your model. You can also animate view for the interior part of any designed model of architecture. Animation also helps to locate your viewpoint in just one click; for example, if I set my model from the front view and use this view frequently for a different purpose, then there is no need to go front view by using the orbit tool, again and again, we just have to click on scene button of it.
How to create Animation in SketchUp?
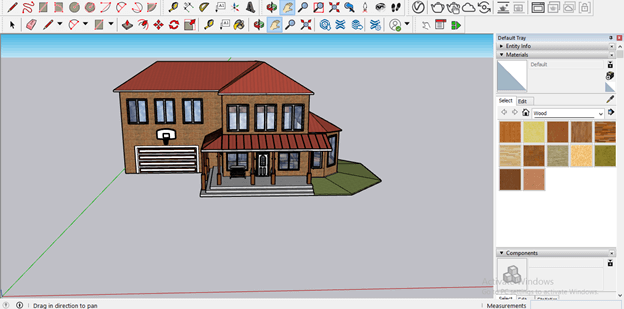
Let us find how we can do the above discussed all things for our own model. Just take your model for which you want to create animation. I have taken this model, and I downloaded it from the 3D Warehouse of SketchUp, which is the online library of this software. If you want to know more about 3D Warehouse, you can go to my article on SketchUp Library.
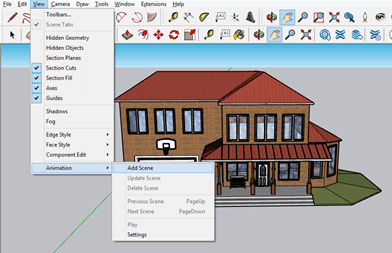
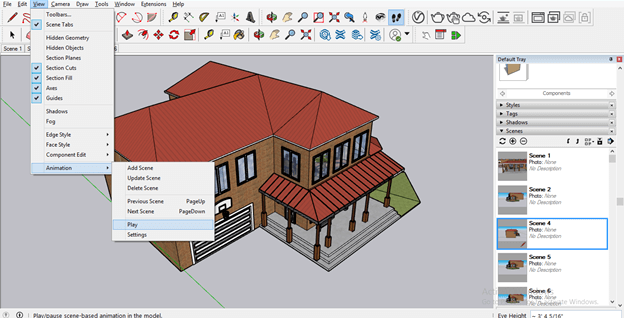
The first step of creating animation is going to the View menu of the menu bar, clicking on it, and then going to the Animation option of the drop-down list. Here we have some sub-option for animation. Let us understand each one by one. The first one is Add Scene so click on it.
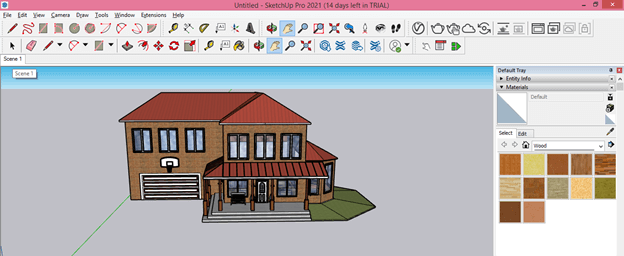
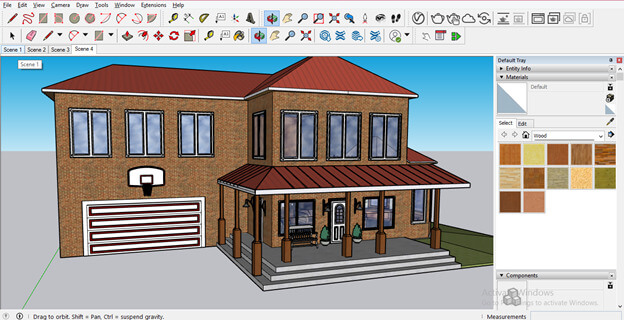
Once you click on it, you will have the Scene 1 tab here below to the toolbar. This is a tab in which we do animation.
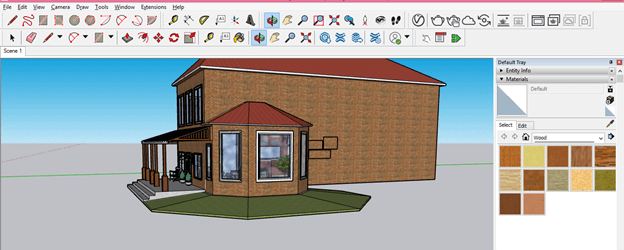
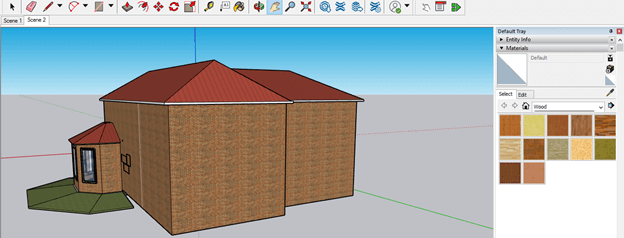
Now you can orbit your model according to that direction or scene which you want to show in the first animation. I will orbit this model to the right view.
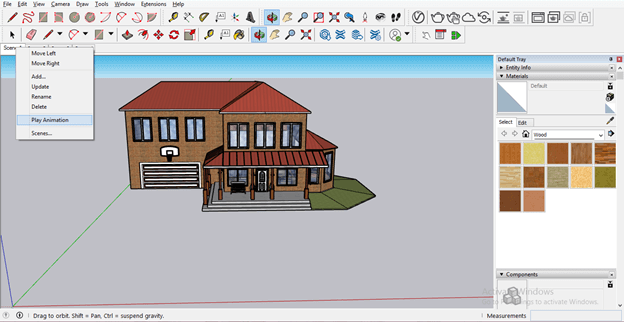
Now let us add the next screen, and for that, you can again repeat previous steps as we did for adding the first scene or simple make right click on this Scene 1 button. Once you click, a drop-down list will be open. Here click on Add option.
The next scene tab will be added here with the name Scene 2. Now animate this scene according to you. I will orbit this house to the back side of it.
Same the previous two scenes, you can add more scenes according to which type of animation you want. For example, I have added 4 scenes here.
Now go to the tab of that scene from where you want to play this animation. For example, I will click on Scene 1 and then make a right-click on it. Again a drop-down list will be open. Here click on the Play Animation option for playing it.
You can also play your animation from the View menu of the menu bar. Just go to the view menu, then click on the Play option of the drop-down list of Animation.
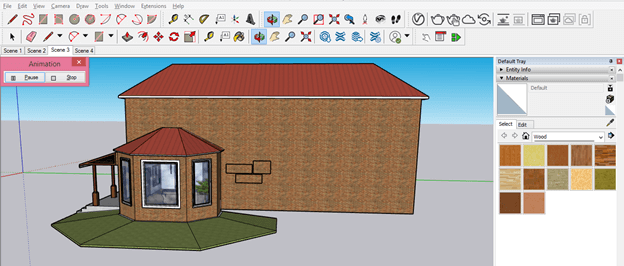
Now your animation will play according to your set animation scene. You can see there is a small dialog box of Animation at the left corner of the display window area of this software. You can click on the Pause button for holding animation, and by again clicking on the same button, you can play it again. The next Stop button of this dialog box will stop animation.
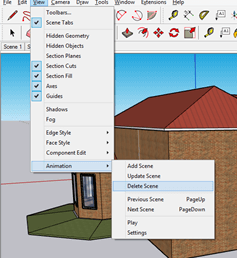
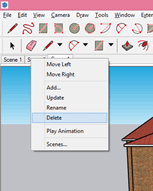
You can also delete the unwanted scene, and for that select, that scene, then goes to the Animation option again and click on the Delete scene option, or you can do this by the right-click options of that scene.
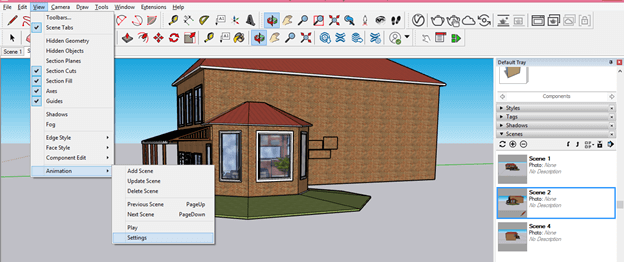
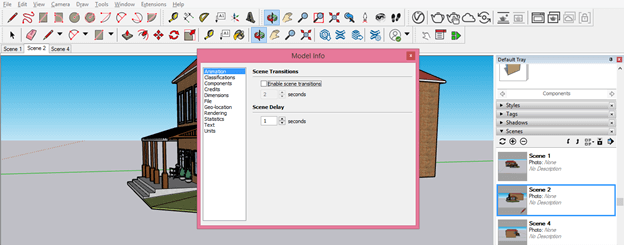
You can do some settings in the playing of animation, so for that, go to view menu gain then Animation option and click on Settings option of the drop-down list of it.
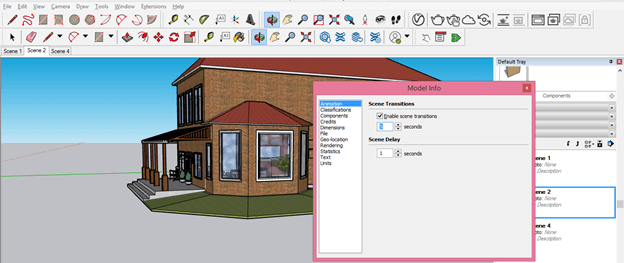
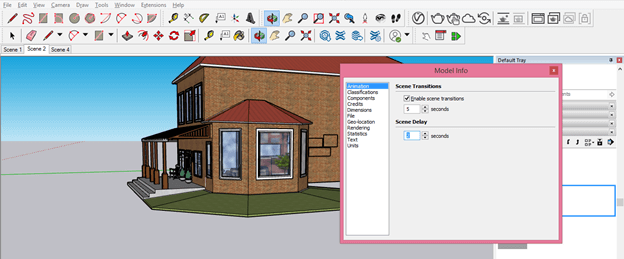
Here in the dialog box of Settings of animation, we have two main parameters: Scene Transitions and Scene Delay. So, for example, we can set the time for animation change between two scenes with scene transpiration.
If you uncheck the box of ‘Enable Scene Transition’, the animation will not move from one scene to another scene; in fact, it will jump from one scene to another scene. So it totally depends on you how you want to show your animation.
You can also set a time for how long it will take to move from one scene to the next screen. If there is high time, then the animation will move slowly for reaching to next screen.
Once the first animation scene ends and the second animation scene starts, there is a small-time gap between the animation and the previous scene for instants of time. You can also set this time. If you give a high value of time, then the animation will hold at the scene for a longer time. If you don’t want any hold time, then you can make this time like 0 sec by entering a value in the Scene delay option.
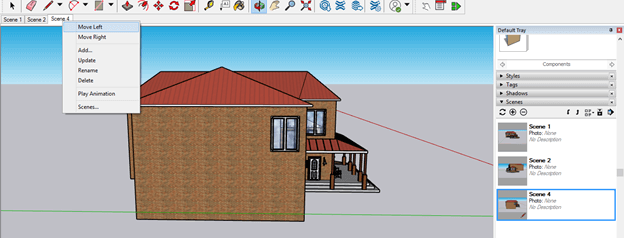
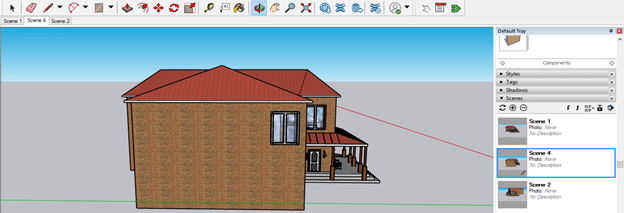
If you want, you can change the sequence of scenes with each other such as you want to show scene 4 before scene 2 the; just make click on scene 4 and then make a right-click. Then, click on Move Left or Move Right according to exchanging places of scenes.
And this time, when you play the animation, scene 4 will come after scene 1 in place of scene 2.
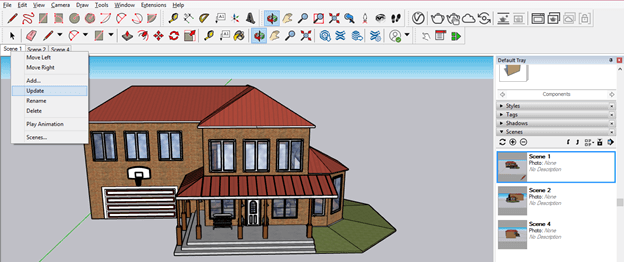
What if you want to make some changes to your previous animation? You just have to go to that scene on which you want to change animation, then make changes according to you, then make a right click on that scene. Then, click on the Update button of the drop-down list of this scene for updating changes.
Same as we did the animation for the outer face of the model, we can do it from the interior of this model also. You just have to set the camera angle for that.
Conclusion
I think it was a good discussion about animation in SketchUp, and you have found this article very useful for learning about this topic. As I told you, you can create a number of scenes and animate them as per the requirement of your model and brief your model in just one click; you need not use the orbit tool again and again for going your particular viewpoint.
Recommended Articles
This is a guide to SketchUp animation. Here we discuss How to create Animation in SketchUp and How to create several scenes and animate them as per the requirement of your model. You may also look at the following articles to learn more –
