Introduction to 3ds Max Software
3ds Max is a professional computer designing software used by Video game developers, Film and TV Editor to give three-dimensional visualization effects to their models. We have a different type of command and functioning tool in 3ds max software. The spline is one of them; it is a very important and basic tool of 3ds max software for making the 2D shapes in it. In our 3D modeling, we need some basic 2D shapes for making a different type of object according to our use, and by spline, we can easily make 2D shapes.
Tools in Spline Command
Here you will learn about spline in 3ds max with me, and I will tell you all the tools of the spline command one by one. So let’s start our tutorial for spline in 3ds max. software:
- This is the user interface of 3ds max software. We have different sections in our work area: viewports for our working, a common panel at the right corner, and some other tool at the top of the work area. This is very user-friendly software.
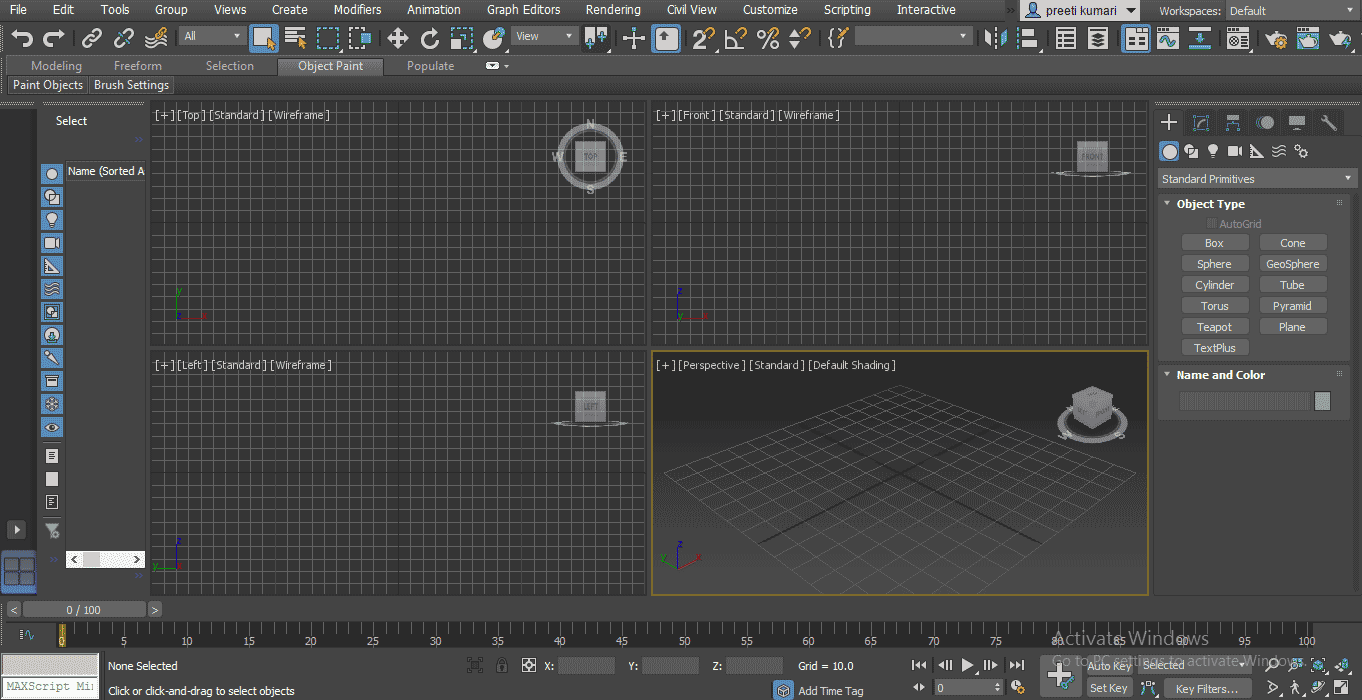
- We have four viewports in 3ds max: Top viewport, Front viewport, Left viewport, and perspective viewport; you can use any one of them to draw any object in 3ds max.

- Click on the Shape tab in a common panel of 3ds max for the spline option.
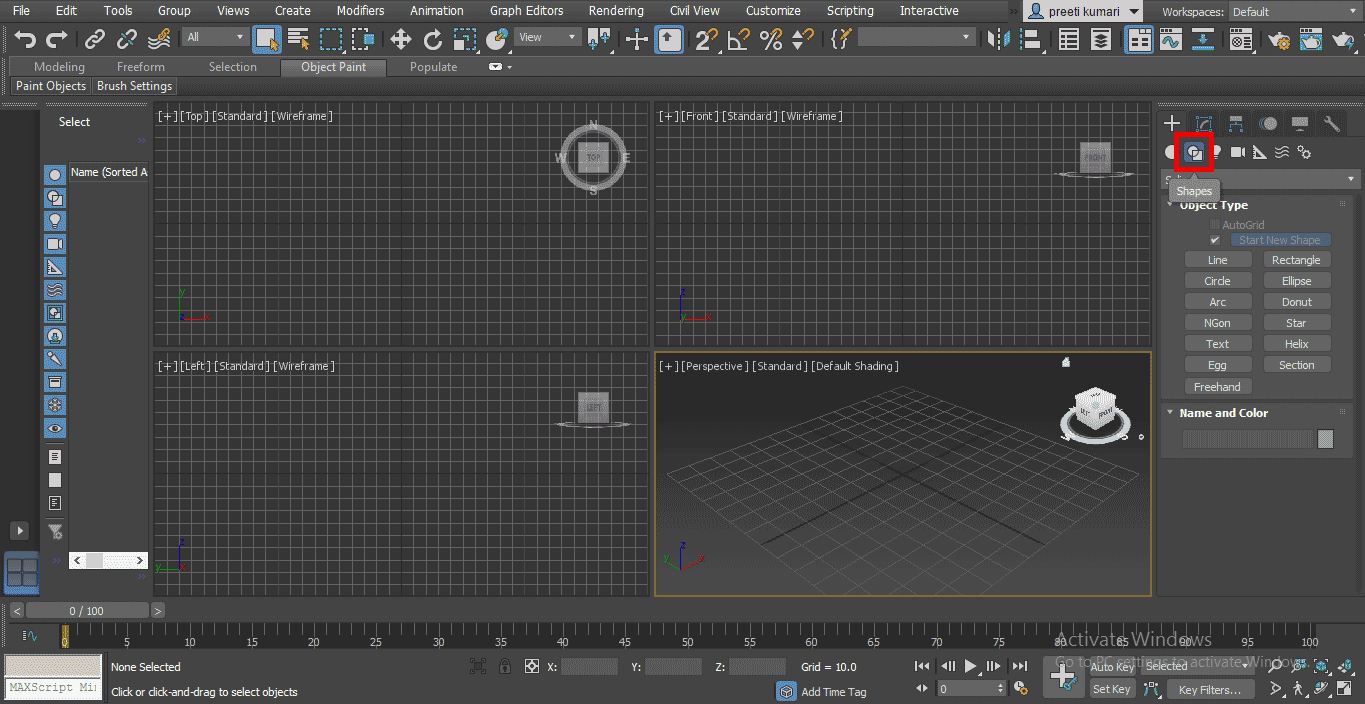
- We have different types of 2d shapes in a spline, such as Line, Rectangle, Circle, and many more. We will see all of them one by one.
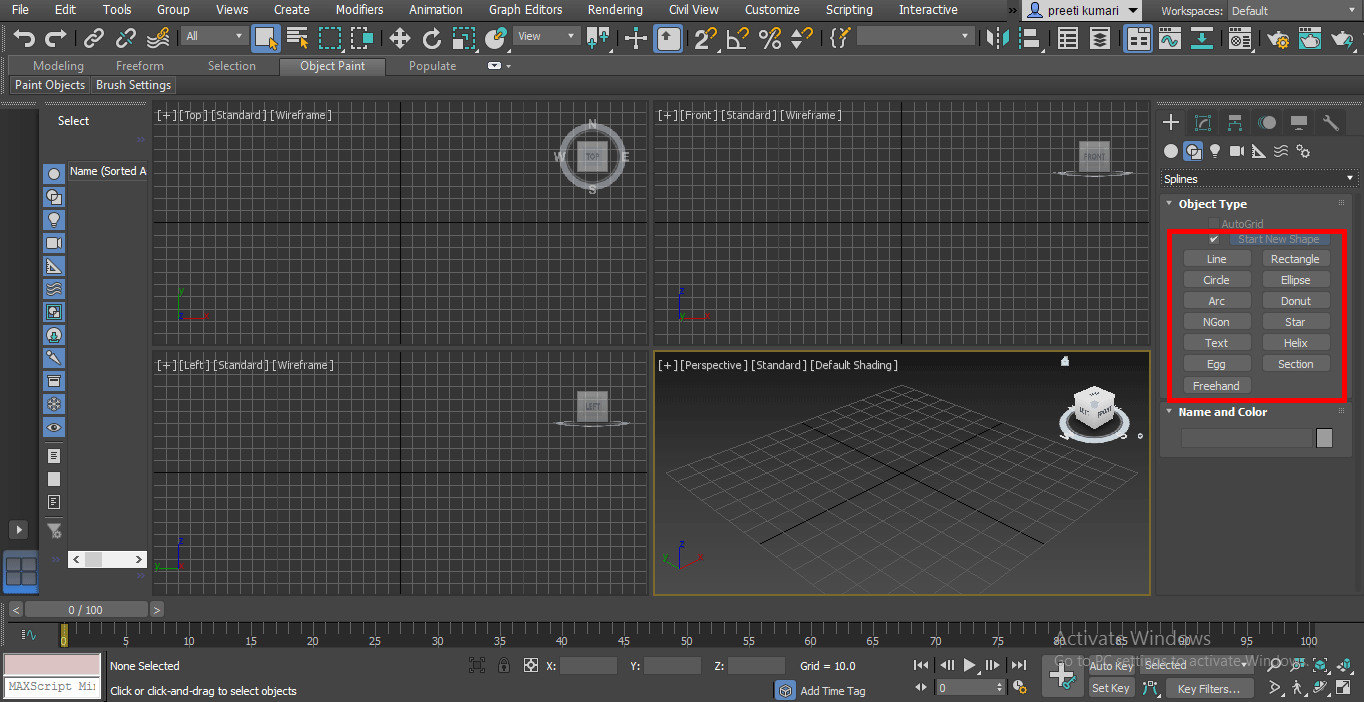
- I will draw these shapes in the top viewport – Press Alt+W for fullscreen mode.
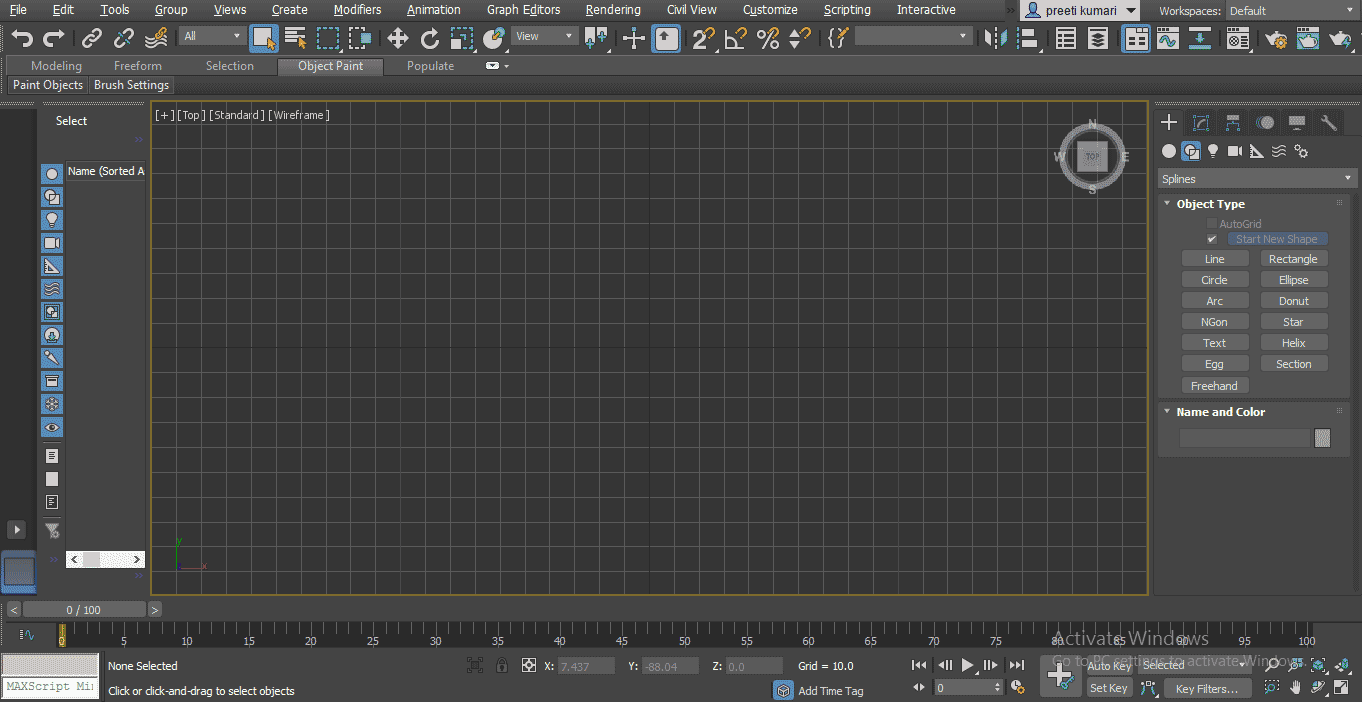
- Now click on the Line command tab in a common panel to activate the line command.
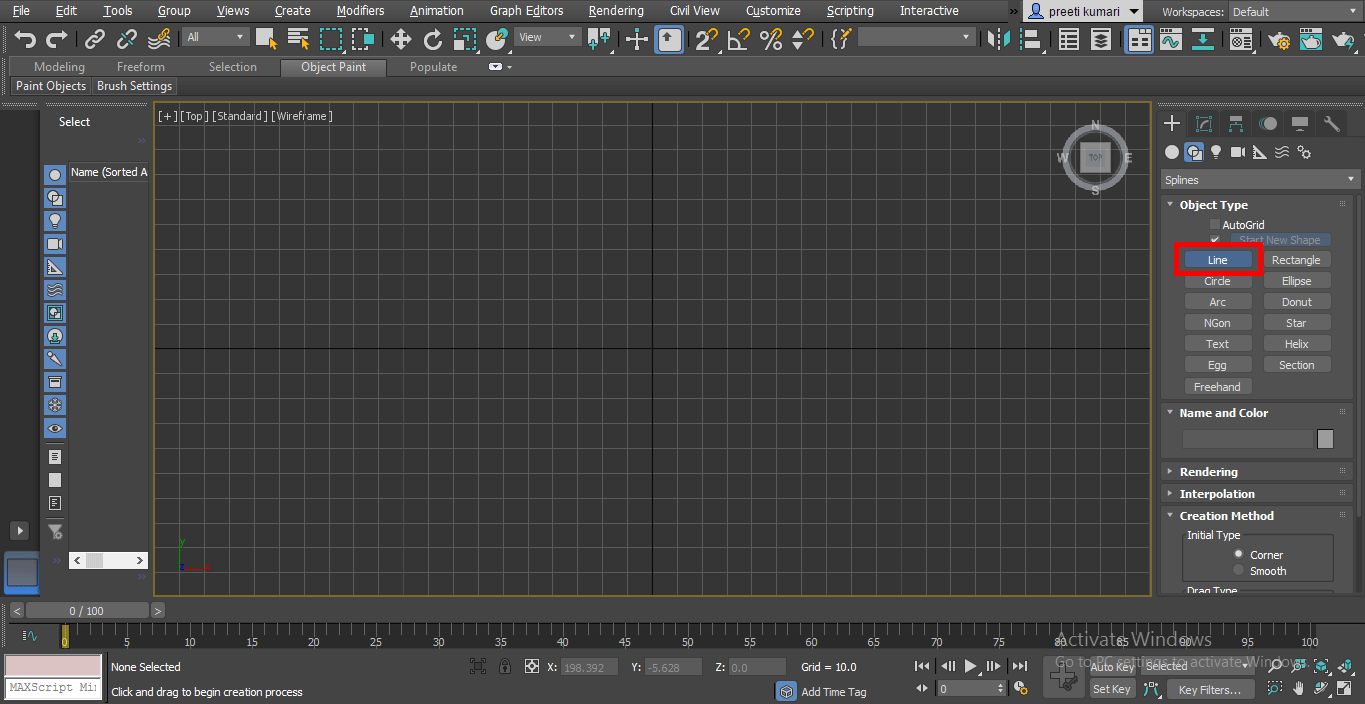
- We have the Creation Method property in the parameter section of the line command that is Corner and Smooth.
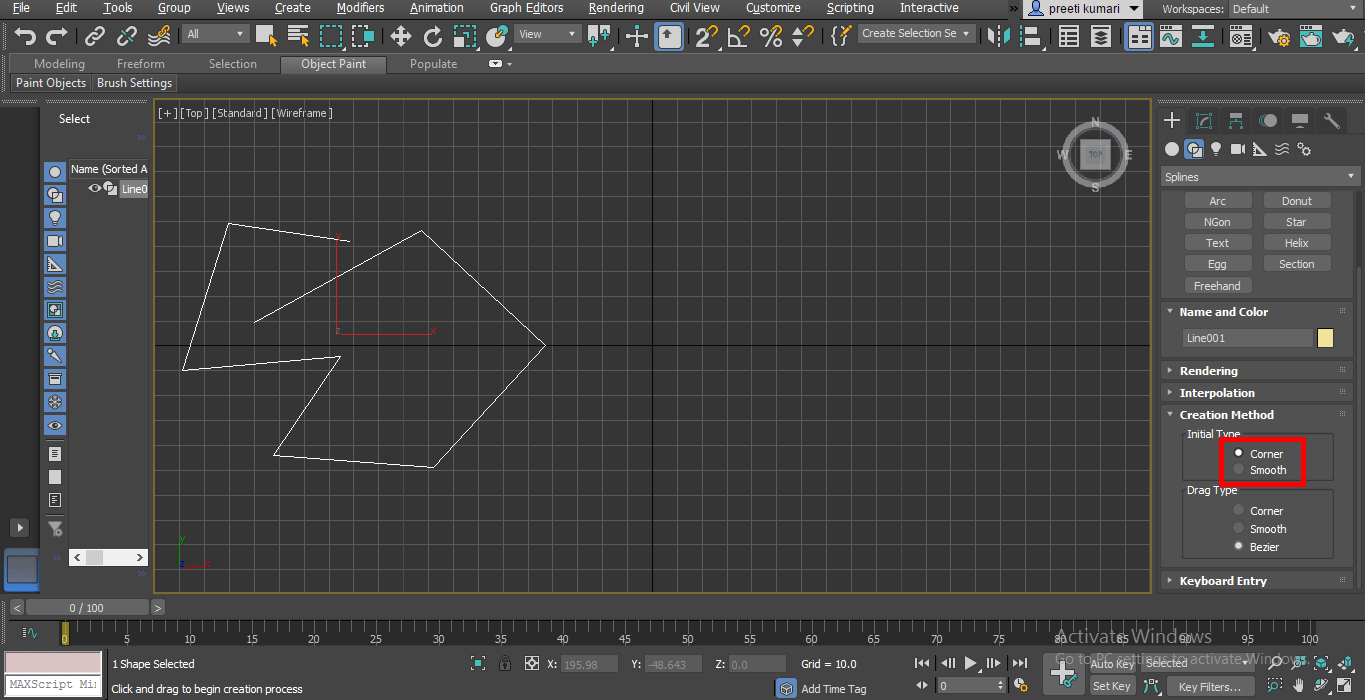
- In the corner method, we will find a sharp corner in the line segment to leave any command press to right-click from the mouse or press the ESC key on the keyboard.

- But in the Smooth method, we find smooth curves at the corner of the line segment.

- The other property is Drag Type that means when you drag the mouse pointer, what it will draw? It may be a drawing corner, smooth segment or Bezier.
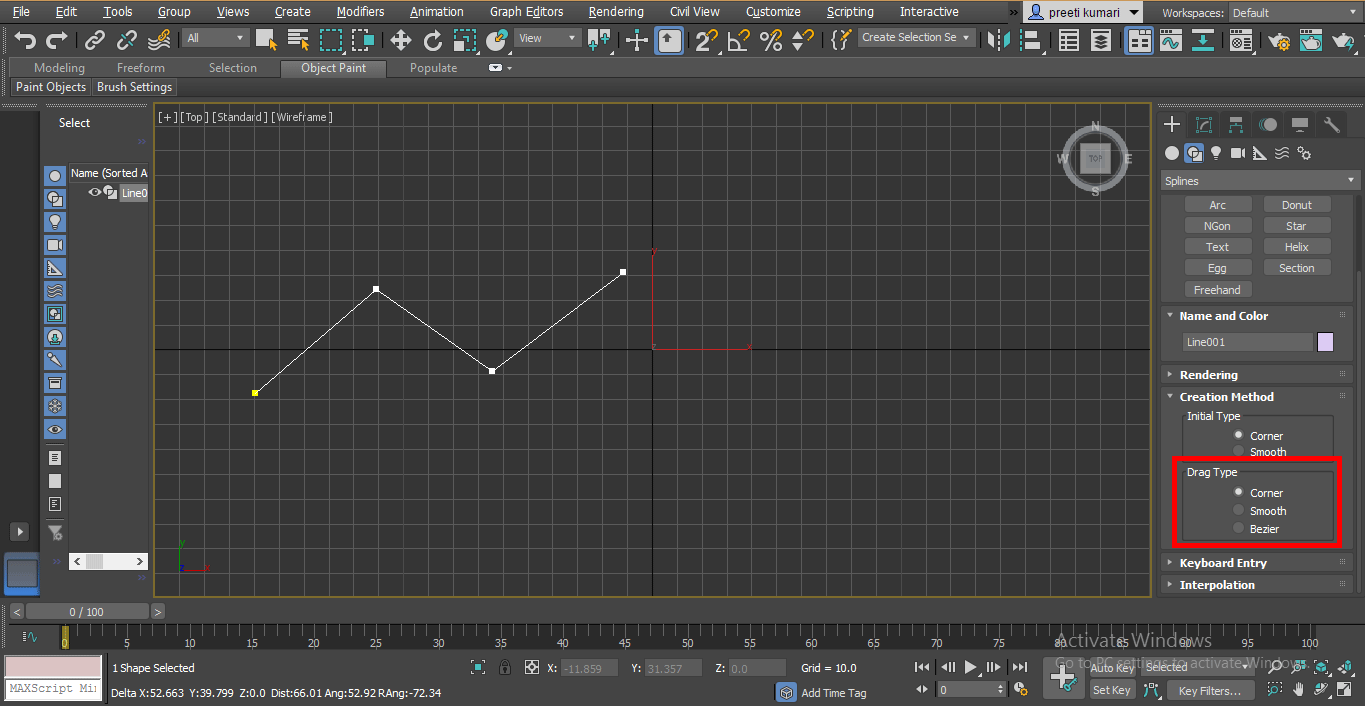
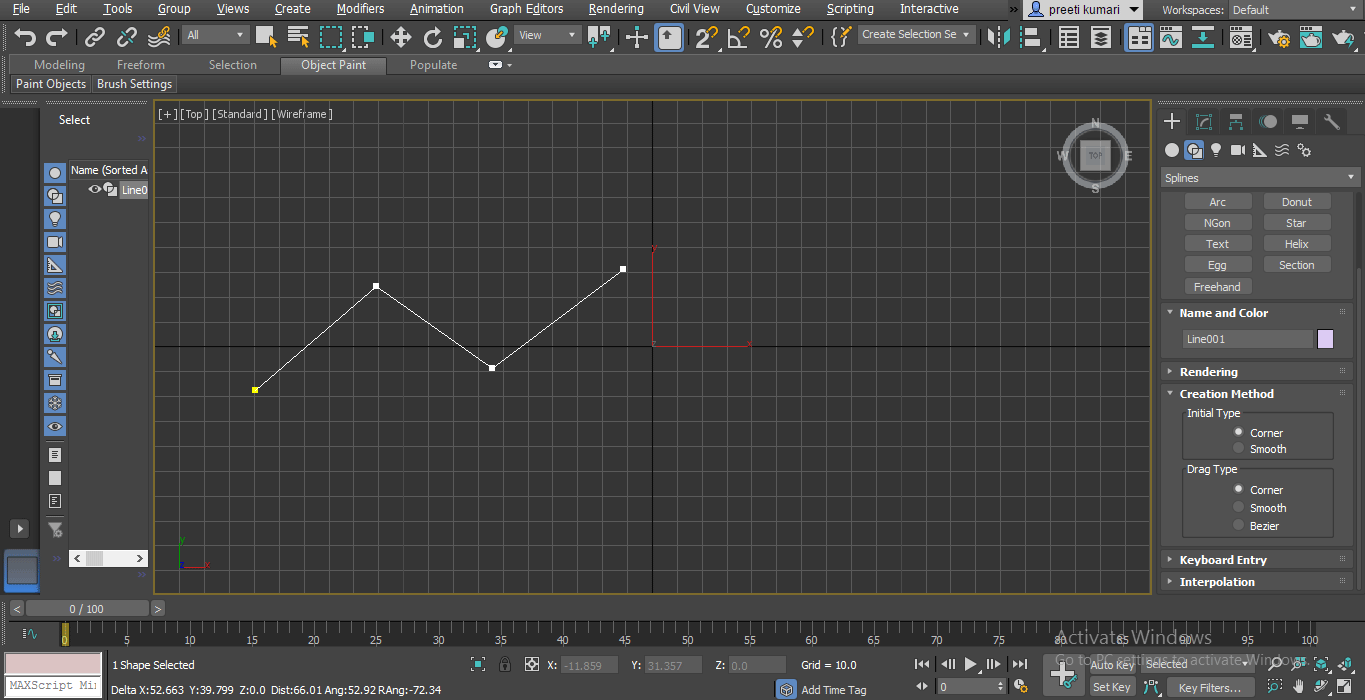
- When you choose the Corner option in Drag type, it will drag a line like this.
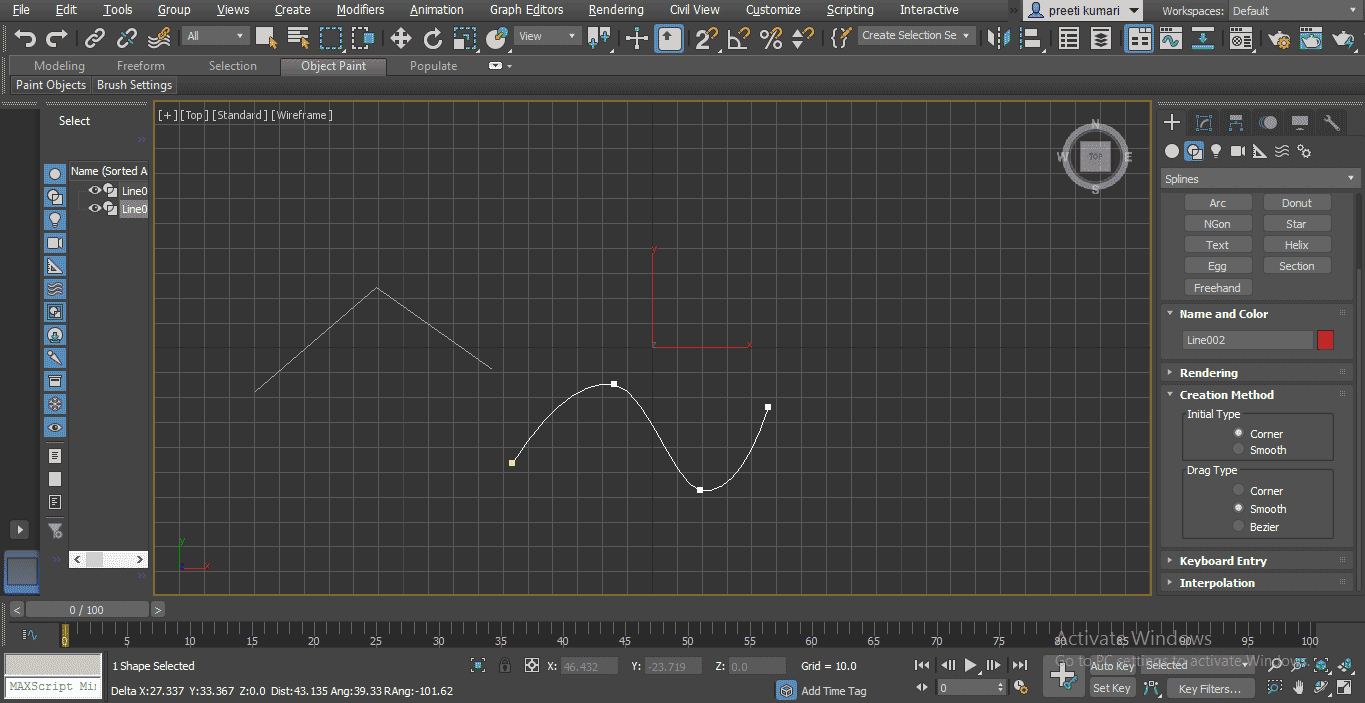
- When we choose the Smooth option, it will draw like this.
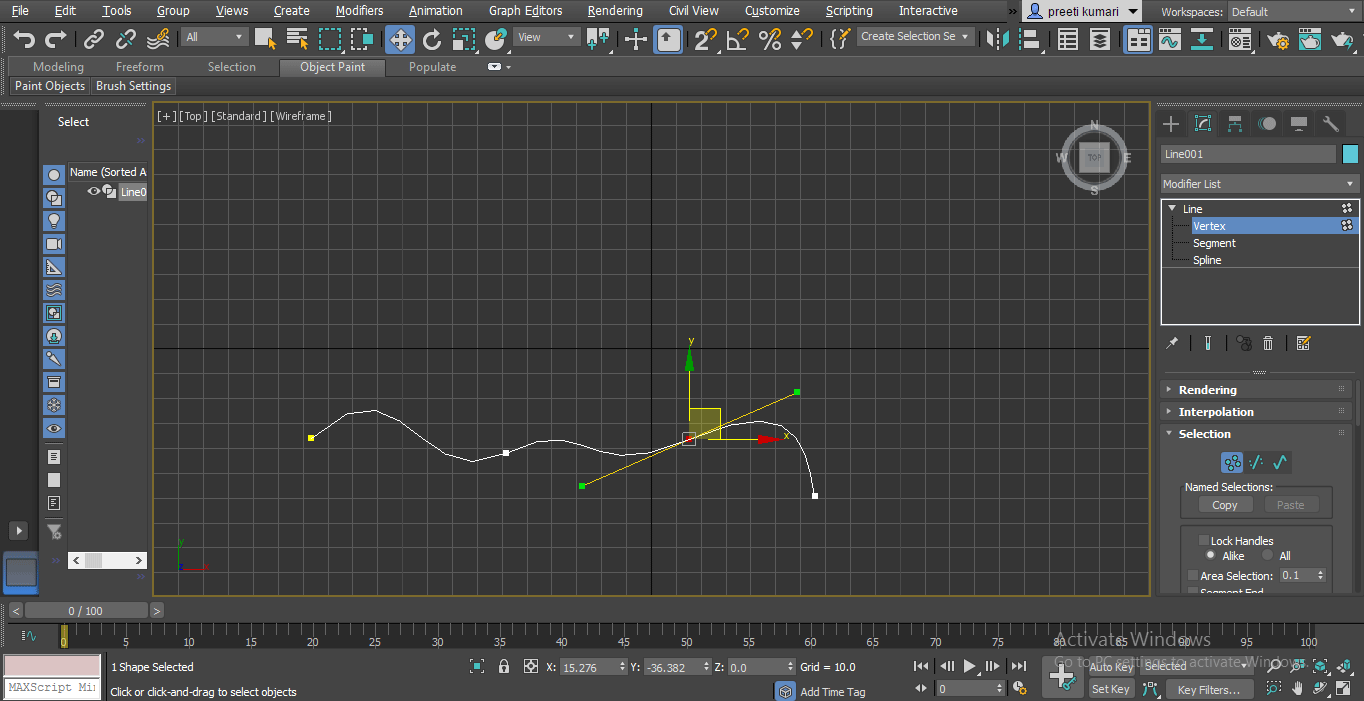
- Choose Bezier from Drag Type. In Bezier, we have a curve handle by which we can change the curve shape of the line at any time.
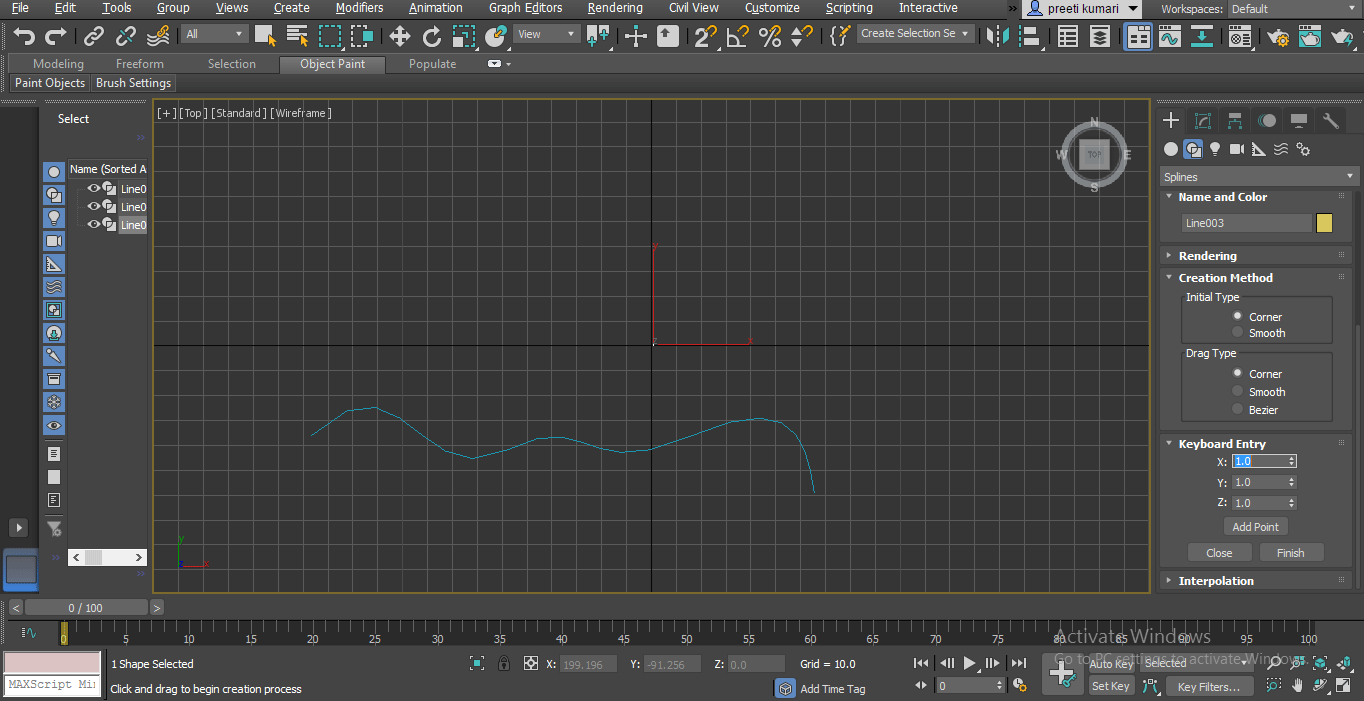
- You can drag the line with the keyboard entry Method; just fill desire data here and click on the Add point tab of this option.
- The other property is the Interpolation property. You can see the line made by a smooth option is not actually very smooth.
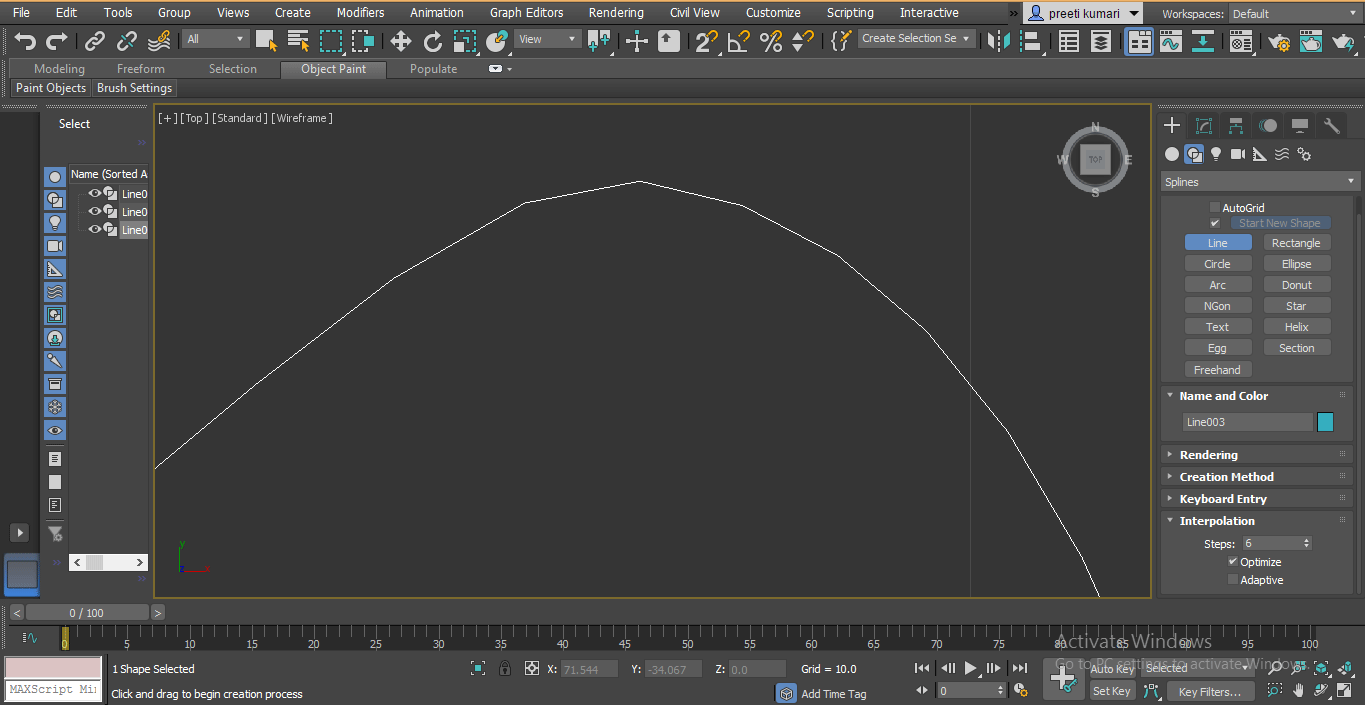
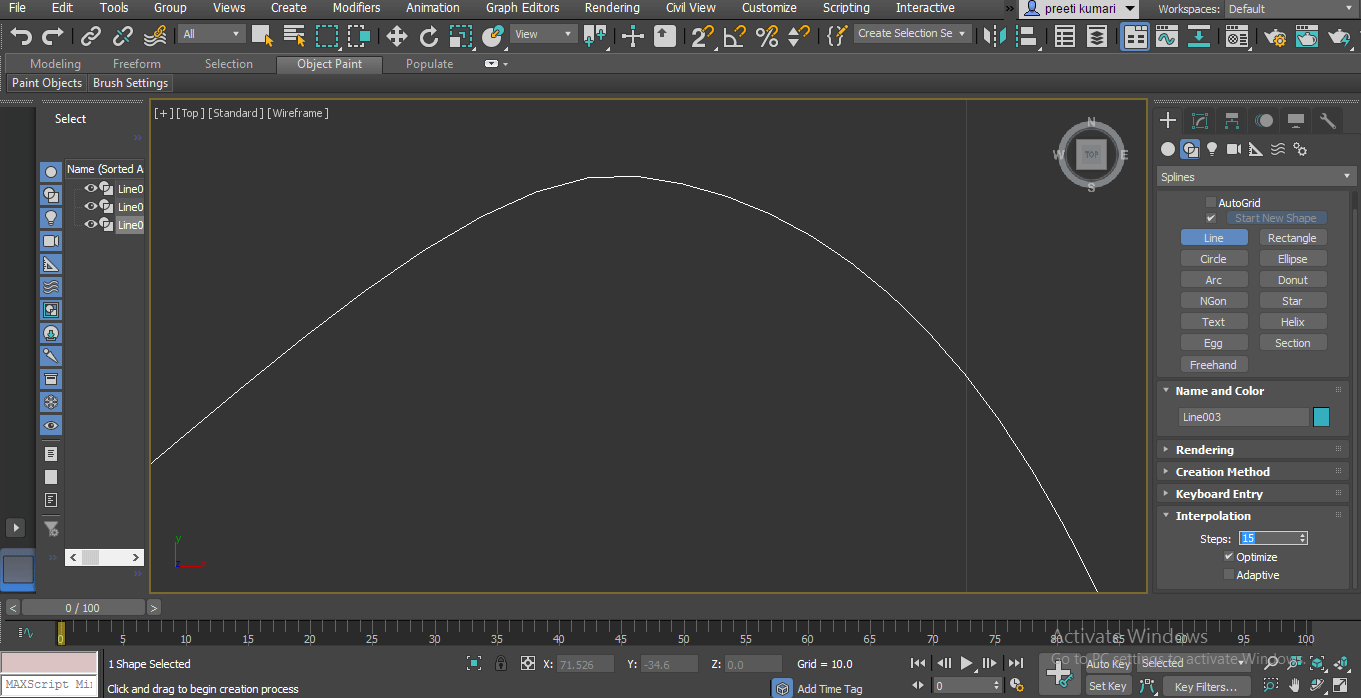
- For making it smooth, increase steps in the interpolation option.
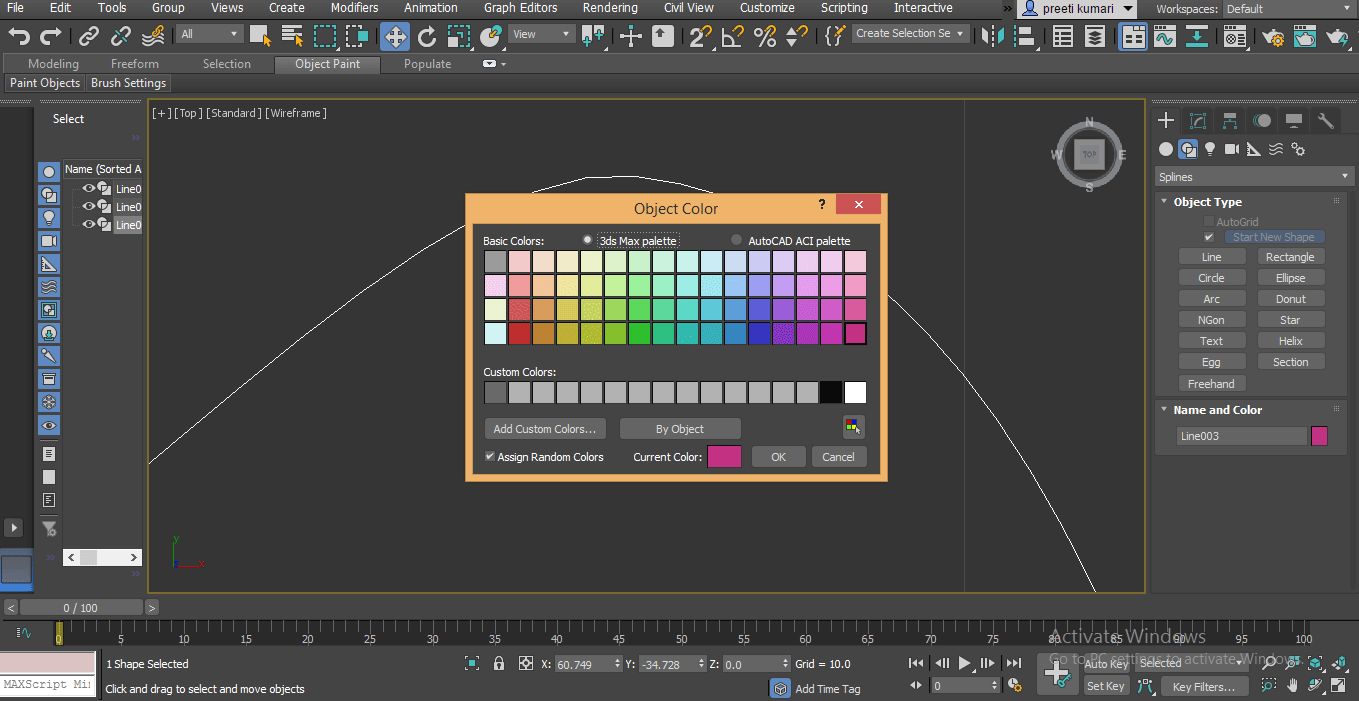
- You can change the color of the line by double click on the box of the color of the Name and color section.

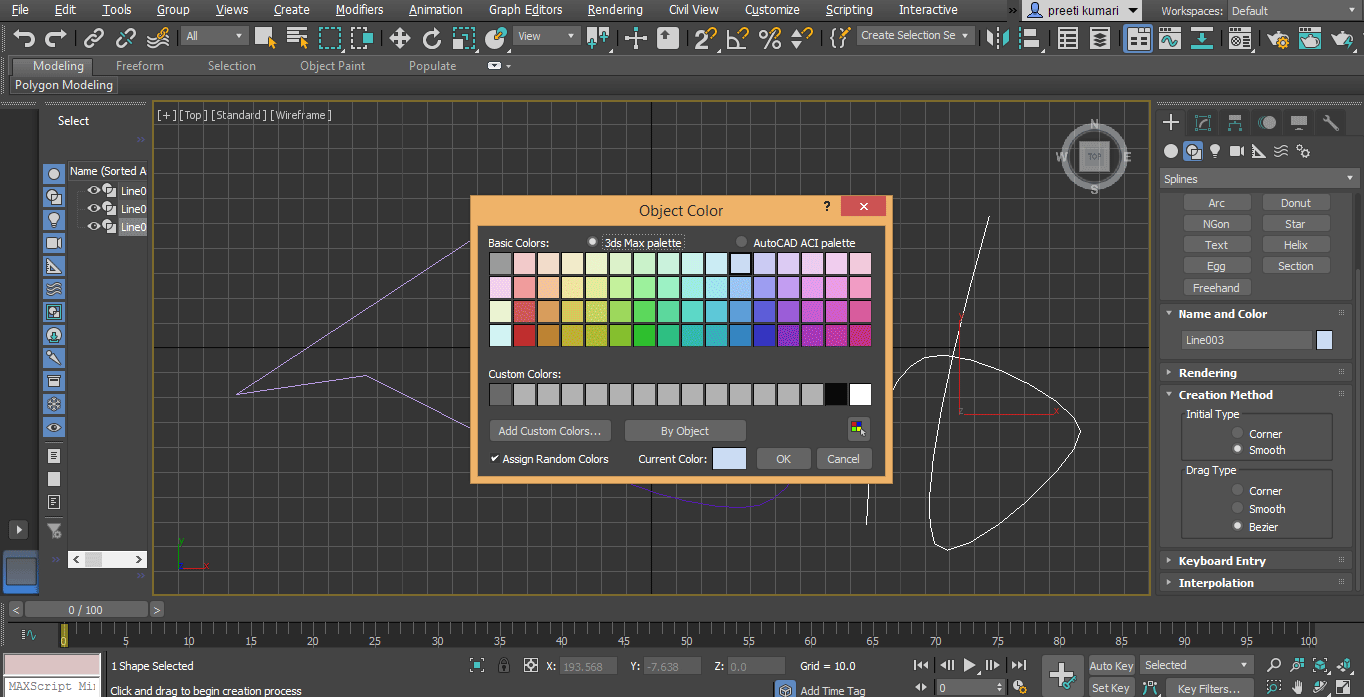
- A dialog box will open. Choose your desired color from here, then press Ok.
- You can see when we draw multiple lines here the colors of all lines are different.
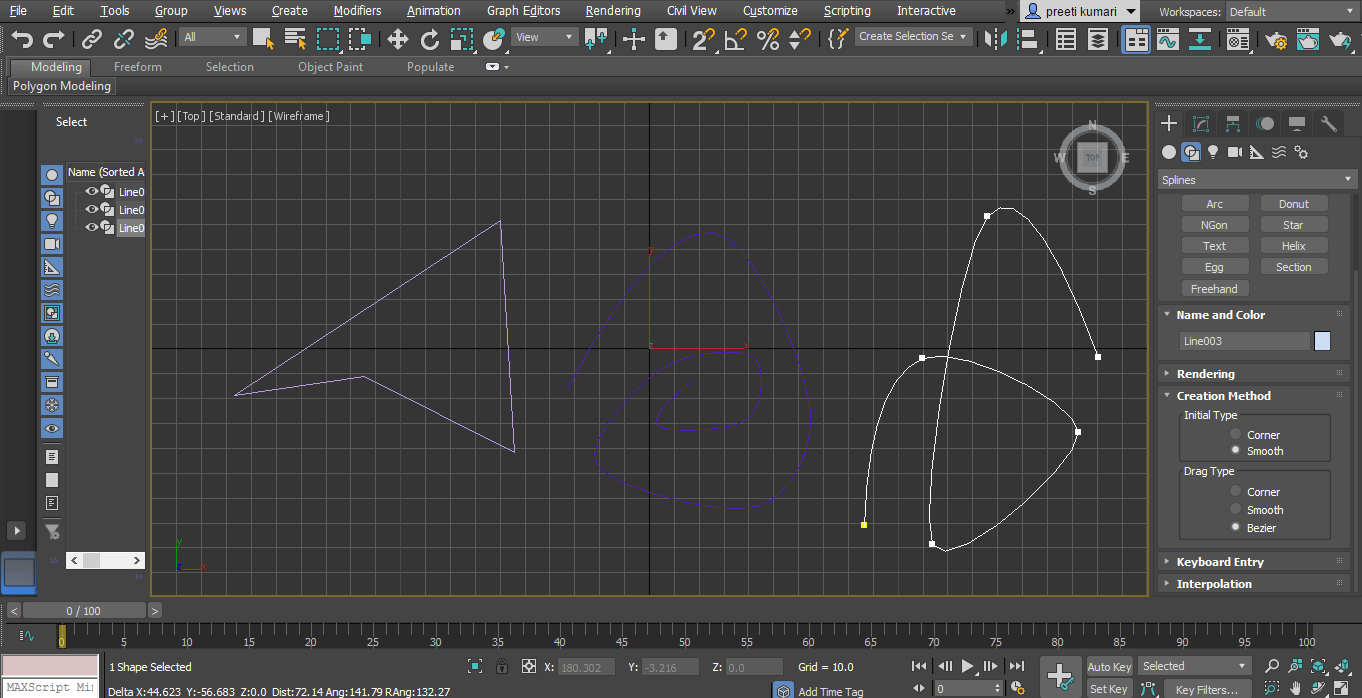
- If you want to draw lines with the same color, then double click on the color box of the Name and Color section a dialog box will be open. Here uncheck the Assign Random colors option and press on the OK tab of this dialog box.
- Now we will take the rectangle command from the common panel section. Click on the rectangle tab.
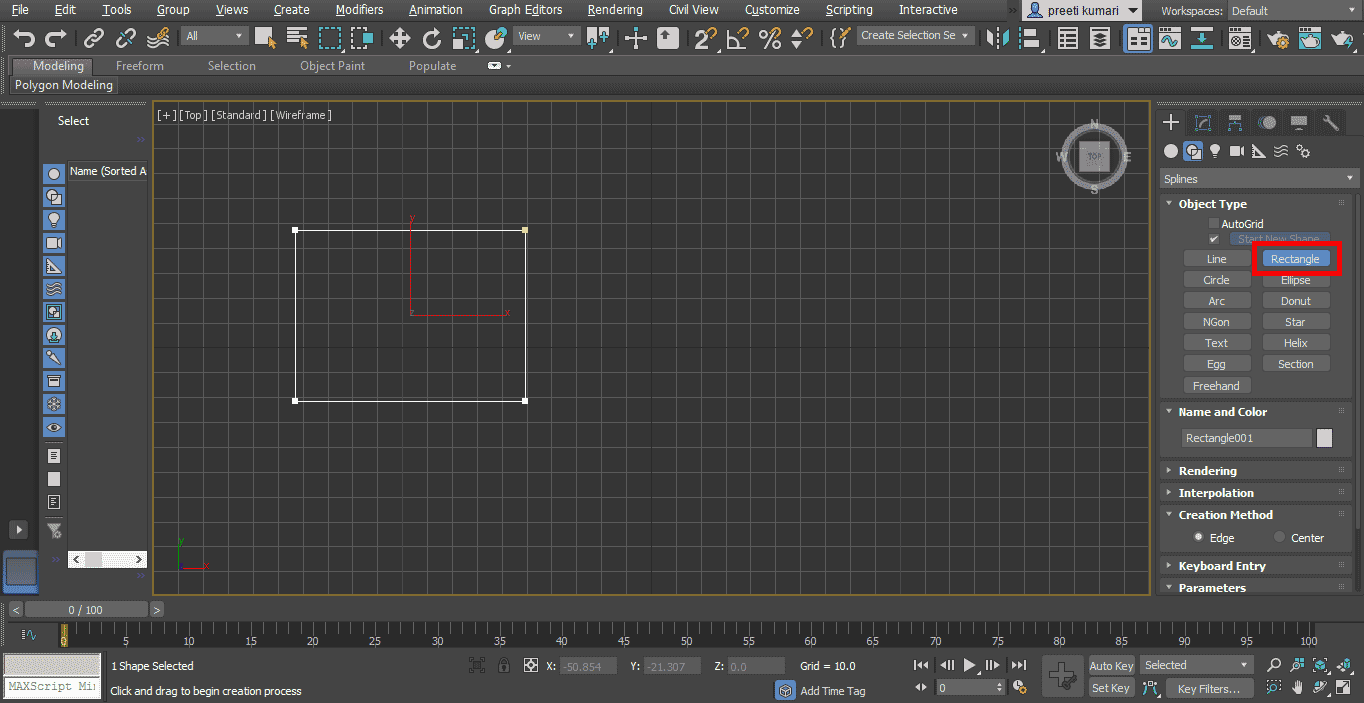
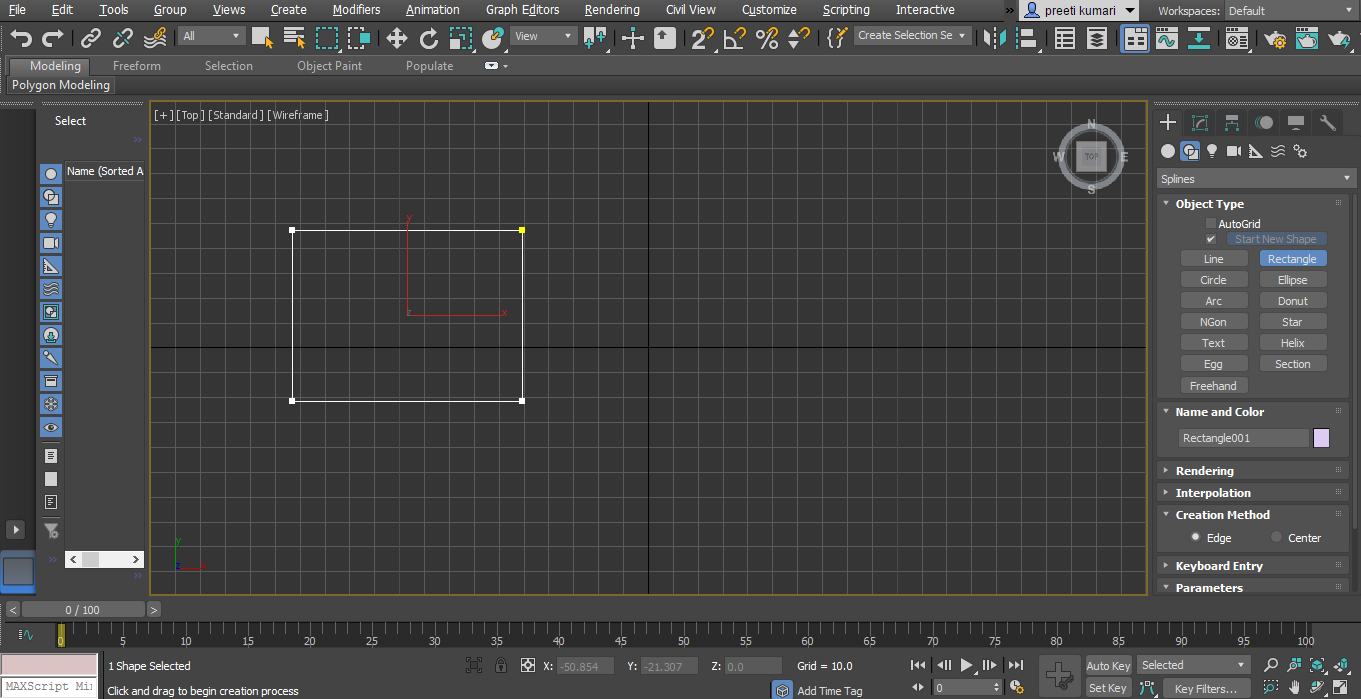
- We have two methods of creation here. One is Edge; now, here, we will draw a rectangle by dragging on the edge.
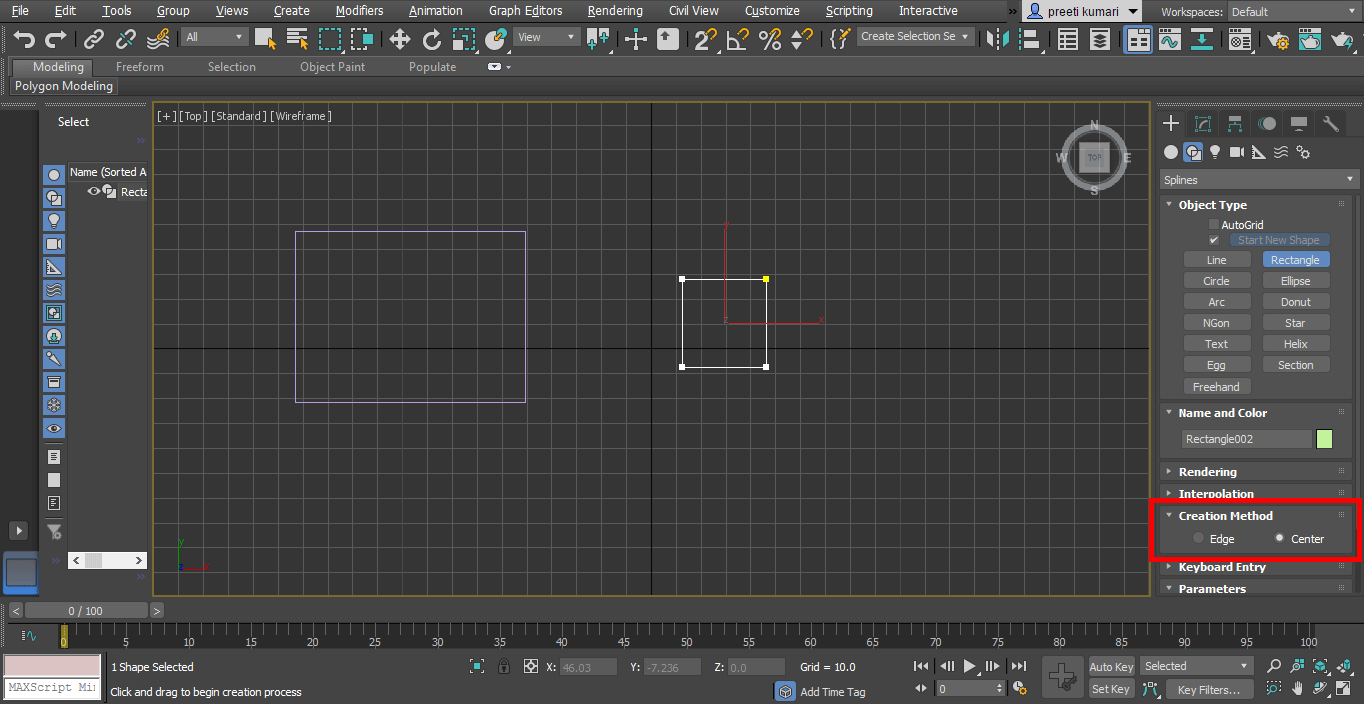
- When you choose the Center method, a rectangle will be drawn from the center of the rectangle.
- You can give a filet to your rectangle by giving a corner radius from here.
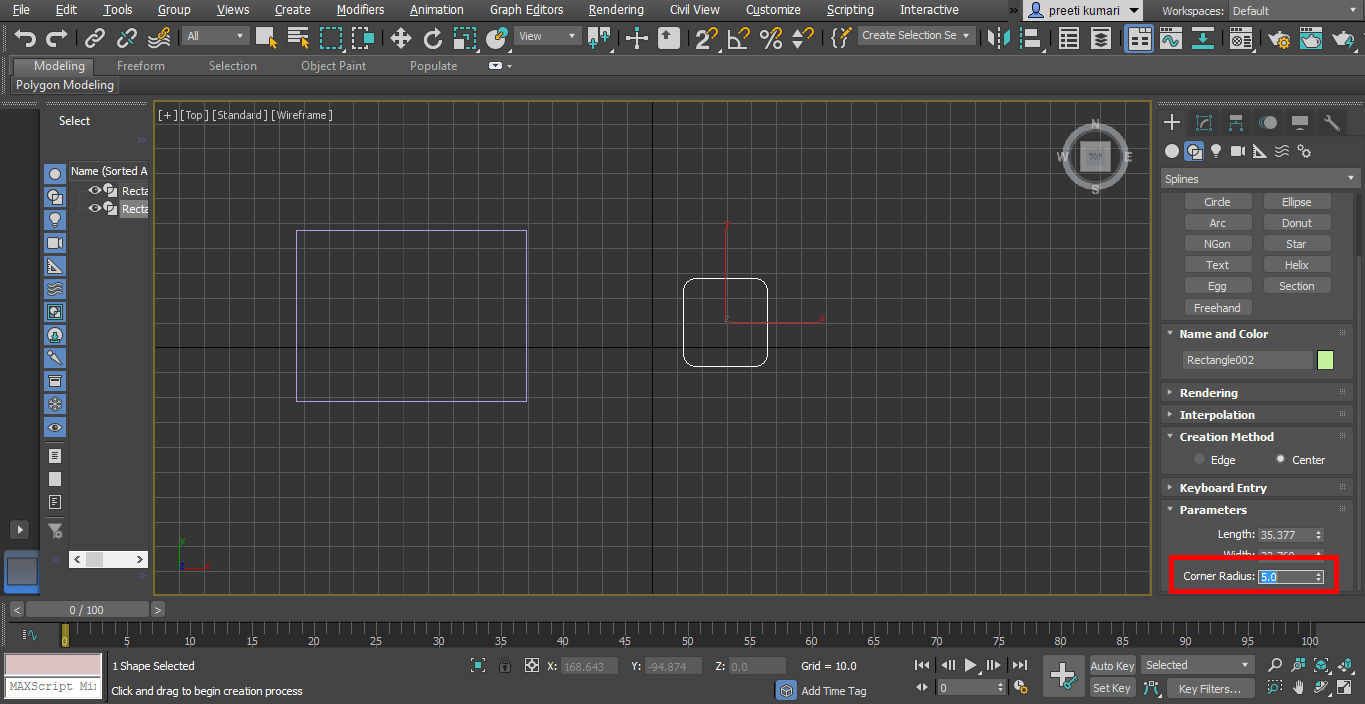
- Another setting of the parameter of the rectangle is the same as a line.
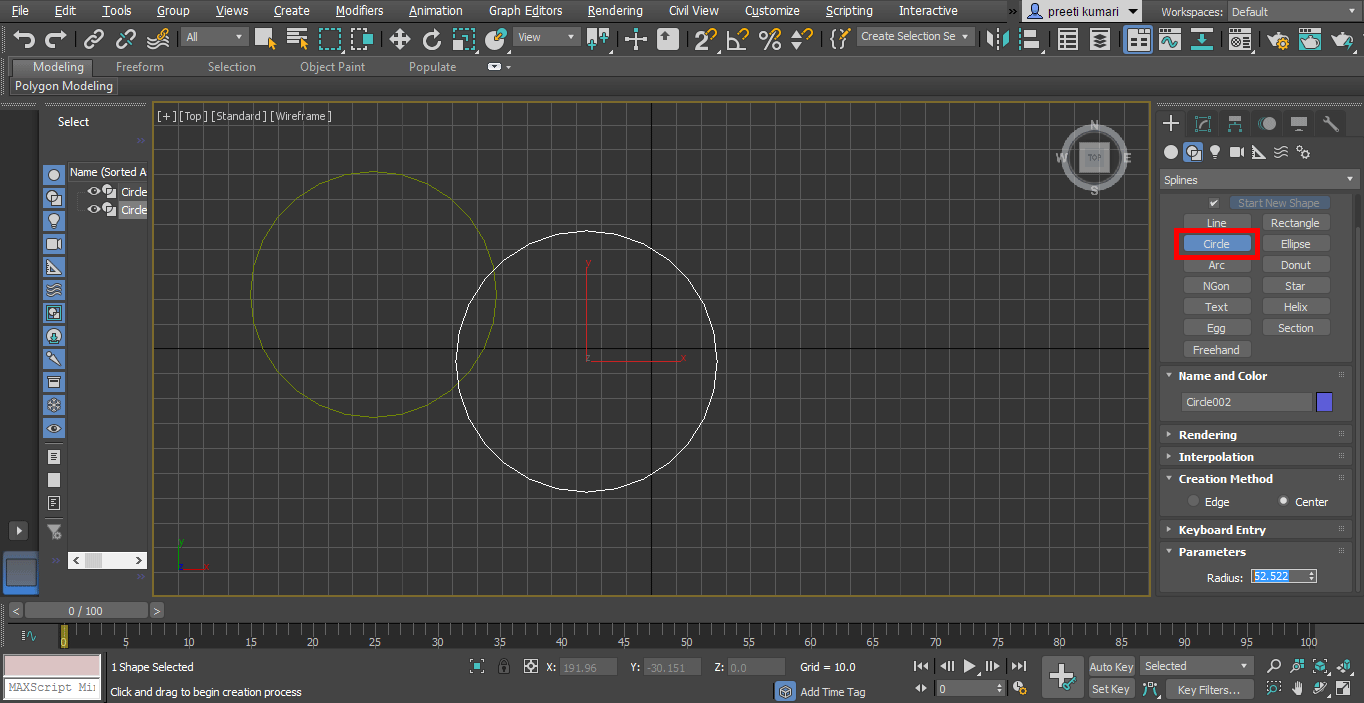
- Now take circle command from the common panel. We have two methods in a circle, also the same as the rectangle; you can check both methods one by one. Here you can directly give the radius of the circle from the radius parameter.
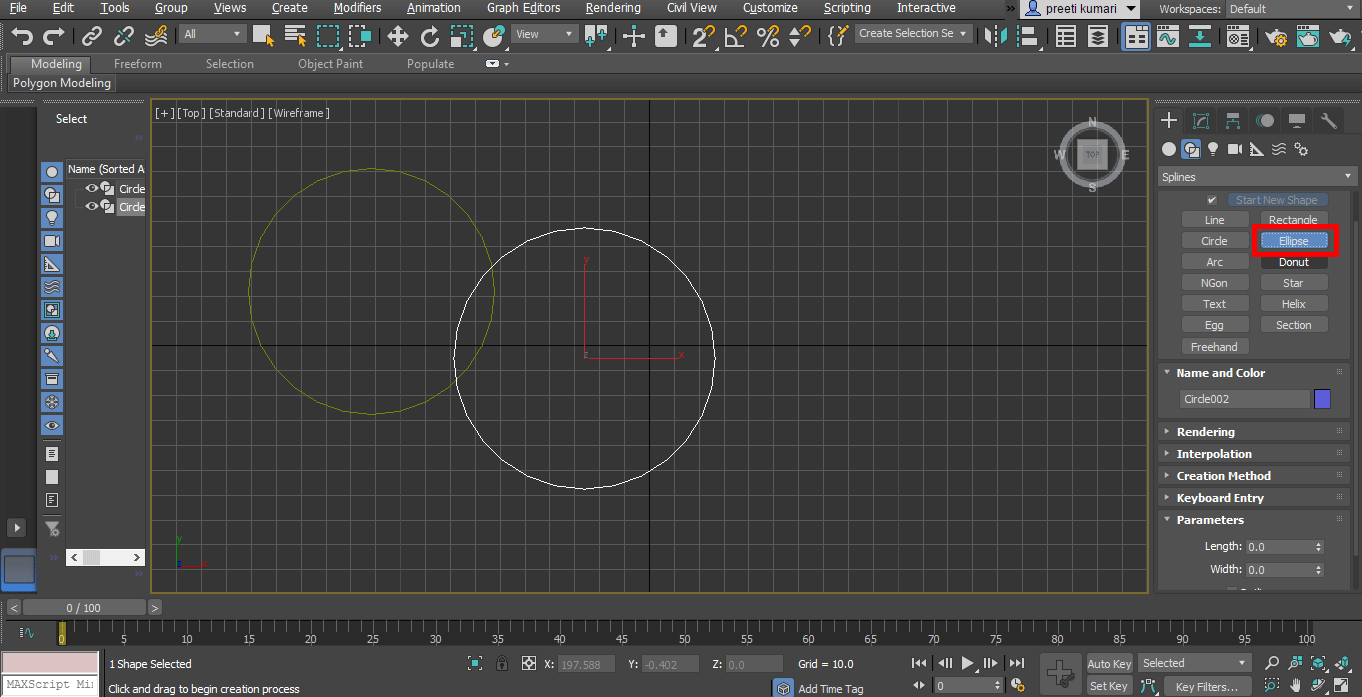
- Ellipse is very similar to a circle; you can draw it for your learning in the same method.
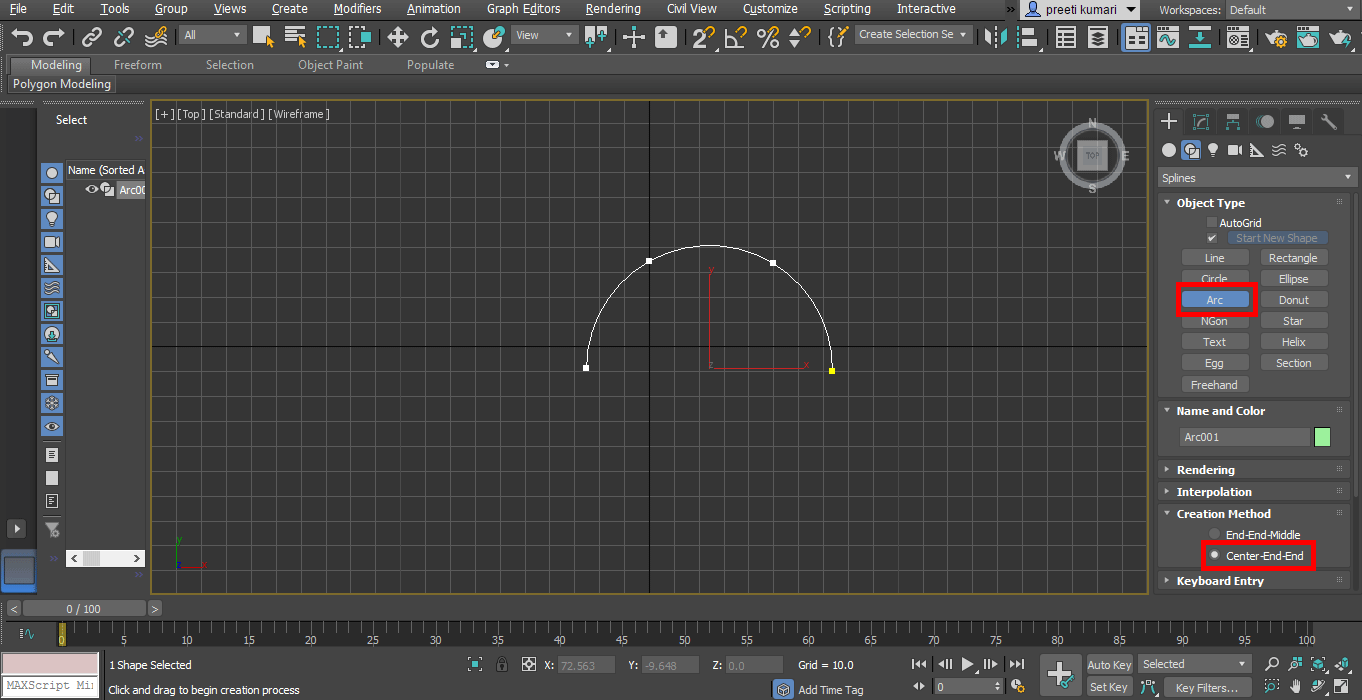
- Next is Arc. Take Arc command from the common panel. Here are two arc-End-Middle methods; one is you should take the first endpoint and then the second endpoint and drag it in that direction in which you want to draw the arc.
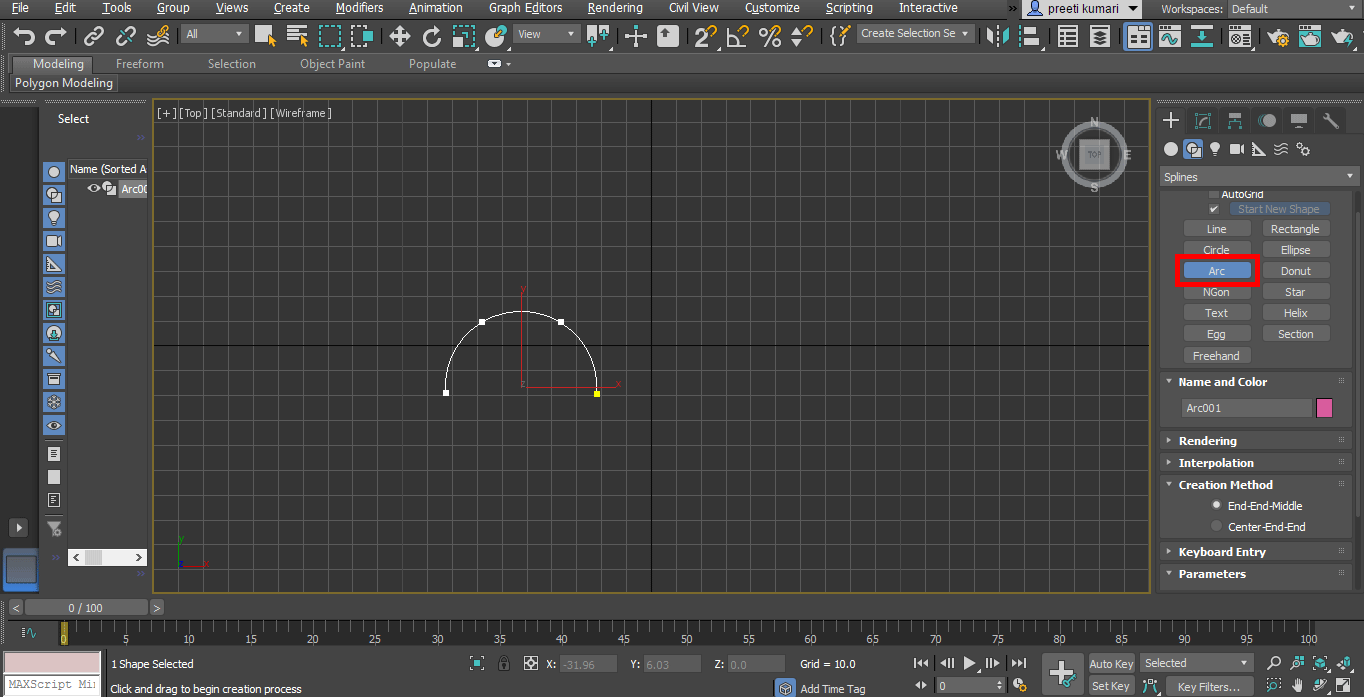
- And the second one is the Center-End-End method it means click the center point of the arc first, then give the first endpoint, and drag the mouse pointer to the next endpoint.
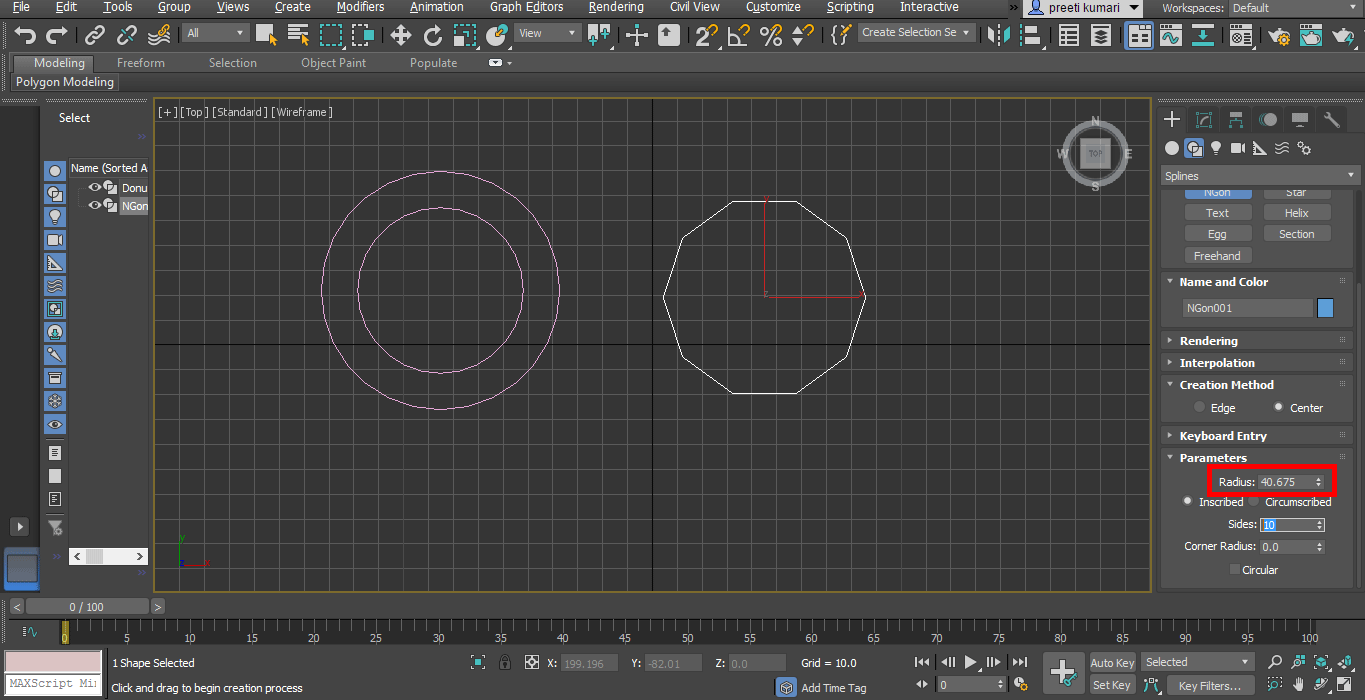
- Next is Donut. Take donut command from the common panel. Here is also two creation method of Donut. One is Edge, and the second is center which is similar to a rectangle. To draw it, click anywhere in the grid and drag the mouse pointer in the outer direction to draw the outer circle of the donut and again drag in an inner direction to draw the inner circle of donut and click to leave.

- Next is NGon. Take NGon command from the common panel, here also we will find two creation methods of NGon; one is Edge, and the second is center which is similar to a rectangle. It is similar to polygon, but in NGon, you can give any number of sides to it according to you. You can give a radius manually from the parameter box.
- In this way, you can easily use other shapes command of the spline in 3ds max software for making 2D shapes and make your desired 3D model with their help.
Conclusion – Spline in 3ds Max
After this tutorial, you can draw many 2D shapes without any difficulties in making your desired 3D shapes. When you have good command in 2D shape, modeling, as well as animation in 3d max, it becomes quite simple and interesting for you.
Recommended Articles
This is a guide to Spline in 3ds Max. Here we discuss an Introduction to 3ds Max Software and the Uses of various tools in Spline Command. You can also go through our other related articles to learn more –


