Updated September 12, 2023

Introduction to Spline in AutoCAD
AutoCAD is a computer-aided 2d and 3d design software that works for architectural, mechanical and other automobile works. We have different types of command in this software for making work our work easy. The spline is a type of line command through which you can make a wavey line for making any type of 2d shape in Auto CAD software. Here in this software, we will understand the Spline command in a few steps and understand some Spline command parameters. You will also get knowledge about the short cut keys of this command in this software. So let us start our learning.
How to Use Spline in AutoCAD?
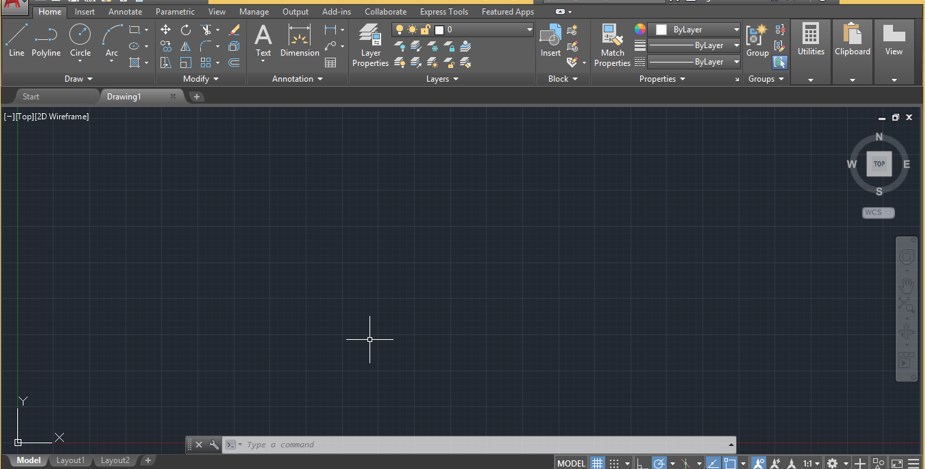
We can understand the Spline command in Auto CAD very easily because it is very similar to the line command of this software but before starting our learning in this article, let us have a brief look at the working screen of this software for our better understanding of this topic throughout this article.
Step 1: At the top of the working screen there are some tabs which have a different type of designing commands such as Home, Insert, Annotate and many others each tab have their different command and sections for handling the parameters of their command and design, below this we have a working window in which we can draw our drawing and make models, below this window there is some navigation command with switching command from 2d to 3d working screen. You can adjust all the sections according to you for making your working screen.
Step 2: You can take the Spline command from the Draw menu of the Home tab of this software which is at the top of the working screen.
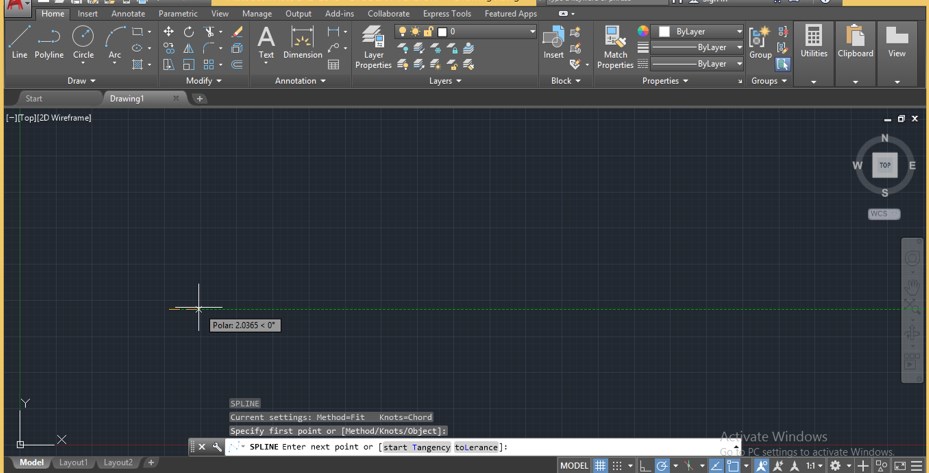
Step 3: Or you can use a short cut key for the Spline command. For short cut key, just type SPL from the keyboard, and a drop-down list will be open. Choose SPL (SPLINE) command from this list.
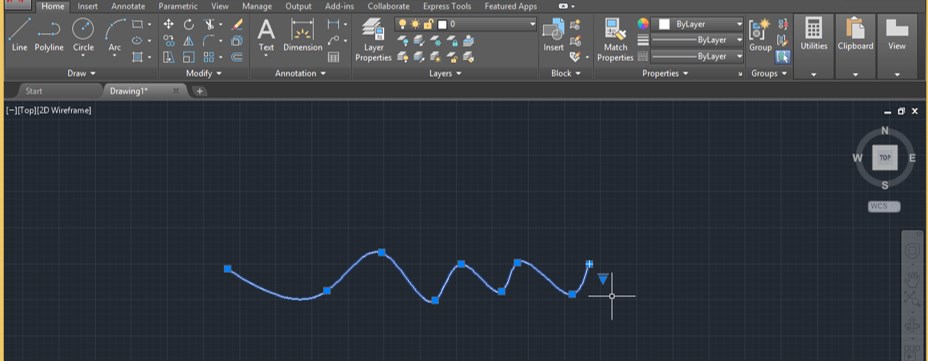
Step 4: Now specify the first point of the spline from where you want to start it. You can choose any point by making click on the mouse button on the working area, or you can manually input value for that.
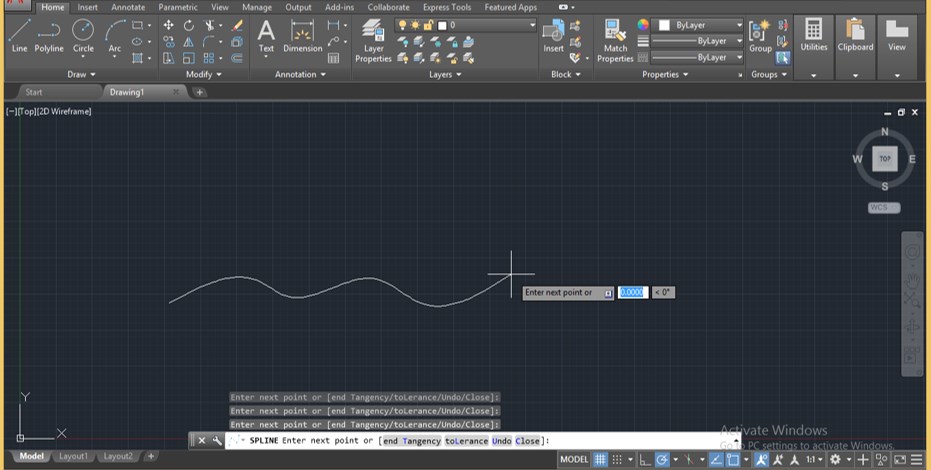
Step 5: Now specify the second point by click on that point and continuously draw the next point like this. In this way, you can draw a spline with a spline command in this software. For exiting the command, press Enter button from the keyboard once you have done it.
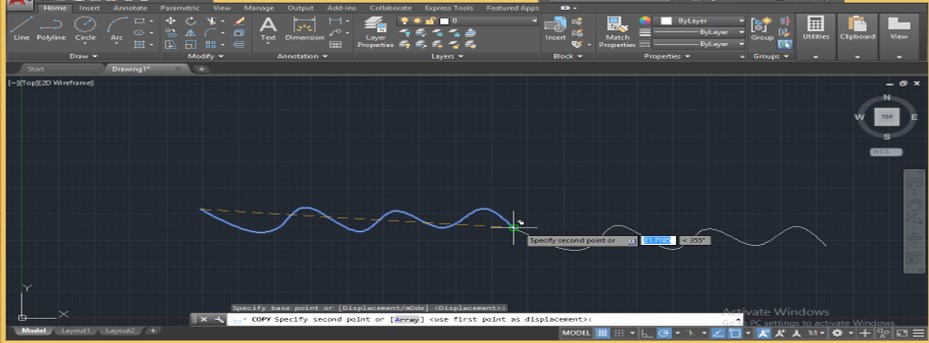
Step 6: Now, if you can join this spline with another spline, then select the spline and go to Copy command of Modify menu of Home tab, which is next to the Draw menu of Home tab and take it by clicking on it.
Step 7: Now click on the starting point of the spline if you want to connect two splines and then place it at the other endpoint of this spline, then press the ‘Enter’ button for leaving the Copy command.
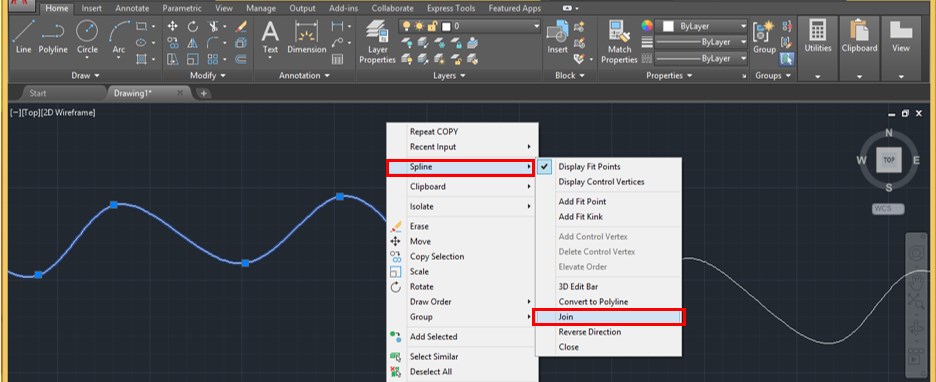
Step 8: Now, for joining these two splines, select any one of the splines of them and make right-click with the mouse button. A drop-down list will be open, go to the Spline option of this list and click on the Join command of the new drop-down list.
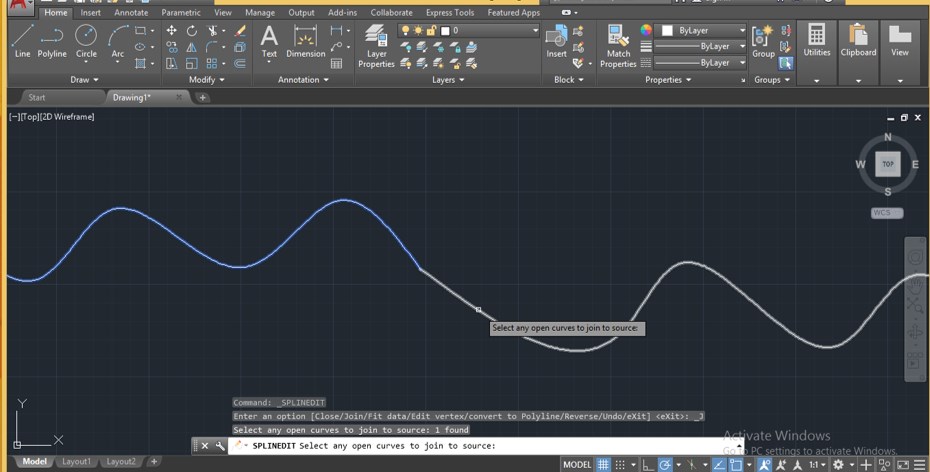
Step 9: And then select both of the splines one by one with this square like a mouse cursor, then press Enter button from the keyboard for joining them.
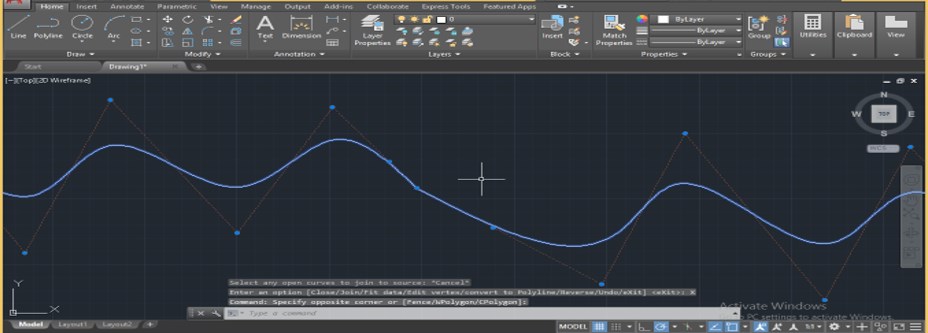
Step 10: Once you press the Enter button, of keyboard splines will join like one spline.
Step 11: You can convert a Polyline in Spline. For converting Polyline into Spline, let us take the Polyline command from the Draw menu of the Home tab.
Step 12: Now draw a polyline and select it by click on it.
Step 13: Now, make right-click on it with the mouse button. A drop-down list will be open, go to the Polyline option and click on the Spline fit option of the new drop-down list.
Step 14: Once you make click on this option, polyline will convert into spline like this.
Step 15: You can move points of the spline by selecting and dragging them like this.
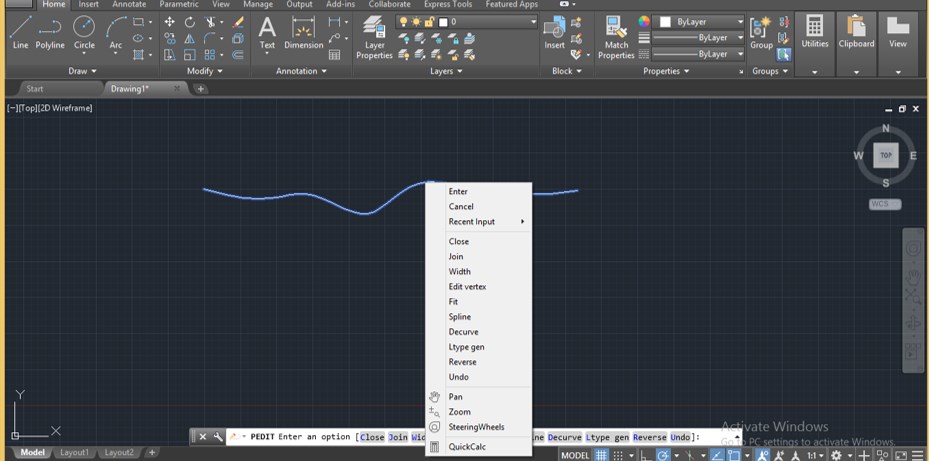
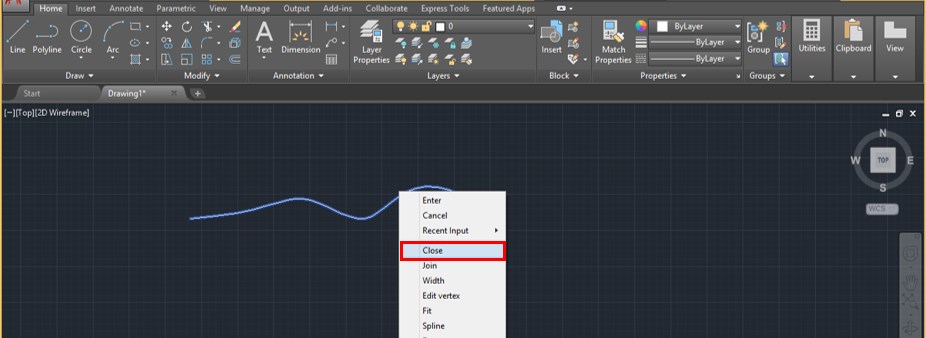
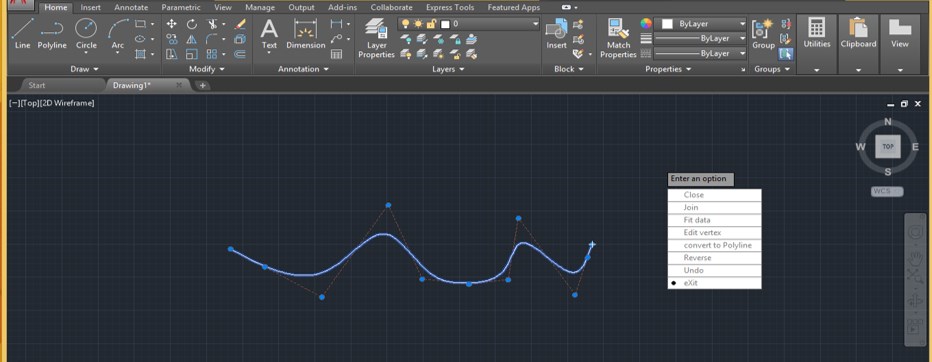
Step 16: You can edit this spline if you want. For editing, it makes a double click on this spline then make right-click from the mouse button. A drop-down list will be open. You can choose any one of the listed commands for editing this spline.
Step 17: I will show you through one of the commands of the list. For example, I want to close this spline; then, I will click on the Close command of this list.
Step 18: Once you click on the Close command, the endpoints of the spline will connect like this.
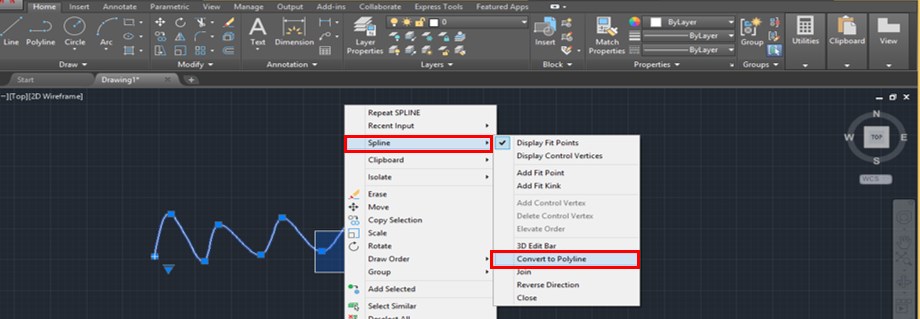
Step 19: You can also convert a spline into a polyline. For converting a spline into a polyline, select drawn spline by clicking on it and make right-click with the mouse button. A drop-down list will be open, go to the Spline option of this list and click on the Convert to Polyline option of the new drop-down list.
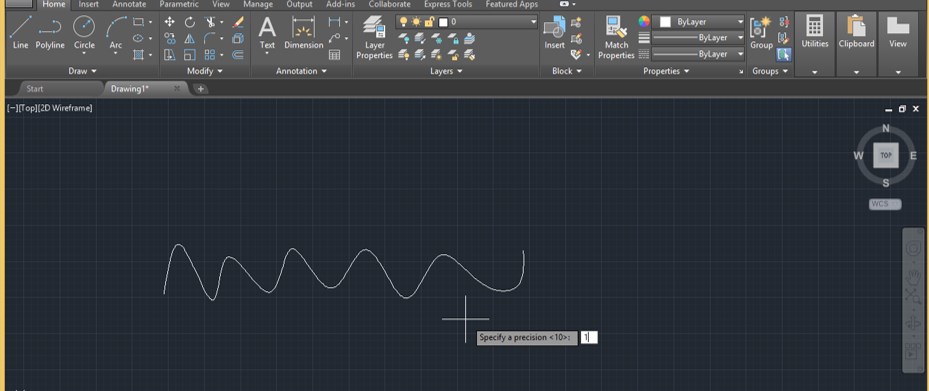
Step 20: Once you click on this option, the command will ask you to give the point of polyline. Let I will give it 1.
Step 21: Then it will convert into a polyline like this.
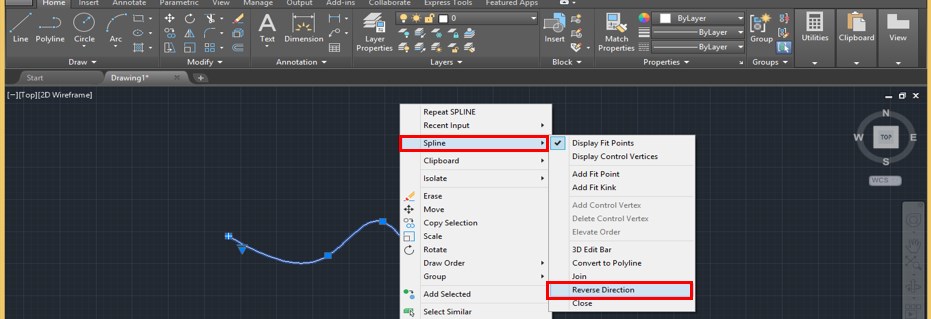
Step 22: You can also change the direction of the spline. For changing the direction of the spline, selected it and make right-click with the mouse button; go to the Spline option and then click on the Reverse Direction option of the new drop-down list.
Step 23: Once you make a click, the direction of the spline will change like this.
Step 24: If you want to display control handles of vertices on this spline, go to the Display Control Vertices option of Splitting this spline.
Step 25: Once you make click on this option, you can see the handles of vertices control will come around this spline in dots line with handle squares.
These are some points through which you can use the spline command in this software and edit spline by using some parameters of this command.
Conclusion
Now, after this article, you will understand Spline in AutoCAD and ‘how you can use its parameters for editing it’. You can use this spline command to make good models in this software and get good output in your project work of this software.
Recommended Articles
This is a guide to Spline in AutoCAD. Here we discuss the Introduction, steps to create Spline in AutoCAD in a very easy manner. You can also go through our other related articles to learn more –
