Introduction
Spotify, the world-renowned music streaming service, has revolutionized how we experience music. Spotify provides a huge selection of music, podcasts, and playlists along with tailored content for each user. Installing Spotify on Ubuntu, a popular open-source operating system, enhances your music experience by integrating it seamlessly into your daily workflow. Whether you’re coding, writing, or simply relaxing, having Spotify on Ubuntu allows you to enjoy a rich audio experience with the stability and performance of Linux.

Table of Contents
- Introduction
- Prerequisites
- Installing Spotify Using Snap
- Installing Spotify Using the Software Center
- Troubleshooting Common Issues
- Uninstalling Spotify
Prerequisites
It’s essential to ensure that your system is up to date. Keeping your system updated guarantees that you get the newest security updates, bug fixes, and software versions, providing a smooth and trouble-free installation experience.
To update your system, open the terminal and run the following commands:
- Update the package list: This command refreshes the list of available packages and their versions but doesn’t install or upgrade any packages.
“sudo apt update” - Upgrade the installed packages: This command installs the most recent versions of all the packages that are already installed on your system and updates any dependencies that are needed.
“sudo apt upgrade”
Installing Spotify Using Snap
Explanation of Snap package manager
Snap is a universal package management system developed by Canonical, the maker of Ubuntu. It allows you to install bundled software packages (snaps) with all their dependencies, ensuring they work consistently across different Linux distributions.
Step-by-step instructions
- If Snap is not installed on your system, install it by running the following command:
“sudo apt install snapd” - Once you have installed Snap, you can proceed to install Spotify by running the following command:
“sudo snap install Spotify”
- After the installation, you can verify that Spotify has been installed correctly by listing all installed Snap packages. Use the following command:
“snap list Spotify”
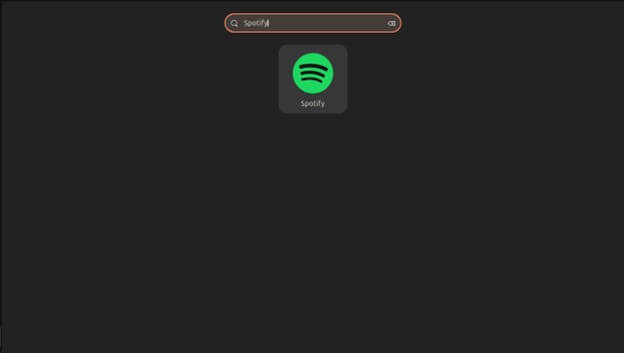
- To launch Spotify, open the application menu and search for “Spotify.” Then, click on the Spotify icon to start the application.
Installing Spotify Using the Software Center
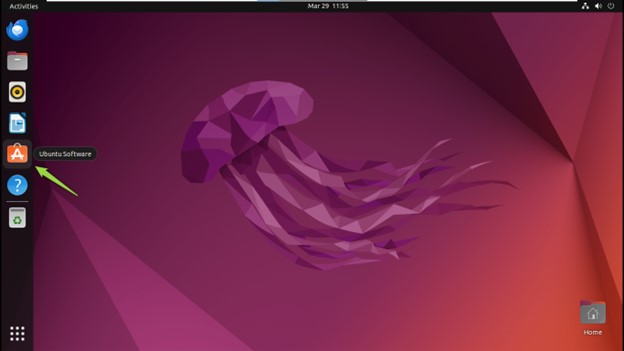
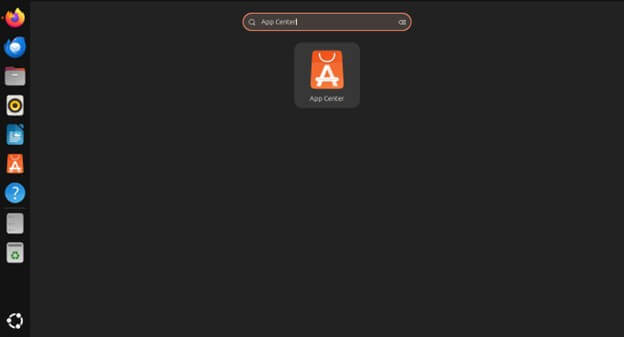
- Click on the Ubuntu Software icon in the dock or search for “Ubuntu Software” in the Activities menu.
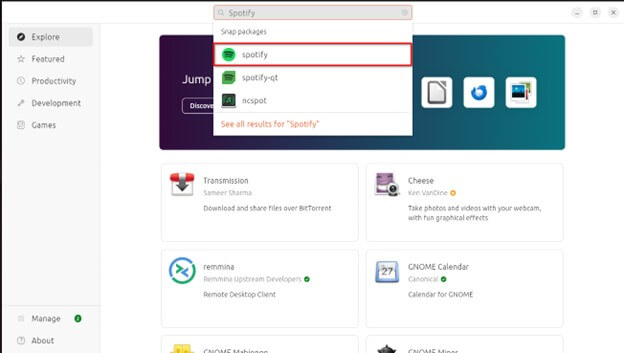
- In the search bar, type “Spotify” & press Enter.
- Click on the Spotify application from the search results.
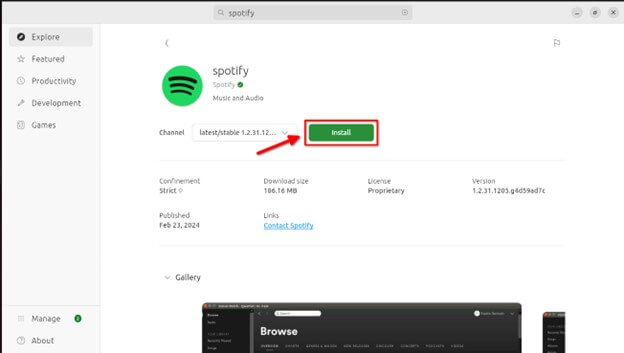
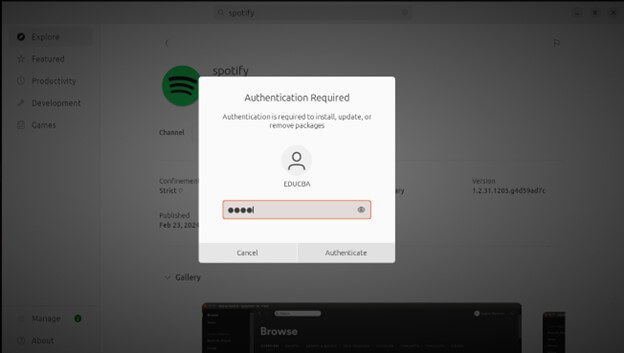
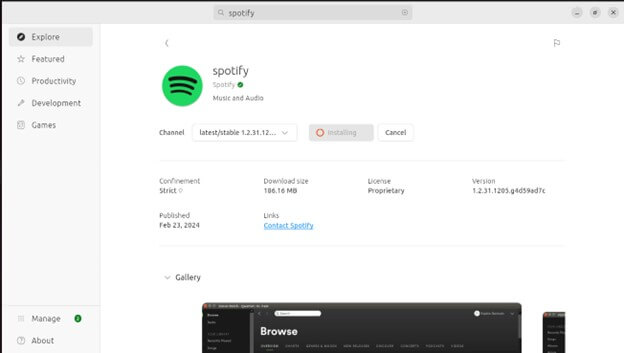
- Click the “Install” button. You may need to enter your password to authorize the installation.
- Once installed, you can launch Spotify from the Activities menu by searching for “Spotify.”
Troubleshooting Common Issues
Common installation errors and solutions
- Error: “snap: command not found”
- Solution: Make sure to install Snap. Run sudo apt install snapd to install Snap.
- Error: “cannot install snap: snapd is not running.”
- Solution: Start the Snap daemon with sudo systemctl start snapd. Enable it to start during boot with sudo systemctl enable snapd.
- Error: “Spotify snap installation fails.”
- Solution: Refresh the Snap package list with sudo snap refresh. If the issue persists, check for Snap updates with sudo apt update && sudo apt upgrade snapd.
Checking for missing dependencies
- Command: sudo apt –fix-broken install
- Solution: Run this command to fix broken dependencies that might prevent Spotify from installing or running correctly. It checks for missing dependencies and tries to resolve them.
- Reinstalling Spotify if issues persist: If you continue to experience issues, try reinstalling Spotify:
“sudo snap remove Spotify” - Reinstall Spotify:
“sudo snap install Spotify”
Uninstalling Spotify
- To remove Spotify installed via Snap, run the following command:
“sudo snap remove Spotify” - After uninstalling Spotify, removing the Spotify repository file is good practice to clean up your system. Run the following command:
“sudo rm /etc/apt/sources.list.d/spotify.list” - Finally, update your package list to reflect the changes:
“sudo apt update”
Conclusion
Installing Spotify on Ubuntu is straightforward, whether you choose the Snap package manager or the Software Center. This guide has provided detailed instructions for both methods, ensuring a smooth installation process. You can quickly resolve any issues by keeping your system up-to-date and following the troubleshooting tips. Uninstalling Spotify is also simple, allowing you to maintain a clean system. With Spotify on Ubuntu, you can enjoy seamless access to your favorite music and podcasts, enhancing your overall Linux experience. Dive into the world of music streaming with ease and efficiency on your Ubuntu system.
Frequently Asked Questions (FAQs)
Q1.Can I use Spotify Connect on Ubuntu?
Answer: Yes, you can use Spotify Connect to play music on other devices. Ensure all the devices are on the same Wi-Fi network, start playing a song on Spotify, click the “Device” icon, and select your desired device from the list.
Q2. How do I improve Spotify’s performance on Ubuntu?
Answer: Enable hardware acceleration in Spotify settings. Go to “Settings,” scroll to the bottom, and enable “Hardware Acceleration.” This can improve Spotify’s performance on your system.
Q3. How can I adjust the audio quality on Spotify?
Answer: Click on your profile picture to access Spotify’s Settings. Scroll down to “Music Quality” and select your preferred streaming quality (Low, Normal, High, or Very High).
Q4. How do I update Spotify?
Answer: Updates are typically automatic for Snap installations. You can check for updates using the Snap Store application. For APT installations, you can update Spotify using the standard system update commands (sudo apt update and sudo apt upgrade).


