Updated April 1, 2023

Introduction to Spring Boot CLI
In Spring boot, we have spring boot CLI, which mainly stands for the command-line interface. This tool allows us to execute the same set of commands which helps us to speed up the project execution via the command line. In other frameworks also, they come up with a command-line by the use of it, we can easily create, run and add a required dependency to our project. It works in the same way. By the use of it, we can easily and fastly create the spring boot application, which makes the process even quicker for us. Also, this CLI can run the script written in groovy, which means developers need not worry about the boilerplate code, which only allows us to focus on writing the business logic for the application.
Installation and Setup for Spring Boot CLI
As of now, we already know that spring CLI is a command-line interface that requires some command to be executed on the command prompt to use it and make the application faster.
We will first see how we can setup its environment on the machine and also some of its useful commands to use while developing.
1. The first step we need to do is we have to setup the spring boot CLI on our machine; for this, we need to first setup the JDK on our machine. We can download this from Oracle official website.
After downloading it, we have to setup the path for Java in our environment properties; for reference, follow the below path and replace it with yours.
Example:
set PATH= path_to_bin
set JAVA_HOME= path_to_jdk
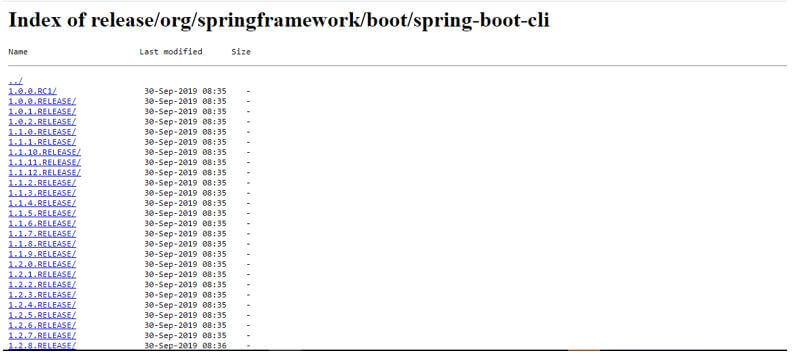
2. Now, we can download the latest version of the spring boot command-line interface, i.e. CLI, from the below-mentioned link. Where you will find so many versions, choose the version you required and download the zip.
3. After downloading the zip extract, set the path in the environment variable as we set for JDK in the above step to use this globally.
4. After doing all this, we can just verify if the spring boot CLI is properly installed or not by using the below command.
Example:
spring –version
After executing this, you may have some logs printing the version for you.
Spring Boot CLI Commands with Examples
Here we will see some of the useful commands which we need to know before we start using them, this commands we can directly write on the CLI and perform the operations we want.
1. Spring –Version: If you want to know the version of the Spring boot CLI then just go to CLI and type in this command; after pressing enter, you will see the correct version of your CLI installed on your system. This command also can be used as the verification or to check the spring boot CLI is properly installed and working fine.
2. Now, we can run the application that we have created. For this, we can first go to the project folder that you have created and, on that path, open the command prompt. Else you can just open the command prompt and type in the path of your project.
Now to run your application, type in the below command.
Example:
spring run your_file_name;As you can see, we have used the run command to run it. On the place of the file, the name provides your project file name like below and press enter.
Example:
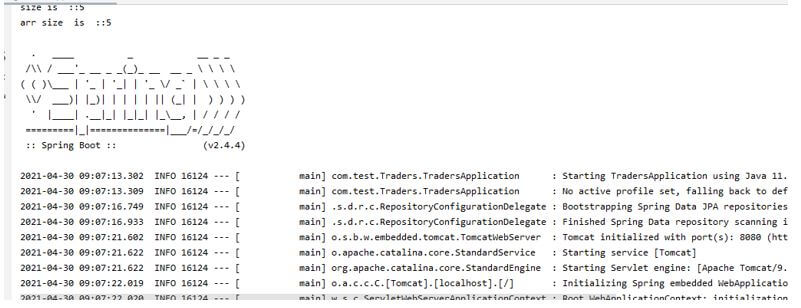
spring run TradersApplication.groovyOutput:
3. Spring: This command will simply return the help screen for us. It does not take any argument with it. It can also be a checking command for spring boot CLI after installation.
4. Spring help run: This command will open more details about the commands we have available in the spring boot CLI, just write it in your command prompt and press enter.
5. We can also specify the port number for our application by using the spring boot CLI; run command this command takes the argument using ‘–‘ this operator.
Below you can find the reference for this command to change the port.
Syntax:
Spring run file_name -- --server.port= port_numberWith the run command, we can use the server.port argument to specify the port for our application.
Syntax:
spring run demo.groovy -- --server.port=80816. We can also set the JAVA_OPTS variable from the spring boot CLI; we can find the below command.
Example:
JAVA_OPTS=-Xmx1024m spring run demo.groovy7. If we want to run the test cases, we can use the below test command to run the test cases for us from the application.
Syntax:
spring test project_fiel_name test_file_anameIn this way, we can define the command.
Syntax:
spring test demo.groovy demotest.groovy8. To create a new project using the spring boot CLI, we should use the below command;
Syntax:
spring init --dependencies=dep projectn_nameFrom the above line of code, we are able to now initialize the new project from scratch.
Syntax:
spring init --dependencies=web,data-jpa demo-projectConclusion
By the use of this, we can easily and quickly build or spring boot applications. Just we need to remember a few of its important commands, we do this all things by using some editor, so after learning this, we can easily make all the things using the commands only which is very quick.
Recommended Articles
This is a guide to Spring Boot CLI. Here we discuss the introduction, installation, setup and spring boot CLI commands with examples. You may also have a look at the following articles to learn more –


