Updated March 13, 2023

Introduction to Spring Boot JdbcTemplate Example
Spring boot jdbctemplate example is used to create a connection between application API and database server. Spring boot jdbc template is a mechanism that was used to connect the database server and execute the query on a database server. Spring boot template internally uses the API of JDBC, but it has problems with JDBC API. Therefore, using the spring boot template, we do not need to handle the transaction.
Steps by steps Spring Boot JdbcTemplate Example
Below is the step-by-step procedure to create the example of the spring boot JDBC template is as follows.
- Create the database in the PostgreSQL database server –
In this step, we are creating the database name as spring_boot_jdbctemplate in the PostgreSQL database server.
Code –
# create database spring_boot_jdbctemplate;
# \l+ spring_boot_jdbctemplate- Create the table into spring_boot_jdbctemplate database –
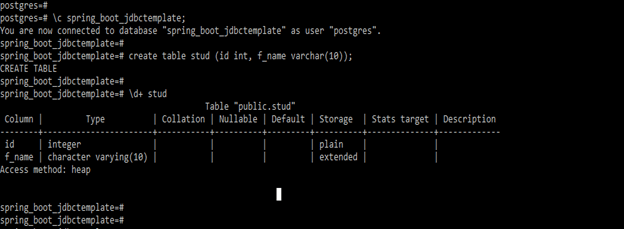
In this step, we are creating the table name as a stud in the database name as spring_boot_jdbctemplate.
Code –
# create table stud (id int, f_name varchar(10));- Create project template using spring initializer and give a name to project –
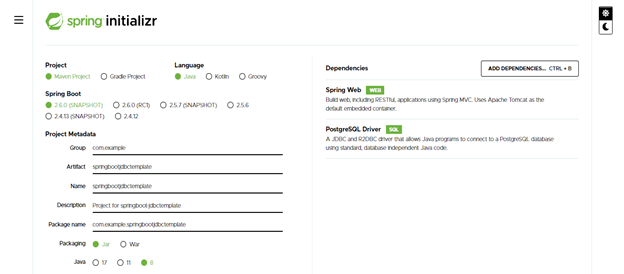
In the below step, we have provided project group name as com.example, artifact name as springbootjdbctemplate, project name as springbootjdbctemplate, and selected java version as 8.
Group – com.example Artifact name – springbootjdbctemplate
Name – springbootjdbctemplate Description – Project for springbootjdbctemplate
Spring boot – 2.6.0 Project – Maven project
Java – 8 Dependencies – spring web, PostgreSQL driver
Package name – com.example.springbootjdbctemplate
- After generating project extract files and open this project by using spring tool suite –
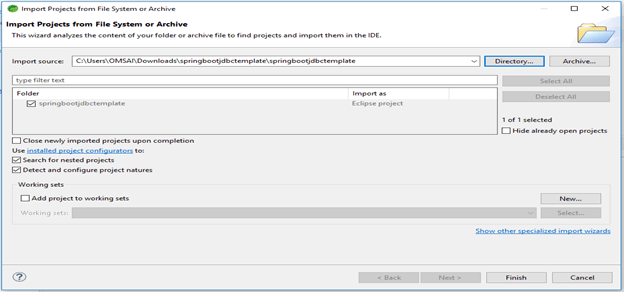
After generating the project using the spring initializer in this step, we are extracting the jar file; after extracting the jar file, we are opening the project template using the spring tool suite.
- After opening the project using the spring tool suite, check the project and its files –
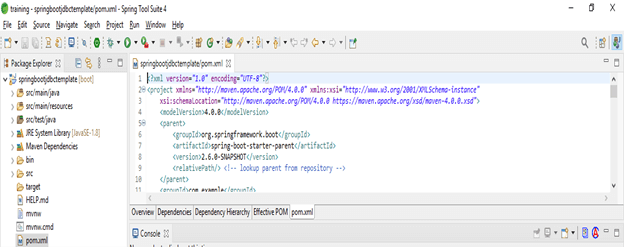
In this step, we are checking all the project template files. We also need to check the maven dependencies and system libraries.
- Add dependency packages –
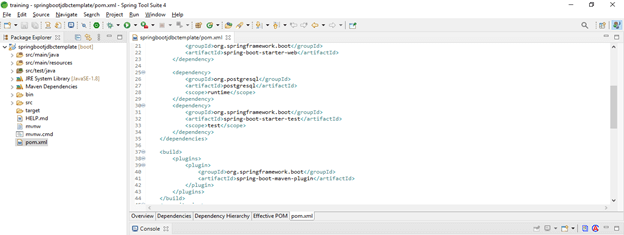
In this step, we are adding the required dependency in our project. In this example, we are adding the spring boot starter web, spring boot starter test, and PostgreSQL dependency in the spring boot jdbc template example project.
Code –
<dependency>   -- Start of dependency tag.
<groupId>org.springframework.boot</groupId>   -- Start and end of groupId tag.
<artifactId>spring-boot-maven-plugin</artifactId>  -- Start and end of artifactId tag.
</dependency>    -- End of dependency tag.
<dependency>   -- Start of dependency tag.
<groupId>org.springframework.boot</groupId>   -- Start and end of groupId tag.
<artifactId>spring-boot-starter-test</artifactId>  -- Start and end of artifactId tag.
</dependency>    -- End of dependency tag.
<dependency>   -- Start of dependency tag.
<groupId>org.springframework.boot</groupId>   -- Start and end of groupId tag.
<artifactId>spring-boot-starter-web</artifactId>  -- Start and end of artifactId tag.
</dependency>    -- End of dependency tag.
<dependency>   -- Start of dependency tag.
<groupId>org.postgresql</groupId>   -- Start and end of groupId tag.
<artifactId>postgresql</artifactId>  -- Start and end of artifactId tag.
</dependency> -- End of dependency tag.- Create stud class –
After adding the required dependency next step is to create a class of our project. In this class, we have defined the two properties with the getter and setter methods.
Code –
public class stud
{
private int id;
private String f_name;
public stud() {}
public int getId () {
return id;
}
public void setId(int id) {
this.id = id;
}
public String getF_name () {
return f_name;
}
public void setF_name (String f_name) {
this.f_name = f_name;
}
public stud(int id, String f_name) {
super();
this.id = id;
this.f_name = f_name;
}
}- Create studDao.java class –
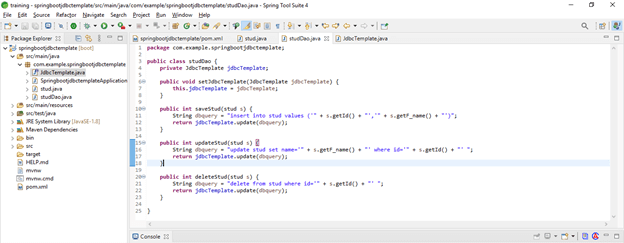
After creating the stud class, we have created the studDao.java class for our spring boot jdbctemplate example project.
This class contains the jdbc template property and three methods name as saveStud(), updateStud() and deleteStud().
Code –
public class studDao {
private JdbcTemplate jdbcTemplate;
public void setJdbcTemplate (JdbcTemplate jdbcTemplate) {
this.jdbcTemplate = jdbcTemplate;
}
public int saveStud (stud s) {
String dbquery = "insert into stud values ('" + s.getId () + "','" + s.getF_name () + "')";
return jdbcTemplate.update(dbquery);
}
public int updateStud (stud s) {
String dbquery = "update stud set f_name='" + s.getF_name () + "' where id='" + s.getId () + "' ";
return jdbcTemplate.update(dbquery);
}
public int deleteStud (stud s) {
String dbquery = "delete from stud where id='" + s.getId () + "' ";
return jdbcTemplate.update(dbquery);
}
}- Create applicationContext.xml file –
After creating stud and studDao classes next step is to create an applicationContext.xml file for the spring boot jdbc template example project.
Code –
<bean id="ds" class="org.springframework.jdbc.datasource.DriverManagerDataSource">
<property name="driverClassName" value="postgresql.jdbc.driver.postgresqlDriver" />
<property name="url" value="jdbc:postgresql:@localhost:5432:spring_boot_jdbctemplate" />
<property name="username" value="postgres" />
<property name="password" value="postgres" />
</bean>- Test the application by running the saveStud() method –
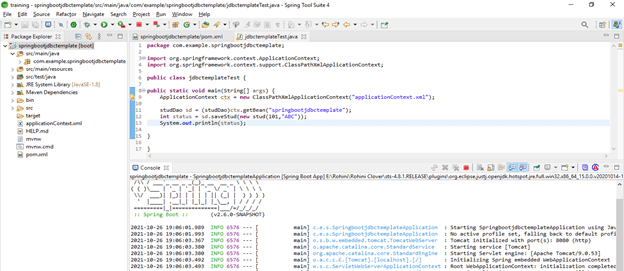
In the below example, we tested our spring boot jdbc template example project using the saveStud method.
Code –
public class jdbctemplateTest {
public static void main(String[] args) {
ApplicationContext ctx = new ClassPathXmlApplicationContext ("applicationContext.xml");
studDao sd = (studDao)ctx.getBean("springbootjdbctemplate");
int status = sd.saveStud (new stud(101,"ABC"));
System.out.println (status);
}
}- We can also check the updateStud() and deleteStud() method by using the following code are as follows.
1) updateStud () –
int status = sd.updateStud (new stud(101,"PQR"));
System.out.println (status);
2) deleteStud () –
stud s = new stud();
s.setId (101);
int status = sd.deleteStud (s);
System.out.println (status);- Run the application –
In this step, we are running our spring boot jdbc template example project using the spring tool suite.
- After running the application, check data is inserted into a database table –
In this step, we are checking the data is inserted into the database table. We can see that data is inserted into the stud table.
Code –
# select * from stud;Recommended Articles
This is a guide to the Spring Boot JdbcTemplate Example. Here we discuss the step-by-step procedure to create the example of the Spring Boot JdbcTemplate. You may also have a look at the following articles to learn more –

