Updated March 29, 2023

Introduction to Spring Boot WebClient
Spring boot WebClient is basically part of the reactive framework which was used to construct the non-blocking and reactive web-based application. WebClient is part of the spring MVC project, and it will allow communication with http servers; after releasing spring 5, the web client is best and recommended for client communication. In addition, WebClient is a component that was used to make calls with other services.
What is a Spring Boot WebClient?
- WebClient is used to build web-based and reactive applications. WebClient is supporting the web request, which was non-blocking.
- From spring 5, spring boot used the spring web framework, which was spring webflux.
- It is designed with APIs of spring boot MVC, but it is also used to add support for the design of non-blocking.
- Using spring boot webflux, we can design asynchronous types of web applications by using functional API’s and reactive streams for better support of scaling and concurrency.
- It supports the synchronous as well as asynchronous types of web applications.
- Also, it will support making the synchronous and asynchronous http request by using API of functional fluent, which was interacting directly with our existing spring configuration.
- Using WebClient, we can send get and post requests to the API of WebClient.
- To make the request with WebClient, we need to add dependency in the pom.xml file of our application.
- We need to add spring boot starter webflux dependency on the pom.xml file.
- After adding the spring boot starter webflux dependency, we do not need to add webflux and reactor-netty dependency; it will configure automatically while adding the webflux dependency in our project.
- Spring boot WebClient API is used on top of the existing http client library. WebClient is mostly using the reactor netty, but we can also use the apache reactive component and http client, or we can also integrate other custom connectors.
- After configuring WebClient, we can send the get request to the WebClient.
Dependencies
- To develop the application of WebClient by using spring boot, we need to add spring boot starter webflux dependency in the pom.xml file.
- While developing a project with spring boot maven, we need to add the following dependency in the pom.xml file.
Building Spring Boot WebClient project with maven –
<dependency>   -- Start of dependency tag.
<groupId>org.springframework.boot</groupId>   -- Start and end of groupId tag.
<artifactId>spring-boot-starter-webflux</artifactId>  -- Start and end of artifactId tag.
</dependency>    -- End of dependency tag.
<dependency>   -- Start of dependency tag.
<groupId>io.projectreactor</groupId>  -- Start and end of groupId tag.
<artifactId>reactor-test</artifactId>   -- Start and end of artifactId tag.
<scope>test</scope>
</dependency>   -- End of dependency tag.
<dependency>    -- Start of dependency tag.
<groupId>org.springframework.boot</groupId>   -- Start and end of groupId tag.
<artifactId>spring-boot-starter-web</artifactId>    -- Start and end of artifactId tag.
</dependency>    -- End of dependency tag.
<dependency>   -- Start of dependency tag.
<groupId>org.springframework.experimental</groupId>  -- Start and end of groupId tag.
<artifactId>spring-native</artifactId>    -- Start and end of artifactId tag.
<version>${spring-native.version}</version>
</dependency>    -- End of dependency tag.
<dependency>   -- Start of dependency tag.
<groupId>io.projectreactor</groupId>    -- Start and end of groupId tag.
<artifactId>reactor-test</artifactId>     -- Start and end of artifactId tag.
<scope>test</scope>
</dependency> -- End of dependency tag.- After adding webflux dependencies of spring boot, other dependencies are automatically added. We do not need to add another dependency separately after adding the webflux dependency.
- While developing a project with spring boot gradle, we need to add the following dependency in the build.gradle file.
Building WebClient project with gradle –
dependencies
{
compile 'org.springframework.boot: spring-boot-starter-webflux'
}
Working Spring Boot WebClient
- While working with WebClient, we need to follow the below steps.
- First, we need to create a WebClient instance. To create the WebClient instance, first, we need to create a WebClient object. After creating the object then we need to initiate the WebClient instance. Finally, after initiating the instance, we need to build the client by using the builder class.
- After creating an instance, define a method for preparing the request; after defining the method, the next step is to define the URL for preparing the request.
- After defining URL next step is to define the body for preparing the request. After defining the body next step is to define headers for preparing requests.
- After creating all the setup final step is sending requests and getting responses from WebClient.
Create and configure WebClient
The below examples show to create and configure WebClient as follows.
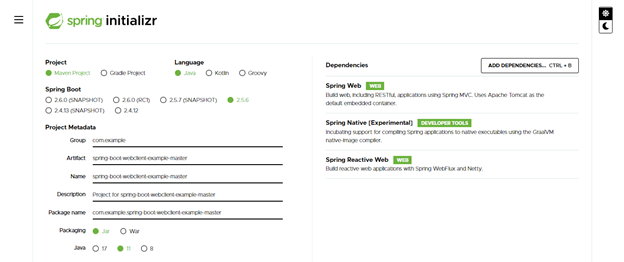
- Create a project template using spring initializer and give a name to the project –
In the below step, we have provided the project group name, artifact name, package, and description.
Group – com.example
Artifact name – spring-boot-webclient-example-master
Name – spring-boot-webclient-example-master
Description – Project for spring-boot-webclient-example-master
Spring boot – 2.5.5
Project – Maven project
Package name – com.example. spring-boot-webclient-example-master
Packaging – Jar
Java – 11
Dependencies – spring native, spring web, spring reactive web.
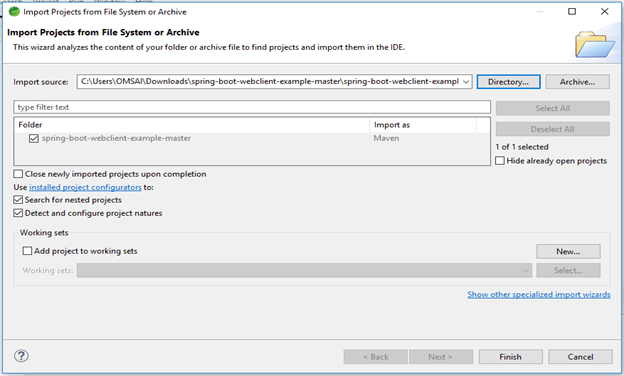
- After generating project extract files and open this project by using spring tool suite –
- After opening the project using the spring tool suite, check the project and its files –
- Add dependency packages –
- Configure application.properties file –
Code –
server.port=8080
logging.level.org.springframework = DEBUG
server.servlet.context-path = /emp_mgmt
spring.codec.max-in-memory-size = 2MB- Configure webflux client –
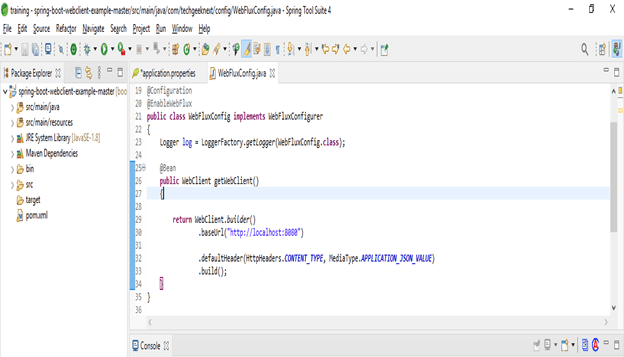
Code –
@Configuration
@EnableWebFlux
public class WebFluxConfig implements WebFluxConfigurer
{
Logger log = LoggerFactory.getLogger (WebFluxConfig. Class);
@Bean
public WebClient getWebClient ()
{
return WebClient.builder ()
.baseUrl ("http://localhost:8080")
.defaultHeader (HttpHeaders.CONTENT_TYPE, MediaType.APPLICATION_JSON_VALUE)
.build ();
}
}
Example
Below is the example of WebClient as follows.
- Retrieve and exchange the data from WebClient –
Code –
@Service
public class EmployeeService
{
@Autowired
WebClient wc;
public Flux<Employee> findAll()
{
return wc.get()
.uri ("/get/all")
.retrieve ()
.bodyToFlux (Employee.class)
.timeout (Duration.ofMillis (10_000));
}
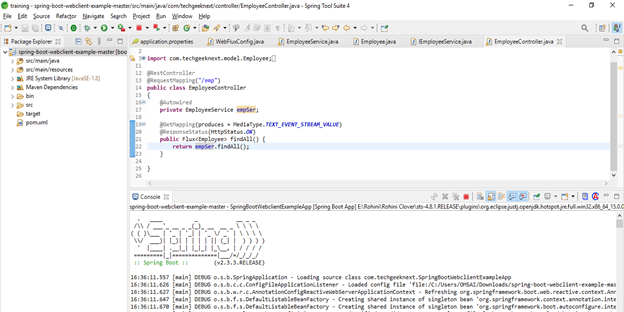
}- Create rest controller –
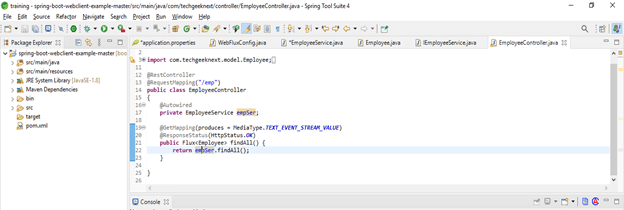
Code –
@RestController
@RequestMapping("/emp")
public class EmployeeController
{
@Autowired
private EmployeeService empSer;
@GetMapping(produces = MediaType.TEXT_EVENT_STREAM_VALUE)
@ResponseStatus (HttpStatus.OK)
public Flux<Employee> findAll() {
return empSer.findAll ();
}
}- Run and test the application –
Conclusion
WebClient is used to build web-based and reactive applications. WebClient is supporting web requests which were non-blocking. WebClient is basically part of a reactive framework that was used to construct non-blocking and reactive web-based applications.
Recommended Articles
This is a guide to Spring Boot WebClient. Here we discuss the example to create and configure Spring Boot WebClient along with the codes. You may also have a look at the following articles to learn more –
