Updated August 11, 2023
Status Bar in Excel
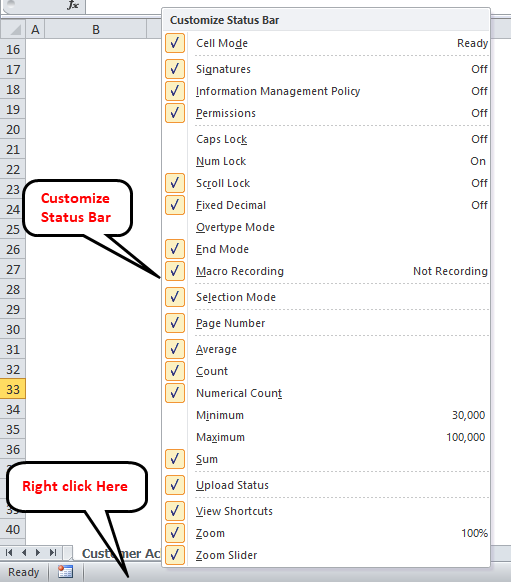
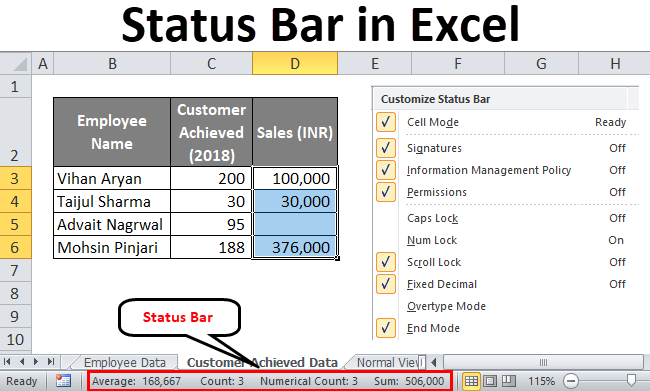
Status Bar in Excel is located down below the Sheet names in an Excel worksheet where we can see the short description of selected data and worksheet such as current page number, number of pages selected, number of selected cells with data, Count of cells, Sum of the numbers, Average and sometimes Maximum and Minimum values as well which are normally not seen until we activate this. Such Status Bar is also available in other Microsoft tools such as Word, PowerPoint, etc. To customize the status bar, right-click on anywhere in the status bar and select the required option we want to see in Status Bar.
How to Customize Status Bar in Excel?
By default, some options are already active in the Excel status bar, like Count, Sum, Average, etc. However, what if we need some of them which are not active by default, like Minimum, Maximum, etc.? We need to customize the status bar so these options can be active.
- Right-click anywhere on the status bar, and the customization bar will pop up, like in the image shown below.
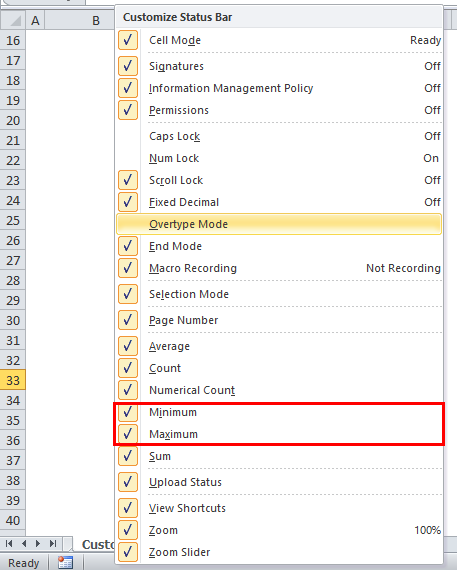
- Now check (√) the options you want to display on the status bar (Like Minimum and Maximum).
- All options with a check (√) in front of them are active on the Excel status bar.
- You can also deselect/uncheck some options you don’t want to see on the status bar.
Quite simple, yeah?
This tutorial will cover default options enabled in the Excel status bar and additional options that can add and prove useful.
Cell Mode Option in Excel Status Bar
The “Cell Mode” option is enabled by default in excel and can be seen at the extreme left side of the status bar. It has different modes listed below:
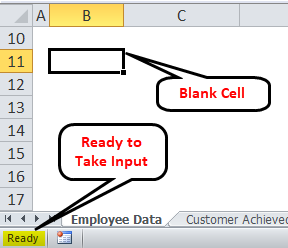
Ready –It means the cell on which you have your cursor is ready to take user input from you. It can also consider as in the general state, where the cell has no input data.
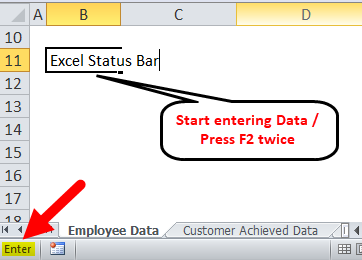
Enter – It means that the user has either started typing the data in the cell or pressed F2 twice to edit the cell. Word entered itself suggests that input entering has been started.
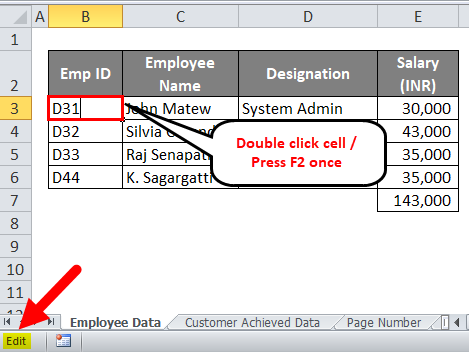
Edit – It is quite like Enter. It means the cell is being edited (new data replace old data). It is displayed when the user double-clicks the cell or presses F2 once.
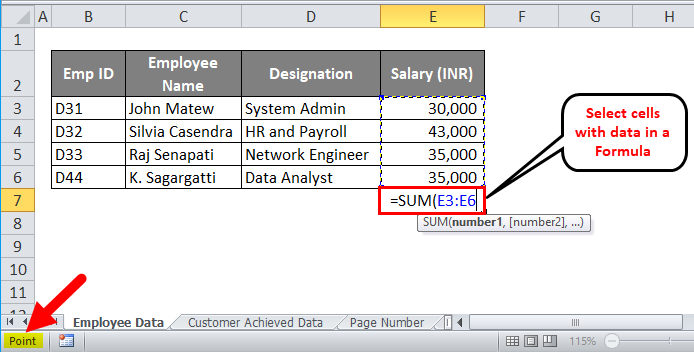
Point – It gets activated when the user enters a formula in a cell while providing other cells (which have data in them) as input to the formula.
Please see the attached sample image for your reference.
Zoom Slider in Excel Status Bar
- If you are working on Excel frequently, you might be well know to this option which is provided at the rightmost corner of the status bar.
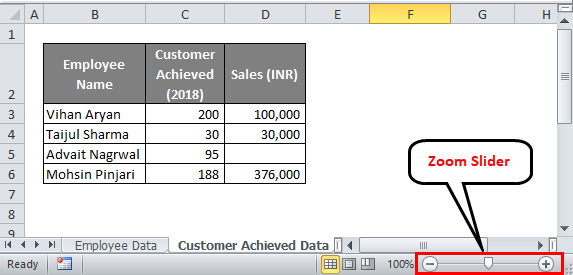
- The zoom slider lets you quickly zoom in or out of the Excel worksheet you are working on.
- Moreover, it has (+) (-) keys that can be used for “Zoom In” and “Zoom Out“, respectively. Using Zoom In, you can magnify the current worksheet and look closely at the data. Zoom Out helps you reduce the worksheet’s magnification, and you can see more data in a single shot.
See the below sample image for your reference.
Zoom Percentage
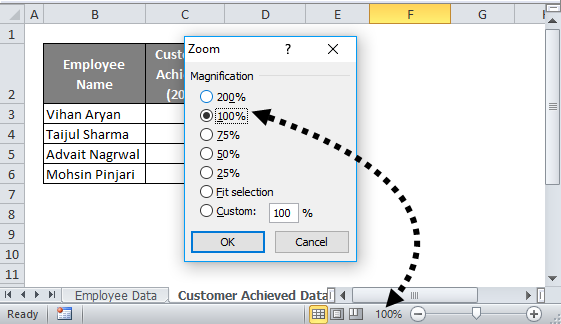
- Zoom percentage can also magnify the worksheet and be considered to function the same as that of the Zoom slider.
- It is situated next to the zoom slider on the left-hand side of the status bar.
- Once you click on zoom percentage, the zoom dialog box opens, from where you can select the magnification percentage for a current worksheet.
Statistical/Mathematical Options
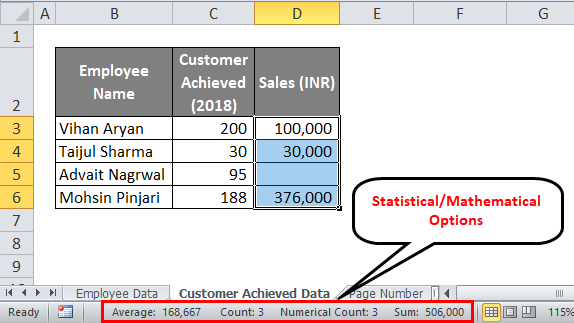
Some statistical/mathematical options exist for a quick calculative view of the numeric data in the Excel status bar. These options are enabled by default. Let’s get through those.
- Count – It counts the number of non-empty cells from columns/rows. (irrespective of data type Numeric/Character).
- Average –It averages all the non-empty cells from columns/rows.
- Sum –It does what the word suggests, sums up all the numeric values.
- Numerical Count –This option is not enabled by default, so you must enable it through Excel status bar customization. This option allows you to capture several numeric entities in a column. It becomes more useful when you have mixed data values (Numeric + Character/String) in cells.
Minimum and Maximum
- Again, these two are some useful options for mathematical/statistical calculations.
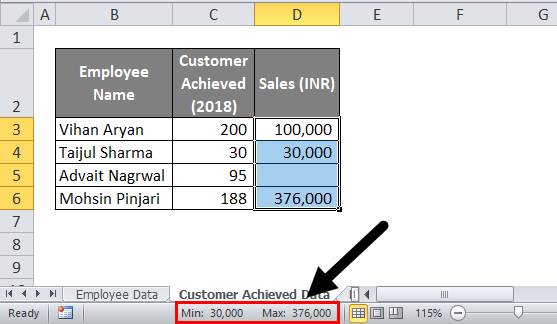
- What if you have a large amount of numeric data (for ex., 20,000 cells), and you want to look at the Minimum and Maximum values from the same? Would it be possible to have a judgment with the naked eye? Not possible. That’s why these two options are in a customized status bar (Not enabled by default).
- Minimum – The Minimum option shows a minimum value on the status bar from given non-empty numeric cells if enabled.
- The maximum option gives us a maximum value on the status bar from given nonempty numeric cells if enabled.
Worksheet Views
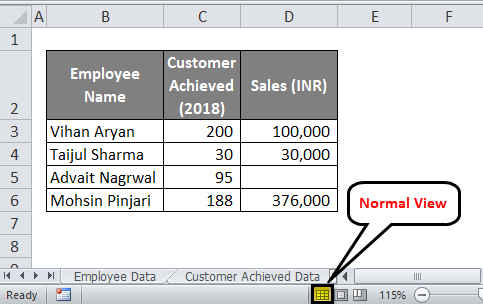
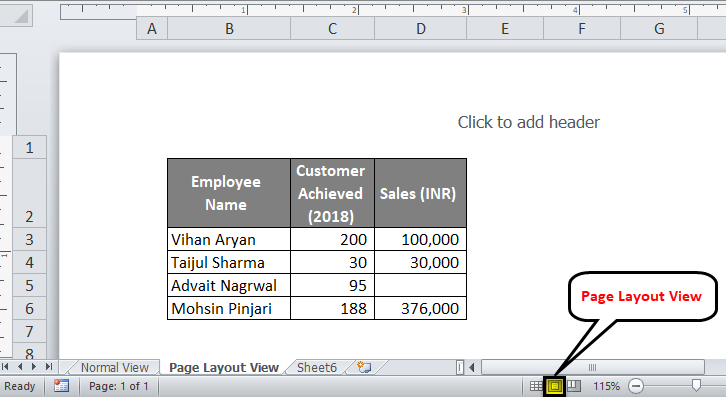
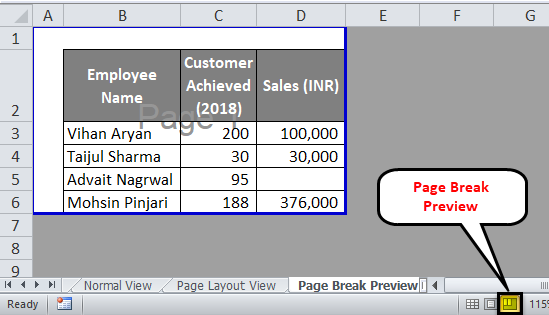
This feature is enabled by default and can be handy for switching between worksheet views like Normal View, Page Layout View, and Page Break Preview. This option can be at the bottom right of the Excel status bar (before Zoom Slider).
Normal View:
Page Layout View:
The Page Break Preview:
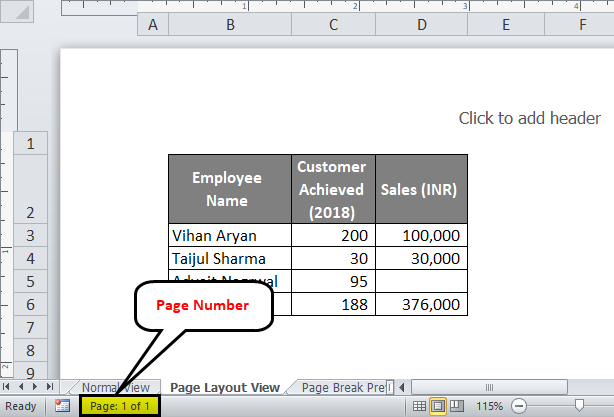
Page Number
- The Page number option is very useful in your worksheet in Page Layout View.
- It is enabled by default and gives several currently used pages (A page in a workbook is said to be in use if a user is editing that page).
That’s all from my end, guys; we will take a moment to wrap up the things with some Things to Remember quickly.
Things to Remember About Status Bar in Excel
- Status Bar in Excel gives the status of simple but frequently used options like Sum, Average, etc.
- Some options are only feasible with numeric data Eg. Average, Sum, Minimum, Maximum, etc.
- Some of the options are feasible with numeric as well as string (character) data. E.g., Count.
- Not all the options are active by default; you can customize the status bar in Excel options anytime.
Recommended Articles
This has been a guide to Status Bar in Excel. Here we discuss how to customize and use the status bar in Excel with practical examples. You can also go through our other suggested articles –
