Updated March 27, 2023
Introduction to Tables in Azure
Azure Table is a service provided by Microsoft Azure to store structured NoSQL data in the cloud, data does not have schema and provides key or attribute to store data. This table is schema-less which offers flexibility and scalability to handle datasets like web application data, address books, etc. as service requires. Tables are perfect for non-relational data and a large amount of data (TeraByte data) as users can quickly query the data using clustered index also based on demand tables that can be easily scaled.
Azure Table Storage
Azure Table storage has the following components
URL format: Storage account has the format as:
http://<storage account>.table.core.windows.net/<table>
- Accounts: Storage account provides access to Azure Storage.
- Table: It is a collection of entities and tables do not enforce any schema on entities.
- Entity: Similar to rows in the RDBMS databases entity is a collection of entities that can be of size 1 MB in Storage and up to 2MB in cosmo DB.
- Properties: It is a name-value pair. Each entity in Azure storage can have a partition key, a row key, and a timestamp. The row key in the entity is its unique identifier in the partition.
How to Create Tables in Azure?
Here we will be creating tables in Azure Studio, to use the same please download and install Powershell ISE on your system.
Step 1: Login into your account in the Powershell.
Step 2: Create AzureStorage account using below:
$storageAccountName = "@_StorageAccountName"

$storageAccount = New-AzStorageAccount -ResourceGroupName $resourceGroup `

-Name $storageAccountName `

-Location $location `

-SkuName Standard_LRS `

-Kind Storage

$ctx = $storageAccount.Context
Step 3: Create a new table using the below command:
$tableName = "educba"

New-AzStorageTable –Name $tableName –Context $ctx
Here table name is “educba” and New-AzStorage Table is used to create a general-purpose storage account
How to Retrieve Tables?
To retrieve table-use Get-AzureStorageTable keyword in Storage:
$tabName = "educba"

Get-AzureStorageTable –Name $tabName –Context $Ctx
How to Delete and Update Tables in Azure?
Below we can see how to delete and update the table:
Delete
To delete the table from Azure Storage use Remove-AzureStorageTable
$tabName = "educba"

Remove-AzureStorageTable –Name $tabName –Context $Ctx
Update
To update the entity in the azure table
1. To update the particular entity in the table create a filter using below:
Code:
[string]$filter = `

[Microsoft.Azure.Cosmos.Table.TableQuery]::GenerateFilterCondition("coursename",`

[Microsoft.Azure.Cosmos.Table.QueryComparisons]::Equal,"Azure")

$user = Get-AzTableRow `

-table $cloudTable `

-customFilter $filter
2. Now change the ‘coursename’ entity from Azure to Microsoft Azure
Code:
$user.coursename = "Microsoft Azure"
3. Use Update-AzTableRow command to commit the change and pipe the updated record into cmdlet:
Code:
$user | Update-AzTableRow -table $cloudTable
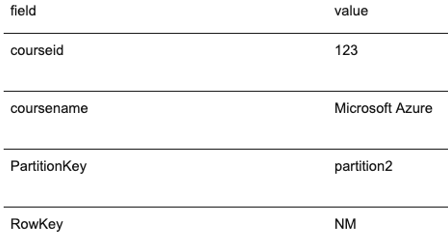
4. To see the new record, query the table.
Code:
Get-AzTableRow -table $cloudTable `

-customFilter "(coursename eq 'Microsoft Azure')"
Output:
Operations on tables in Azure
Rows in the table are also called entities and it can have up to 255 properties with 3 system properties such as PartitionKey, RowKey, and Timestamp. Get a reference table name from Azure Storage:
Code:
$TableName = "educba"

#Get a reference to a table.

$table = Get-AzureStorageTable –Name $TableName -Context $Ctx
1. Add/Insert values into table entities using the command Add-AzTableRow:
Code:
$partitionKey1 = "partition1"

$partitionKey2 = "partition2"

# add three rows

Add-AzTableRow `

-table $table `

-partitionKey $partitionKey2 `

-rowKey ("NM") -property @{"coursename"="Azure";"courseid"=123}

Add-AzTableRow `

-table $table `

-partitionKey $partitionKey1 `

-rowKey ("IN") -property @{"coursename"="SQL";"courseid"=222}

Add-AzTableRow `

-table $table `

-partitionKey $partitionKey2 `

-rowKey ("US") -property @{"coursename"="AWS";"courseid"=333}
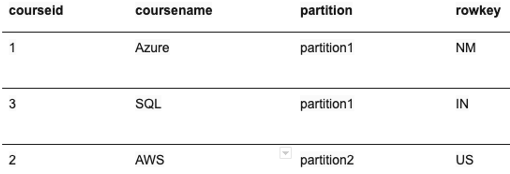
2. Query the table to retrieve the data of the table using Get-AzTableRow:
Code:
Get-AzTableRow -table $table | ft
Output:
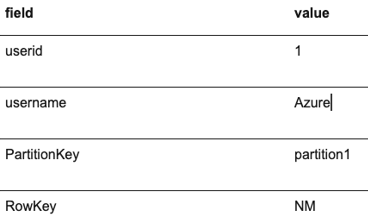
3. Retrieve entities from the table for a specific value in from particular columns
Code:
Get-AzTableRow -table $table `

-columnName "coursename" `

-value "Azure" `

-operator Equal
Output:
4. Delete all entities in the table using command Remove-AzTableRow:
Get-AzTableRow `-table $table | Remove-AzTableRow -table $cloudTable
5. Delete a table from Azure storage using the command Remove-AzStorageTable
Remove-AzStorageTable –Name $tableName –Context $ctx
6. To verify that the above commands have removed the table use below command to retrieve the list of tables:
Get-AzStorageTable –Context $Ctx | select Name
The above command will give an empty result.
Azure Portals to manage Azure Storage Tables
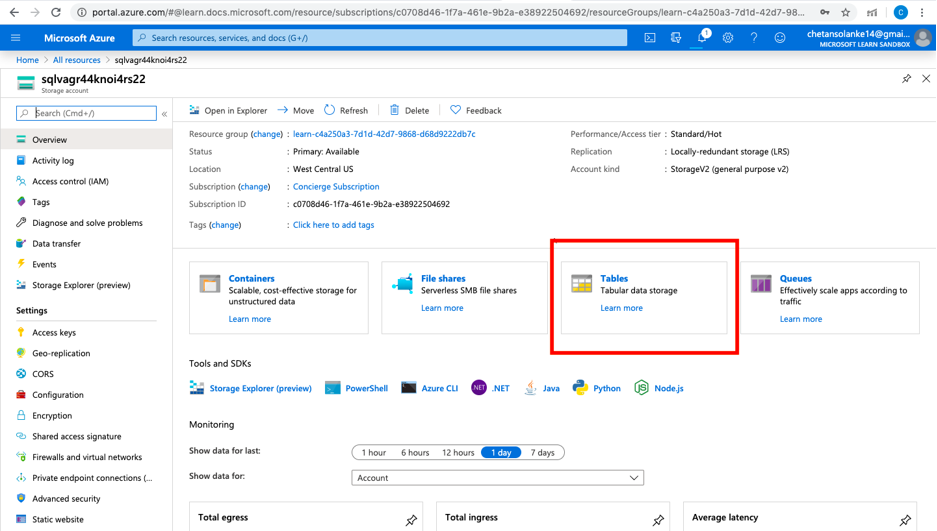
User can also use storage explorer to create and manage the table using the portal as below:
Step 1: Click on overview and then click on the tables as below:
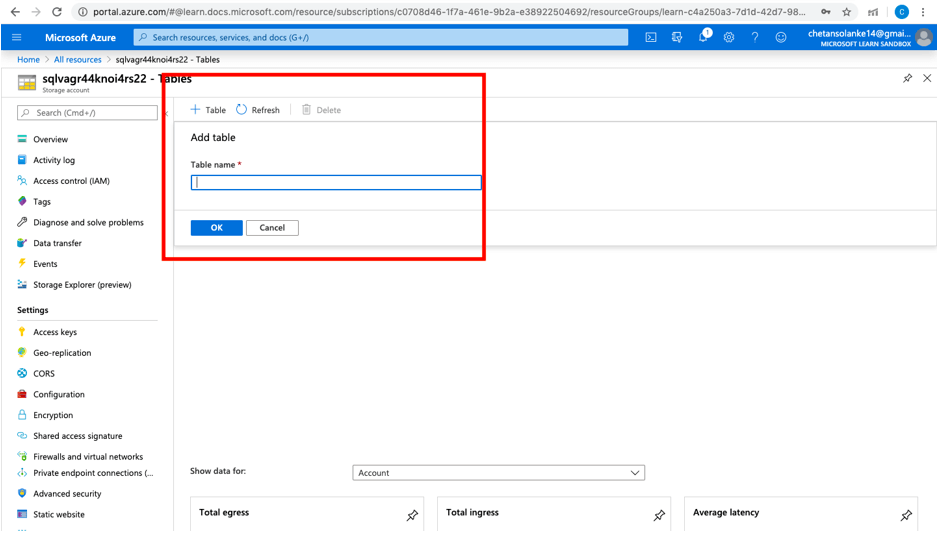
Step 2: To add a table click on + Table sign
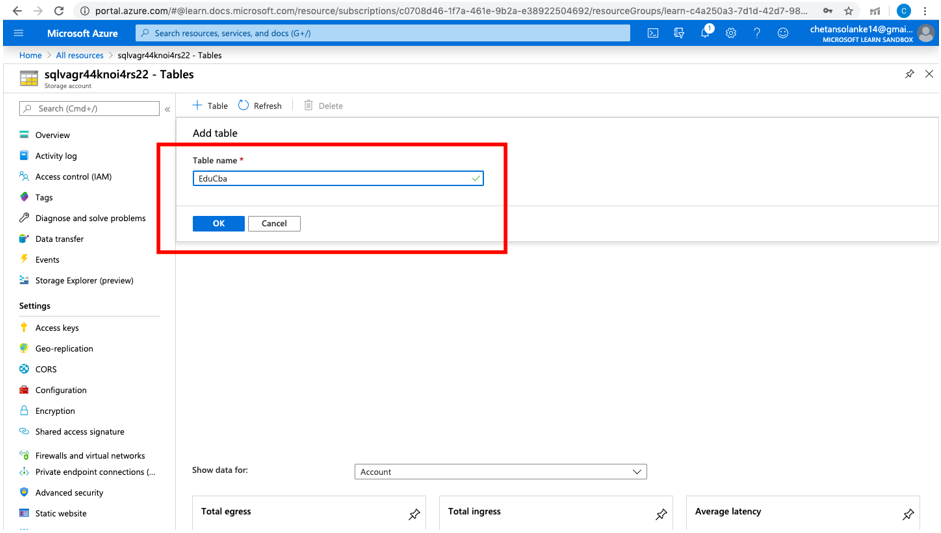
Step 3: In the table name box type the name of the table as ‘EduCba’ user wants to create and then click on OK.
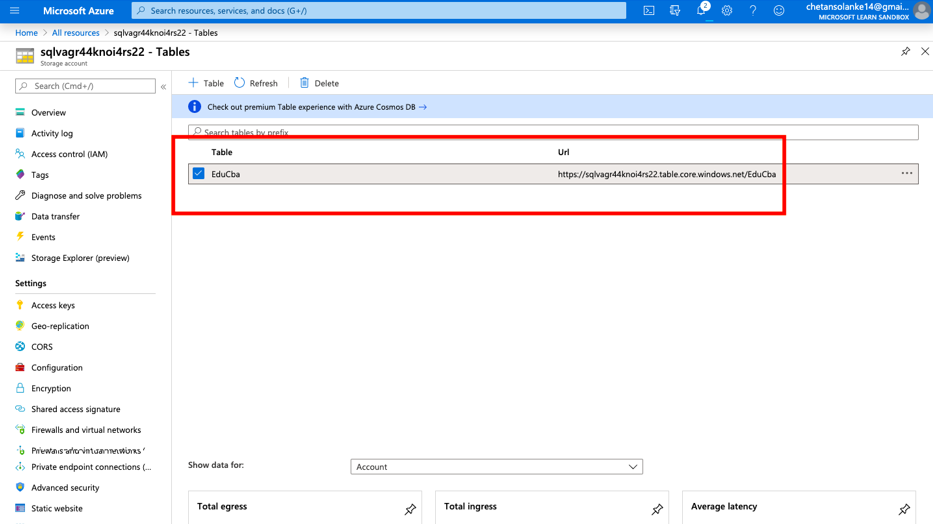
Step 4: Check created table in the azure storage:
Conclusion
In this article, we have learned how to use Azure Storage tables and perform operations like create, Delete, insert, etc. on tables with PowerShell editor and also users can use Azure Storage Explorer to create and manage tables. In conclusion, storage is useful to manage NoSQL tables effectively and has DDL and DML commands to handle operations.
Recommended Articles
This is a guide to Tables in Azure. Here we discuss Syntax, how to retrieve, update, delete the table, and create and manage the table. You can also go through our other related articles to learn more –
