Introduction to VNC Server for Ubuntu
Virtual Network Computing (VNC) which is a GUI based desktop sharing system that allows you to remotely access and control another computer’s graphical user interface (GUI). With VNC, you can see the remote machine’s desktop, interact with applications, and work as if you were sitting right in front of it. It makes VNC a valuable tool for system administration, remote technical support, or accessing your desktop while away from your main machine.

Table of Contents
Prerequisites
- Access to the Terminal: Most of the setup process will be via the terminal, the command line interface (CLI). Ensure that you have access to the terminal on your Ubuntu system.
- Basic Understanding of Linux Commands: While you don’t need to be a Linux expert, having a basic understanding of Linux commands will be beneficial throughout the setup process.
Installing the VNC Server
Different VNC server options are available.
- TightVNC: TightVNC is a lightweight VNC server known for its efficient compression algorithms. It offers good performance, making it suitable for slower network connections. TightVNC is widely used and appreciated for its simplicity and reliability.
- RealVNC: RealVNC provides free and paid versions of their VNC server software. The free version offers only the basic functionalities Although the premium edition offers additional features like encryption, cloud connectivity, and enhanced support. RealVNC is a popular choice for users who are prepared to spend money on a device and who need advanced features paid solution.
- TigerVNC: TigerVNC is another popular VNC server option for Ubuntu. It is known for its simplicity, reliability, and ease of use. TigerVNC is suitable for personal and enterprise use cases and offers a straightforward setup process.
Recommendation: For most users, TightVNC or TigerVNC should suffice for basic remote desktop needs. Both options are reliable, easy to set up and offer good performance. If you require additional features such as encryption and cloud connectivity or need enhanced support, you may consider opting for RealVNC. However, remember that the accessible version of RealVNC will have limitations compared to the paid version.
Using the command line package manager (apt) to install VNC Server
- Open the Terminal: Press Ctrl + Alt + T.
- Update Package Lists: Prior to installing any new packages. It’s good practice to update the package lists to make sure you get the latest versions. Run the following command:
- sudo apt update
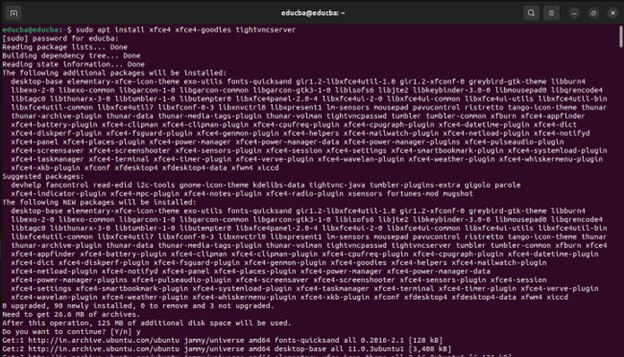
- Installing TightVNC:
- sudo apt install xfce4 xfce4-goodies tightvncserver
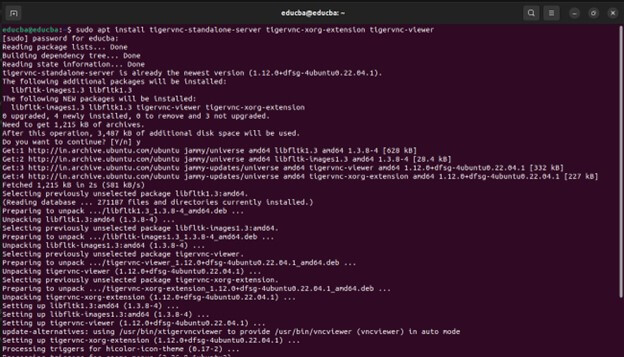
- TigerVNC:
- sudo apt install tigervnc-standalone-server tigervnc-xorg-extension tigervnc-viewer
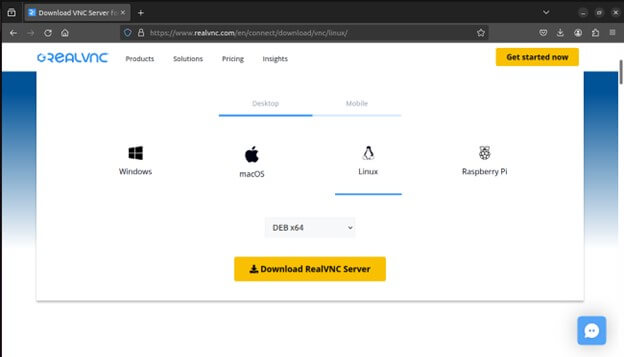
- RealVNC:
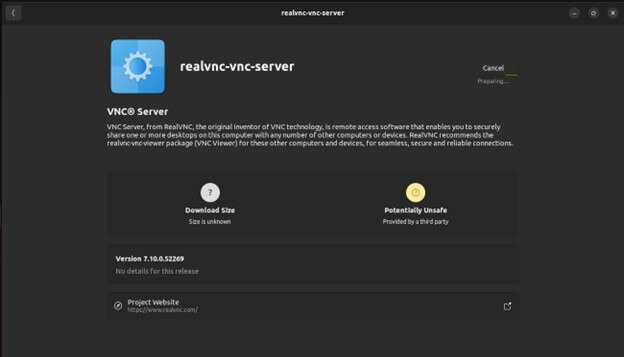
- Head over to https://www.realvnc.com/en/connect/download/vnc/linux/ and download the linux version of RealVNC And install it.
Configuring the VNC Server
After installing the VNC server software on your Ubuntu system, the next step is to configure it to suit your preferences and requirements.
- Run “vncserver” to set VNC password, create the initial configuration files, and start a VNC server instance.
- Because we are configuring the vncserver, we need to stop the running instance of it by running the following command:
- vncserver -kill :2
- Before modifying the xstartup file, you must backup the original file, run the following command:
- mv ~/.vnc/xstartup ~/.vnc/xstartup.bak
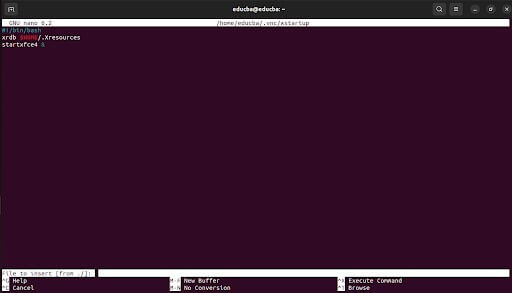
- We do not create a new xstartup file and open it.
- nano ~/.vnc/xstartup
- Then add the following lines:
#!/bin/bash
xrdb $HOME/.Xresources
startxfce4 &
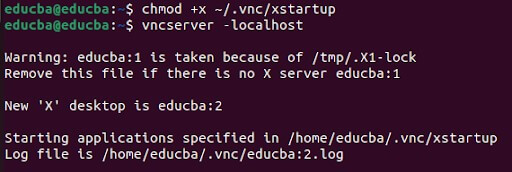
- To utilize the new startup file effectively, you must give executable permissions to the VNC server.
- chmod +x ~/.vnc/xstartup
- vncserver -localhost
Connecting to the VNC Server
To ensure secure connectivity to your server while using VNC, you must set up an SSH tunnel and configure your VNC client to use it instead of a direct connection. It involves creating an SSH connection on your local PC that securely forwards to the localhost connection for VNC. You can achieve this on Linux or macOS by running the SSH command in the terminal.
ssh -L 59000:localhost:5901 -C -N -l your_username your_ip
The following is an explanation of the options for an SSH command:
- The -L switch forwards a specific port on the local computer to a designated host and port on the destination server. The local port can be any number not already bound to another service.
- The -C flag enables compression to minimize resource consumption and speed up the process.
- The -N option instructs ssh not to execute any remote commands, which is helpful for port forwarding.
- The -l switch specifies the user you want to log in once you connect to the server. You must replace “your_username” and “your_ip” with the name of your user and your server’s IP address.
Steps for connecting to the VNC server from a remote machine.
- Launch the VNC Client: Open your chosen VNC client software on your remote device.
- Enter Server Information: The client will ask you to specify the VNC server address. This address consists of two parts:
- IP Address: The IP address of your Ubuntu machine running the VNC server. You can find your IP address using various methods, like network settings or command line (ifconfig or ip addr).
- Port Number: By default, TightVNC uses port 5900. If you used a different display number during configuration, add it to the port number.
- Enter VNC Password: Once you enter the server address, the VNC client will prompt you for the password you set earlier using vncpasswd. Enter the password to establish a connection.
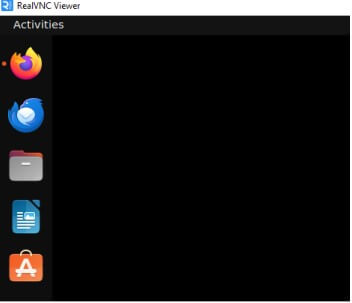
- Remote Desktop Access: If the password is valid, you’ll be connected to your Ubuntu machine’s graphical desktop through the VNC client. You can now interact with your Ubuntu desktop remotely.
Using VNC client software (mention a few popular options for different platforms)
RealVNC Viewer:
- RealVNC offers a free VNC Viewer application for various platforms, including Windows, macOS, Linux, and Raspberry Pi.
- It provides the user with GUI and supports features like encryption and cloud connectivity.
- RealVNC Viewer is reliable for users seeking a polished VNC client experience.
TightVNC Viewer:
- TightVNC provides a cross-platform VNC viewer application that works on Windows, macOS, and Linux.
- It is lightweight and straightforward, offering basic functionality for connecting to VNC servers.
- TightVNC Viewer suits users looking for a simple and efficient VNC client without additional features.
TigerVNC Viewer:
- TigerVNC is an open-source VNC viewer for Windows, macOS, and Linux.
- It offers a straightforward interface and supports various authentication methods, including password and SSH tunneling.
- TigerVNC Viewer is a good choice for users who prefer open-source software and need reliable VNC connectivity.
Tips and Troubleshooting
Firewall Settings:
- Issue: Firewall settings can block incoming VNC connections, preventing remote access to the server.
- Troubleshooting: Check the firewall configuration on both the server and client sides. Ensure the firewall allows incoming connections on the VNC port (usually 5900 or 5901).
Connection Problems:
- Issue: Users may experience difficulty connecting to the VNC server from a remote machine.
- Troubleshooting: Double-check the IP address and port number used for the connection. Ensure that the VNC server is running and configured correctly.
Performance Optimization Tips:
- Issue: Users may encounter lag or sluggish performance when accessing the VNC server remotely.
- Troubleshooting: Optimize the VNC server settings for better performance. Lower the display resolution and color depth if bandwidth is limited.
Security Considerations
Using SSH Tunneling for Encrypted Connections:
- SSH tunneling provides a secure way to encrypt VNC traffic and protect it from interception by malicious actors.
Firewall Configuration to Restrict Access:
- Configuring firewall rules is essential to restrict access to the VNC server and prevent unauthorized connections.
- Users should configure firewall rules to only allow incoming connections on the VNC port (e.g., 5900 or 5901) from trusted IP addresses or networks.
Regularly Updating the VNC Server Software:
- Keeping the VNC server software up-to-date is critical to address security vulnerabilities and mitigate potential risks.
- VNC server software vendors release updates and patches regularly to address security issues and improve software functionality.
Conclusion
Establishing a VNC server on Ubuntu provides valuable remote desktop capabilities, yet ensuring robust security measures is imperative. Leveraging SSH tunneling, crafting precise firewall configurations, and maintaining regular software updates are pivotal steps in fortifying the system against unauthorized access. By adopting these precautionary measures, users can not only relish the convenience of remote desktop accessibility but also uphold the integrity and confidentiality of sensitive data. Prioritizing security safeguards the system’s resilience, guaranteeing a seamless and protected remote desktop experience.
Frequently Asked Questions (FAQs)
Q1. How does a VNC server work?
Answer: A VNC server captures the graphical output of the desktop environment on the server machine and transmits it over the network to a VNC client software running on a remote device.
Q2. Is VNC secure?
Answer: Although VNC doesn’t offer encryption by default, you can secure it by utilizing techniques such as SSH tunneling and configuring firewalls to limit access.
Q3. Which platforms are supported by VNC client software?
Answer: VNC client software is available for various platforms, including Windows, macOS, Linux, and mobile operating systems such as Android and iOS.
Q4. Can multiple users connect simultaneously to a VNC server?
Answer: Yes, most VNC servers support multiple simultaneous connections, allowing multiple users to access the same desktop environment concurrently
Recommended Articles
We hope that this EDUCBA information on “Test VNC Server for Ubuntu” was beneficial to you. You can view EDUCBA’s recommended articles for more information,
