Updated August 28, 2023
Introduction to Text Animation in After Effects
After Effects is an incredibly versatile program for creating and animating text, the title sequence is the main lead play in all industries; if the titles are good, our content was successful in the first step itself, so we need effective software for such titles. In this topic, we are going to learn about Text Animation in After Effects.
If you think you need to get a good response for your content or a project, the title will give a stylish touch to your project or content; among all designing software’s after effect is an easy and effective way to do title animation, nowadays after-effects became a major software for title animations.
Fields like education, designing, animation, broadcasting, cinema, and corporate use after-effects for their title animation purpose because they give smooth and quality output with an easy workflow.
How to Create Text Animation in After Effects?
Ok, let us see how to create text animation in After effects.
Step 1
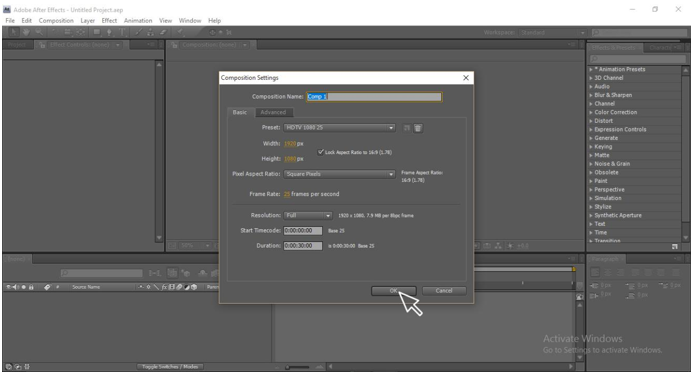
Create a new composition; go to File and select a new composition
Step 2
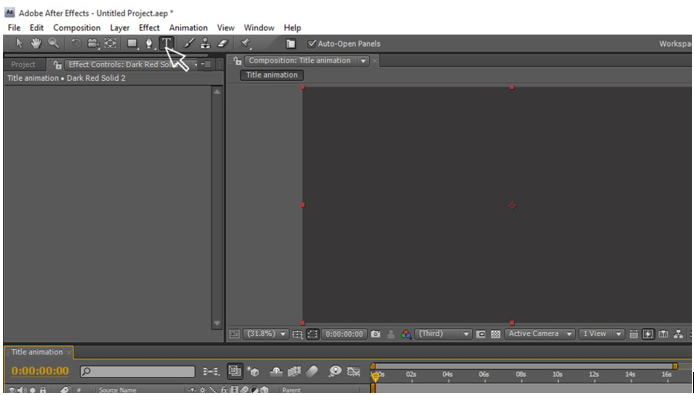
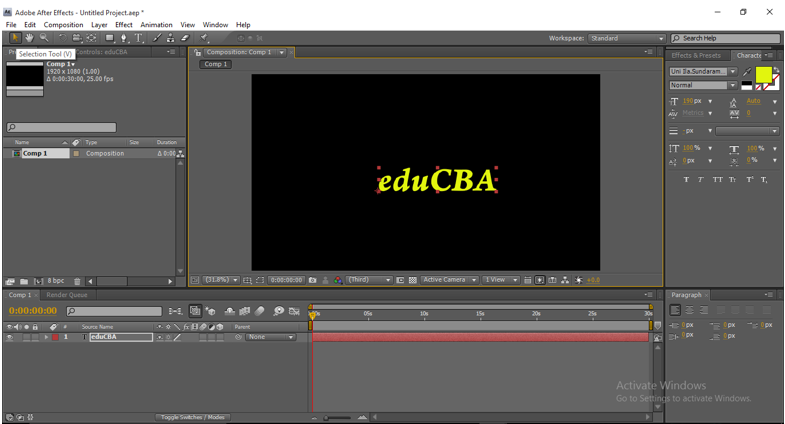
Select the [T] text tool
Step 3
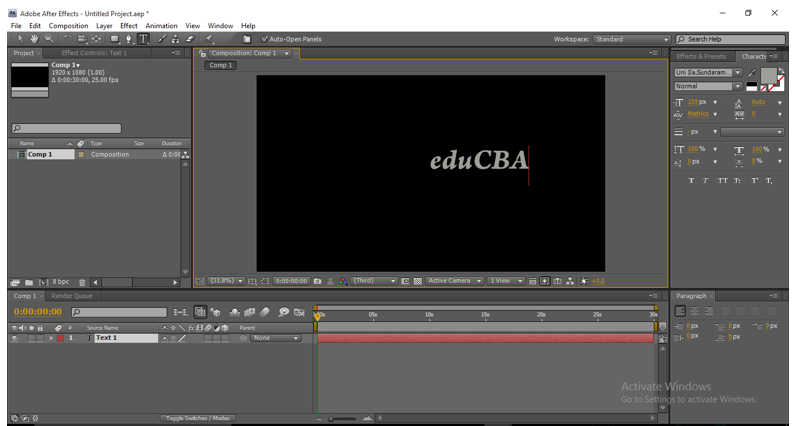
Type your text.
Step 4
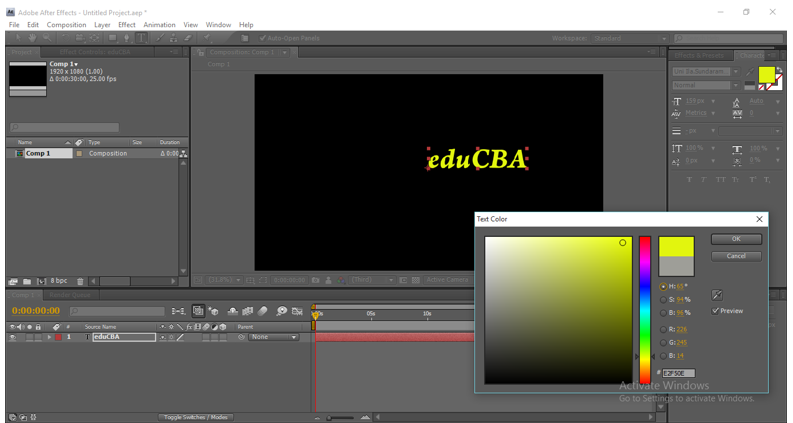
Change the color of the text according to you.
Step 5
With the help of select tool [V], adjust the text position and change size.
Step 6
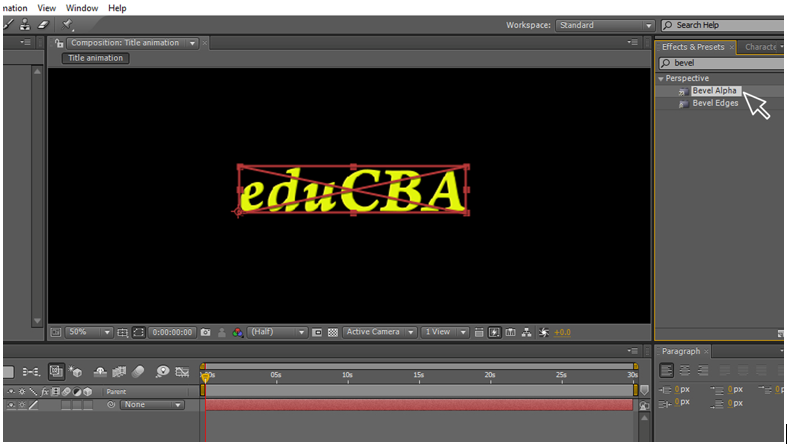
Apply bevel alpha to the text [it will be in Effects and presets]
Step 7
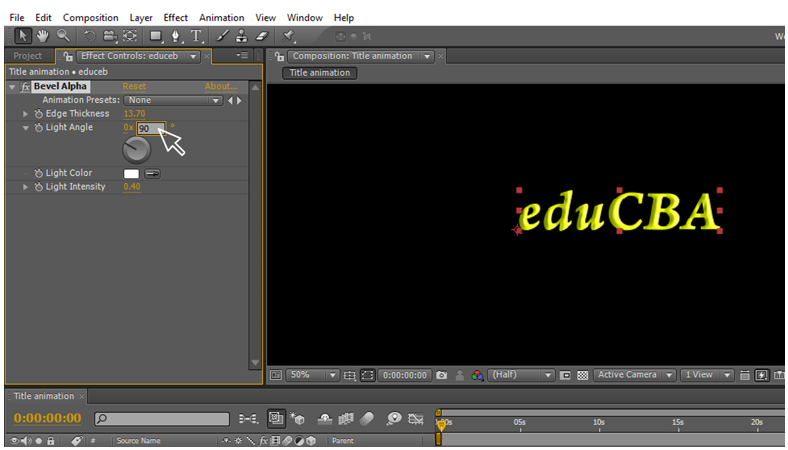
Change the bevel alpha values, Edge thickness 13.70 & light angel 0 x 90.
Step 8
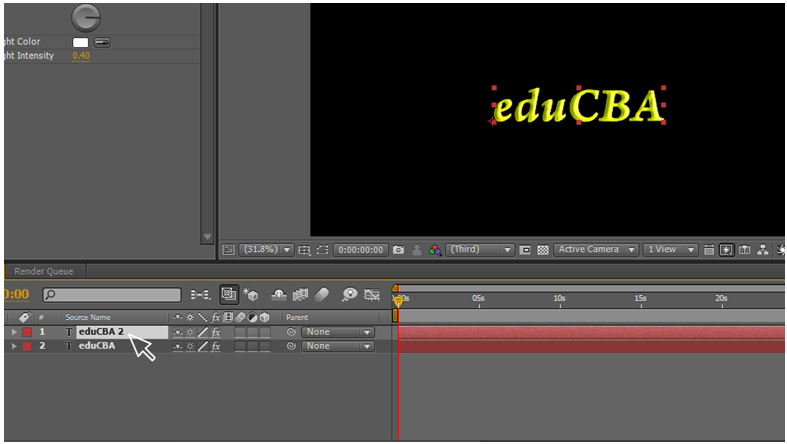
Create a duplicate layer for the text.
Step 9
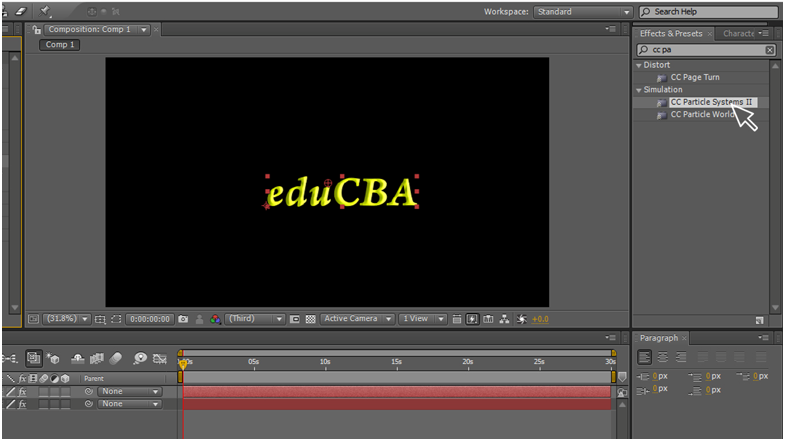
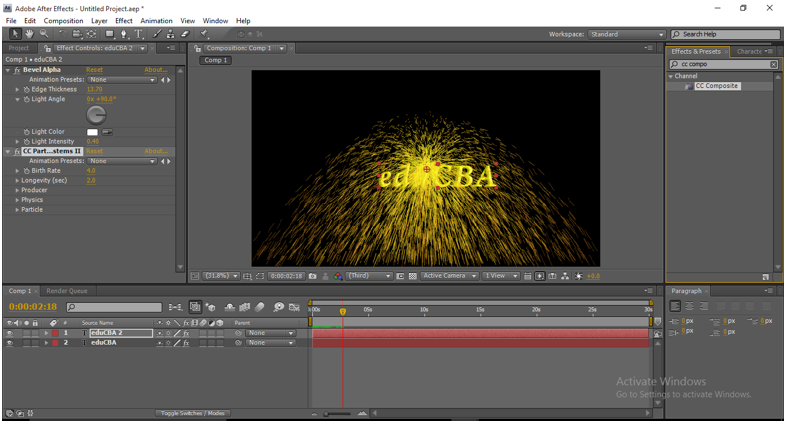
Apply cc particle system to duplicate layer.
A particle system is defined by a collection of particles that evolves over time and can be controlled to create a virtually infinite number of different animations. These animations might range from simple explosions to sparkling fountains and massive smoke screens. You can also twirl polygons in different directions Particle Systems II is especially useful when you want to animate the position and size of the particle generator. You can also control particle generation from a logo or other source with an alpha channel.
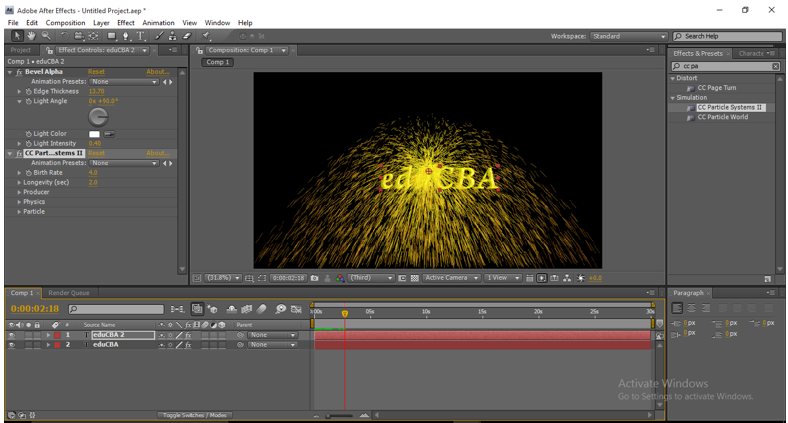
Here we use this cc particle system to change the text layer in particles.
Step 10
Now duplicate layers became as particles.
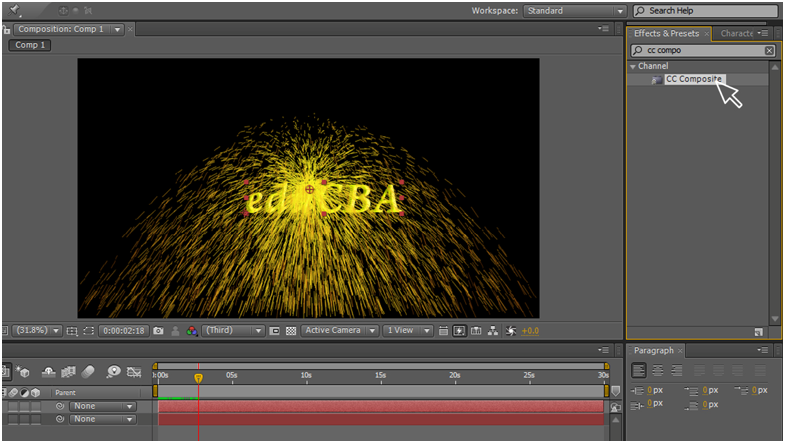
CC Composite is a powerful effect that helps you be more efficient when working with … Then it allows you to choose what kind of mode you want.
Step 11
Add cc composite to duplicate layer.
Step 12
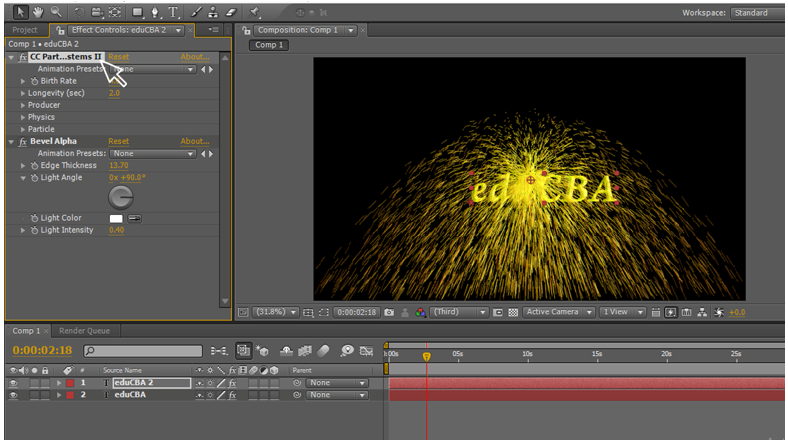
Arrange cc composite layer to upper than a cc particle system.
Step 13
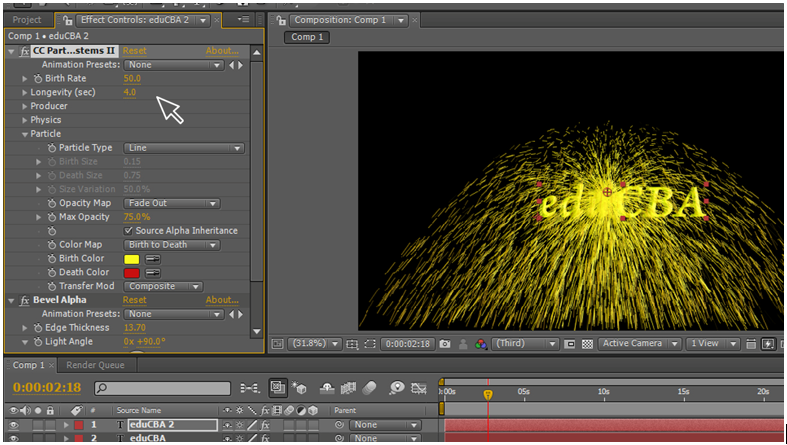
Change the values of cc particle systems.
Birth rate: 50
Longevity (sec) : 4.0
Go to particles and enable source alpha inheritance
(alpha inheritance will give the eared blended in between the layers )
Step 14
Go to producer and enable keyframe animation in position. Next, go to the 3rd sec in the timeline and give the value of 1920 in position.
Step 15
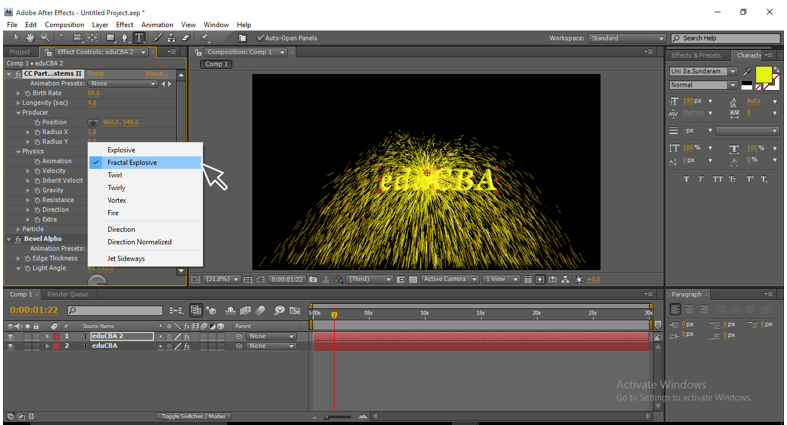
Change the values in the cc particle system – physics – Animations – Fractal explosive.
Step 16
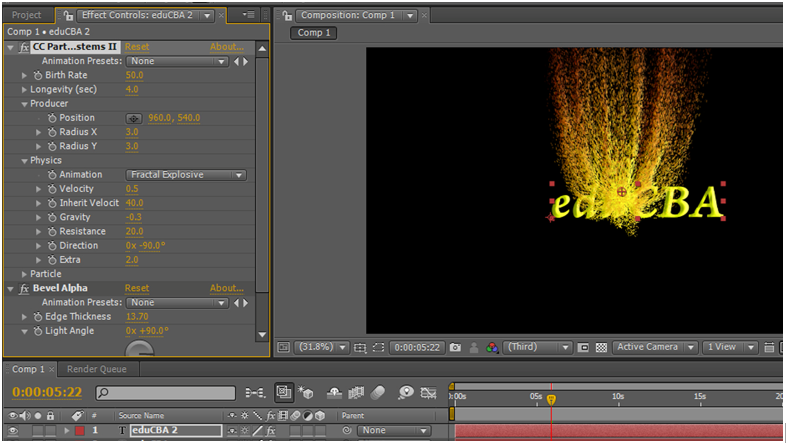
Change some more values in cc particle system – physics.
Velocity : 0.5
Inherit velocity: 40
Gravity: -.03
Resistance: 20
Direction : 0 x 90
Extra : 2.0
By changing the values here, we can get the shape for the particles; we can get the perfect blow of particles.
Step 17
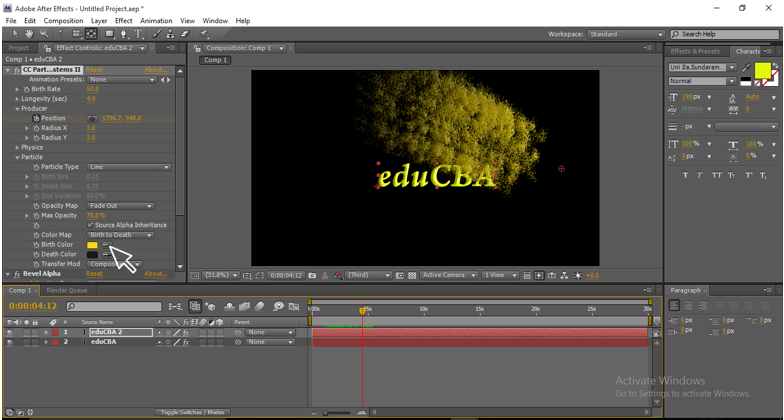
We can change the color of particles [particles-birth color and death color] while beginning and ending colors can be changed to show effectively.
It is very important to change the colours of the particles in the end and starting because when a fire starts it will be so bright and when it ends it looks like dull ash, like ways in the starting we need bright color for the particles and make it dull color when it comes to an end and dissolves give you more effective in the title animation.
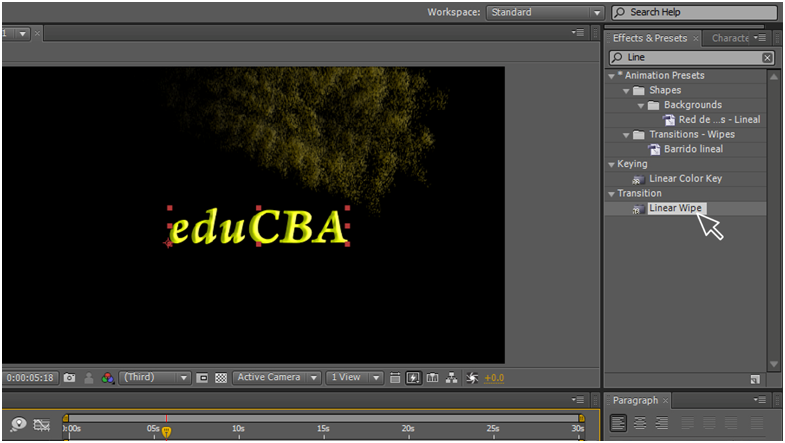
Linear wipe is used as a transition for the film, video and animation works. which disappears the one layer with another, here we use the linear wipe to disappear the text from one side to another; this is the main process in this title animation,
Step 18
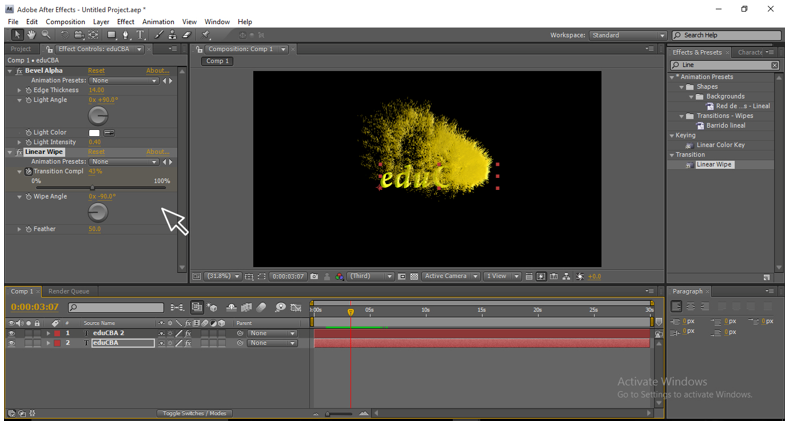
Apply liner wipe to the Text layer.
Step 19
Change the values in the liner wipe. Transition completion 0 at the starting frame & 100 at the end frame.
Wide angel : 0 x 90
Feather: 50
Adjust both layers starting and ending positions, whether they start equal or not.
Step 20
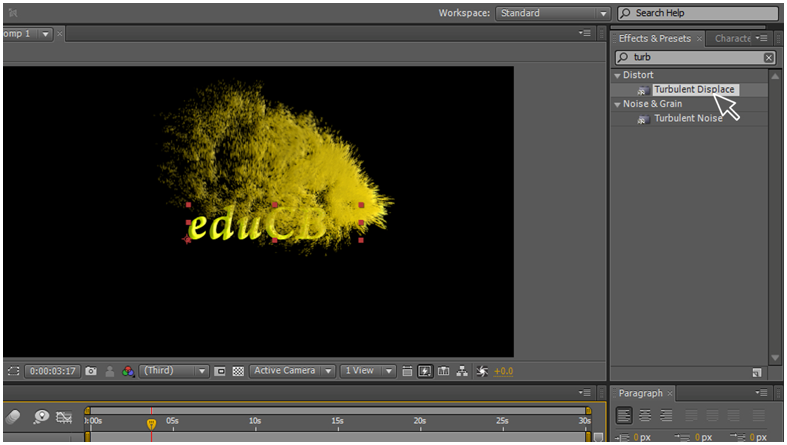
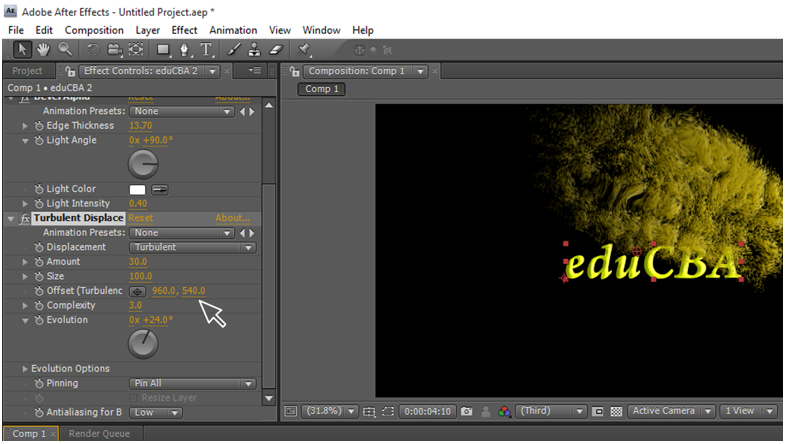
Apply turbulent display to duplicate layer.
The turbulent display gives us a stylish look to the animation; when it moves normally, it won’t get such effective, but when we add a turbulent display, the particles move in wave and fly motion and ends so smooth and give a very professional look for the animation.
Step 21
Change the values of Turbulent Displace.
Amount: 30
Complexity : 3.0
Evolution : 0 x +24.0
Now you can get animation so smooth.
However, I have explained step by step, and you just do not have to follow what we did in this process; you need to have some creative thoughts to create yourself. Do change the random values you have seen in this process to get different animations; just keep it as a sample project and create some new animations similar to this project.
In this process, first, we have to create a text layer, and later we have created a duplicate for it; we add some effects like Bevel alpha, cc particle systems and cc composite to duplicate layer by changing the values, we can change the text into particles, now apply liner wipe effect to the text layer and make a keyframe animation, we have text in liner wipe effect, and we arrange duplicate layer upon the text layer when both animations play at a time where text in liner wipe and duplicate layer moves as particles upon the text it looks like titles animation, now use a turbulent display to duplicate layer to make animation too effective.
Recommended Articles
This is a guide to Text Animation in After Effects. Here we discuss How to Create Text Animation in After Effects step by step with screenshots. You may also look at the following articles to learn more –
