Updated June 29, 2023

Introduction to TextArea Tag in HTML
The <textarea> tag is one of the many HTML tags. The <textarea> tag format is divided into three main parts, an opening tag (<textarea>), the content, and the closing tag (</textarea>). Users can input text over multiple lines by using the HTML tag in a form to create a text area. A <textarea> tag creates a text area that can hold a lot of characters.
How <textarea> Tag work in HTML?
A textarea element creates an area or space specified using attributes like cols, rows, or both. CSS styling and height and width properties can format the look and feel.
Syntax:
<textarea rows="3" cols="20">
Enter your text here...
</textarea>
Attributes
The <textarea> tag, like all other HTML tags, accepts a number of other attributes, which are also common in <input> form element. They are listed below:
- autofocus: The autofocus attribute ensures that the text area automatically gets the focus when the page loads.
- cols: The ‘cols’ attribute specifies the text area’s width. The value should be a positive integer. If not specified, the default value of ‘cols’ is 20.
- disabled: This feature disables the text area, freezes it, and does not accept user input changes. Disabling the text area will cause the tab key to skip it.
- form: The ‘form’ attribute specifies the form id to which the text area belongs.
- name: It assigns a name to the text control.
- placeholder: This attribute helps the user by providing a hint or a sample text that guides what should be written in the text box.
- readonly: This attribute sets the text area in read-only mode; that is, it is not affected by the user’s input or cannot change its content.
- wrap: This feature specifies how the text area will wrap the text. If not specified, the default value is ‘soft.’
Examples of TextArea Tags in HTML
To understand the work of text area element more, check out the following example that has <textarea> tag in action,
Example #1
Code:
<form>
<p>Leave your Comment:</p>
<br />
<textarea id="ta" cols="60" rows="5"> Write Here...</textarea></form>
Output:
The above example is simple, demonstrating features of <textarea> element. For example, the ‘id’ attribute is for accessibility purposes. Another interesting feature used in this example is the cols and rows attributes.
The rows and cols allow the programmer to set the boundary values for the size of the text area, the exact space the text area will acquire. Using these attributes helps in cross-browser support and format consistency since browser defaults can be different.
Example #2
Code:
<!DOCTYPE html>
<html>
<head>
<title> Textarea HTML Tag Demo </title>
</head>
<body>
<form>
<p>Fill the Detail:</p>
<br />
<textarea rows="5" cols="40" name="demo" maxlength="60" minlength="10" required="required">Enter your name</textarea>
<br />
<input type="submit" name="Submit" value="Submit" />
</form>
</body>
</html>
Output:
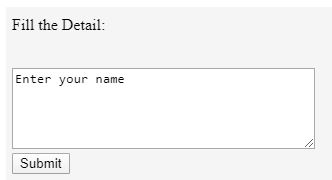
The above example shows another set of properties used alongside <textarea> tag, max length, and minlength. The maxlength specifies the maximum number of characters a user can enter in the text area. So here, the user can enter ’60’ characters, special characters included.
The max length attribute was added in HTML5; HTML did not support this attribute. The text area requires a minimum of 10 characters as set by the ‘minlength’ property. The ‘required’ attribute indicates that the user must not leave the text area blank to be considered valid and submitted. It’s a simple validation for the tag.
Example #3
Code:
<form id="Form1">
<label>Textarea Box 1</label>
<br />
<textarea rows="5" cols="40" name="demo" maxlength="60" minlength="10" disabled="disabled"> This is Disabled</textarea>
<br />
<label>Textarea Box 2</label>
<br />
<textarea rows="5" cols="40" required="required"></textarea>
<br />
<label>Textarea Box 3</label>
<br />
<textarea rows="5" cols="40" placeholder="This is readonly textarea" readonly="readonly"></textarea>
<br />
<input type="submit" name="Submit" value="Submit" />
</form>
Output:
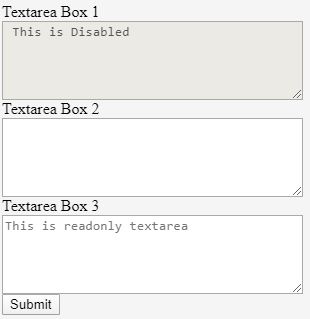
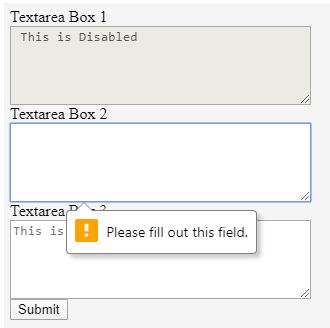
Observe that the ‘Textarea Box 2’ text area is a required text area, whereas the ‘Textarea Box 1’ is disabled.
Example #4
Code:
<form id="label2" action="textareaDemo.html">
<fieldset>
<legend><b>Form 2</b></legend>
<input type="text" name="FN" value="Name" />
<br />
<input type="submit" name="Submit" value="Submit" />
<br />
</fieldset>
</form>
<textarea rows="5" cols="40" form="label2" required="required"></textarea>
<br />
<p>Above Text Area belongs to 'Form 2'</p>
Output:
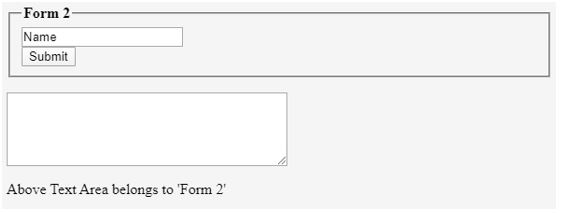
Note the output below. The textarea box below is a ‘required’ field, and as mentioned in the code above, this field is associated with the form ‘Form 2’. Thus when we try to submit the form with an empty text area, it shows an alert.
Conclusion
The <textarea> element can be a nested element within a <form> tag or can exist outside a form tag but use the ‘form’ attribute to associate itself with a form. One important note is this element does not have a ‘value’ attribute, so if you need a default text for your text area, enter that text between the opening and the closing <textarea> tags.
Recommended Articles
This is a guide to textarea Tag in HTML. Here we discuss the introduction, how <textarea> Tag works? Attributes and examples, respectively. You may also have a look at the following articles to learn more –

