Updated August 28, 2023
Introduction to Time Remapping After Effects
Time remapping of After Effects is a technique of this software through which you can manage the time frame of any video footage or any animation video made by you for speeding up a time frame or for slow down speed of time frame between your chosen keyframes or you can also play your animation or video footage in reverse directions through Time remapping technique of this software. For learning about time remapping, we have to understand some important parameters of the time frame, and by handling these parameters, we can easily arrange a time for your video footage or animation.
How to Do Time Remapping in After Effect?
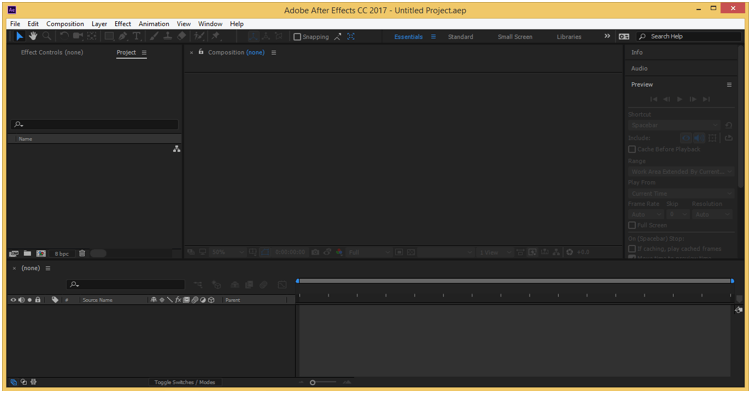
This is a fascinating and easy learning technique for this software. We can easily learn it by following some simple steps of this technique and getting introduced to important parameters. But before starting,g I think we should understand the working screen of this software so that we can easily get familiar with the different terms of this software which we will use throughout this article to understand this topic.
At the top of the working screen, there is a bar called a Menu bar. Below this first bar, we have the second bar of the user screen, which is a toolbar. Below the second bar, the user screen is divided into three sections in which at left side we have Project panel, at the center, we have Composition window in which we can see our work, at the right side, we have some parameters’ tab such as Preview tab, Align tab, Effects & Presets and some other important tabs. Finally, the lower end of this screen is divided into two important sections: the Layer panel at the left side and the Timeline frame section on the right side.
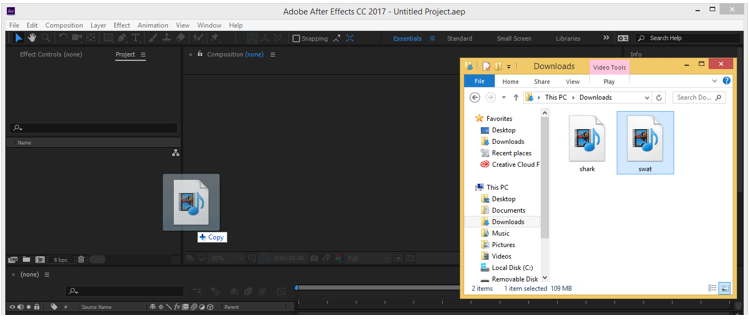
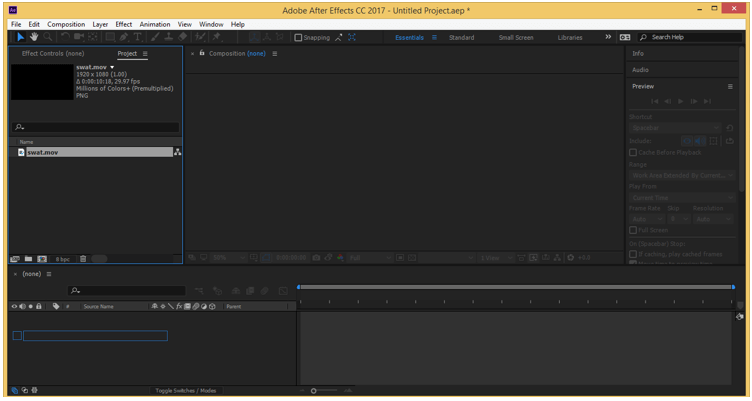
Now let us have video footage or animated video for our learning. I have downloaded video footage from an internet website. You can also download it or take your video footage or animated video for this purpose. To import video footage in this software, open a folder of your personal computer where you have saved it, select your desired video and pick it from there, then drop it in the project panel of this software.
Now drag this video footage from the project panel to the layer panel of this software with the help of the mouse left button.
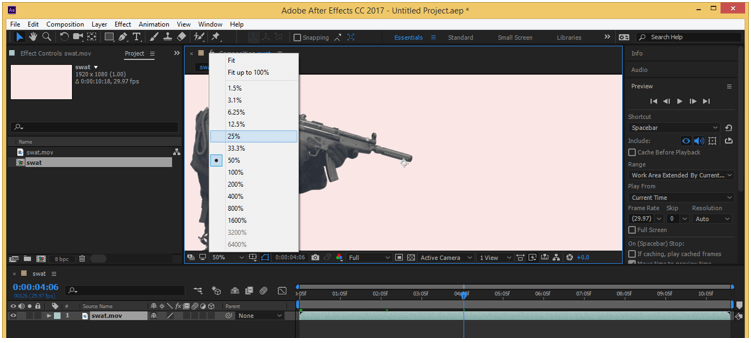
Once you drop it in the layer section, it will display in the composition window like this. You can adjust the display area of your video footage from the percentage value of this list. For example, I will choose 25 % for seeing my video footage properly. You can choose any other percentage according to the size of your video footage.
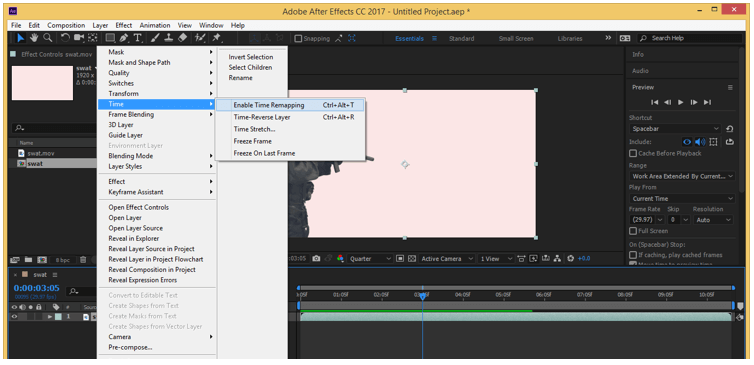
Now go to the Layer panel of this software and make right-click on the layer of this video footage. Once you click, a drop-down list will be open like this. Go to the Time option of this list and choose the ‘Enable Time Remapping’ option from a new popup list or you can simply press Ctrl + Alt + T buttons of the keyboard as a short cut key for enabling this option.
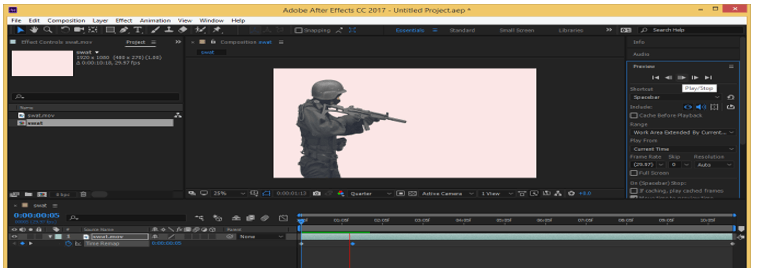
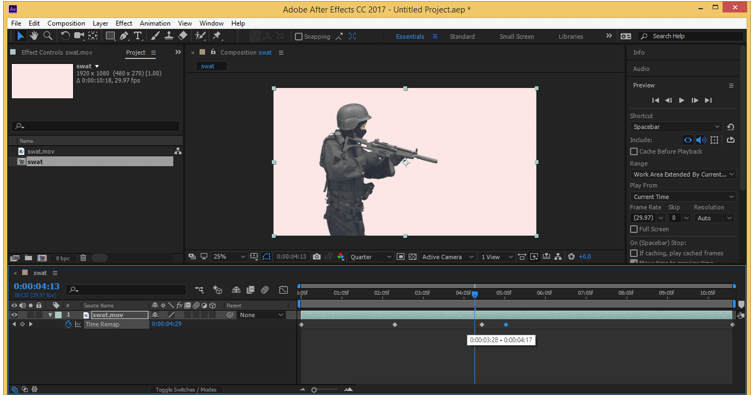
Once you enable this option, two keys will be added in the keyframe sections area of the timeline, and a Time Remap option will come in a layer section like this.
The first key of the Time Remap option will add at 0 sec.
And the second key of the Time Remap option will add at the end frame of the video footage.
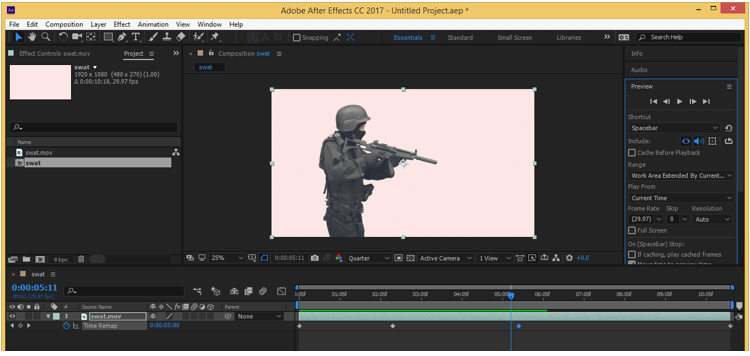
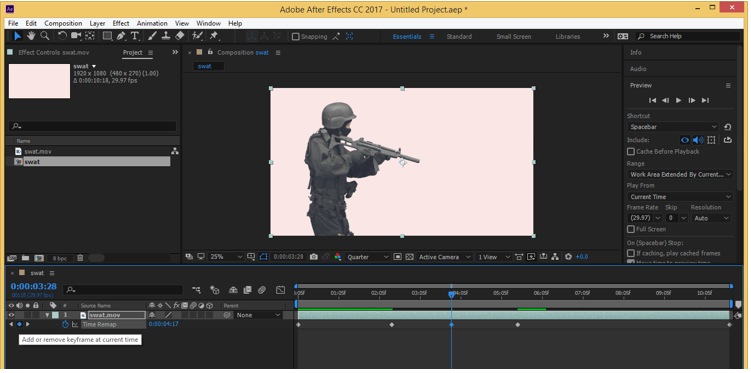
Now we will add a key between these two keys to speed up our video footage’s playing speed. So place the keyframe play head at this frame by dragging it and clicking on the key’s Add button in the layer section of this software.
Now drag this key near to the first key of the time remap option. When you do this, the time between the first key and added key will be compressed. Now play the video by click on the play button of the preview tab, or you can press Spacebar as a short cut key for playing it, and when you play this video, the speed of playing of video between these two keys will become fast.
Now, suppose you drag this key far away at some frame from the first key of the time remap option. In that case, the speed of playing of video between these keys becomes slow, or you can add more keys and increase frame distance between the added key and now when you play your video. Video speed becomes slow between your set keys because of the time expend between chosen keys.
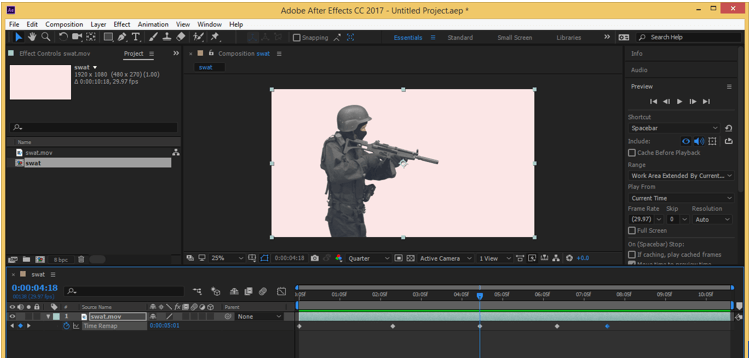
You can play your video in the reverse direction by using the Time Remapping option of this software. You can use this technique in some portion of video footage, so for this, let us drag keyframe play head at the frame from here; you want to reverse your video and add one more key between these two added keys by clicking on the Add button of the key in layer panel of this software.
Now select this keyframe with the mouse button and hold the mouse button, then drag this key in the forward direction in the layer of this video footage, then place it after the second added key of this layer like this. Now when you play it by pressing the play button of the preview tab of this software, it will play in the reverse direction from your chosen frame.
You can also drag the last keyframe near to added keyframe for speeding up video speed between these keyframes or drag added key away from the last keyframe for slow down speed of your footage between these keys, and then after the last key, your video will play in its normal play speed.
In this way, you can use the time remapping option of After Effects.
Conclusion
After this article, you can now understand what Time remapping is in After Effect and how you can handle parameters of this feature of After Effect. Furthermore, you can increase your expertise in this feature by practicing on it again and again with your ideas.
Recommended Articles
This is a guide to Time Remapping After Effects. Here we discuss How to Do Time Remapping in After Effect and how you can handle parameters of this feature of After Effect. You may also have a look at the following articles to learn more –

