Updated March 24, 2023

Introduction to Tkinter Frame
Tkinter frame is an awesome process of organizing and also grouping the other widgets in a simple and friendly way which works like a container and also for arranging other widget’s position, and it also uses the rectangular areas in order to organize layout which can provide the padding of the widgets and this Tkinter widget also can be used in order to implement the complex widgets as a foundation class.
Syntax:
w=frame( master, option, …. )Attributes:
The attributes are :
- Master: Master attribute helps us to represent the parent window
- Options: Options attribute helps us list the options commonly used for the widget, and these options are very useful as the key-value pairs, which the commas can separate.
Tkinter Frame Options
These are the Tkinter frame options, which is helping a lot to control the Tkinter frame. Check out those options given below:
- bg: The Tkinter frame’s bg option is the normal bg( background color ), which is used to display behind the indicator and the label.
- bd: The Tkinter frame’s bd option is very much helpful in setting the border size around the indicator, and by default, its size is only 2 pixels.
- cursor: The “cursor” option helps set this cursor option to a cursor name ( dot, arrow, etc.. ). With this mouse cursor’s help, it will help change the pattern when the cursor/mouse point is over the checkbutton/ we can call it as changing the pattern when the checkbutton is below the cursor point.
- height: The “height” option of this is only the new frame’s vertical dimension.
- highlightbackground: The “highlightbackground” option of the Tkinter frame is the focus highlight’s color when the frame don’t have any focus.
- highlightcolor: The “highlightcolor” option of the Tkinter frame only shows the color in the focus highlight when there is a focus for the frame.
- highlightthickness: The “highlightthickness” option is the focus highlight’s thickness.
- relief: The “relief” option of the Tkinter frame is the only checkbutton which don’t even stand out from the background, and by default, the relief value is FLAT (relief = FLAT). You can set this option to all of the other styles.
- width: The “width” option of the Tkinter frame is the checkbutton’s width which is the size of the text or the image by default. One can also use this option to the number of the characters, and this width checkbutton also have room for many characters always.
Methods:
- Pack() method: This “pack()” method of the this is very much helpful in order to manage the rows and columns by filling, expanding and moving by controlling the pack geometry manager.
Examples
The following are code examples for showing how to use Tkinter.Frame.
Example #1
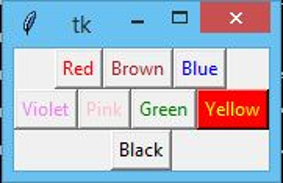
This is the program that displays the buttons with different colors and their color names on the buttons. Here pack() method is used which is used to align the Tkinter frame based on our requirement. Here in the below example, all Tkinter functions are called using the import and from functions. Frame1 is to fall the Tkinter frame from the root1 variable. Variables are created for each color button with the color names on it for the frame. redbutton1 is the variable for the button with the master option as frame1 in order to call the Tkinter frame, and then the option text is included in order to know what color is embedding to the button and then the font background color is added to the font using “fg” option. The “bg” color is an option to implement the background color.
After this redbutton1 variable is embedded with the pack() function in order to align the button based on our requirement; likewise, for each button, I implemented the same code but with the different color using ‘fg”, “bg” options and alignment using the pack() method with the option side = “LEFT” or side = “BOTTOM” or side = “RIGHT” etc… Check out the output below the output section/heading to know what is happened or happening when implemented the following program in the command prompt / in a Python interpreter or at any other software based on our requirement.
Red, Brown, Blue, Violet, Pink, Green, Yellow, and Black color buttons are used in the Tkinter frame functions. Here for the yellow button bg color (background color = “RED”) option also used.
Code:
from tkinter import *
import tkinter
root1 = Tk()
frame1 = Frame(root1)
frame1.pack()
bottomframe1 = Frame(root1)
bottomframe1.pack( side = BOTTOM )
redbutton1 = Button(frame1, text="Red", fg="red")
redbutton1.pack( side = LEFT)
greenbutton1 = Button(frame1, text="Brown", fg="brown")
greenbutton1.pack( side = LEFT )
bluebutton1 = Button(frame1, text="Blue", fg="blue")
bluebutton1.pack( side = LEFT )
blackbutton1 = Button(bottomframe1, text="Black", fg="black")
blackbutton1.pack( side = BOTTOM)
yellowbutton1 = Button(bottomframe1, text="Yellow", fg="yellow", bg="red")
yellowbutton1.pack( side = RIGHT)
greenbutton1 = Button(bottomframe1, text="Green", fg="green")
greenbutton1.pack( side = RIGHT)
violetbutton1 = Button(bottomframe1, text="Violet", fg="violet")
violetbutton1.pack( side = LEFT)
pinkbutton1 = Button(bottomframe1, text="Pink", fg="pink")
pinkbutton1.pack( side = BOTTOM)
root1.mainloop()
Output:
Example #2
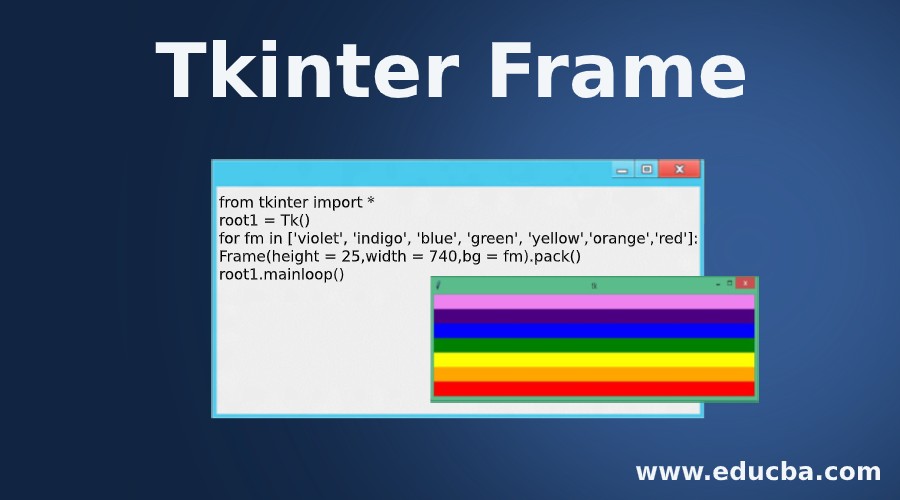
The below program will implement the series or colors one by one, one after the other, using the for loop function with various colors mentioned in the loop. Colors mentioned in the loop are VIBGYOR (Violet, Indigo, Blue, Green, Yellow, Orange, Red). These are the colors of the prism when the incident of white light is passed through it. Here root1 variable is used in order to call the Tkinter frame in the loop function. The “fm” is the variable to show the color from the colors of the listed colors one at an instance.
Code:
from tkinter import *
root1 = Tk()
for fm in ['violet', 'indigo', 'blue', 'green', 'yellow','orange','red']:
    Frame(height = 25,width = 740,bg = fm).pack()
root1.mainloop()
Output:
Recommended Articles
This is a guide to Tkinter Frame. Here we discuss the basic concept and what are its attributes and methods, along with different examples and its code implementation. You may also look at the following articles to learn more –


