Updated April 15, 2023
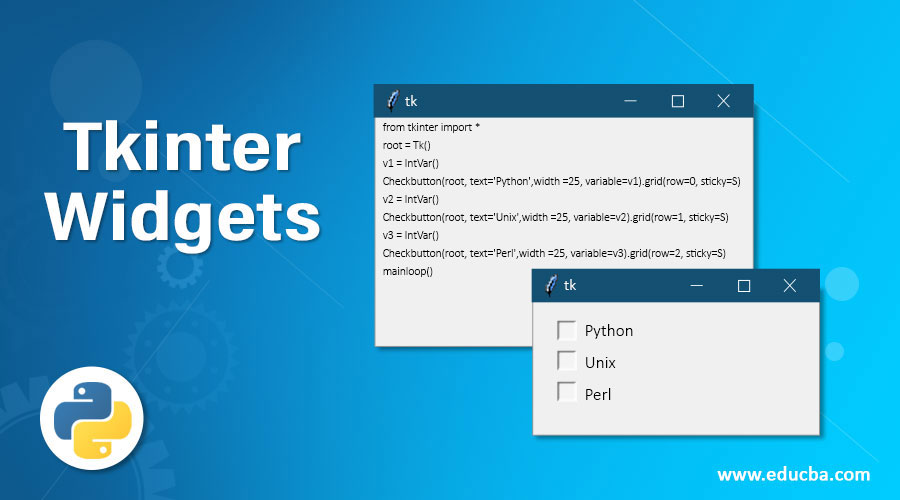
Introduction to Tkinter Widgets
Python Tkinter is a package or inbuilt library that is used for GUI programming. To develop GUI applications, Tkinter provides widgets that are used to represent in the browser. Tkinter widgets are eventful and represented in the browser, such as textbox, button, etc. In Python, Tkinter widgets are standard GUI elements used to handle events through elements like button, frames, labels, etc. In Python, Tkinter provides a small range of widgets that are used in some basic GUI programming, and it also allows us to create specialized widgets as custom widgets. Tkinter widgets usually provide various controls in GUI applications.
Working of Tkinter Widgets with Examples
Tkinter in Python provides various ranges of widgets; roughly, Tkinter has 11 different widgets in it. Tkinter widgets are necessary as they provide GUI applications with a different and attractive look and feel. Let us see some basic and major widgets in detail with an example:
1. Button
The button is a widget that is used for the user to interact with just one click or a button is usually used when there is a click event in the GUI applications. The button is used to control behavior which means if we press or click the button, action or event is performed, such as displaying text or images.
Syntax:
Button (master, option = value)Parameters:
- Master: This argument is used to represent or declare the root or parent window.
- Options: There are many different values for options that are provided button widgets such as activebackground color, activeforeground color, bg, font, image, width, height, command, etc
Example:
import tkinter as tk
r = tk.Tk()
button = tk.Button(r, text='click me', width=25, command=r.destroy)
button.pack()
r.mainloop()
Output:
In the above code, Tkinter must be imported and then declare root window and initialize button with the text to be displayed on the button as “click me” with button width as “25” and we have given command as r.destroy, which is used to close the root window.
2. CheckButton
Checkbutton widget is used to display the checkbox without the checkmark and can access it through the Tkinter variable. This button usually used to store or record status like on or off, true or false, etc., which means these are also like buttons but used when the user wants to choose between two different values or status. In this, the user can select more than one checkbox. Let us see an example of how this button works.
Syntax:
CheckButton (master, option = value)Options can be like the title for giving the title to the widget, activebackground, and activeforeground for setting back and foreground color, bg for setting up the background color, command, font, image, etc.
Example:
from tkinter import *
root = Tk()
v1 = IntVar()
Checkbutton(root, text='Python',width =25, variable=v1).grid(row=0, sticky=S)
v2 = IntVar()
Checkbutton(root, text='Unix',width =25, variable=v2).grid(row=1, sticky=S)
v3 = IntVar()
Checkbutton(root, text='Perl',width =25, variable=v3).grid(row=2, sticky=S)
mainloop()
Output:
In the above example, we can see in the screenshot “Python”, and “Unix” checkboxes are check marked. In the above code, we have declared variables as intvar() for each option to access these checkbuttons.
3. RadioButton
This is also similar to the checkbutton, but this widget is used when the user is given many different options but is asked to select only one among all these options. The radiobutton widgets must be associated with the same variable, and each symbolizes a single value.
Syntax:
RadioButton (master, option = values)Options are the same as for checkbuttons.
Example:
from tkinter import *
root = Tk()
v = IntVar()
Radiobutton(root, text='male',width =25, variable=v, value=1).pack(anchor=W)
Radiobutton(root, text='female',width =25, variable=v, value=2).pack(anchor=W)
Radiobutton(root, text='others',width =25, variable=v, value=3).pack(anchor=W)
mainloop()
Output:
In the above example, in the screenshot, we can see that only one button can be selected using the RadioButton widget.
4. MenuButton
This button is associated with a menu widget and displays the selected option when the user clicks on it. MenuButton is part of a dropdown menu that is always present on the window.
Syntax:
MenuButton (master, option = value)Again the options are the same as that of checkbuttons and radiobuttons.
Example:
from tkinter import *
root = Tk()
root.geometry("300x350")
menubutton = Menubutton(root, text = "File", width = 35)
menubutton.grid()
menubutton.menu = Menu(menubutton)
menubutton["menu"]=menubutton.menu
menubutton.menu.add_checkbutton(label = "New file", variable=IntVar())
menubutton.menu.add_checkbutton(label = "Save", variable = IntVar())
menubutton.menu.add_checkbutton(label = "Save as",variable = IntVar())
menubutton.pack()
root.mainloop()
Output:
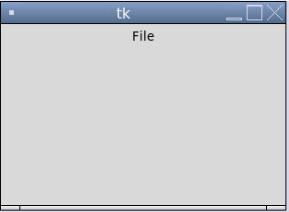
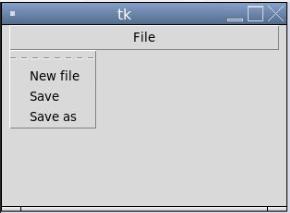
In the above example, we can see the output; when you click on “File”, you will get a dropdown menu as “New file”, “Save”, and “Save as” else “File” is only and always on the window.
5. Entry
This widget is used to provide the user with a single-line text box to enter the string or sentence. This widget is limited to only entering one line of strings or sentences. If we want to enter more than one line, then we can use the text widget.
Syntax:
Entry (master, option = value)Options can be either one among this like, bd for border setting, bg for background color setting, command, height, width, etc.
Example:
from tkinter import *
root = Tk()
root.geometry("300x350")
Label(root, text='Enter the College Name').grid(row=0)
Label(root, text='Enter the Course name').grid(row=1)
e1 = Entry(root)
e2 = Entry(root)
e1.grid(row=0, column=1)
e2.grid(row=1, column=1)
mainloop()
Output:
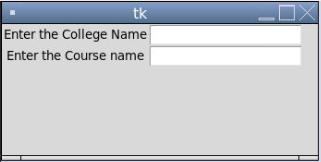
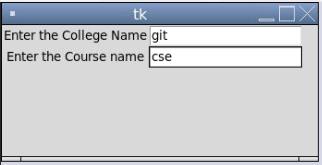
In the above example, we can see the two text boxes for entry, and in the screenshot, we can see we have “git” and “cse” as the entry value entered.
6. Label
This widget is used to tell us specifically where to place text or images, which helps the user to know for what the other widget is for. This widget provides a message as to what the widget will do to the user.
Syntax:
Label (master, option = value)Options are again the same as for the Entry widget, and there are many different options also.
Example:
from tkinter import *
root = Tk()
root.geometry("300x350")
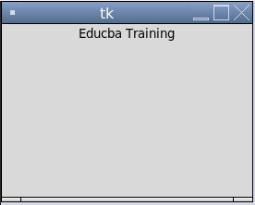
r = Label(root, text='Educba Training',width =35)
r.pack()
root.mainloop()
Output:
Conclusion
Tkinter widgets in Python very important part of any GUI applications. Tkinter widgets are the element of any GUI application. This article has many different widgets with a variety of options provided by each of the widgets. In this article, we have to note that root must be one of the arguments for any widget as we have to place these widgets in the parent window which we declare as root. In Python, Tkinter widgets are very simple to use and understand.
Recommended Articles
We hope that this EDUCBA information on “Tkinter Widgets” was beneficial to you. You can view EDUCBA’s recommended articles for more information.


