Updated May 11, 2023
Introduction to Toolbar in Excel
The Toolbar is an area where you can add different commands or tools associated with Excel. By default, it is located above the ribbon with different tools and in the Excel window’s upper right corner. To increase customer friendliness, toolbars have become customizable according to the frequent use of different tools. Instead of a set of tools, excel gives us the option to select and build a Quick Access Toolbar. This makes quick access to the tools that you want. So the toolbar is popularly known as Quick Access Toolbar.
It is a symbolical representation of built-in options available in Excel. By default, it contains the below commands.
- Save: To save the created workbook.
- Undo: To return or step back one level of an immediate action performed.
- Redo: Repeat the last action.
How to Use the Toolbar in Excel?
The Toolbar in Excel is a shortcut tool to avoid searching for the commands you often use in the worksheet. Using Toolbar in Excel is easy, and it helps us simplify access to the document’s commands. Let’s understand the working of the Toolbar in Excel by the examples below.
Example #1
Adding Commands to the Toolbar in Excel
To get more tools, you have the option to customize the Quick Access Toolbar simply by adding the commands.
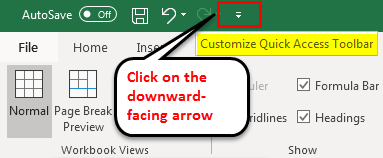
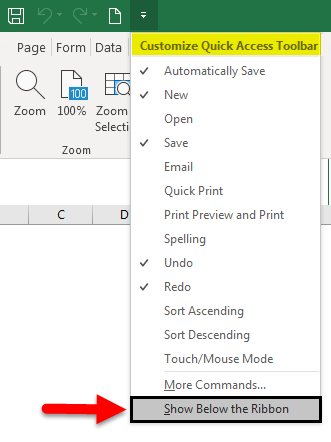
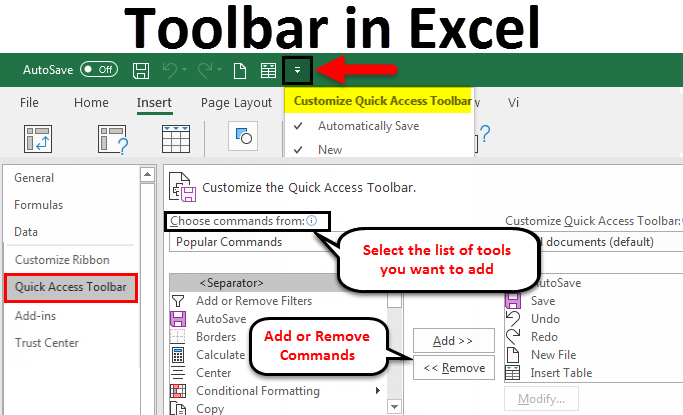
- Click on the downward-facing arrow at the end of the Toolbar in Excel. A pop up will be shown as Customize Quick Access Toolbar.
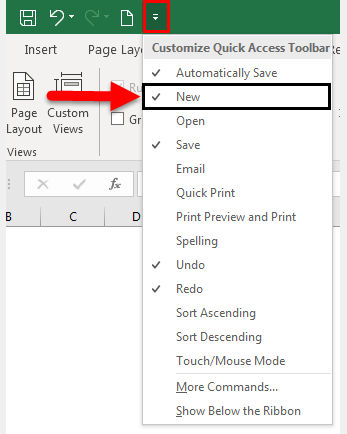
- From the dropdown, you will get a list of commonly used commands. Click any options you want, and it will be added to the toolbar.
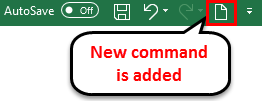
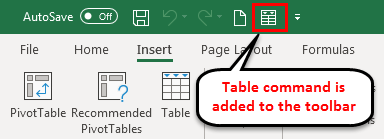
- A new command is selected, which will be added to the toolbar highlighted as the command is added with already available tools.
In a similar way, you can add the tools which you want to access quickly. So instead of clicking and finding the tools from the multiple hierarchies, you can access the option with a single click.
Example #2
Adding Commands to the Toolbar in Excel
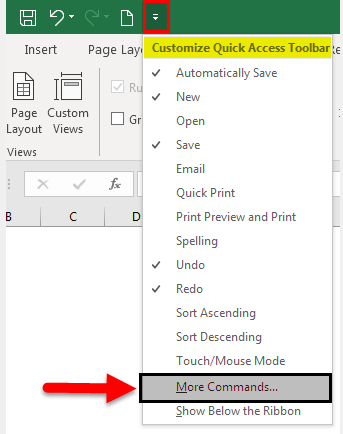
There are options to add more tools Instead of the listed commands. Select More Commands to add more commands to the quick Access Toolbar.
- Click on the downward-facing arrow at the end of the toolbar. Select the More Commands option.
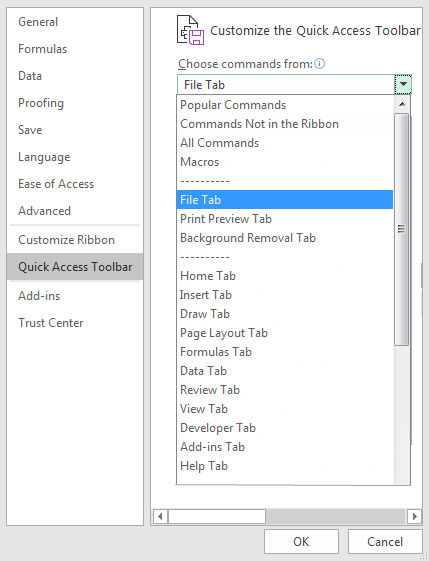
- You will get a new window that gives you all the options available with Excel to add to your toolbar.
You can select which tools to add from the Choose commands in the drop-down. Each list will lead to a different list of commands that you can add to the toolbar.
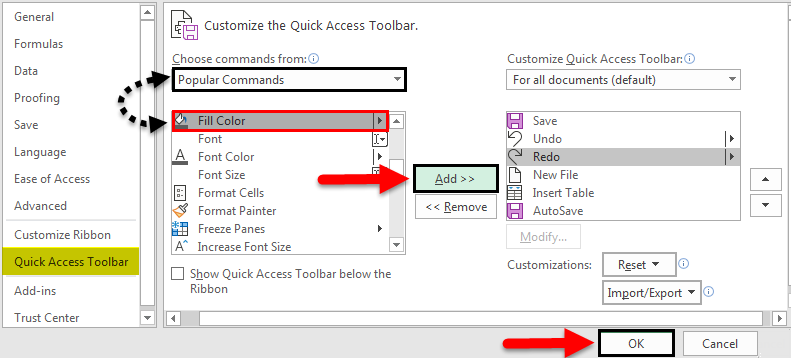
- Click on the Popular Commands, which shows the most commonly used commands. Select the Fill color which you want to add to the toolbar. You can see an add button next to the list of commands; by pressing it and clicking the OK button, you can add the selected tool to the Excel Toolbar.
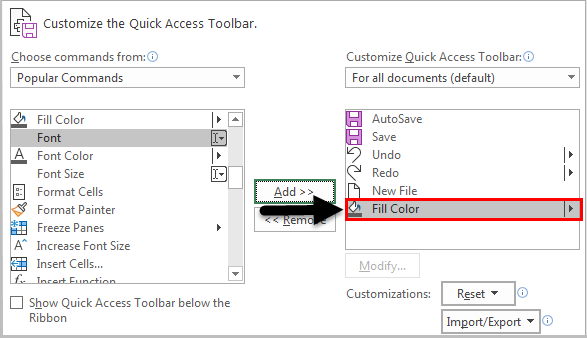
- Once you add the command, it will appear in the list next to the add button. This is the list of tools added to the Toolbar. The “Fill Color” command will be added to the Customize Quick Access Toolbar.
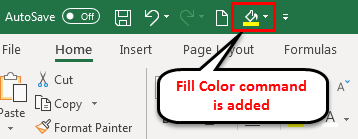
- You can see the “Fill Color” command added to the Quick Access Toolbar below and the existing commands. Since this is the last item added to the Quick Access Toolbar, it will appear in the listed order.
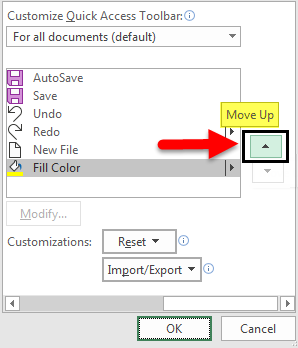
- To reorder the added items, you can use the up and down arrow highlighted on the right to the list of items.
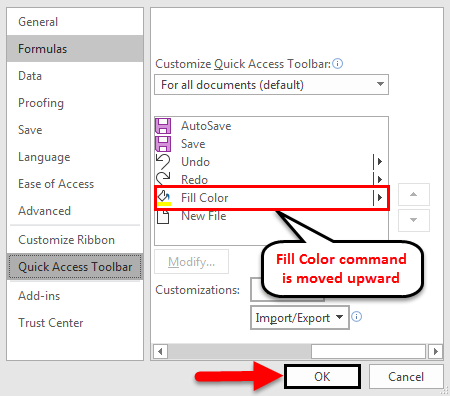
- Select the command which you want to reorder or change the position. By clicking the Upward arrow, the “Fill Color” command is moved upwards in the list shown below.
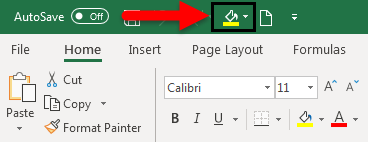
- The selected format will be applied to the Quick Access Toolbar by pressing the OK button. The “Fill Color” Command is visible before the “New File” Tool.
You can see the visibility order of the listed tools is changed. According to the new list order, the “Fill Color” position has been changed to the second last from the end.
Example #3
Removing Command
The commands can be removed from the quick access toolbar if you are no longer using them or not using them frequently. The commands can be removed similarly to how you added the commands to the Quick Access Toolbar.
- Click on the downward-facing arrow at the end of the toolbar. Select the More Commands option.
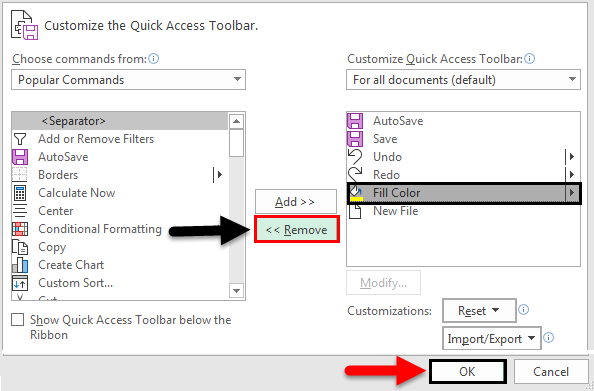
- A new window will show the already added commands on the right side. This is the list of commands already in the quick access toolbar.
- Select the command which you want to remove from the quick access toolbar. In the center, below the add button, a Remove button will be enabled. Press the OK button to make the applied changes.
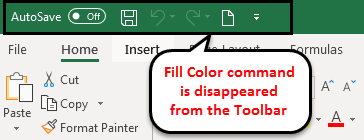
- The Fill Color command is removed and will disappear from the Quick Access Toolbar, as shown below.
Example #4
Moving the Position
According to your convenience, you can change the position of the toolbar. You can change the position from top to below the ribbon or vice versa.
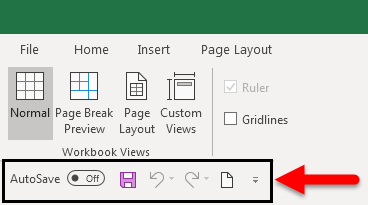
- Select the downward-facing arrow at the end of the toolbar, then select the Show Below Ribbon option from the list.
- Now the Toolbar is moved below the ribbon.
Example #5
Adding Ribbon Commands
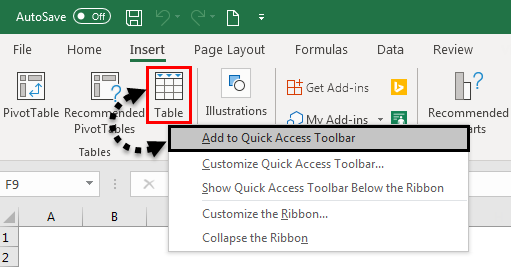
- Right-click on the tool within the ribbon you want to add to the Toolbar in Excel. You will get the option to Add to Quick Access Toolbar. Here we right-clicked on the Table tool to add from the insert command.
- The command will be added to the Quick Access Toolbar as below.
Things to Remember
- Similar to the name Quick Access Toolbar, this is a customizable toolbar to access the tools easily.
- It is possible to add any of the available commands in Excel to the Excel Toolbar.
- The visibility of the toolbar can be set above or below the ribbon.
- Just through a right-click, you will get the option to add most of the commands to the Toolbar in Excel.
Recommended Articles
This has been a guide to Toolbar in Excel. Here we have discussed How to Use and Customize the Toolbar in Excel and practical examples. You can also go through our other suggested articles –

