Updated April 18, 2023

Introduction to TypeScript JSX
The following article provides an outline for TypeScript JSX. TypeScript works on JavaScript and is an open source language. Static type definitions are added in JavaScript to make it TypeScript. Ways of describing the shape of an object and to provide enhanced documentation is provided by Types. It allows TypeScript to validate if the code is working without any incorrections. Writing different types are optional in TypeScript as type inference provides the developer great power without the effort of additional codes.
Syntax:
1. Preserve Mode
<div />2. React Mode
<div className="App"/>3. React Native Mode
<div />Working of JSX in TypeScript
JSX can be embedded just like XML. JSX can be transformed in JavaScript even though the transformation is majorly based on the kind of implementation. JSX is majorly used with React framework and now TypeScript also supports the compilation of JSX into JavaScript.
For using JSX, there are two most important things which should be done:
- .tsx should be the file extension of the files used.
- The jsx option should be enabled
TypeScript works in three JSX modes. The modes are react native, react and preserve. The emit stage is affected by these modes. JSX is kept as the output’s part by preserve mode. In the react mode, React.create element is emitted and JSX transformation is not necessary. React native mode is somewhat same as the preserve mode.
Examples
Given below are the examples mentioned:
Example #1
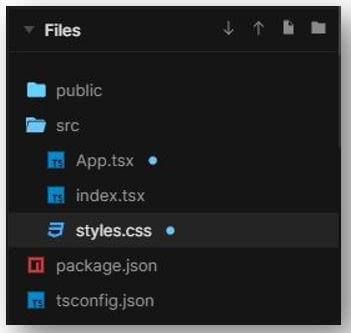
The files used for the proper execution of the code are:
a. App.tsx
import "./styles.css";
export default function App() {
return (
<div className="App">
<div>
<h1>EDUCBA</h1>
<h2>****WE ARE HAPPY TO HELP****</h2>
<div style={{
backgroundImage: `url("https://cdn.educba.com/academy/wp-content/uploads/2020/05/cropped-website_logo_transparent_background_white.png")`
, height:'240px'
, width: '250px'
, alignItems: 'center'
, alignContent: 'center'
}}>
</div>
</div>
</div>
);
}
b. index.tsx
import { render } from "react-dom";
import App from "./App";
const rootElement = document.getElementById("root");
render(<App />, rootElement);
c. styles.css
.App {
font-family: 'Times New Roman'
, Times
, serif;
text-align: center;
background-image: url('https://images.pexels.com/photos/1619690/pexels-photo-1619690.jpeg?auto=compress&cs=tinysrgb&dpr=1&w=500');
height: 450px;
width: 490px;
color: #94041f;
border-image: url('https://images.pexels.com/photos/1485637/pexels-photo-1485637.jpeg?auto=compress&cs=tinysrgb&dpr=1&w=500');
border-radius: 500px;
background-color: #f57ff3;
border-right-width: 100px;
border-right-color: #f58c58;
border-left-width: 100px;
border-left-color: #f50c18;
border-top-width: 100px;
border-top-color: #140ddb;
border-bottom-color: #ba1658;
}
Output:
Example #2
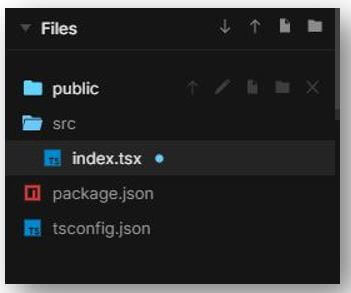
The files used for the proper execution of the code are:
a. index.tsx
import * as React from "react";
import { render } from "react-dom";
interface IState {
count: number;
}
class EDUCBA extends React.Component<
{}
, IState> {
public readonly state = {
count: 0
};
private handleClick = (
event:
React.MouseEvent<
HTMLButtonElement
>) => {
const type:
string =
event.currentTarget.title;
this.setState(
(
{ count
}
) => ({
count: type === "decrement" ?
count - 10 : count + 10
}));
};
public render() {
return (
<div>
<div style={{
backgroundImage: `url("https://images.pexels.com/photos/3475679/pexels-photo-3475679.jpeg?auto=compress&cs=tinysrgb&dpr=1&w=500")`
, height:'470px'
, width: '490px'
}}>
<div>
<button
title="decrement"
onClick={
this.handleClick
}
style={{
color: '#991450'
, height: '50px'
, width: '150px'
, backgroundColor: '#8ef73e'
, borderRadius: '50px'
, borderRightWidth: '5px'
, borderRightColor: '#b30b1b'
, borderLeftWidth: '5px'
, borderLeftColor: '#0b0ebd'
, borderTopWidth: '10px'
, borderTopColor: '#e3431b'
, borderBottomColor: '#22c0f5'
, fontSize: '15px'
}}
>
Decreasiow
</button>
{
this.state.count
}
<button
title="increment"
onClick=
{
this.handleClick
}
style={{
color: '#e30b1d'
, height: '50px'
, width: '150px'
, backgroundColor: '#f5ee67'
, borderRadius: '50px'
, borderRightWidth: '5px'
, borderRightColor: '#31cc43'
, borderLeftWidth: '5px'
, borderLeftColor: '#0c0c70'
, borderBottomWidth: '10px'
, borderTopColor: '#ad1599'
, borderBottomColor: '#3e700c'
, fontSize: '15px'
}}
>
Increasiow
</button>
<div style={{
backgroundImage: `url("https://cdn.educba.com/academy/wp-content/uploads/2020/05/cropped-website_logo_transparent_background_white.png")`
, height:'240px'
, width: '250px'
, alignItems: 'center'
, alignContent: 'center'
}}>
</div>
</div>
</div>
</div>
);
}
}
render(<EDUCBA />
, document.getElementById("root"));
Output:
On code execution:
On clicking “Decreasiow” button:
On clicking “Increasiow” button:
Example #3
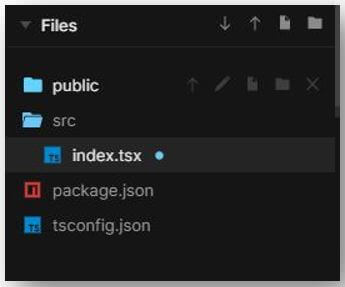
Files used for the proper execution of the code are:
a. index.tsx
import ReactDOM from "react-dom";
import React from "react";
import {
makeStyles } from "@material-ui/styles";
const useStyles = makeStyles({
root: {
backgroundColor: (
{
color }) => color
}
});
const EDUCBA = () => {
const classes = useStyles(
{
color: "#53f5cf"
});
return <div style={{
backgroundImage: `url("https://images.pexels.com/photos/800330/pexels-photo-800330.jpeg?auto=compress&cs=tinysrgb&dpr=1&w=500")`
, height:'470px'
, width: '490px'
}}>
<div>
<div
className={
classes.root
}>EDUCBA
</div>
</div>
</div>
};
ReactDOM.render(
<EDUCBA />
, document.getElementById(
"root"
));
Output:
Example #4
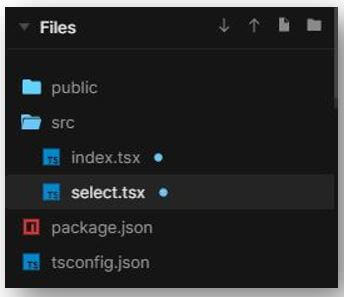
The files used for the proper execution of the code are:
a. index.tsx
import * as React from "react";
import { render } from "react-dom";
import "antd/dist/antd.css";
import Select from "./select";
const { Option } = Select;
function handleChange(value: string) {
console.log(`selected ${value}`);
}
class Application extends React.Component<{}, {}> {
public render() {
return (
<div>
<div style={{
backgroundImage: `url("https://images.pexels.com/photos/3361746/pexels-photo-3361746.jpeg?auto=compress&cs=tinysrgb&dpr=1&w=500")`
, height:'470px'
, width: '490px'
}}>
<div>
<Select
defaultValue="PROGRAMMING LANGUAGE"
style={
{
width: 220,
backgroundColor: "#6cf5d3"
}
}
onChange={handleChange}
>
<Option
value="REACT NATIVE"
style={
{
backgroundColor: "#a922c7"
}
}>
REACT NATIVE
</Option>
<Option
value="TYPESCRIPT"
style={
{
backgroundColor: "#655bfc"
}
}>
TYPESCRIPT
</Option>
<Option
value="disabled"
disabled
style={
{
backgroundColor: "#9ff263"
}
}>
NO CHOICE
</Option>
<Option
value="JAVASCRIPT"
style={
{
backgroundColor: "#e6f55f"
}
}>
JAVASCRIPT
</Option>
</Select>
<Select
defaultValue="COURSE CHOICE"
style={
{
width: 510
}
}
onChange={handleChange}
>
<Option
value="DATA SCIENCE"
style={
{
backgroundColor: "#f54c5d"
}
}>
DATA SCIENCE
</Option>
<Option
value="FINANCE"
style={
{
backgroundColor: "#63f76f"
}
}
>
FINANCE
</Option>
<Option
value="disabled"
disabled
style={
{
backgroundColor: "#f2ca63"
}
}>
NO CHOICE
</Option>
<Option
value="EXCEL"
style={
{
backgroundColor: "#72dcfc"
}
}
>
EXCEL
</Option>
</Select>
<Select
defaultValue="EDUCBA"
style={
{
width: 120,
backgroundColor: "#a864f5"
}
} loading>
<Option
value="EDUCBA"
style={
{
backgroundColor: "#a864f5"
}
}
>EDUCBA
</Option>
</Select>
</div>
</div>
</div>
);
}
}
render(<Application />
, document.getElementById(
"root"));
b. select.tsx
import * as React from "react";
import Select
, { SelectProps } from "antd/es/select";
import "antd/es/input/style/css";
class MySelect<T>
extends React.Component<
SelectProps<
T>
, {}> {
static Option: typeof Select.Option = Select.Option;
render() {
return <
Select<
SelectProps<
T>> {
...this.props
} />;
}
}
export default MySelect;
Output:
On code execution:
On clicking “PROGRAMMING LANGUAGE” dropdown:
On clicking “COURSE CHOICE” dropdown:
On clicking “EDUCBA”:
Conclusion
We saw how TypeScript uses the three JSX modes, preserve, react and react native. The examples represent all of the three modes.
Recommended Articles
This is a guide to TypeScript JSX. Here we discuss the introduction, working of JSX in TypeScript along with examples respectively. You may also have a look at the following articles to learn more –
