Updated August 28, 2023
Introduction to Typography in After Effects
Typography can be used for animating any text in different ways. You can understand Typography as a technique of arrangement of the texts (or combination of text) and its letter in a different type of manner for making the appearance of that text different from normal writing methods, which helps the graphics professionals in proper conveying of the purpose of that arrangement of those texts.
How to Create Typography in After Effect?
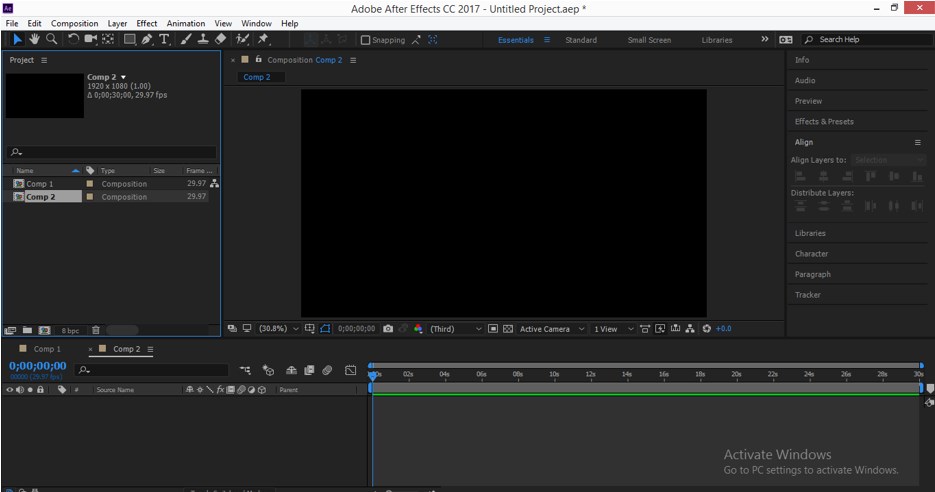
Before starting our article, let us have a look at the user interface of this software for a better understanding of all areas of this software, and when I use any word for a particular section, then there will be no confusion in our understanding.
Step 1: This is the user interface of his software. We have a Menu bar at the top of the working area for managing panels of this software, at the left corner, we have a Project panel in which you can see a number of composition used by you in your work, at the right corner, you can find Effects & Presets option, Align option, Play head and other terms, at the center we have a working screen on which you will create any animation, at the bottom section of this software we have Timeline section with its important features for animating our project.
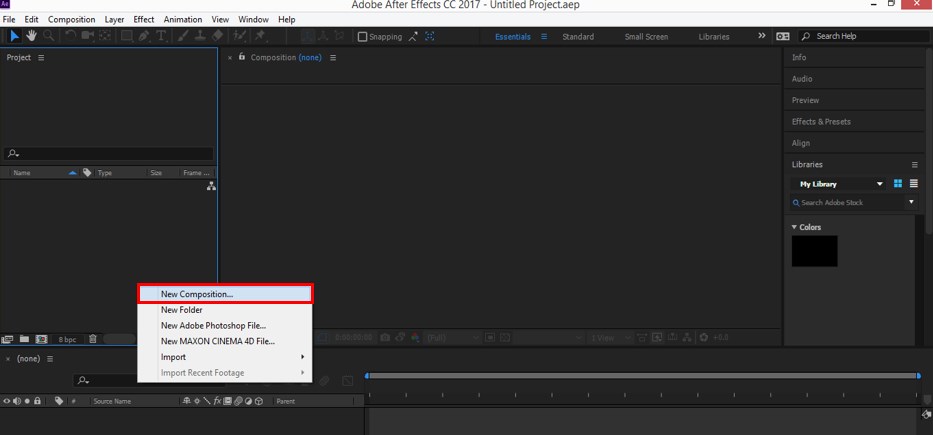
Step 2: First of all, take ‘New Composition’ for our work. For taking new composition, enable Right-click in this area of the project panel. Choose the ‘New Composition’ option from the drop-down list.
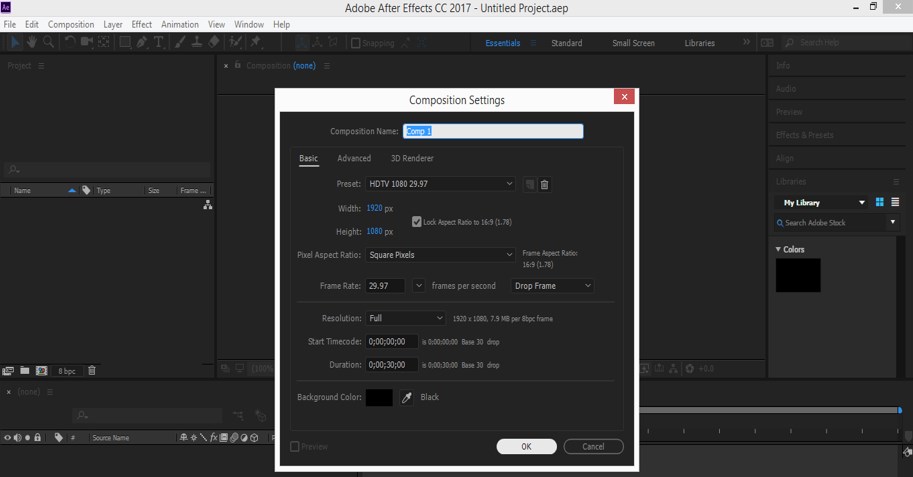
Step 3: A ’Composition Setting’ box will open for ‘New Composition’. Set the parameter of this composition according to your requirement and also name it for your future use. I will take black color as the background color from this box. You can choose any color which suits your typography work. Now press the Ok button of this dialog box to apply the settings.
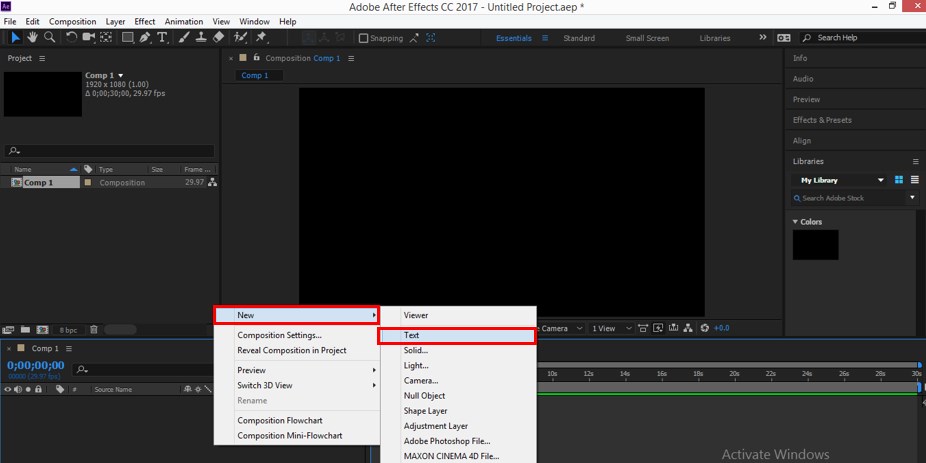
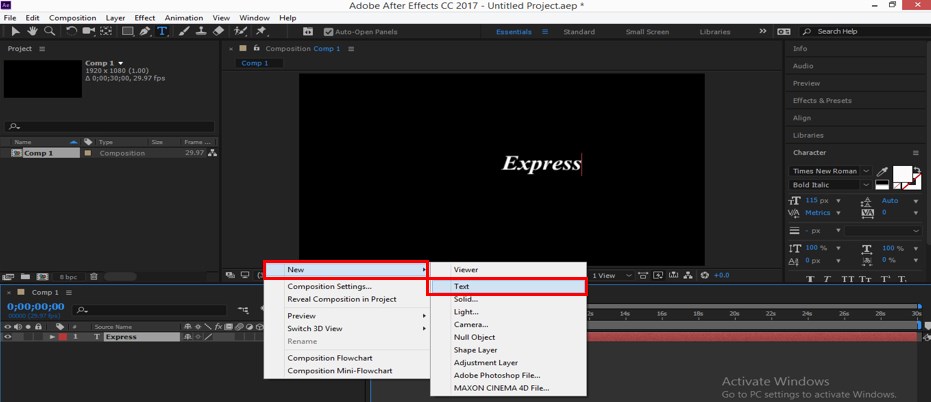
Step 4: Now, Right-click in the Timeline section area for creating a text layer in the composition area. A drop-down list will be open. Go to the ‘New’ option of this list and choose the Text option from a new drop-down list.
Step 5: Now, a text layer is generated on the composition screen.
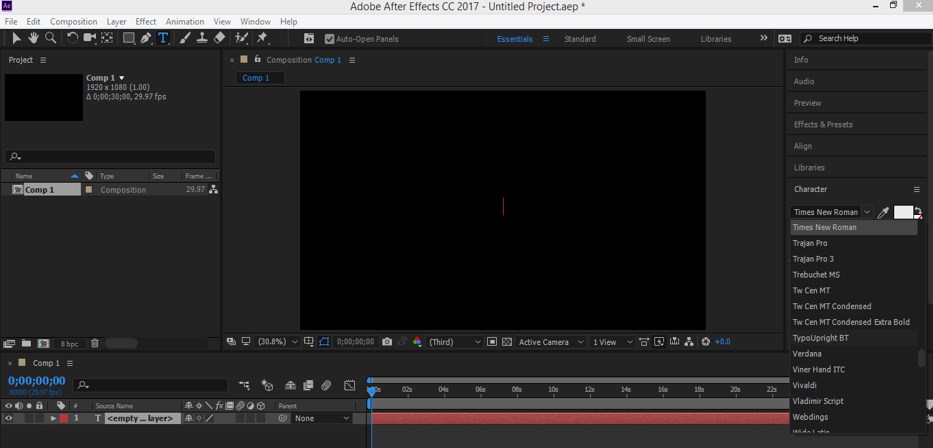
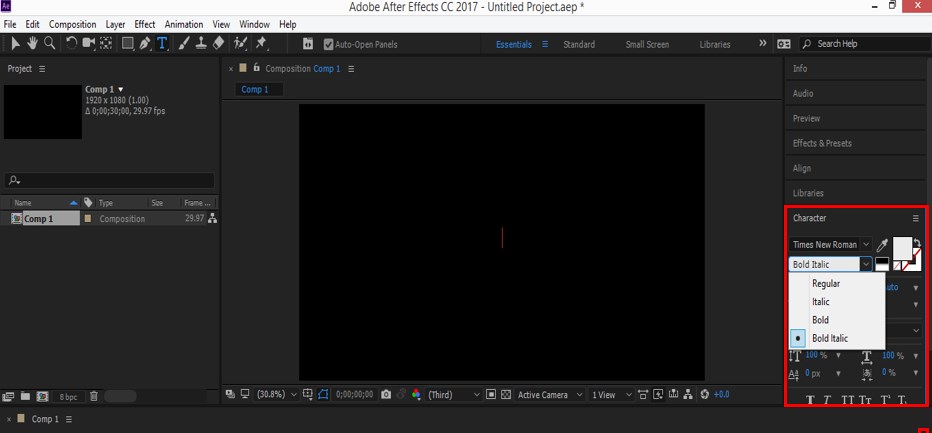
Step 6: Choose the font style, size, and other parameters of your text according to you from the properties bar of the text layer, which is at the right-hand side of the working screen. I will take the Bold Italic style of Times New Roman font. You can choose or download any stylish font style from the internet.
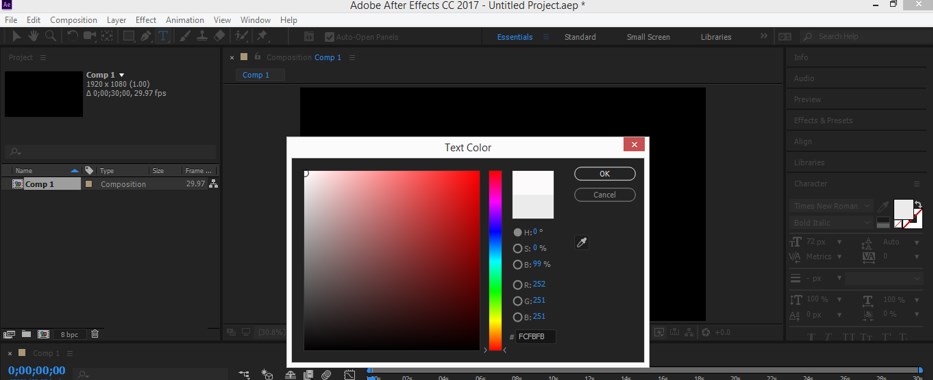
Step 7: Now click on the color box of the text for choosing the color of the text. A Text-color box will be open when you click on a small square color box at the property section of the text layer and select your desired color from here. I will choose white color as my text color.
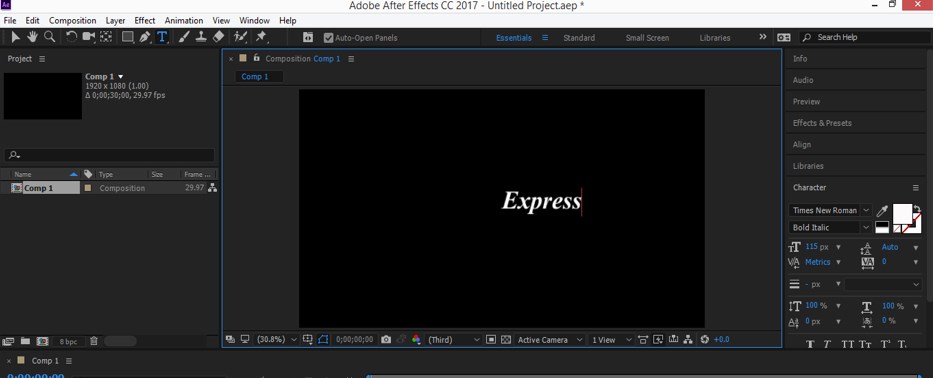
Step 8: Now, type one word of text as I type here.
Step 9: Now add a new text layer in this composition. For adding a new text layer again, right-click on layer section area. Go to the ‘New’ option of the drop-down list and choose Text from a new drop-down list.
Step 10: We are adding a new text layer because we will type each text in different layers so that we can animate their properties separately for getting a highly professional typographic animation.
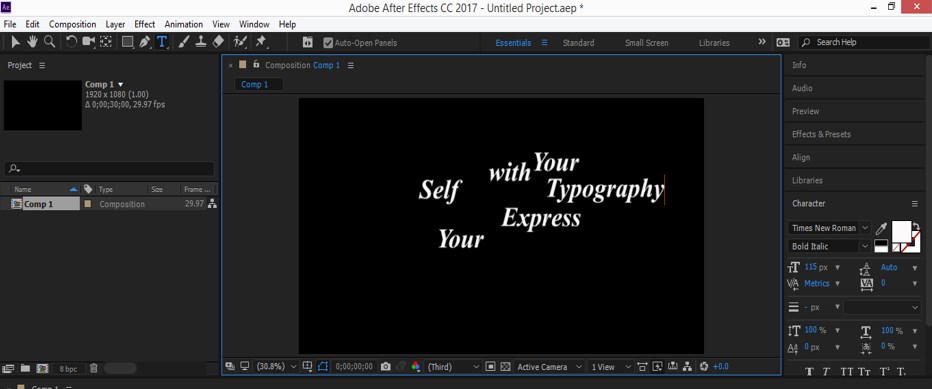
Step 11: Type the next word of the text in this text layer. Add a new text layer again and again according to the number of the word in your text. Now type all of the text on different text layers as I did.
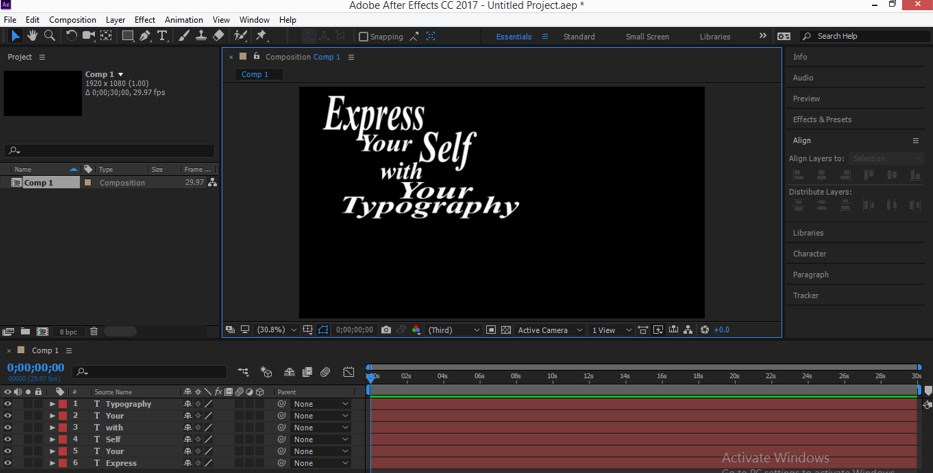
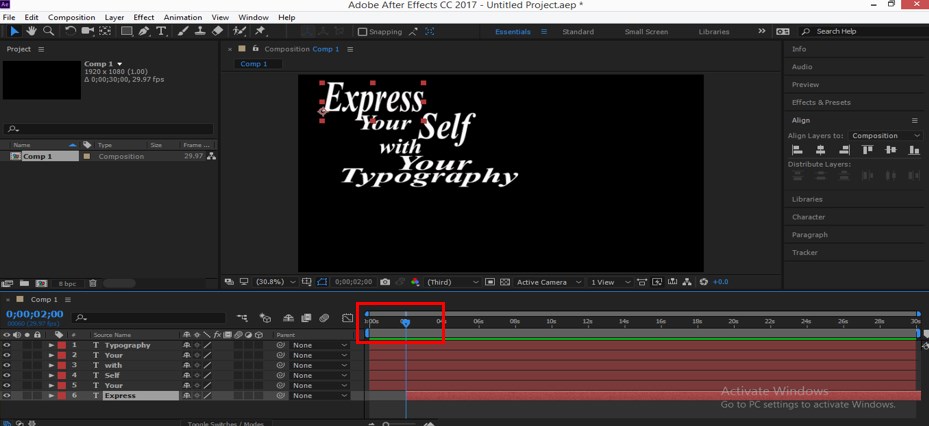
Step 12: Now arrange all the text in typographic style by using the move and align tool of this software. I will arrange my text like this. Make sure the arrangement made by you will convey the proper meaning of that sentence.
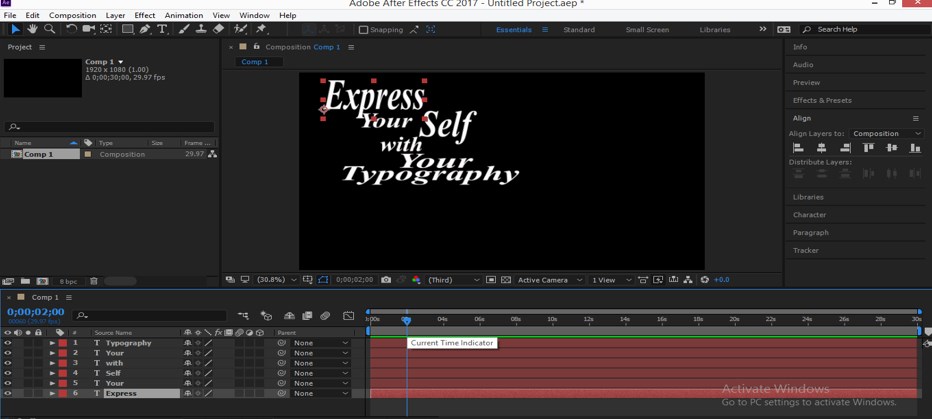
Step 13: Now, come into the Timeline section and set the keyframe head of the timeline of the first layer (Express layer) at 2 sec.
Step 14: And press ‘[‘ to set its timeline at 2 sec of the keyframe.
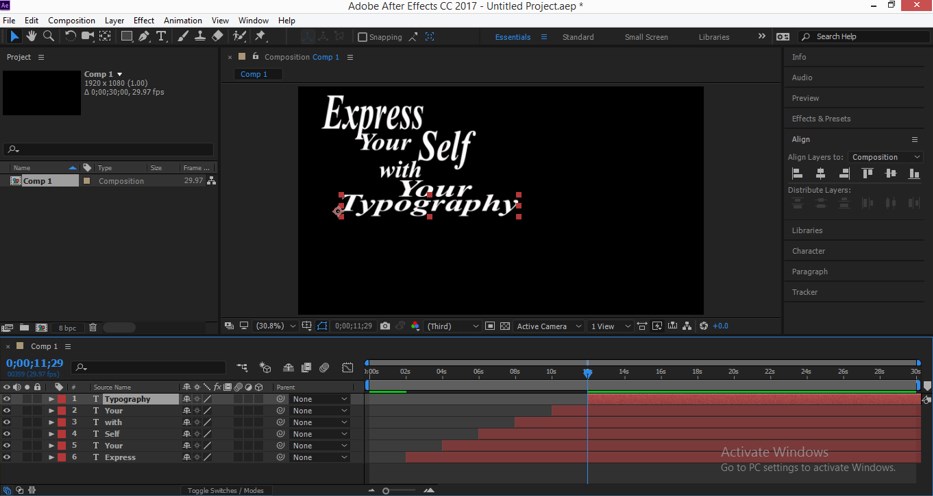
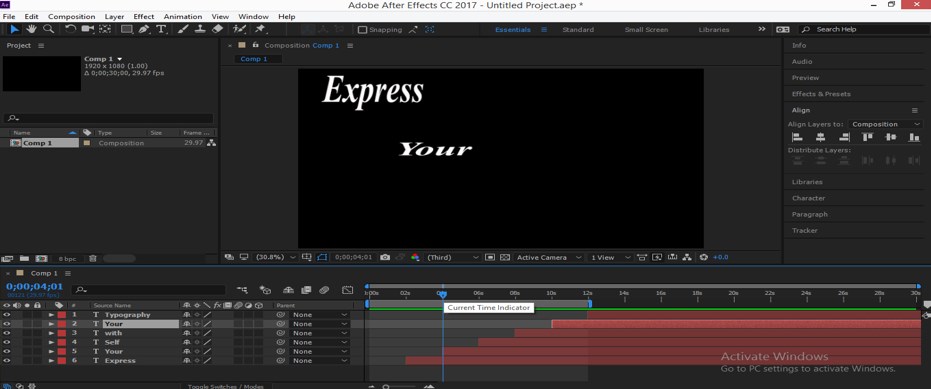
Step 15: We will set the timeline of each text layer at a difference of a 2-sec keyframe. For setting them, select that layer and place the keyframe head at the 2-sec difference in each step and press ‘[‘.
Step 16: Now press play head to see the animation. You can adjust the timeline of each text layer according to you for getting the desired effect in your typography.
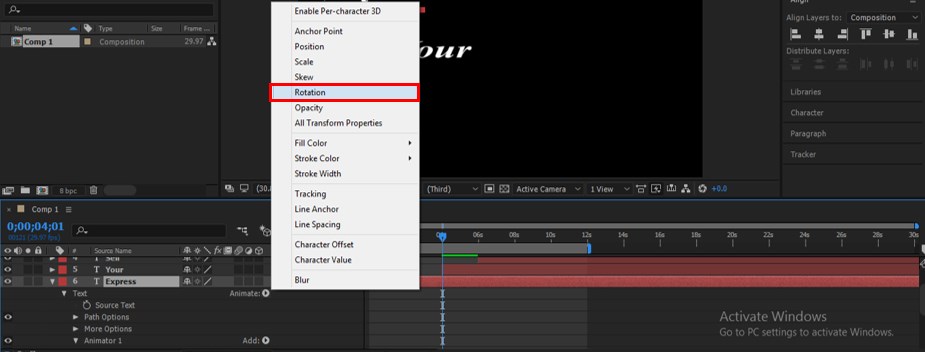
Step 17: Now come to the layer section and select the Express layer. Now click on the Animator option of this layer. A drop-down list will be open. Choose the Rotation option from here.
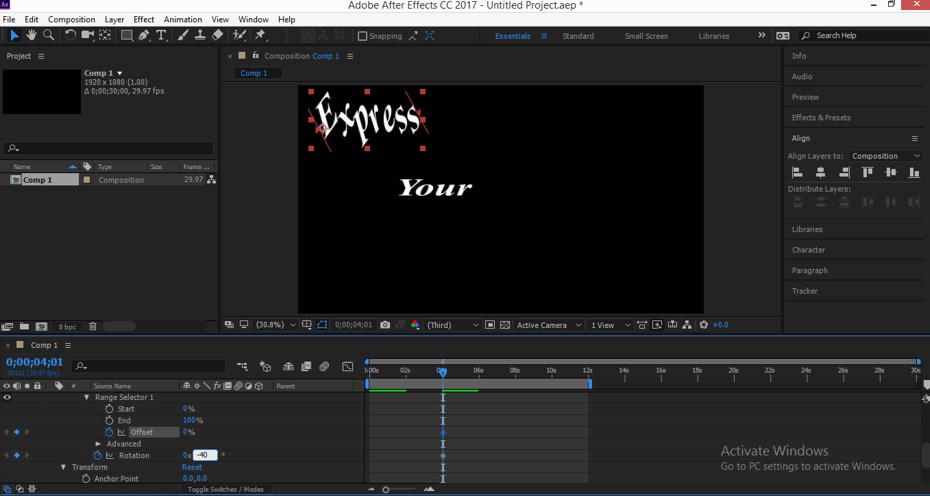
Step 18: Now, set a keyframe in the Offset and Rotation property of this layer by click on the clock icon of these properties. Set rotation angle at -40 degrees and the offset value at 0%.
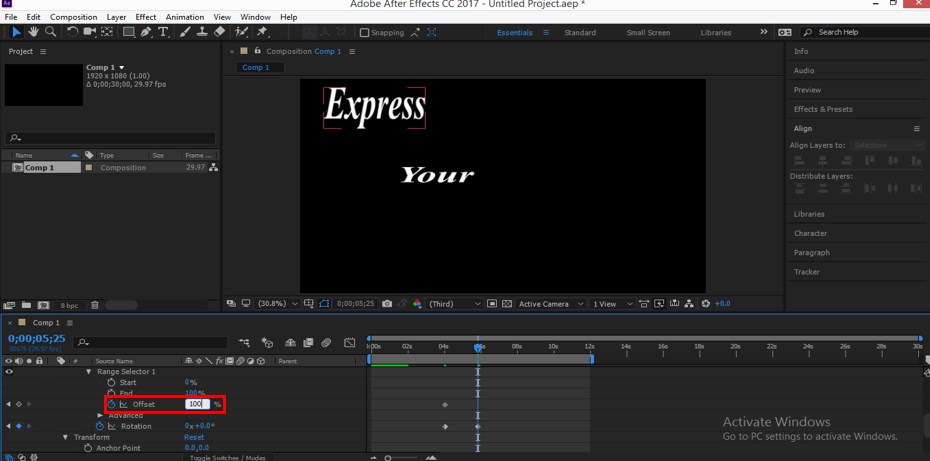
Step 19: Now, place the keyframe play head just before the timeline of the next text. Set the value of offset at 100% and make rotation at 0 degrees.
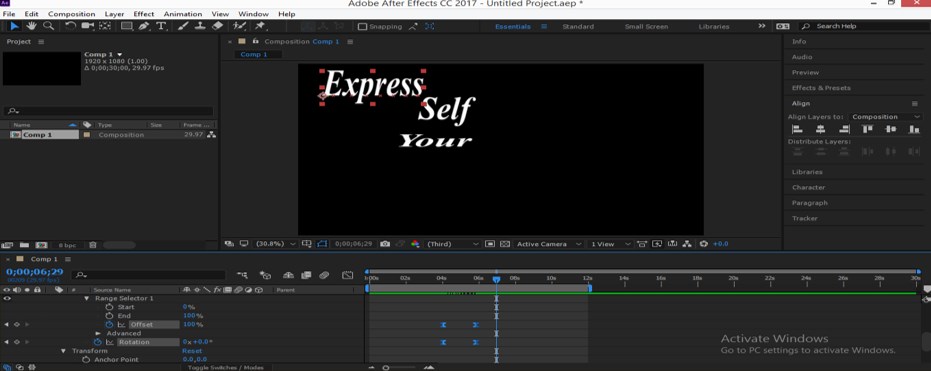
Step 20: Now select keys of both property and press F9 for making them Easy Ease key.
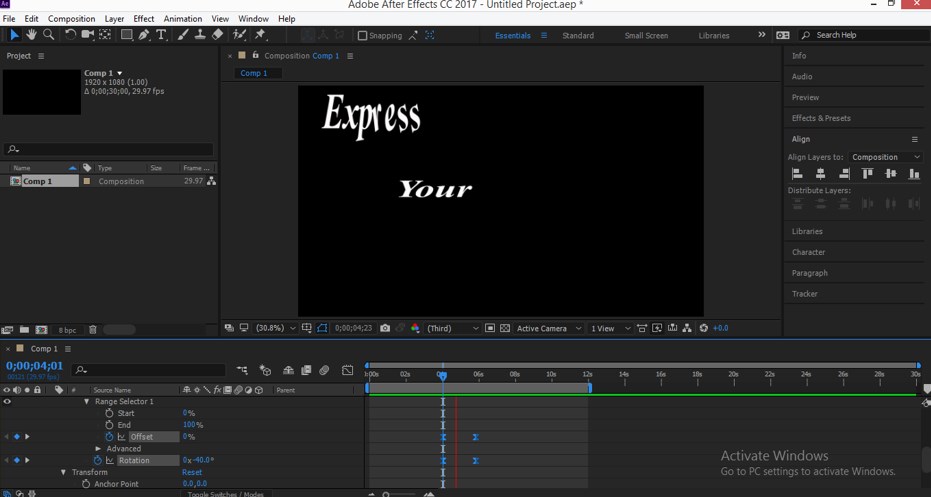
Step 21: Now, when you play the generate animation of this text layer, it will look like this.
- In this way, you can animate more properties of this layer. After animating the properties of this layer, move to the next layer of text combination and animate them according to your choice.
Conclusion
Now, after going through this article, you can understand ‘What is Typography?’ and ‘How you can animate in adobe After Effect with a different type of presenting manner?’ In the present time, Typography is covering most of the area of graphics designing, and you can have command of it by analyzing its different aspects.
Recommended Articles
This is a guide to Typography in After Effects. Here we discuss a simple example and learned the technique of animation in a step-by-step manner. You can also go through our other related articles to learn more –
