Introduction
Video editing on Ubuntu has surged in popularity thanks to its robust, open-source ecosystem. Ubuntu, a widely used Linux distribution, empowers beginners and professionals with powerful video editing tools. This blog explores Ubuntu’s dynamic video editing world, showcasing essential software, installation processes, basic and advanced editing techniques, and troubleshooting tips.
Table of Contents
Popular Video Editors for Ubuntu
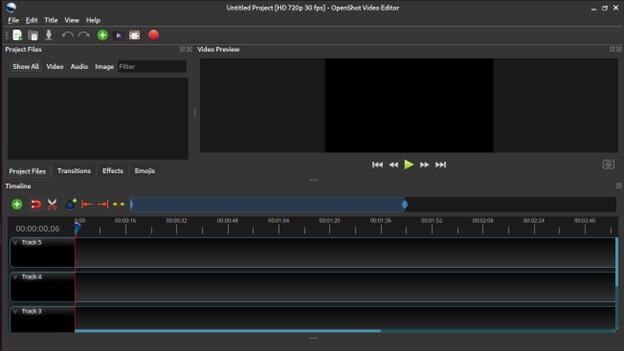
OpenShot
Features:
- User-friendly interface suitable for beginners
- Supports a range of image formats, video, and audio
- Drag-and-drop functionality for easy timeline management
- Extensive library of video transitions and effects
- Keyframe animation for advanced effects
- Title templates and 3D animated titles
- Real-time previews
Pros & Cons:
| Pros | Cons |
| Easy to use with minimal learning curve | It can be prone to occasional crashes, especially with large projects |
| Free and open-source | Limited advanced features compared to professional software |
| Regular updates and community support | Performance issues on lower-end hardware |
| Cross-platform (available on Linux, Windows, and macOS) | Requires higher system resources for smooth operation |
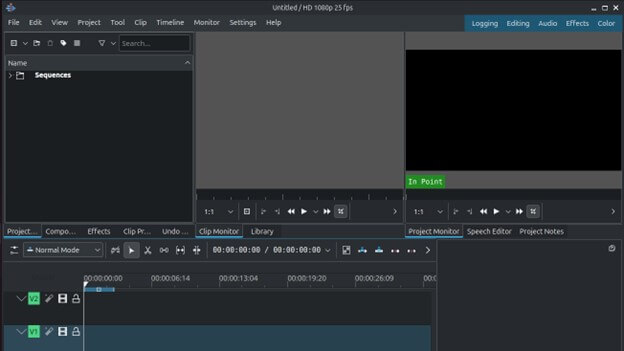
Kdenlive
Features:
- Multi-track video editing with timeline and clip management
- Support for a wide array of formats and codecs
- A comprehensive set of video & audio effects
- Advanced keyframe editing
- Customizable interface with dockable panels
- Proxy editing for improved performance on lower-end machines
- Powerful titling tool
Pros & Cons:
| Pros | Cons |
| Highly customizable and feature-rich | The interface could be overwhelming for new users |
| Strong community support and active development | Occasional bugs and crashes |
| Suitable for both beginners and advanced users | Some advanced features have a steep learning curve |
| Good performance and stability | Requires higher system resources for smooth operation |
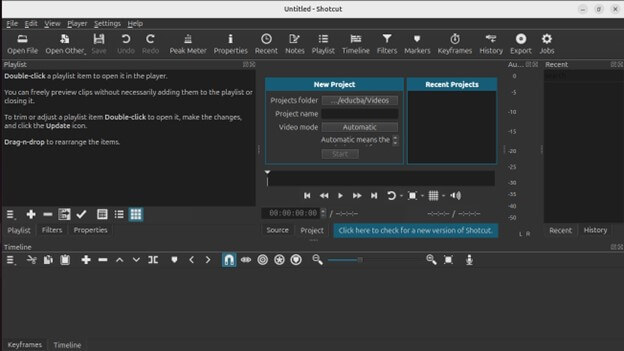
Shotcut
Features:
- Wide format support through FFmpeg
- Native timeline editing without importing
- Multi-format timeline for mixing and matching resolutions and frame rates
- Extensive set of video effects and transitions
- Audio mixing, filtering, and effects
- Intuitive drag-and-drop interface
- Real-time preview and export options
Pros & Cons:
| Pros | Cons |
| Free and open-source | Limited advanced features compared to professional editors |
| Simple and intuitive interface | The learning curve for some features |
| Regular updates and active development | Occasional performance issues with high-resolution video |
| Cross-platform compatibility | Rendering and exporting can be slow |
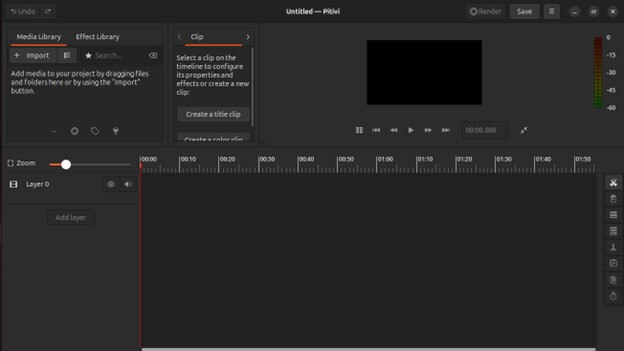
Pitivi
Features:
- Simple and intuitive interface
- Support for various video, audio, and image formats
- Non-linear video editing with a multi-track timeline
- A basic set of transitions and effects
- Real-time video preview
- Frame-accurate editing with snapping and trimming tools
- Active community and developer support
Pros & Cons:
| Pros | Cons |
| Easy to use with a straightforward interface | Limited advanced features compared to other editors |
| Free and open-source | Occasional stability issues |
| Suitable for essential to intermediate video editing needs | Not as widely used, so fewer third-party resources and tutorials |
| Regular updates and improvements | Interface can be overwhelming for new users |
Installing Video Editors on Ubuntu
Installing via APT
Installing OpenShot:
- Open the terminal.
- Add repository:
sudo add-apt-repository ppa:openshot.developers/ppa- Update the package list:
sudo apt update- Install OpenShot:
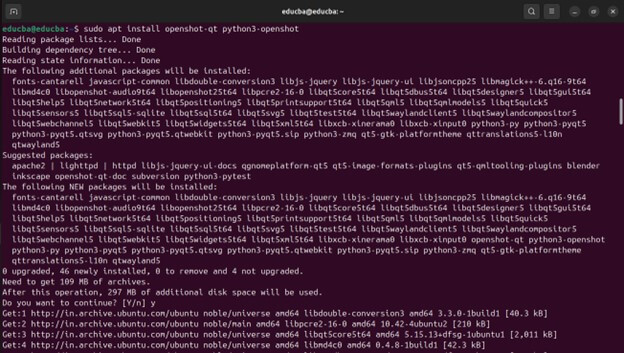
sudo apt install openshot-qt python3-openshotInstalling Kdenlive:
- Open the terminal.
- Update the package list:
sudo apt update- Install Kdenlive:
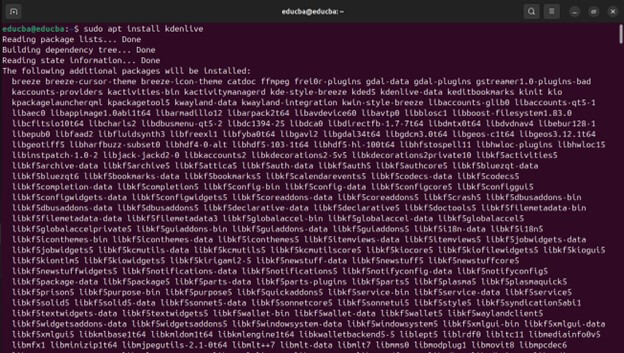
sudo apt install kdenliveInstalling Pitivi:
- Open the terminal.
- Update the package list:
sudo apt update- Install Pitivi:
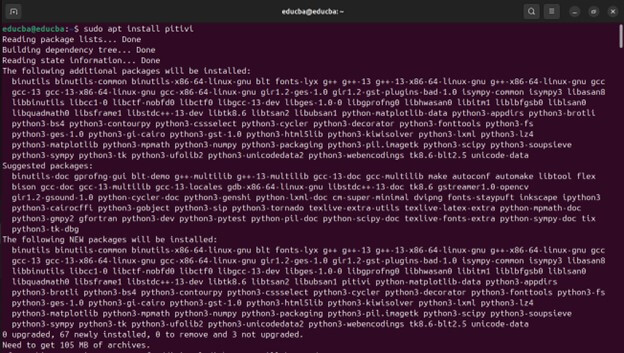
sudo apt install pitiviInstalling via Snap
Installing Shotcut:
- Open the terminal.
- Install Shotcut:
sudo snap install shotcut --classicBasic Usage and Workflow
Interface Overview
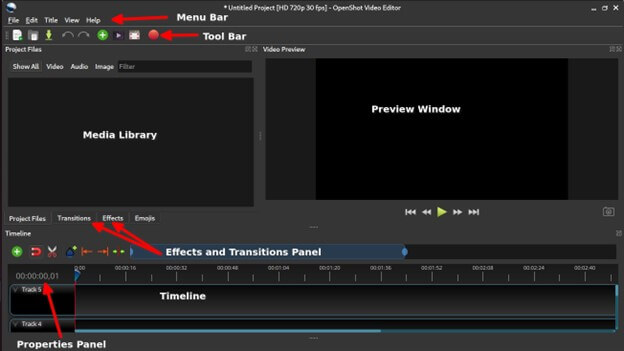
Most video editors like OpenShot, Kdenlive, Shotcut, DaVinci Resolve, and Pitivi have a similar interface layout. Here’s an overview of the common elements:
- Menu Bar: Contains various options like File, Edit, View, etc.
- Toolbar: Quick access to frequently used tools and commands.
- Media Library: Area to import and organize your video, audio, and image files.
- Preview Window: Displays the edited video, allowing you to preview changes in real time.
- Timeline: This is where you arrange and edit your media clips. It includes multiple tracks for layering video and audio.
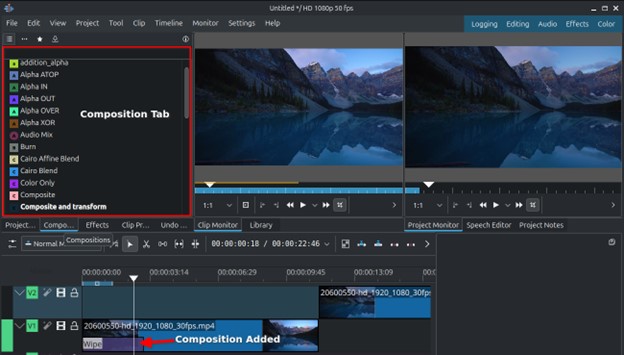
- Effects and Transitions Panel: A collection of video effects & transitions you can apply to your clips.
- Properties Panel: Displays properties and settings for the selected clip or effect.
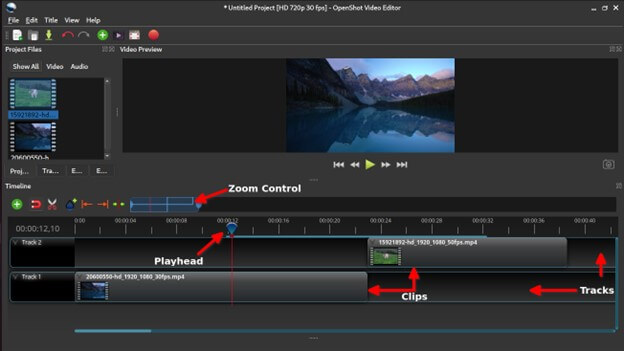
Understanding the Timeline
It is the heart of video editing. It consists of:
- Tracks: Horizontal layers where you place video, audio, and image clips.
- Playhead: A vertical line that shows the current position in the timeline.
- Clips: Individual media files placed on the tracks.
- Zoom Controls: Adjust the timeline’s zoom level to see more or less detail.
Importing Media
Supported File Formats: Most video editors on Ubuntu supports a range of file formats, including:
- Video: MP4, AVI, MOV, MKV, etc.
- Audio: MP3, WAV, AAC, etc.
- Images: JPEG, PNG, BMP, etc.
Importing Video, Audio, and Images:
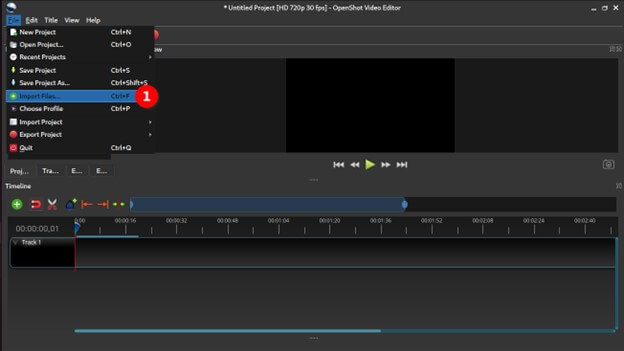
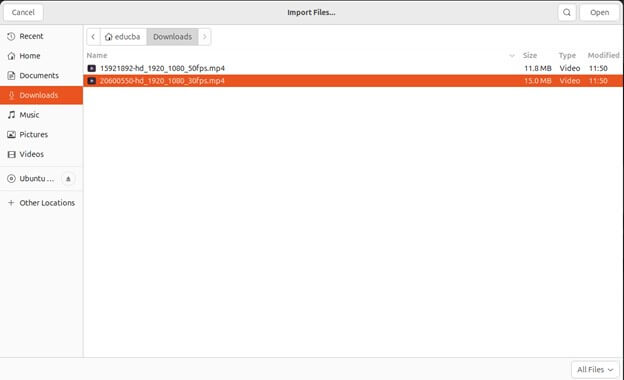
- Open the Media Library.
- Click on Import Media or drag and drop files into the library.
- Organize your media into folders if needed.
Basic Editing Techniques
Cutting and Trimming Clips:
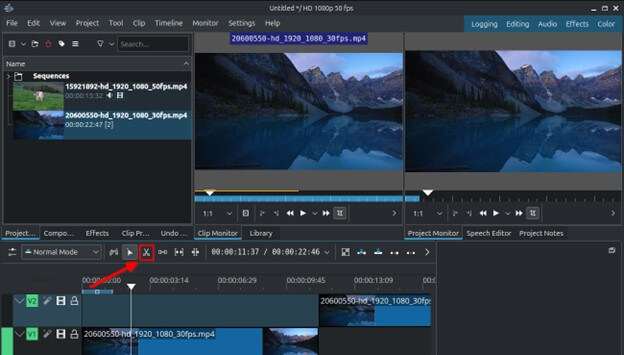
- Cutting: Use the scissors tool or a similar function to split a clip into two parts.
- Trimming: Adjust a clip’s start and end points by dragging the edges.
Splitting and Merging Clips:
- Splitting: Position the playhead where you want to split the clip and use the split tool.
- Merging: Place clips next to each other on the same track to create a continuous sequence.
Adding Transitions:
- Drag a transition effect from the transitions panel onto the timeline between two clips.
- Adjust the duration & properties of the transition as needed.
Adding Effects and Titles
Applying Video Effects:
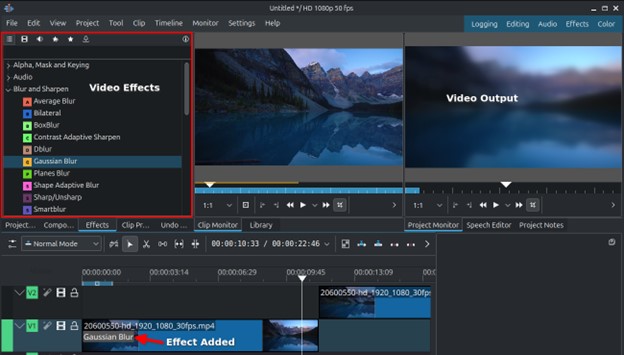
- Drag an drop the effect from the effects panel onto a clip in the timeline.
- Adjust the effect’s properties in the properties panel.
Adding Text and Titles:
- Open the titles tool and choose a template.
- Customize the text, font, size, and other properties.
- Drag the title to the timeline.
Working with Audio
Importing and Editing Audio Tracks:
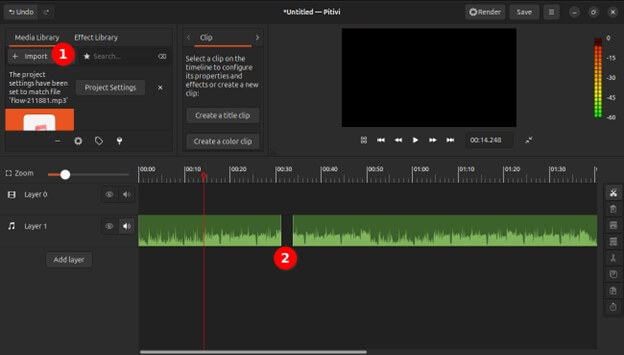
- Import audio files into the media library and drag them onto audio tracks in the timeline.
- Use the trim, cut, and move tools to edit audio clips.
Applying Audio Effects:
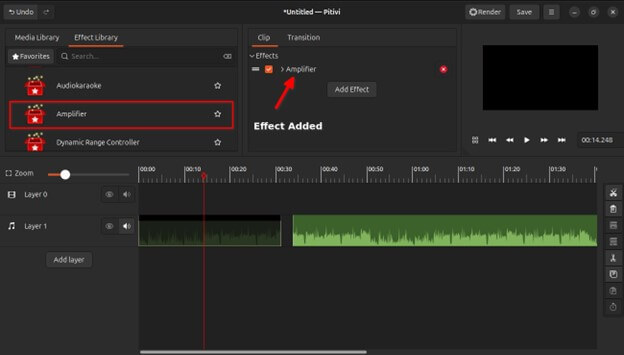
- Drag an audio effect onto an audio clip in the timeline.
- Adjust the effect’s properties in the properties panel.
Syncing Audio with Video:
- Align the audio and video clips on the timeline.
- The waveform display and visual cues match audio with the corresponding video actions.
Advanced Editing Techniques
Color Correction and Grading
Essential Color Correction Tools:
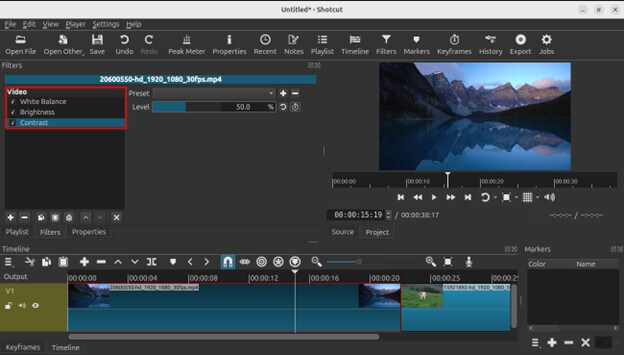
- Brightness and Contrast: Adjust them to enhance the visual quality.
- Color Balance: Modify the red, green, and blue (RGB) channels to achieve the desired color balance.
- Exposure: Control the amount of light in the video, affecting how dark or bright the image appears.
- Saturation: Increase or decrease intensity of the colors in your video.
- White Balance: Correct the color temperature to make whites appear white, compensating for lighting conditions.
Advanced Grading Techniques:
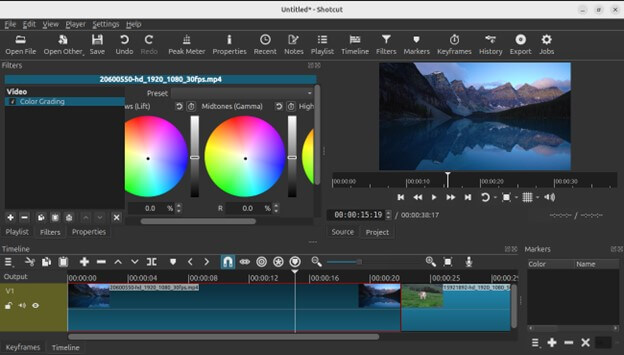
- Color Wheels: Use color wheels for detailed shadows, midtones, and highlights adjustments.
- Curves: Adjust RGB curves to fine-tune color and luminance across different ranges.
- Scopes: Use waveform monitors, vectorscopes, and histograms to assess and adjust color accurately.
- Lookup Tables (LUTs): Apply LUTs to achieve specific color grading styles or match the look of different cameras.
- Secondary Color Correction: Isolate and adjust specific colors within the image without affecting others.
Exporting Your Project
Choosing Export Settings
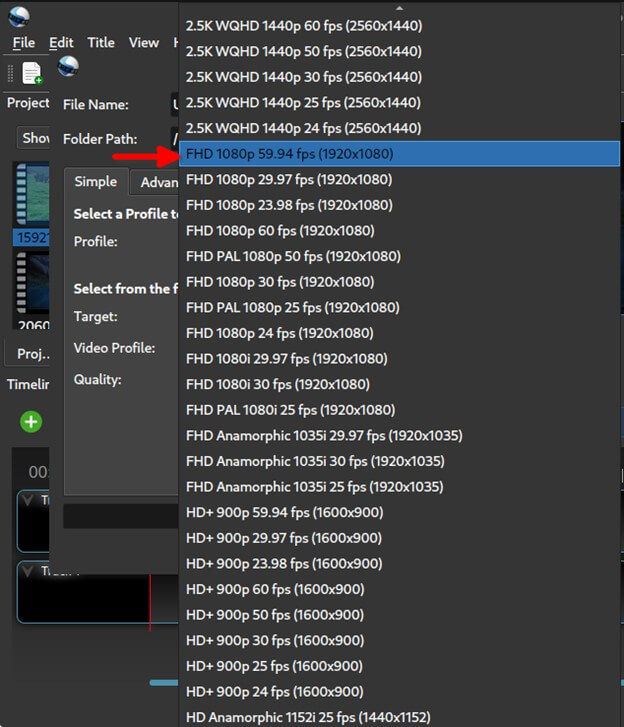
Export settings determine the final output quality and compatibility of your video. Key factors include resolution, bitrate, format, and codec. Different projects may require different settings based on their intended use.
- Open the Export Dialog: Most video editors have an export or render button, usually found in the file menu or toolbar.
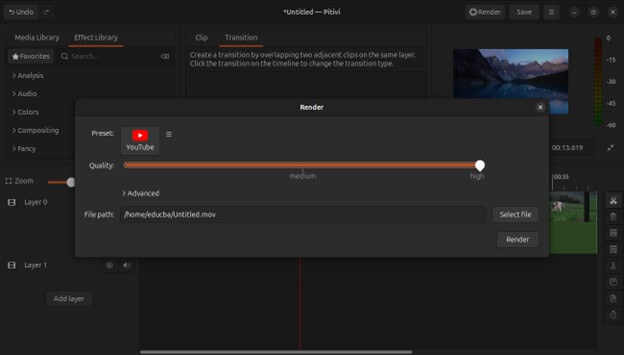
- Preset Options: Many editors offer presets tailored for everyday uses, like YouTube, social media, and high-quality playback.
Selecting the Output Format
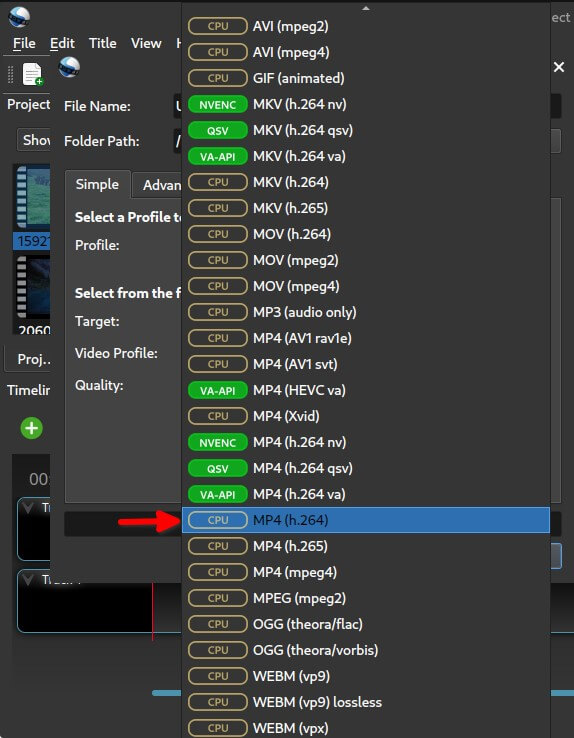
The output format affects compatibility, file size, and quality. Common formats include:
- MP4(H.264): Widely used for its good balance of quality and file size, compatible with most platforms.
- AVI: High quality but larger file sizes, suitable for archival purposes.
- MOV: Preferred for professional use, especially on macOS.
- MKV: Versatile and supports high-quality video and multiple audio tracks.
- WEBM: Good for web use with efficient compression.
Configuring Resolution and Quality
Resolution and quality settings impact the clarity and file size of your video.
- Resolution: Choose from standard options like 1080p (1920×1080), 720p (1280×720), or customize your own.
- Bitrate: Adjust the bitrate to control the video quality. Higher bitrates provide better quality but result in larger files. Common bitrates for 1080p video range from 5-10 Mbps.
- Frame Rate: Maintain the original frame rate of your footage (commonly 24, 30, or 60 fps) to ensure smooth playback.
Exporting for Different Platforms
YouTube:
- Format: MP4 with H.264 codec.
- Resolution: 1080p or 4K for higher quality.
- Bitrate: 8-12 Mbps for 1080p, 35-45 Mbps for 4K.
- Audio: AAC codec, 320 kbps bitrate.
Social Media (Facebook, Instagram, Twitter):
- Format: MP4 with H.264 codec.
- Resolution: 720p or 1080p, depending on platform guidelines.
- Bitrate: 3-6 Mbps for 720p, 6-8 Mbps for 1080p.
- Audio: AAC codec, 128-192 kbps bitrate.
Exporting for High-Quality Playback
- Format: Consider using MOV or AVI for minimal compression and maximum quality.
- Resolution: Export at the highest resolution supported by your source footage.
- Bitrate: Use a high bitrate (20-50 Mbps) to preserve detail.
- Audio: Use uncompressed audio formats like WAV for the best sound quality.
Export Process Steps
- Open Export Settings: Navigate to your video editor’s export or render settings.
- Select Preset or Custom Settings: Choose a preset for your desired platform or customize the settings needed.
- Adjust Advanced Settings: If available, fine-tune advanced settings like bitrate, resolution, and audio quality.
- Choose Export Location: Select a destination folder for your exported file.
- Start Export: Click the export or render button to begin the process. Monitor progress in the export dialog.
Tips for Successful Exporting
- Test Export: Export a short section of your project to ensure settings are correct before exporting the entire video.
- Check Guidelines: Refer to platform-specific guidelines (e.g., YouTube, Facebook) for recommended export settings.
- Backup Project: Before exporting, save a copy of the project file in case you need to make adjustments later.
Troubleshooting and Optimization
Common Issues
Crashes and Freezes:
- Symptoms: The software stops responding, crashes during editing, or freezes unexpectedly.
- Solutions:
- Update Software: Make sure you use the latest version of the video editor. Developers frequently release updates that fixes bugs and improve performance.
- Check System Resources: Close other applications to free up system resources. Video editing can be resource-intensive.
- Increase RAM Allocation: Allocate more RAM to your video editor if the option is available in the settings.
- Clear Cache: Some video editors allow you to clear the cache, which can resolve issues related to temporary files.
- Reduce Project Complexity: Simplify your project by reducing the number of layers, effects, or transitions.
Import/Export Errors:
- Symptoms: Errors occur when importing media files or exporting the final project.
- Solutions:
- Check File Compatibility: Ensure your media files are in a supported format and codec. Convert files if necessary.
- Verify File Integrity: Corrupted media files can cause issues. Try re-downloading or re-importing the files.
- Update Codecs: Ensure your system has the necessary codecs installed to handle various media formats.
- Check Export Settings: Review export settings for any incompatible options. Use presets provided by the software for standard formats.
Performance Optimization
Improving Playback Performance:
- Use Proxy Editing: Proxy editing involves creating lower-resolution versions of your video files for smoother playback during editing. You use high-resolution files for the final export.
- Adjust Preview Quality: Lower the preview quality in your video editor’s settings to improve playback speed.
- Render Previews: Some editors allow you to render previews for complex sections of your timeline, reducing playback lag.
Optimizing Export Settings for Speed:
- Lower Resolution: If high resolution is not critical, exporting at a lower resolution can speed up the process.
- Reduce Bitrate: Lowering the bitrate will decrease the file size and export time, though it may affect quality.
- Disable Unnecessary Effects: Turn off effects or transitions that are not crucial to the final output.
- Use Hardware Acceleration: If your system supports it, enable hardware acceleration to speed up rendering and exporting.
Contributing to Open Source Projects:
Reporting Bugs:
- Bug Tracker: Use the official bug tracker provided by the software to report issues.
- Detailed Reports: Include as much detail as possible, such as steps to reproduce the bug, system specifications, and error messages.
Contributing Code and Features:
- Open Source Contribution: If you have coding skills, contribute to developing the video editor by fixing bugs or adding new features.
- GitHub/GitLab: Most open-source projects are on platforms like GitHub or GitLab, where you can submit pull requests and collaborate with other developers.
Conclusion
Exploring video editing on Ubuntu opens up a world of creativity and technical precision. With powerful tools like OpenShot, Kdenlive, Shotcut, DaVinci Resolve, and Pitivi, users can craft professional-quality videos tailored to various needs. You can efficiently produce impressive projects by understanding the installation processes, mastering basic and advanced editing techniques, optimizing performance, and leveraging community support. Embrace the learning curve, experiment with different features, and tap into the vibrant community for guidance. Ubuntu’s versatile platform ensures a robust, rewarding video editing experience, encouraging you to bring your visual storytelling ideas to life.
Frequently Asked Questions (FAQs)
Q1. What is the best video editor for Ubuntu?
Answer: The best video editor depends on your specific needs. OpenShot is great for beginners due to its simplicity. Kdenlive and Shotcut are excellent for intermediate users with more advanced features. DaVinci Resolve is a professional-grade editor that is suitable for high-end video production.
Q2. How can I improve the video editing performance on Ubuntu?
Answer: To improve performance, ensure you have sufficient RAM and a good GPU. Close unnecessary applications while editing, use proxy editing for high-resolution footage, and optimize your export settings.
Q3. Can I edit 4K videos on Ubuntu?
Answer: Yes, you can edit 4K videos on Ubuntu using editors like DaVinci Resolve, Kdenlive, and Shotcut, which support high-resolution video editing. However, you will need a powerful computer with sufficient processing power and RAM.
Q4. Can I contribute to the development of open-source video editors?
Answer: Absolutely. Open-source video editors like OpenShot, Kdenlive, Shotcut, and Pitivi welcome contributions from the community. You can even contribute by reporting bugs, suggesting new features, or writing code if you have the skills.
