Updated June 2, 2023
Excel Unprotect Sheet (Table of Contents)
- Introduction to Unprotect Sheet in Excel
- How to Protect and Unprotect Sheet in Excel?
- How to Protect and Unprotect Multiple Sheets using Excel VBA Code?
Introduction to Unprotect Excel Sheet
We usually keep sharing a file with our subordinates. We often do not want them to make any changes to the sheet so that it remains unaltered. Before we explain to you the process of protecting & unprotecting excel sheets, let me tell you an important thing about the protection of sheets in excel. This is not complete security to your sheet; people still can see the data, insights, and everything; the only thing is that they cannot make any changes to the sheet, that’s all. This article will show you how to protect sheets and unprotect them with a password in excel. Follow this article closely to learn the process of locking & unlocking.
How to Protect and Unprotect Excel Sheets?
Below are the steps to protect and unprotect the sheet in Excel.
#1- Protect sheet & Prevent Users from Making Changes
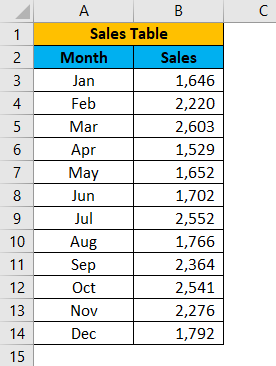
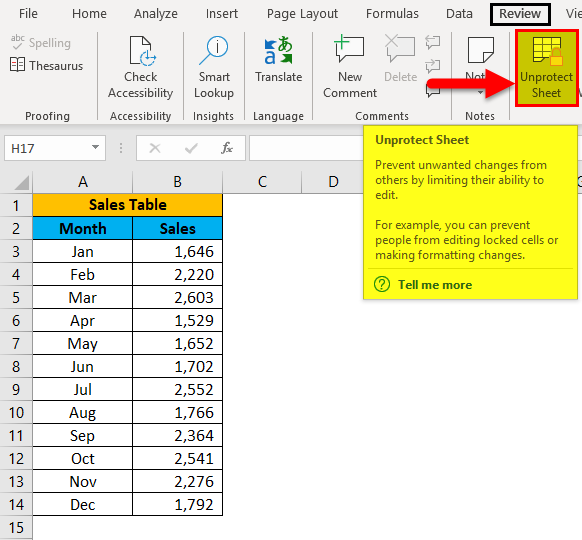
Assume you are sending the below file to all the department managers, and you don’t want them to make any changes; rather, just see the numbers.
Follow the below steps to protect your sheet.
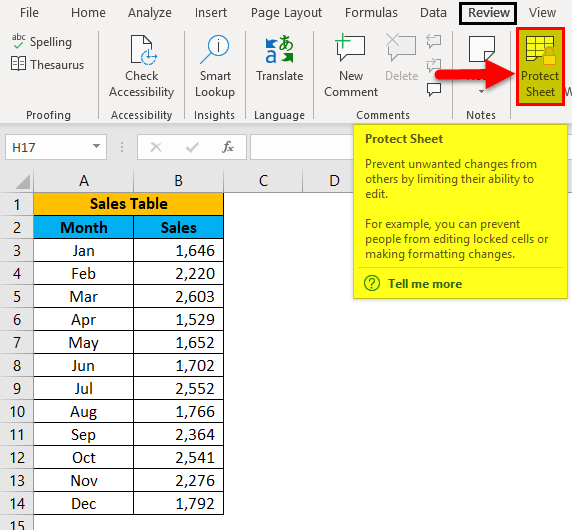
Step 1: Go to the Review tab and click on the Protect Sheet.
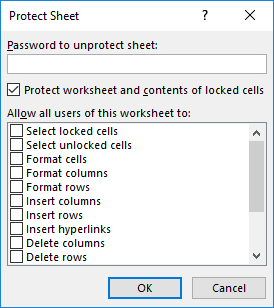
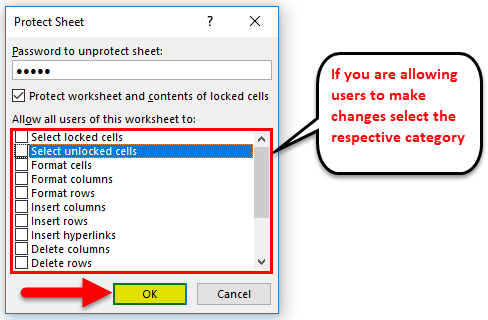
Step 2: Now, you will see the Protect Sheet window, which asks you to enter the password.
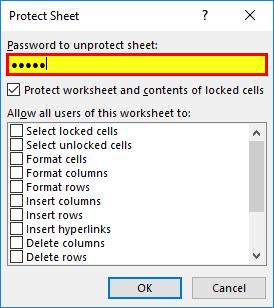
Step 3: Enter your password carefully here. Because you need the same password to unprotect the sheet later if you want to make some changes, a password is case-sensitive, so remember the exact characters. Here we have set the password as 12345.
Step 4: At the same time, we can allow a user to make some kind of changes like Insert Hyperlink, Insert row or column, etc… If you allow them to make changes, you need to select those options under “Allow all users of this worksheet to.”Click on OK.
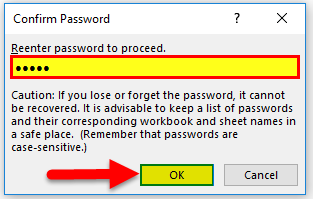
Step 5: It will ask you to re-enter the password again. Re-enter and click on OK to complete the process.
Ok, now we have protected this sheet. Users cannot make any changes.
Users cannot do anything else besides seeing the data in this sheet. The only thing they can do is insert a new sheet and only work on that newly inserted sheet.
#2 – How to Unprotect Sheets in Excel?
Now we have protected our sheet, which restricts the users from modifying the document. If you want to make changes, you must unprotect the sheet and make changes in Excel. Follow the below steps to unprotect the Excel sheet.
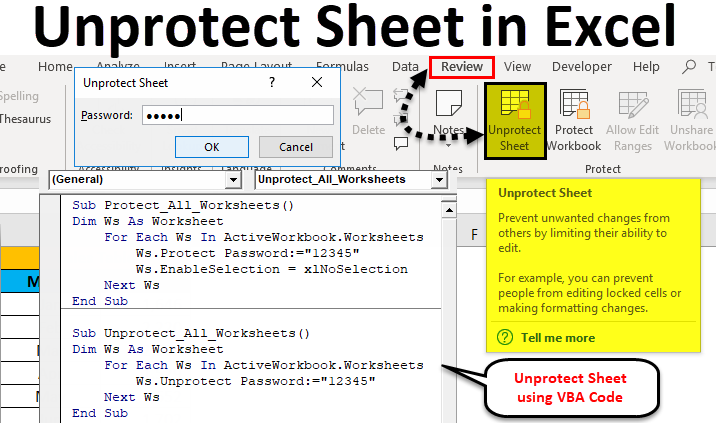
Step 1: Go to the Review tab & click on Unprotect Sheet.
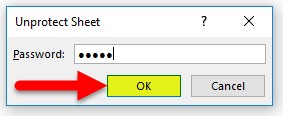
Step 2: When you click on Unprotect, it will ask you to enter the same password you typed while protecting the sheet.
Step 3: After the password is entered, click on OK.
Step 4: If the password is correct, you can make changes, or it will say Password is Incorrect.
How to Protect and Unprotect Multiple Sheets Using Excel VBA Code?
Below are the steps to protect and unprotect multiple sheets using VBA Code in Excel.
#1 – Protect Multiple sheets Using Excel VBA Code
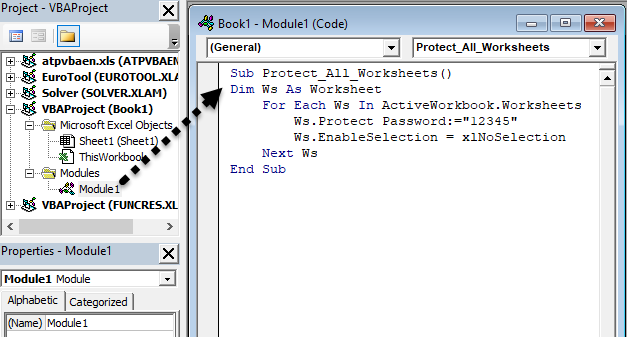
What if you have many sheets? Can you keep protecting the sheets one by one? It is a herculean task to do. But using VBA code, we can protect all the sheets in a few seconds; all you need to do is copy the below code and paste it into the VBA editor.
Code:
Sub Protect_All_Worksheets()

Dim Ws As Worksheet

For Each WsIn ActiveWorkbook.Worksheets

Ws.Protect Password:="12345"

Ws.EnableSelection = xlNoSelection

Next Ws

End Sub
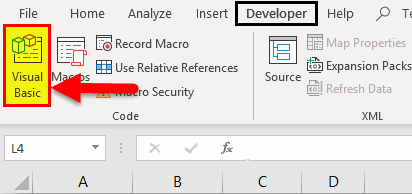
Step 1: Click on Visual Basic under the Developer tab.
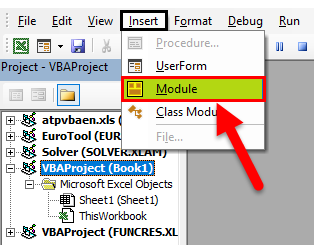
Step 2: Go to Insert & click on Module.
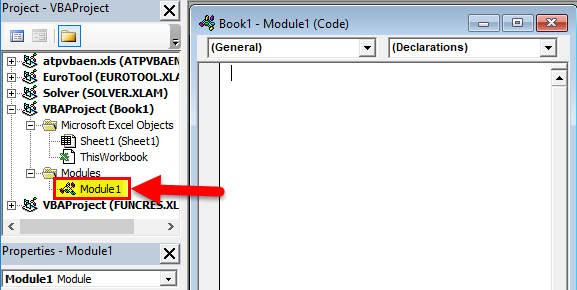
Step 3: Now, we can see that a new module has been added as Module 1 on the left-hand side of the panel.
Step 4: Double click on the module and paste the code.
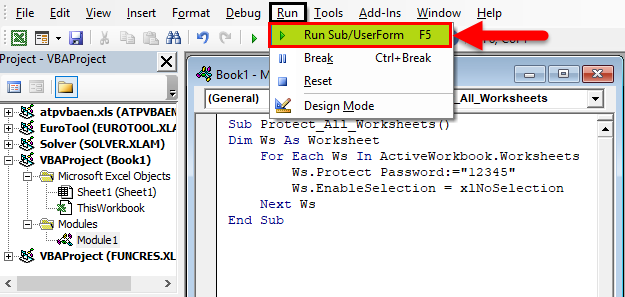
Step 5: After pasting this code in Module 1, click the RUN button. Or else you can press the F5 key by placing a cursor inside the macro.
The code will protect all the sheets in your workbook as soon as it is run.
#2 – Unprotect Multiple sheets Using Excel VBA Code
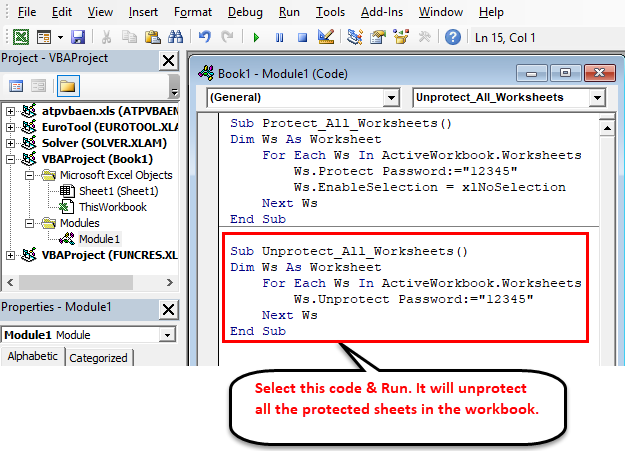
We can protect multiple sheets using VBA code in simple code in a few seconds. If you have locked multiple sheets, it is not easy to unprotect them one by one. For this also, I have written VBA code and copied & paste the code.
Code:
Sub Unprotect_All_Worksheets()

Dim Ws As Worksheet

For Each Ws In ActiveWorkbook.Worksheets

Ws.Unprotect Password:="12345"

Next Ws

End Sub
Things to Remember
- After pasting the code to the module, you need to save the file as Macro-Enabled Workbook.
- You can change the password to your own password. Remove 12345 and enter your password inside the double quotes.
- A password is case-sensitive.
- If you forget the password, you need to google research and upload your file to the website to remove the password from the file.
Recommended Articles
This has been a guide to Unprotect Excel Sheet. Here we also discuss how to protect manually and use VBA code, practical examples, and a downloadable Excel template. You can also go through our other suggested articles to learn more –
