Updated August 10, 2023
Excel User Defined Function (Table of Contents)
Introduction to Excel User Defined Function
Excel has reached a source of inbuilt functions to make your life easy when analyzing data. However, that is not the end. Sometimes, you might come up with a situation where all the formulae provided must be more suitable for your task. In such cases, you can create your function in Excel with the help of VBA; such functions are called User Defined Functions (UDFs). UDFs can be used within the worksheet the same way you use the normal Excel functions such as SUM, AVERAGE, etc. These functions can be created per the user’s requirement through VBA and ease the user’s tasks in Excel. In this article, we will discuss the User Defined Function in Excel.
Any UDF has a basic rule; you need to define it under a FUNCTION procedure instead of a subroutine procedure (sub-procedure we generally use). Using the FUNCTION procedure, we can create UDFs and use them inside Excel as the general Excel functions such as SUM, AVERAGE, VLOOKUP, etc.
This article will teach how to create UDFs per the user’s requirement and use them in Excel to ease the tasks.
Examples to Create User Defined Function
Let’s understand how to create the User Defined Functions in Excel with some examples.
Example #1 – User Defined Function to Find the Area of Triangle
Students from the mathematical stream may always have a problem where they need to find a triangle area. Though it has a very easy formula to work around, students will be pleased if they have some function that can compute the area of a triangle. Follow the steps below to create a function that can compute the area of a triangle.
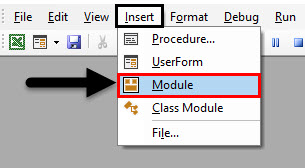
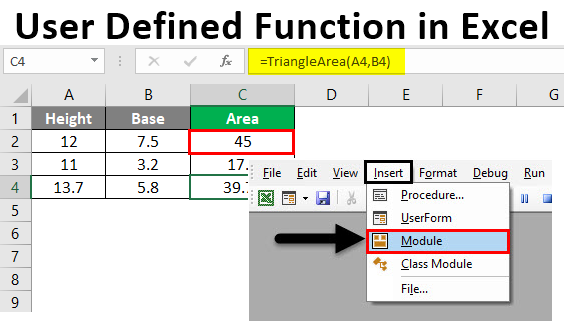
Step 1: Insert a new module under Visual Basic Editor (VBE). Open VBE > click on Insert tab > select Module.
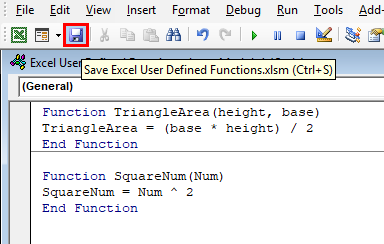
Step 2: Define a new FUNCTION procedure with the name as TriangleArea. This name will be used to find this function in Excel.
Since it is a FUNCTION procedure, we must set the arguments to calculate the triangle area while defining the function.
Step 3: After TriangleArea, mention height and base as two arguments to this function in the bracket. These are the mandatory arguments. The user needs to provide values for height and base to calculate a triangle’s area. The FUNCTION procedure is complete (you can see the End Function clause), and we can write pieces/lines of code within this procedure.
Step 4: Now, we will write a code that will return the area for a triangle when we provide the height and base values within this procedure. Since the area of the triangle is formulated as we will formulate it under the code and assign it to TriangleArea.
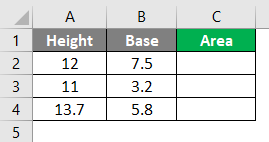
Suppose we have different height and base values, and we need to capture the area of a triangle for those values using the function we just have created. This is it; the function is created and can be used. Save the code, and we will see how it works for the different values of height and base.
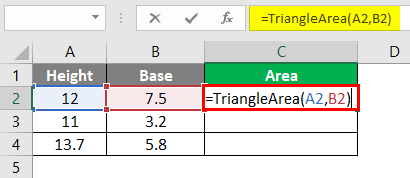
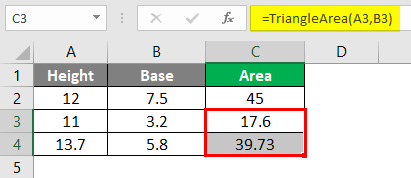
Step 5: In cell C2, start typing the formula =TriangleArea(A2, B2) to compute the area of a triangle and provide height and base as an argument to the same formula.
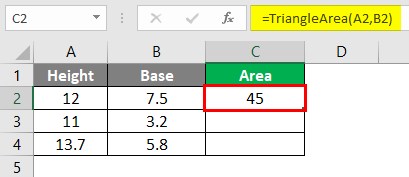
Step 6: Close the parentheses to complete the formula and press Enter key to see the area of a triangle with height 12 and base 7.5.
Drag the formula to get the area for the second and third values of height and base.
Example #2 – User Defined Function to Square any Number
Suppose we want the squared value of any number (integer or float). No such function gives you the squared value for any number. Let’s create one that can do the task for you in Excel.
Step 1: In the same module, start defining a new FUNCTION procedure for squaring a number with the name SquareNum.
Step 2: We need to add an argument for the function. Use num as an argument to the function within parentheses. As soon as you provide an argument within the function, you will be able to see the End Function statement, which means the arguments we have provided are accepted,
Step 3: We can add the code/lines to get the square of numbers within the function. As num is the argument to the SquareNum function, we have two options to get the desired output. One way is to multiply num by itself (num * num ex. 2 * 2), or another way is to use the power operator “^” over the num function (num^2 ex. 3^2). I will go with the other way as it makes the code more versatile.
Step 4: Save the code by clicking on the Save button under VBE so that we can use the function named SquareNum under the Excel sheet.
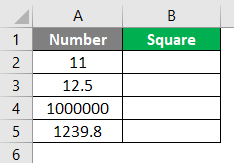
Suppose we have a set of different numbers, as shown in the image below, and we need to find the square values for those. We can use the SquareNum function defined just above to get the result.
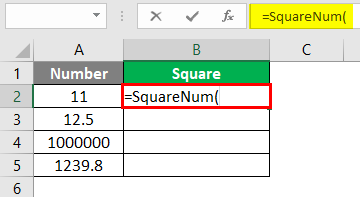
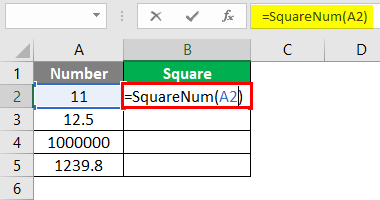
Step 5: In cell B2, start typing the Square, and you can see the function we just have defined for squaring a number. Double click on it to select the function.
Step 6: Provide A2 as an argument to this function so that it will square the number present in cell A2.
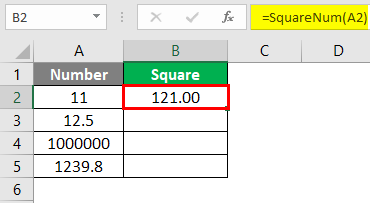
Step 7: Close the parentheses to complete the formula and press Enter key to see the square of number 11 (number in cell A2).
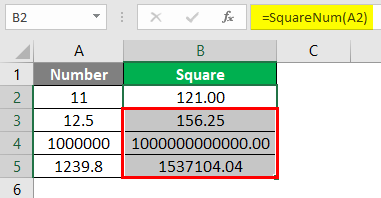
Step 8: Drag and Paste the formula across the remaining cells to find the square roots of the numbers provided.
This article emphasized creating User Defined Functions in Excel, which can reduce the man’s work. Let’s wrap things up with some points to be remembered.
Things to Remember About User Defined Functions in Excel
- UDF, through VBA, helps create custom formulas that can reduce the time we need to do any task and simplify the tasks.
- The UDF is limited to the sheet under which it is created. However, you can copy and paste the code to other worksheets you want./li>
Recommended Articles
This is a guide to User Defined Functions in Excel. Here we discuss how to create a User Defined Function in Excel, practical examples, and a downloadable Excel template. You can also go through our other suggested articles –
